Advertisement
en
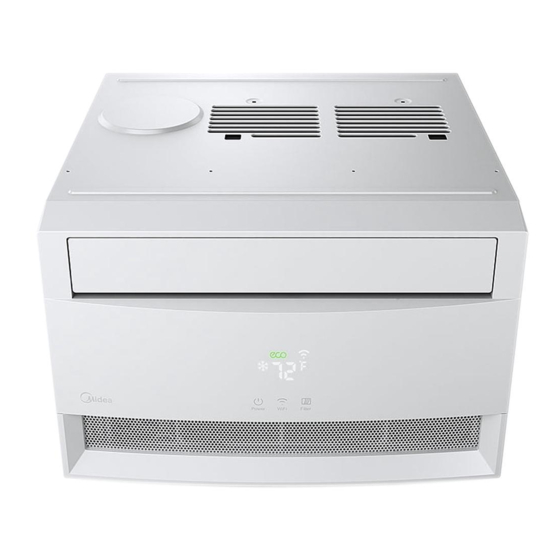
USER MANUAL
Window Type
MWB
Rated voltage: 115V
Rated power: 490 ~ 833W
Frequency: 60Hz
Capacity: 6000 ~ 10000BTU/h
Warning notices: Before
using this product, please
read this manual carefully
and keep it for future
reference.
The design and
specifications are subject to
change without prior notice
for product improvement.
MWB10CW71
Consult with your dealer or
MWB08CW71
manufacturer for details.
MWB06CW71
version A - 04 - 2017
www.midea.com
Advertisement
Table of Contents

Related Manuals for Midea MWB10CW71


Summary of Contents for Midea MWB10CW71
-
Page 1: User Manual
The design and specifications are subject to change without prior notice for product improvement. MWB10CW71 Consult with your dealer or MWB08CW71 manufacturer for details. MWB06CW71 version A - 04 - 2017 www.midea.com... -
Page 2: Table Of Contents
Owner’s Manual 0 Safety Precautions ..................3 Unit Specifications ..................7 Operating Instructions ................8 Installation Instructions ................12 Care and Cleaning ..................19 Troubleshooting Tips ................20 Read This Manual Inside you will find many helpful hints on how to use and maintain your air conditioner properly. -
Page 3: Safety Precautions
Safety Precautions To prevent injury to the user or other people and property damage, the instructions shown here must be followed. Incorrect operation due to ignoring of instructions may cause harm or damage. The level of risk is shown by the following indications. This symbol indicates the possibility of death or serious injury. - Page 4 WARNING • Do not direct airflow straight into people to avoid possible health hazard. • Always install circuit breaker and a dedicated power circuit. Incorrect installation may cause fire and electric shock. • Do not open the unit during operation. It may cause electric shock.
- Page 5 NOTE WARNING - Electrical Information The power supply cord with this The complete electrical rating of your new room air conditioner is air conditioner contains a current detection device designed to reduce stated on the serial plate. Refer to the the risk of fire.
-
Page 6: Operation Of Current Device
WARNING - Prevent Accidents To reduce the risk of fire, electrical shock, or injury to persons when using your air conditioner, follow basic precautions, including the following: • Be sure the electrical service is adequate for the model you have chosen. This information can be found on the serial plate, which is located on the side of the cabinet and behind the grille. -
Page 7: Unit Specifications
Unit Specifications MWB06CW71 MWB08CW71 MWB10CW71 MODEL 1Ph, 115V-, 60Hz 1Ph-115V-60Hz 1Ph-115V-60Hz Power supply Ph-V-Hz 6000 8000 10000 Rated Capacity Btu/h Rated EER Btu/w.h,w/w 12,2 12,0 12,0 12,1 12,0 12,0 Rated CEER Btu/w.h,w/w Cooling Rated input Rated current Standby power Moisture Removal Max. -
Page 8: Operating Instructions
Operating Instructions Normal Sounds High Pitched Chatter Modern compressors may have a high pitched sound during cooling cycle. Vibration Sound of Rushing Air Unit may vibrate and In front of the unit, make noise because you may hear the of poor wall or sound of rushing air window construction being moved by... -
Page 9: Air Conditioner Features
NOTE This air conditioner is designed to be operated under conditions as follows: 64°F ~ 109°F/18-43°C Outdoor temp.: Cooling (64°F ~ 125°F/18-52°C for special tropical models) Operation Indoor temp.: 62°F ~ 90°F / 17-32°C NOTES • The relative humidity of room should be less than 80%. If the unit is used in a condition with a relative humidity over 80%, there will be condensed water on the surface of the unit. -
Page 10: Special Features
Error codes: AS - Room temperature sensor error - Unplug the unit and plug it back in. If error repeats, call for service. NOTE: In Fan only mode, it will display “LO” or “HI”. ES - Evaporator temperature sensor error - Unplug the unit and plug it back in. - Page 11 Timer: auto start/stop feature WiFi feature Set the auto start/stop unit time For the first time to use WiFi feature, no matter what the unit is on or off. press the WiFi button for 5 seconds to Turning the unit ON or OFF at any time turn off the unit and initiate the WiFi will cancel the Auto Start/Stop timed connection mode.
-
Page 12: Installation Instructions
Installation Instructions Your air conditioner is designed to install WARNING - Before You Begin in standard double hung windows with opening widths of 23 to 36 inches (584mm Read these instructions completely to 914mm). and carefully. Fig. D • IMPORTANT - Save these instructions OFFSET for local inspector’s use. - Page 13 NOTE Save Carton and these Installation Instructions for future reference. The carton is the best way to store unit during winter, or when not in use. 1. PREPARE THE WINDOW Lower sash must open sufficiently to allow a clear vertical opening (H) of following size (see Table 1).
- Page 14 C. Align the hole in the top rail with those in the top of Fig.B the unit as shown in Fig. B. D. Secure the top rail to the unit with the 3/8” Screws as Fig.C shown in Fig. C. NOTE For safety reasons, all four (4) screws MUST be securely fastened.
- Page 15 B. Slide the free end “ “ section of the panel directly “I” section into the cabinet as shown in Fig. 2. Slide the panel down. Be sure to leave enough space to slip the top and bottom of the frame into the rails on the cabinet.
- Page 16 B. Extend the side panels out against the window frame (Fig. 6). window frame Fig. 6 Fig. 5 5. INSTALL SUPPORT BRACKET A. Place the frame lock between the frame extensions and the window sill as shown (Fig. 7). Drive 3/4” (19mm) or 1/2” (12.7mm) locking screws through the frame lock and into the sill.
- Page 17 6. INSTALL R1 HARDWARE (only be applicable to Energy star models) In order to minimize air leaks and ensure optimal insulation, it is necessary to install the included R1 hardware to the side curtain. Follow the instructions below. Step 1. After the unit is installed to the window, measure the inner width of the side curtain as shown (Fig.
- Page 18 7. INSTALL WEATHER STRIPPING (only be applicable to Energy star models) In order to minimize air leaks between the room air conditoner and the window opening, trim the weather sttipping with a proper length, peel off the protective backing and plug any gaps if needed (Fig.
-
Page 19: Care And Cleaning
Care and Cleaning CAUTION Clean your air conditioner occasionally to keep it looking new. Be sure to unplug the unit before cleaning to prevent chock or fire hazards. Air Filter Cleaning The air filter should be checked at least once a month to see if cleaning is necessary. -
Page 20: Troubleshooting Tips
Troubleshooting Tips Before calling for service, review this list. It may save you time and expense. This list includes common occurrences that are not the result of defective workmanship or materials in this appliance. Problem Solution Wall plug disconnected. Push plug firmly into wall outlet. House fuse blown or circuit breaker tripped.
Need help?
Do you have a question about the MWB10CW71 and is the answer not in the manual?
Questions and answers