Table of Contents
Advertisement
IMPORTANT FOR FUTURE REFERENCE
Please complete this information and retain this manual
for the life of the equipment:
Model #: ___________________________
Serial #: ___________________________
Date Purchased:
___________________
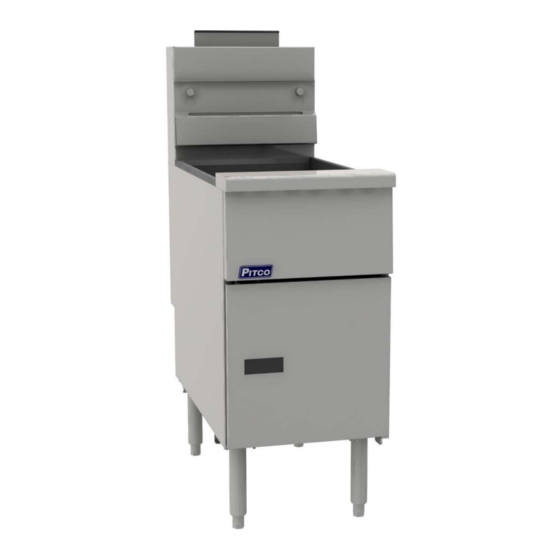
Installation and Operation Manual
For Gas Fryer
NO OPTION/STAND ALONE
Covering Model
VF35 & VF65
1
L20-418 Rev 1 6/16
Advertisement
Table of Contents

Subscribe to Our Youtube Channel
Summary of Contents for Pitco VF35
- Page 1 Please complete this information and retain this manual for the life of the equipment: Model #: ___________________________ Serial #: ___________________________ Date Purchased: ___________________ Installation and Operation Manual For Gas Fryer NO OPTION/STAND ALONE Covering Model VF35 & VF65 L20-418 Rev 1 6/16...
- Page 2 Service and Parts (ASAP) companies, this warranty will be void. In WARNING addition, Pitco and its affiliates will not be liable for any claims, damages If gas flow to appliance is interrupted, or pilots extinguish, wait 5 minutes or expenses incurred by the customer which arises directly or indirectly,...
-
Page 3: Notice
NOTICE In the event of problems or questions about your order, contact the Pitco Frialator factory at (603) 225-6684. In the event of problems or questions about your equipment, contact the Pitco Frialator Authorized Service and Parts representative (ASAP) covering your area, or contact Pitco at the numbers listed above. -
Page 4: Table Of Contents
Table of Contents NOTICE ........................................3 INSTALLATION ...................................... 5 Checking And Unpacking Your New Appliance ........................... 5 Installation Clearances ................................... 5 Leveling The Fryer – Legs/Casters ................................ 6 Gas Connection ...................................... 7 Fuel Types ......................................7 ... -
Page 5: Installation
Checking And Unpacking Your New Appliance Your new Pitco appliance has been carefully packed into one crate. Every effort has been made to ensure that it is delivered to you in perfect condition. Pitco does not assume responsibility for damage or loss incurred in transit. -
Page 6: Leveling The Fryer - Legs/Casters
Leveling The Fryer – Legs/Casters CAUTION To prevent equipment damage and/or personal injury, do not tilt the appliance onto any two of its casters or legs, or pull the appliance by the splash back. WARNING This appliance must be installed with the legs or casters provided by the manufacturer. WARNING DO NOT perform leveling procedure when appliance is in operation or full of hot liquids. -
Page 7: Gas Connection
Gas Connection Your fryer will give you peak performance when the gas supply line is of sufficient size to provide the correct gas flow. The gas line must be installed to meet the local building codes or National Fuel Gas Code ANSI Z223.1 Latest Edition. -
Page 8: Ventilation And Fire Safety Systems
Ventilation And Fire Safety Systems Your new appliance must have proper ventilation to function safely and properly. Exhaust gas temperatures can reach as high as 1100 °F (593 °C). Therefore, it is very important to install a fire safety system. Your ventilation system should be designed to allow for easy cleaning. -
Page 9: Lighting Instructions
Turn the fryer gas valve knob to the “ON” position. Allow the fryer to bring the water to a low boil and add one packet of Pitco fryer cleaner or a mild, low sudsing detergent and allow water to continue to boil for a minute, making sure water does not boil over. -
Page 10: Weekly Fryer Cleaning
Turn the fryer gas valve knob to the “ON” position. Allow the fryer to bring the water to a low boil and add one packet of Pitco fryer cleaner or a mild,low sudsing detergent and allow water to continue to boil for a minute, making sure water does not boil over. -
Page 11: Thermostat Calibration
Thermostat Calibration Millivolt thermostats a. Set the thermostat dial to 325 b. Remove the thermostat dial by pulling the knob straight out. DO NOT rotate the dial. c. Hold the outside of the shaft so it does not move. Use the tip of a small, flat tip screw driver to scrape away the sealing compound from the adjustment screw. - Page 12 Pitco Frialator Frialator factory at: Authorized Service and Parts representative (603)-225-6684 World Wide (ASAP) covering your area, or contact Pitco at the Website Address: www.pitco.com number listed to the left. MAILING ADDRESS – P.O. BOX 501, CONCORD, NH 03302-0501...


Need help?
Do you have a question about the VF35 and is the answer not in the manual?
Questions and answers