Table of Contents
Advertisement
Quick Links
QUICK START GUIDE
QuickVu
- Ref. QVU150-3G
Thank you for choosing
up and use your powerful Dual Scaler Hi-Resolution Seamless Switcher based on
platform within minutes. Discover the QuickVu capabilities and intuitive interface while configuring your first
show and unleash your creativity for a new experience in show and event management.
WHAT'S IN THE BOX
• 1 x QuickVu (QVU150-3G)
• 1 x Power supply cord
• 1 x Ethernet cross cable (for device update)
• 1 x Remote Control Software (RCS²)*
• 1 x Set of 6 audio 5-pin screw terminals
• 1 x Front Rack Ears (the parts are stowed in the packaging foam)
• 1 x User Manual (PDF)*
• 1 x Quick Start guide*
* User manual, quick start guide and the RCS² are available on
QUICK INSTALL AND SETUP
Getting started:
You may wish to reset the unit to factory settings to get
started. Go to: Menu > Control > Reset/Erase > Default
Values > Yes
1.
Select the Output resolution that matches the native
resolution of your display. You will next be prompted to
choose enable follow mode if desired and output rate.
Menu > Output > Output format > 1920x1080 >
Internal Ref > 60 Hz
2.
Inputs can be configured automatically using the Auto
Set All function. Menu > Intputs > AutoSet All > Yes
It will scan each input and detect the sync type that is
plugged in. You can still do an Autoset or manual setup per
input.
The QuickVu has 2 layers available called: LAYER A and
QUICK FRAME.
3.
To display a source, select a source (it will blink). Press
TAKE to transition your source from Preview to Program
output.
To view on Preview or change the contents of a different
source, simply select it. Only 1 layer can be seen on the
Preview.
4.
To clear the layer select BLACK. Press TAKE to remove
the layer from the Program output.
Analog Way
and the QuickVu. By following these simple steps, you will be able to set
www.analogway.com
TIP:
If you would like the Program and Preview to toggle/
flipflop during each Take, enable this feature by going to
Menu > Control > Functions > Preset Toggle.
Once enabled, the old Program output will become the
new Preview after each Take.
5.
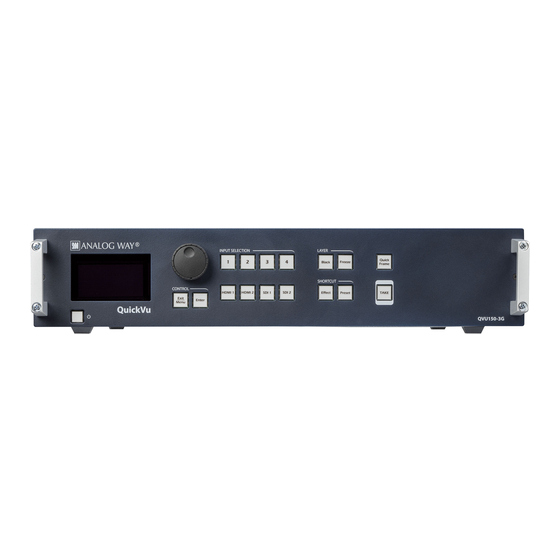
See the next page which describes the button lighting
color code and other front panel features.
QuickVu can be used to display:
- sources seamlessly switched in the LAYER A.
IMPORTANT:
Simply selecting a menu item will not set it
to that value. Be sure to press the ENTER button when
setting the menu items.
Analog
Way's new Midra™
CAUTION!
If required, front handles of the
device can be dismantled, but
with caution. The original screws
removed must not be reintro-
duced to their location without
handles in place. Substantial da-
mages can occur, including risk of
electric shock from the mains vol-
tage. Only M4x12mm screws can
be used. (They are supplied with
the unit.)
Advertisement
Table of Contents

Related Manuals for Analog way QuickVu QVU150-3G


Summary of Contents for Analog way QuickVu QVU150-3G
-
Page 1: Quick Start Guide
QUICK START GUIDE QuickVu - Ref. QVU150-3G Thank you for choosing Analog Way and the QuickVu. By following these simple steps, you will be able to set up and use your powerful Dual Scaler Hi-Resolution Seamless Switcher based on Analog Way’s new Midra™... -
Page 4: Warranty And Service
WARRANTY AND SERVICE This Analog Way product has a 3 year warranty on parts and labor, back to factory. This warranty does not include faults resulting from user negligence, special modifications, electrical surges, abuse (drop/crush), and/or other unusual damage. In the unlikely event of a malfunction, please contact your local Analog Way office for service.
Need help?
Do you have a question about the QuickVu QVU150-3G and is the answer not in the manual?
Questions and answers