Advertisement
Quick Links
P515-548
Tools for Installation
OR
B
A
1
Remove Template From Booklet
a
Installation Instructions
Keep the programming
booklet with you while
STOP
installing lock. Without
the user codes, you can
get locked out.
D
C
Install Lock
b
FE595
H
J
E
F
P
Q
2
Check Door Holes
Note: If door holes do not match template, visit
www.schlage.com for door drilling instructions.
K
L
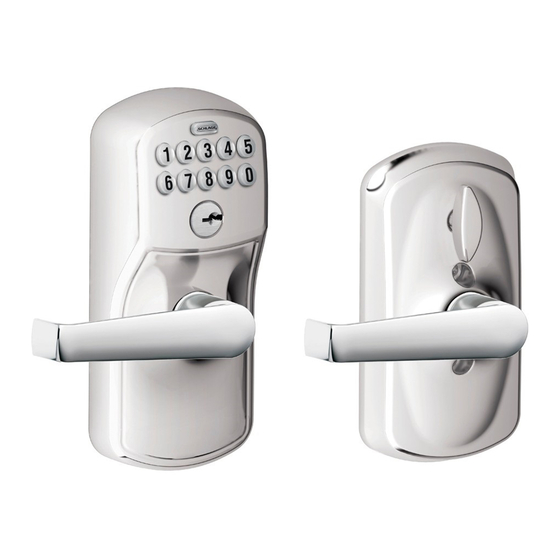
A. Outside Knob/Lever
B. Pin Wrench
C. Key
N
D. Keypad Assembly
E. Latch
F. Latch/Strike Screws
G
G. Strike
H. Inside Mounting Plate
J. Mounting Plate Screw
K. Inside Thumbturn Assembly
L. Mounting Screws
M. Inside Knob/Lever
N. 9V Battery
P. Drive-in Faceplate
Q. Square-corner Faceplate
5¹⁄₂"
Minimum
M
Advertisement

Related Manuals for Schlage FE595


Summary of Contents for Schlage FE595
- Page 1 L. Mounting Screws M. Inside Knob/Lever N. 9V Battery P. Drive-in Faceplate Q. Square-corner Faceplate Install Lock Check Door Holes Remove Template From Booklet Note: If door holes do not match template, visit www.schlage.com for door drilling instructions. 5¹⁄₂” Minimum...
- Page 2 Choose Deadbolt Faceplate Install Keypad Assembly IMPORTANT: Cable must slide under latch. Move to Step 5 Install Latch IMPORTANT: Latch bevel must face door jamb. Bevel Bevel Jamb Jamb Wood Block Actual Size (Not included)
- Page 3 Install Inside Mounting Plate Install Battery and Connect Cables IMPORTANT: Pull excess wire through mounting plate. IMPORTANT: Cable must be routed and tucked as shown. Tuck Cable...
- Page 4 Note: Lock should be straight on door before tightening screws. Correct Incorrect Match Flat Sides Actual Size Install Strike onto Door Jamb If Needed, Install Knobs/Levers Actual Size Tip Pointing Down ©2006 Schlage Lock Company Printed in U.S.A. P515-548 Rev. 6/06 CD...
Need help?
Do you have a question about the FE595 and is the answer not in the manual?
Questions and answers