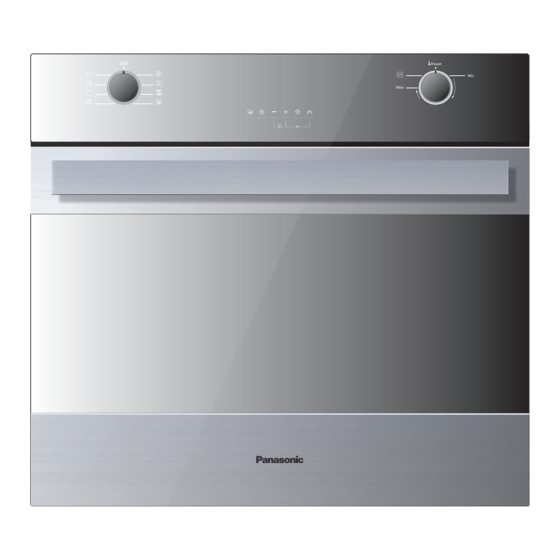
Panasonic HL-BD82S Service Manual
Electric built-in oven
Hide thumbs
Also See for HL-BD82S:
- Operating instructions manual (38 pages) ,
- Installation instructions manual (9 pages) ,
- Manual (32 pages)
Table of Contents
Advertisement
TABLE OF CONTENTS
1 Safety Precautions----------------------------------------------- 2
2 Service Navigation ----------------------------------------------- 2
3 Specifications ----------------------------------------------------- 3
4 General/Introduction -------------------------------------------- 4
5 Location of Controls and Components ------------------- 7
6 Troubleshooting Guide ----------------------------------------19
7 Disassembly and Assembly Instructions ---------------22
8 Wiring Connection Diagram ---------------------------------30
9 Exploded View and Replacement Parts List -----------31
ELECTRIC BUILT-IN OVEN
Model No.
PAGE
© Panasonic Corporation 2012 Unauthorized copy-
ing and distribution is a violation of law.
Order Number MENO121101CE
HL-BD82S
Canada
PAGE
Advertisement
Table of Contents

Related Manuals for Panasonic HL-BD82S


Summary of Contents for Panasonic HL-BD82S
-
Page 1: Table Of Contents
5 Location of Controls and Components ------------------- 7 6 Troubleshooting Guide ----------------------------------------19 7 Disassembly and Assembly Instructions ---------------22 8 Wiring Connection Diagram ---------------------------------30 9 Exploded View and Replacement Parts List -----------31 © Panasonic Corporation 2012 Unauthorized copy- ing and distribution is a violation of law. -
Page 2: Safety Precautions
HL-BD82S 1 Safety Precautions 1.1. Health & Safety Note: When servicing the SCHOLTES oven, health and safety issues must be considered at all times. Specific safety issues are listed below with their appropriate icon. These are illustrated throughout the service information to remind service people of the health and safety issues 1.1.1. -
Page 3: Specifications
HL-BD82S 3 Specifications 3.1. Oven Specifications 3.1.1. Oven Weight Single 30 inch bs /Kg = 181/82 3.1.2. Power rating TECHNICAL DATA OVENS Electrical Ratings and Maximum Connected Load @ 240 Volts 60 Hz @ 208 Volts 60 Hz SINGLE Amperes... -
Page 4: General/Introduction
HL-BD82S 4 General/Introduction 4.1. System Description • ELECTRONIC CONTROL. The control consists of a main power board and a display board. An additional power board is derived from the main one remov- ing the power supply parts. It has all the functions of the main one to drive the lower cavity in a double oven. The main power board provides the voltages to the other boards (GND, -5V and -24V for the relays to the lower power board only). - Page 5 HL-BD82S 4.2. Oven Model Set Up and Configuration The control must be able to drive multifunction cavities, with one or two convection fans, and thermal cavities. Different oven mod- els are possible as described in the following table. 4.2.1. Set Up N°...
-
Page 6: Meat Probe
HL-BD82S 4.2.2. Configuration 4.2.2.1. Meat Probe • Turn the knob clockwise and check that the values corre- spond to the ones in the following table: • The meat probe must be inserted when the message Prob OFF is displayed. If everything is fine, the probe temperature will be displayed instead of OFF. -
Page 7: Location Of Controls And Components
HL-BD82S 5 Location of Controls and Components 5.1. Control Panel The user interface has the following features: display, keys for commands, cooking mode and temperature selector 5.1.1. Command Keys [TIME]: touch this key until [SET TIME] appears to set or change the time of day. Touch this key until [TIMER] appears to set, modify or clear the minute minder value. -
Page 8: Oven Modes
HL-BD82S 5.2. Oven Modes The table below describes the cooking mode basic cycles. Each cycle is defined to guarantee the best heat distribution and perfor- mances, depending on the mode. The table shows which heaters must be energized and how long, whether the fan has to work or not, the temperature range and the standard preset value. -
Page 9: Setting The Clock And Timer
HL-BD82S turn off automatically when the door is opened. The convection internal components temperature becomes high. fan will run during the preheat time. 5.3.11. Locking the Keyboard 5.3.10. Component Cooling Fan Hold both the keys indicated by [KEYBD. LOCK] legend for 3 Activates during any cooking or self-cleaning mode to cool seconds. -
Page 10: Time Oven Mode Operation
HL-BD82S 5.5.2. Using [OPTIONS] key to select low temperature knob until the display shows the desired value. • Move the cooking mode selector to OFF if you intend to stop temperature functions cooking Moving the cooking mode selector to Low Temp position one of the following functions is displayed: 1. -
Page 11: Sabbath Mode Instruction
HL-BD82S 5.7. Special Features Function The Special Features function can be used to select the following special oven features: SAB => SABBATH MODE (for religious faiths with [no work] • Touch the [INC] or the [DEC] key to scroll all avail- requirements on the Sabbath). -
Page 12: Setting The Self Clean Mode
HL-BD82S 5.9. Setting the Self Clean Mode 5.9.1. To set the Self Clean Mode 5.9.3. To Delay the Start of Clean 1. Rotate both knobs into the clean position. 1. Follow steps 1 through 7 above. 2. CLEAN & TIME appear. -
Page 13: Oven Door Removal
HL-BD82S 5.10. Oven Door Removal 5.10.1. To Remove Door 5.10.2. To Replace Door 1. Open the door completely. 1. Insert the upper arms (2) of both hinges into the slots (3). 2. Lift up the hinge bracket (1). The recesses (4) must hook on the lips (5). -
Page 14: Replacing An Oven Light
HL-BD82S 5.11. Replacing an Oven Light • Each oven is equipped with halogen lights located in the lat- eral walls of the oven. • The lights are switched on when the door is opened or when the oven is in a cooking cycle. - Page 15 HL-BD82S 5.12. Configuration 5.12.1. Power supply 208v voltage selection This option is provided for areas where standard 240V service is not available. This option must be accessed with the oven connected to power source, and using the following sequence: 1. Within five minutes from power up, hold [OPTION] and [TIME] key for 3 seconds to enter the user option menu.
- Page 16 HL-BD82S 5.13. Description of Electronic Control A power module, described in the block diagram below, is able to manage one cavity. The main power board is also providing the lower one and the display board with the power supply. • An external safety thermostat, named STH, is placed in the appliance: it must always be connected in series with the heaters.
-
Page 17: Fault Codes
HL-BD82S 5.14. Fault Codes If the fault involves safety requirements or the correct oven functionality, any activity must be stopped until the fault is removed. Every alarm condition can be reset manually by turning the cooking mode knob in the OFF position and the temperature knob in the preset position. - Page 18 HL-BD82S 5.15. Oven Safety Features 5.15.1. Child - safe locking system All of our ovens are built-in child-safe locking systems. The future is automatically enabled any time the appliance is con- nected to the power, any time the switch is turned on and any time the oven is programmed to run a self-cleaning of the cav- ity.
-
Page 19: Troubleshooting Guide
HL-BD82S 6 Troubleshooting Guide 6.1. Error Message TO Reset assembly FAILURES, REMOVE THE CAUSE AND SWITCH THE SELECTORS IN [OFF] AND [Preset assembly] POSITIONS RESPECTIVELY. Code Error Description Possible Cause Corrective Action section Temperature sensor The control reads out of range... - Page 20 HL-BD82S 6.2. Oven not operative 6.5. Door Lock Problems Anomaly Possible Cause Corrective Action section Anomaly Possible Cause Corrective Action section Oven does not run Main breaker or Replace the fuses Door lock control Power board relay Replace Power board 7.16.
- Page 21 HL-BD82S 6.6. Oven Light Problems Anomaly Possible Cause Corrective Action section During the manual The board has If the display shows test it’s not possi- never been pro- 2p check the connec- ble to check the grammed. tions between the...
-
Page 22: Disassembly And Assembly Instructions
HL-BD82S 7 Disassembly and Assembly Instructions 7.1. Oven removal 7.2. Upper and Single cooling fan motor replacement 1. Disconnect the power supply cord 2. Remove the screws shown in the pictures. 1. Disconnect the power supply cord and remove the Oven 3. - Page 23 HL-BD82S 7.3. Convection fan motor replace- 11. Run the Oven and check all functions. ment 1. Disconnect the power supply cord and remove the Oven from the cabinet. 2. Remove the rear upper covers. 3. Disassemble the baffle by removing the four screws in the cavity for double fans.
-
Page 24: Door Gasket Replacement
HL-BD82S 7.6. Lower element replacement 1. Disconnect the power supply cord and remove the Oven from the cabinet. 2. Remove the rear cover. 3. Disconnect the terminals of heating element. 4. Remove the eight screws B on the brackets and the other two screws A near the external terminals. - Page 25 HL-BD82S 7.9. Door Lock Switch replacement 1. Disconnect the power supply cord and remove the Oven from the cabinet. 2. Remove the upper cover. 3. Disconnect the terminals from the switch. 4. Unscrew the bracket A. 5. Pull out the switch from the holder.
- Page 26 HL-BD82S 7.14. Door hinges replacement 1. Remove the door following the (see section 5.10.Oven Door Removal). 2. Put the door on a flat surface with a soft cloth to prevent scratching of the aesthetics. 3. Remove the door external glass by the screws A and B.
- Page 27 HL-BD82S 5. Replace the new selector by reversing the previous steps 6. DURING MOUNTING, THE SPRING BUTTONS MUST BE IN THE RIGHT POSITION. 7. Reinstall the Oven into the cabinet. 8. Reconnect the power supply cord after the Oven is installed.
- Page 28 HL-BD82S 7.21. Lampholder replacement 6. Assemble the glass and door keeping door in the middle of the glass and making attention at correct position of rubber bumpers. 7. Replace the Oven door following the (section 5.10.Oven Door Removal). 1. Disconnect the power supply cord and remove the Oven from the cabinet.
- Page 29 HL-BD82S 7.22. Meat probe board replacement 1. Disconnect the power supply cord and remove the Oven from the cabinet. fig.1 2. Remove the upper cover. 3. Remove the screws connecting the meat probe power board. 4. Replace the new board using the spacers.
-
Page 30: Wiring Connection Diagram
HL-BD82S 8 Wiring Connection Diagram... -
Page 31: Exploded View And Replacement Parts List
HL-BD82S 9 Exploded View and Replacement Parts List 9.1. Exploded View_A... - Page 32 HL-BD82S 9.2. Exploded View_B...
- Page 33 HL-BD82S 9.3. Exploded View_C...
- Page 34 HL-BD82S 9.4. Exploded View_D...
- Page 35 HL-BD82S 9.5. Exploded View_E...
- Page 36 9.6. REPLACEMENT PARTS LIST Ref.No. Part No. Part Name & Description Remarks AC01 A060341Y0CP ENAMELED PAN AC02 A064841Y0CP ANTISPLASH SHIELD AC03 A060241Y0CP OVEN CROMED RACK 80K AC07 A064141Y0CP TELESCOPIC RACK FOR 30" OVEN CAVITY AS01 A400D41Y0CP ASSEMBLY MOTOR LOCKING DOOR ...
- Page 37 Ref.No. Part No. Part Name & Description Remarks GU03 A646041Y0CP RING ELEMENT SEAL GU06 A646141Y0CP GASKET LM01 A662641Y0CP THERMOSTAT BRACKET LM02 A100341Y0CP LEFT SIDE COVER LM03 RIGHT SIDE COVER A100241Y0CP LM04 UPPER COVER BACK A103241Y0CP ...
Need help?
Do you have a question about the HL-BD82S and is the answer not in the manual?
Questions and answers