Renesas RX65N Series User Manual
Renesas 32-bit mcu
Hide thumbs
Also See for RX65N Series:
- User manual (60 pages) ,
- Getting started manual (32 pages) ,
- Quick start manual (8 pages)
Table of Contents
Advertisement
Quick Links
RX65N Group
32
32
RENESAS 32-Bit MCU
RX Family / RX600 Series
All information contained in these materials, including products and product specifications, represents
information on the product at the time of publication and is subject to change by Renesas Electronics
Corporation without notice. Please review the latest information published by Renesas Electronics
Corporation through various means, including the Renesas Electronics Corporation website
(http://www.renesas.com).
RX65N Envision Kit User's Manual
Rev. 1.00 Sep 2017
Advertisement
Table of Contents

Related Manuals for Renesas RX65N Series


Summary of Contents for Renesas RX65N Series
- Page 1 All information contained in these materials, including products and product specifications, represents information on the product at the time of publication and is subject to change by Renesas Electronics Corporation without notice. Please review the latest information published by Renesas Electronics Corporation through various means, including the Renesas Electronics Corporation website (http://www.renesas.com).
- Page 2 Renesas Electronics disclaims any and all liability for any damages or losses incurred by you or third parties arising from the use of any Renesas Electronics product for which the product is not intended by Renesas Electronics.
- Page 3 General Precautions in the Handling of Microprocessing Unit and Microcontroller Unit Products The following usage notes are applicable to all Microprocessing unit and Microcontroller unit products from Renesas. For detailed usage notes on the products covered by this document, refer to the relevant sections of the document as well as any technical updates that have been issued for the products.
- Page 4 Precautions The following precautions should be observed when operating any development kit product: This development kit is only intended for use in a laboratory environment under ambient temperature and humidity conditions. A safe separation distance should be used between this and any sensitive equipment. Its use outside the laboratory, classroom, study area or similar such area invalidates conformity with the protection requirements of the Electromagnetic Compatibility Directive and could lead to prosecution.
-
Page 5: How To Use This Manual
The following documents apply to the RX65N Group. Make sure to refer to the latest versions of these documents. The newest versions of the documents listed may be obtained from the Renesas Electronics Web site. - Page 6 List of Abbreviations and Acronyms Abbreviation Full Form Do Not Fit DRW2D RX microcontroller 2D Graphics drawing Engine peripheral. Renesas Programmer / Debugger Emulator E2 Lite Renesas Programmer / Debugger Emulator E2OB Renesas On-chip Programming/Debugging Emulators Electro Static Discharge GLCDC...
-
Page 7: Table Of Contents
Table of Contents 1. Overview ..........................8 Purpose ..............................8 Features ..............................8 Board specification ............................. 9 2. Power Supply ........................10 Requirements ............................10 Characteristics ............................10 3. Board Layout ........................11 Component Layout ........................... 11 Component Placement ..........................13 Internal Functional Connectivity ....................... -
Page 8: Overview
RX65N Envision Kit 1 Overview 1. Overview Purpose This development kit is an evaluation tool for Renesas microcontrollers. This manual describes the technical details of the RX65N Envision Kit hardware. Features The RX65N Envision Kit provides an evaluation of the following features: In-circuit programming and debugging with E2 Lite On Board (E2OB). -
Page 9: Board Specification
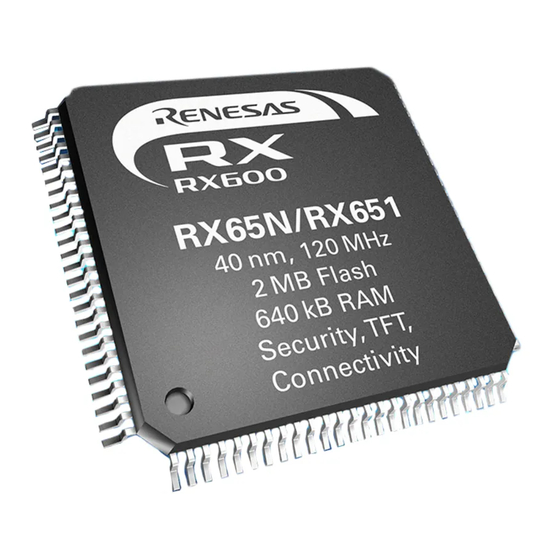
RX65N Envision Kit 1 Overview Board specification The board specification is shown in Table 1-1 below. Table 1-1: Board specification Specification Item Part No : R5F565NEDDFB Microcontroller Package : 144-pin LFQFP (PLQP0144KA-B) On-Chip Memory : ROM 2MB+32KB, RAM 640KB On-Board Memory QSPI Serial Flash : 32Mbit RX65N Main : 12MHz Input Clock... -
Page 10: Power Supply
RX65N Envision Kit 2 Power Supply 2. Power Supply Requirements With the display backlight enabled, and operational, the RX65N Envision Kit can typically draw 170mA from the 5V supply provided from the mini-B USB connection CN9. This is a typical figure and not worst case, so it is recommended that the RX65N Envision Kit be supplied from a USB supply capable of supplying at least 500mA. -
Page 11: Board Layout
RX65N Envision Kit 3 Board Layout 3. Board Layout Component Layout Figure 3-1 below shows the bottom component layout of the board. USB Type A LCD Direct Pmod LCD Touchscreen User LED Socket Drive Interface Connector Interface (Blue) QSPI Serial Flash Power User Switch... - Page 12 RX65N Envision Kit 3 Board Layout Figure 3-2 below shows the User-Fit header locations on the bottom component layout of the board. Spare MCU Arduino Port Header Headers Analogue Header Arduino E1 Debugger Headers Header Figure 3-2 : Board Layout Showing User-Fit Header Locations Figure 3-3 below shows the User-Fit options on the bottom component layout of the board.
-
Page 13: Component Placement
RX65N Envision Kit 3 Board Layout Component Placement Figure 3-4 below shows the placement of individual components on the bottom side of the PCB. There are no components located on the top side. Component types and values can be looked up using the board schematics. Figure 3-4 : Bottom–Side Component Placement R01UH0761EG0100 Rev. -
Page 14: Internal Functional Connectivity
RX65N Envision Kit 3 Board Layout Internal Functional Connectivity Figure 3-5 below shows the RX65N Envision Kit functional components and their connectivity to the MCU. 3.3V Enable/ Power Control Fault Arduino SDHI I2C SCI ADC Connections LAN8720 RMII Phy IC Ethernet 1. -
Page 15: Envision Kit Circuitry
RX65N Envision Kit 4 Envision Kit Circuitry 4. Envision Kit Circuitry Power Scheme 4.1.1 Debug USB – CN9 The mini-B USB socket CN9 provides an interface between the programmer/debugger and the development Power for the RX65N Envision Kit is sourced from this USB connection; it is important that sufficient current is available. -
Page 16: Power Supply
4.2.1 E2 On Board Programmer / Debugger The E2OB implements the functionality of the Renesas E2 Lite Programmer / Debugger on the Envision PCB, requiring just a USB connection to a development PC. For more details of the E2OB capabilities please see the ‘On-chip Debuggers Performance Property’ reference document. -
Page 17: Operation Of E2Ob Programmer / Debugger
Figure 4-3. The exact messages may vary depending upon operating system. If Windows 7 use, USB driver for Windows 7 is required. USB driver can be obtained from the website www.renesas.com/envision. Figure 4-3: USB-Serial Windows... -
Page 18: Usb/Serial Uart Connections To Mcu
E2OB. When in use, the on-board E2OB should be switched off by setting SW1 position 1 to OFF. See section 4.2.2. For details of obtaining and using an external E1 Emulator please contact your local Renesas representative. Clock Circuit Clock circuits are fitted to the Envision Kit to generate the required clock signal to drive the MCU, and other peripherals. -
Page 19: Switch And Joystick
RX65N Envision Kit 4 Envision Kit Circuitry Switch and Joystick There is one user-switch located on the Envision Kit board and provision has also been made for a 5-way micro- switch operated joystick, which is not fitted as standard. The switch and joystick connections to the RX65N MCU are shown in Table 4-7 and Table 4-8. -
Page 20: Pmod
RX65N Envision Kit 4 Envision Kit Circuitry Pmod™ There is a single Pmod™ Interface Type 2A Compatible expansion header on the Envision kit. Care should be taken when installing Pmod modules to ensure pins are not bent or damaged. Pmod modules are vulnerable to electrostatic discharge (ESD);... -
Page 21: Ethernet
When running any Ethernet software, a unique MAC address should be used. As the Envision Kit is not fitted with an Ethernet transceiver IC or Connector by default, it is not supplied with a unique Renesas allocated MAC address. It is recommended that a unique MAC address should be always be used with this device ensured to ensure full compatibility when using other hardware on a common Ethernet connection. -
Page 22: Ethernet Connector And Rmii Transceiver Ic
RX65N Envision Kit 4 Envision Kit Circuitry Note that with the LAN8720A configured to provide the 50MHz clock-out signal from the 25MHz crystal oscillator, the worst-case output delay time for the RX65N Ethernet controller (15ns) combined with the worst case setup time for the LAN8720A (7ns) exceeds the 20ns clock period for the RMII interface. In practice the combined controller delay time and transceiver setup time does not exceed the clock period. -
Page 23: Usb Host
RX65N Envision Kit 4 Envision Kit Circuitry USB Host The Envision Kit is fitted with a USB host socket (type A), CN11, which uses the USB module USB0 on the RX65N MCU. The connections for the USB0 module and USBA module are shown in Table 4-16 below. Table 4-16 : USB0 Module Connections Signal on Envision Kit USB Signal... -
Page 24: Wqvga Lcd Display
RX65N Envision Kit 4 Envision Kit Circuitry WQVGA LCD Display 4.9.1 Display Configuration The Envision Kit shows the capabilities of the RX65N MCU to directly drive a TFT LCD Display using its internal graphic LCD controller (GLCDC) and 2D drawing engine (DRW2D) peripherals. The display on the Envision Kit is a 4.3 inch 480 x 272 (WQVGA) colour display. - Page 25 RX65N Envision Kit 4 Envision Kit Circuitry Table 4-18 : LCD Display CN4 Pin Connections Signal on Envision Kit Display Connector Function Schematic CN4 Pin Number Port Backlight supply negative VBACKLIGHT- Backlight supply positive VBACKLIGHT+ VCC3V3 Red 0 PE3_LCD_DATA13 Red 1 PE2_LCD_DATA14 Red 2 PE1_LCD_DATA15...
-
Page 26: Qspi Flash
RX65N Envision Kit 4 Envision Kit Circuitry 4.10 QSPI Flash The Envision Kit has a 32Mbit Quad Serial Peripheral Interface Flash memory. Table 4-19 below details the connections to the RX65N MCU, utilising the on-board QSPI-B peripheral. The Flash memory device used is a Macronix MX25L3233F. -
Page 27: Sdhi Power Management
RX65N Envision Kit 4 Envision Kit Circuitry 4.11.1 SDHI Power Management The 3.3V supply to the SDHI card output uses a power management circuit to control the power output and provide protection from overloads and short-circuits. The schematic for this is shown in Figure 4-7 below. The circuit is based around the ISL61861 power management IC from Intersil, which has an active-high enable input, an (asserted low) fault output and can supply up to 1.5A from the 3.3V source supply. -
Page 28: Sdhi Connector And Power Management Ic
RX65N Envision Kit 4 Envision Kit Circuitry 4.11.2 SDHI Connector and Power Management IC The SD connector CN7 and power management IC, U2 are not fitted as standard to the Envision board. The part number details are shown in Table 4-21. For their location on the Envision Kit PCB, refer to Figure 3-3. Table 4-21 : SDHI Not Fitted Component Details RefDes Description... -
Page 29: Arduino Tm Configuration
RX65N Envision Kit 4 Envision Kit Circuitry 4.12.1 Arduino Configuration Table 4-22 below details the function of the zero-Ohm option links associated with the Arduino configuration. Bold, blue text indicates the default configuration that the Envision Kit is supplied with. Table 4-22 : Option links affecting configuration of the Arduino Interface MCU Signal name... -
Page 30: Available Mcu Hardware Interrupt Pins (Irq)
RX65N Envision Kit 4 Envision Kit Circuitry 4.13 Available MCU Hardware Interrupt Pins (IRQ) Table 4-23 below shows a list of available hardware interrupt IRQ lines on the Envision PCB. Table 4-23 : List of Available IRQ pins on the Envision Board Availability on Envision Board Port IRQ13... -
Page 31: Additional Information
Copyright This document may be, wholly or partially, subject to change without notice. All rights reserved. Duplication of this document, either in whole or part is prohibited without the written permission of Renesas Electronics Europe Limited. © 2017 Renesas Electronics Europe Limited. All rights reserved. - Page 32 REVISION HISTORY RX65N Envision Kit User’s Manual Rev. Date Description Page Summary 1.00 Sep 30, 2017 First Edition issued ...
- Page 33 RX65N Envision Kit: User’s Manual Publication Date: Rev. 1.00 Sep 30, 2017 Published by: Renesas Electronics Corporation...
- Page 34 SALES OFFICES Refer to "http://www.renesas.com/" for the latest and detailed information. Renesas Electronics America Inc. 2801 Scott Boulevard Santa Clara, CA 95050-2549, U.S.A. Tel: +1-408-588-6000, Fax: +1-408-588-6130 Renesas Electronics Canada Limited 9251 Yonge Street, Suite 8309 Richmond Hill, Ontario Canada L4C 9T3...
- Page 35 RX65N Group R01UH0761EG0100...
Need help?
Do you have a question about the RX65N Series and is the answer not in the manual?
Questions and answers