Advertisement
Table of Contents
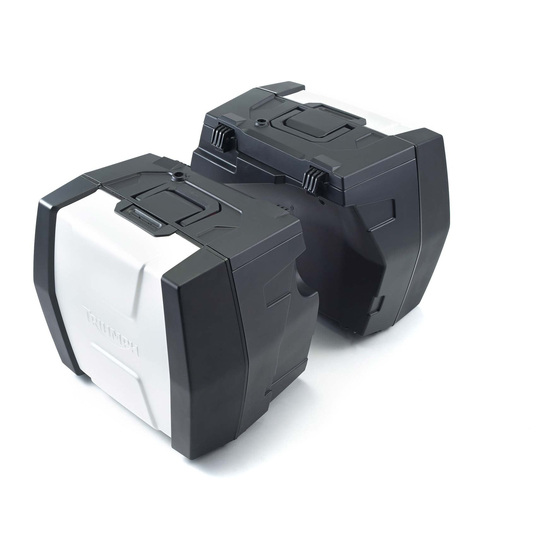
- 1 Pannier Kit
- 2 Pannier Mounting Kit
- 3 Parts Supplied: A9508184, A9500747
- 4 Parts Supplied: A9508186, A9508178
- 5 Installation of the Pannier Third Mounts and Pannier Cable
- 6 Installation of the Upper Mounts
- 7 Pannier Cable Adjustment
- 8 Models Fitted with Rear Side Reflectors
- 9 Lock Barrel Fitment
- 10 Mounting the Panniers
- 11 To Install each Pannier
- 12 To Remove each Pannier
- 13 Pannier Operation
- Download this manual
Kit number
A9508184
A9500747
To be used with
Kit number
A9508186
or
Kit number
A9508178
Thank you for choosing this Triumph genuine accessory kit. This accessory kit is the product of Triumph's use of
proven engineering, exhaustive testing, and continuous striving for superior reliability, safety and performance.
Completely read all of these instructions before commencing the installation of the accessory kit in order to
become thoroughly familiar with the kit's features and the installation process.
These instructions should be considered a permanent part of your accessory kit, and should remain with it even
if your accessory equipped motorcycle is subsequently sold.
Publication part number 9900777 issue 4
© Triumph Designs Ltd. 2017
Accessory Fitting Instructions
Pannier Kit
Models Affected
Tiger XR, Tiger XR
Tiger XC
and Tiger XCx,
A
Tiger 800, Tiger 800XC, Tiger 800 XR, Tiger 800 XR
Tiger 800 XR
, Tiger 800 XC
T
Pannier Mounting Kit
Models Affected
Tiger XR, Tiger XR
Tiger XC
and Tiger XCx,
A
Tiger 800, Tiger 800XC, Tiger 800 XR, Tiger 800 XR
Tiger 800 XR
, Tiger 800 XC
T
Pannier Mounting Kit
Models Affected
Tiger XR, Tiger XR
Tiger XC
and Tiger XCx,
A
Tiger 800, Tiger 800XC, Tiger 800 XR, Tiger 800 XR
Tiger 800 XR
, Tiger 800 XC
T
1 of 20
, Tiger XRx, Tiger XC ,
T
, Tiger 800 XR
A
, Tiger XRx, Tiger XC ,
T
, Tiger 800 XR
A
, Tiger XRx, Tiger XC ,
T
, Tiger 800 XR
A
, Tiger 800 XC
X
X
LRH
X
, Tiger 800 XC
X
X
LRH
X
, Tiger 800 XC
X
X
LRH
X
English
,
,
,
Advertisement
Table of Contents

Subscribe to Our Youtube Channel
Related Manuals for Triumph A9508184


Summary of Contents for Triumph A9508184
- Page 1 , Tiger 800 XC , Tiger 800 XR Thank you for choosing this Triumph genuine accessory kit. This accessory kit is the product of Triumph's use of proven engineering, exhaustive testing, and continuous striving for superior reliability, safety and performance.
- Page 2 Parts supplied: A9508184, A9500747 Pannier assembly, left hand 1 off Reflector, red 2 off Pannier assembly, right hand 1 off Cleaning wipe (not shown) 1 off 2 of 20...
- Page 3 Parts supplied: A9508186, A9508178 Tiger 800 Tiger 800XC 24mm 24mm (135mm) Pannier upper mount, front 2 off Rocker arm, left hand 1 off Pannier upper mount, rear 2 off Rocker arm, right hand 1 off Bolt, M8 x 80 mm 4 off Cable cover 1 off...
- Page 4 7 mm diameter drill bit and a 24 mm diameter They should not be fitted to any other Triumph sheet metal punch are required to fit this kit. model or to any other manufacturer’s motorcycle.
- Page 5 Remove the diagnostic socket from its location Carefully release the relay and wiring harness on the battery tray moulding. Move the grommet from their location at the rear of the diagnostic socket and wiring harness away from battery tray moulding. the side of the battery tray moulding.
- Page 6 Remove the four screws and washers securing Carefully lower the battery tray moulding to rest the battery tray moulding to the motorcycle on the rear tyre. frame. Note, one of the screws also retains the air intake duct. Discard the screws. Retain the washers for reuse.
- Page 7 Position the left hand template to the left hand Warning outer edge of the battery tray moulding, as shown. Secure the template to the battery tray When drilling the battery tray moulding take moulding using a suitable adhesive masking tape extreme care not to allow the drill bit to come into (not supplied in the kit).
- Page 8 18. Using the markings provided carefully drill 23. Using the four M6 x 20 mm screws from the kit, suitable size pilot holes for the 24 mm sheet together with the original washers secure the metal punch. battery tray moulding and air intake duct to the motorcycle frame.
- Page 9 25. Refit the relay block and cable grommet to the 30. Support the silencer and loosen its fixing. Raise battery tray moulding. the silencer up and tighten its fixing to 15 Nm. 1. Relay 1. Silencer mounting bracket fixing 2. Grommet, wiring harness 2.
- Page 10 32. Using the cleaning wipe provided, clean the areas 37. Repeat steps 33 to 36 for the left hand side of on both the left and right hand sides of the rear the rear subframe. subframe shown in grey below. 38.
- Page 11 Feed the end of the pannier cable with the 43. Secure the left hand pannier third mount to the curved metal tubing, over the main wiring motorcycle rear subframe using two M6 x 50 mm harness in the battery tray moulding and bolts and M6 washers, in the orientation shown.
- Page 12 46. Fit a shouldered bolt from the kit, with the head Warning of the bolt towards the front of the motorcycle, to retain the rocker arm to the clevis of the left When locating the rocker arm into the clevis section hand third mount.
- Page 13 Installation of the Upper Mounts Remove the two nuts and bolts and remove the two left hand pannier mounting plates. Note: • Retain the plates for reuse • For Tiger 800 and Tiger 800XC up to VIN 583614, • Retain the bolts for reuse if the motorcycle is rear rack been...
- Page 14 Assemble a front pannier upper mount with a Pannier Cable Adjustment pannier mounting plate and M8 x 80 mm bolt, in the orientation shown below. Warning Cable adjustment must be carried out with the panniers empty. Adjustment of the pannier cable with the panniers loaded will cause an incorrect adjustment to be set.
- Page 15 Push the left hand pannier inwards towards the Slide the rubber sleeve to cover the cable motorcycle, as far as it will go, until the left hand adjuster. rocker arm contacts the top of the moulded cap Check that the panniers are free to move in the clevis, as shown.
- Page 16 Models Fitted with Rear Side Reflectors Using the cleaning wipe provided, clean the area of both panniers prior to fastening each reflector, as shown below. Caution When fitting self-adhesive parts care must be taken to ensure positioning is correct and accurate. Once the adhesive has been attached to the mounting surface, there is no satisfactory method of removal or re-positioning if incorrectly aligned.
- Page 17 Lock Barrel Fitment To install each pannier: Note: Note: • Once fitted the lock barrel cannot be removed. • The same procedure can be followed to remove and mount the left hand or the right hand Take a lock barrel and key (supplied with the panniers.
- Page 18 Ensure that the third mount rocker arm fits into Pannier Operation the locating cup moulded into the front of the pannier. 1. Key slot (shown in the LOCK position) 2. Lock position symbol 1. Rocker arm (left hand shown) 3. Unlock position symbol 2.
- Page 19 Note: Warning • Due to the effective nature of the pannier lid seal, reasonable force may be required to close Incorrect loading may result in an unsafe riding the lid to the second latch position. condition leading to loss of motorcycle control and To close and lock the pannier, close the lid until an accident.
- Page 20 Warning Warning Never ride an accessory-equipped motorcycle at Only operate this Triumph motorcycle at high speed speeds above 80 mph (130 km/h). in closed-course, on-road competition or on closed- course racetracks. High-speed operation should The presence of accessories will cause changes in only be attempted by riders who have been the stability and handling of the motorcycle.
Need help?
Do you have a question about the A9508184 and is the answer not in the manual?
Questions and answers