Table of Contents
Troubleshooting

Related Manuals for Omcan MX-CN-0020-G


Summary of Contents for Omcan MX-CN-0020-G
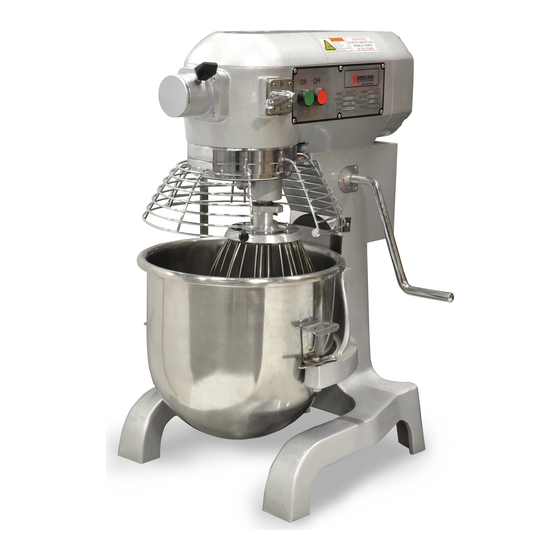
- Page 1 General Purpose Mixers Models MX-CN-0020-G, 0020-T, 0030-G, 0030-T, 0010-G Items 20467, 20441, 17835, 20442, 17836 Instruction Manual Revised - 11/09/2017 Toll Free: 1-800-465-0234 Fax: 905-607-0234 Email: service@omcan.com www.omcan.com...
-
Page 2: Table Of Contents
Table of Contents Model MX-CN-0010-G / Model MX-CN-0020-G / Model MX-CN-0020-T Model MX-CN-0030-G / Model MX-CN-0030-T Section Page General Information ---------------------------------------------------------------------------------- 3 - 4 Safety and Warranty --------------------------------------------------------------------------------- 4 - 5 Technical Specifications --------------------------------------------------------------------------------- 5 Installation -------------------------------------------------------------------------------------------------- 6 Operation ---------------------------------------------------------------------------------------------- 6 - 11... -
Page 3: General Information
If the package has suffered rough handling, bumps or damage (visible or concealed), please note it on the bill of lading before accepting the delivery and contact Omcan within 24 hours, so we may initiate a claim with the carrier. A detailed report on the extent of the damage caused to the machine must be filled out within three days, from the delivery date shown in the shipping documents. -
Page 4: Safety And Warranty
Si el paquete ha sufrido un manejo de poco cuidado, golpes o daños (visible o oculto) por favor anote en la factura antes de aceptar la entrega y contacte Omcan dentro de las 24 horas, de modo que podamos iniciar una reclamación con la compañia. -
Page 5: Technical Specifications
Safety and Warranty Please see www.omcan.com/warranty.html for complete info. WARNING: The packaging components are classified as normal solid urban waste and can therefore be disposed of without difficulty. In any case, for suitable recycling, we suggest disposing of the products separately (differentiated waste) according to the current norms. -
Page 6: Installation
WARNING: DO NOT SWITCH GEARS DURING USAGE. The Omcan mixers are equipped with Standard Safety features. Refer to the diagram on page 3 for an explanation of their functions. The bowl safety guard must be in the closed position or the mixer will not operate. -
Page 7: Operation
Operation pull the gear change hand lever (1) to the position required. 3. Shutting down: when the operation is completed, turn off the power switch (5) first, then pull the gear change hand lever (1) to position 1, and lower bowl to load position (6), and finally disconnect the power supply. - Page 8 Operation On/Off Switch - MX-CN-0020-G Features: 1. On Button 2. Off Button On/Off Switch - MX-CN-0030-T Features: 1. Separate On and Off Switches 2. Countdown Timer Knob 3. Speed Adjusting Lever with Handle On/Off Switch - MX-CN-0030-G Features: • On Button •...
- Page 9 Operation Installing Mixer Bowls - All Models 1. Place the bowl on the two arms to keep it in place. Insert the bowl pin into pin support located on frame. Carefully align holes on the bowl with the studs on the bowl arms. (Fig.1) 2.
- Page 10 Fig.4 Fig.5 Installing Mixer Attachments - MX-CN-0020-T / MX-CN-0020-G Ensure machine is off, lower bowl to loading position. Open the Guard by pulling the handle away from the magnetic latch. (Fig.6) Raise the attachment over the shaft, keeping note of where the notch is. (Fig.7) Guide the notch through the path until it reaches the end and locks.
-
Page 11: Maintenance
Operation Fig.9 Maintenance Clean the bowl and attachments daily or after use to maintain hygiene standards. Clean the mixer with a soft wet cloth. The transmission gear box is greased in factory. Check the greasing each 6 months. To add or refill grease, open the top cover, then fill grease from aperture or replace the grease directly. -
Page 12: Mixer Capacity Chart
Troubleshooting Motor temperature raises while Too low voltage Check the power supply reduced output speed Over-loaded Reduce load The speed of mixing is too high, or Select a suitable speed and wrong attachment is being used, or attachment. Reduce load. mixing too long. - Page 13 MX-CN-0010-G VFM10B Guard 0.67 HP / 500 W 110V/60/1 ETL Mixer General Purpose 20 QT / 5 Gal with 20441 MX-CN-0020-G SP200A Guard 1.5 HP / 1119 W 110V/60/1 ETL Mixer General Purpose 20 QT / 5 Gal 17835 MX-CN-0020-T with Guard with Timer 1.5 HP / 1119 W...
-
Page 14: Parts Breakdown
Parts Breakdown Model MX-CN-0010-G 20467... - Page 15 Parts Breakdown Model MX-CN-0010-G 20467 Item No. Description Position Item No. Description Position Item No. Description Position 25061 Wire Whip for VFM10B 24985 Plug for VFM10B 25123 Gear for VFM10B 25062 Hook for VFM10B 25093 Nut for VFM10B 25124 Ring for VFM10B 25063 Spring for VFM10B 25094...
- Page 16 Parts Breakdown Model MX-CN-0020-G 20441 Model MX-CN-0020-T 17835...
- Page 17 Parts Breakdown Model MX-CN-0020-G 20441 Model MX-CN-0020-T 17835 Item No. Description Position Item No. Description Position Item No. Description Position Green Button Round without Timer for 25153 Wire Whip for SP200A 24888 Operating Shelf for SP200A 24922 SP200A 25154 Dough Hook for SP200A...
- Page 18 Parts Breakdown Model MX-CN-0030-G 20442 Model MX-CN-0030-T 17836...
- Page 19 Parts Breakdown Model MX-CN-0030-G 20442 Model MX-CN-0030-T 17836 Item No. Description Position Item No. Description Position Item No. Description Position 24951 Dough Hook for SP300A 24987 Spacer-Lower for SP300A 25023 Bushing for SP300A 24952 Beater for SP300A 24988 Big Gear for SP300A 38-1 25024 Brass Gear-New Style for SP300A...
-
Page 20: Electrical Schematics
Electrical Schematics Model MX-CN-0010-G 20467 Name Model Specs Remark Motor 110V 60Hz / 1725rpm / 1PH 0.4Kw Micro Switch V-152-1C25 250V 10A Contact Switch CJX2-0910 Ac110V 60Hz Start Button SPL63 250V 10A Green Stop Button SPL63 250V 10A Overload Protector Ac125/250V 15A KUOYUH Start Capacitor... - Page 21 Electrical Schematics Model MX-CN-0020-G 20441 Name Model Specs Remark Motor 110V 60Hz / 1725rpm / 1PH 1.1Kw Micro Switch V-152-1C25 250V 10A Contact Switch CN--11 Ac110V 60Hz Start Button SPL63 250V 10A Green Stop Button SPL63 250V 10A Overload Capacitor...
- Page 22 Electrical Schematics Model MX-CN-0020-T 17835 Name Model Specs Remark Motor 110V 60Hz / 1PH 1.1Kw Micro Switch V-152-1C25 250V 10A Contact Switch CN--11 Ac110V 60Hz Start Button SPL63 250V 10A Green Stop Button SPL63 250V 10A Overload Capacitor Ac125/250V 15A KUOYUH Start Capacitor 300MF 125VAC...
- Page 23 Electrical Schematics Model MX-CN-0030-G 20442 Name Model Specs Remark Motor 110V 60Hz / 1725rpm / 1PH 1.8Kw Micro Switch V-152-1C25 250V 10A Contact Switch CN--11 Ac110V 60Hz Start Button SPL63 250V 10A Green Stop Button SPL63 250V 10A Overload Protector Ac125/250V 20A KUOYUH Start Capacitor...
- Page 24 Electrical Schematics Model MX-CN-0030-T 17836 Name Model Specs Remark Motor 110V 60Hz / 1725rpm / 1PH 1.8Kw Micro Switch V-152-1C25 250V 10A Contact Switch CN--11 Ac110V 60Hz Start Button SPL63 250V 10A Green Stop Button SPL63 250V 10A Overload Capacitor Ac125/250V 20A KUOYUH Start Capacitor...
-
Page 25: Notes
Notes ________________________________________________________________________________________ ________________________________________________________________________________________ ________________________________________________________________________________________ ________________________________________________________________________________________ ________________________________________________________________________________________ ________________________________________________________________________________________ ________________________________________________________________________________________ ________________________________________________________________________________________ ________________________________________________________________________________________ ________________________________________________________________________________________ ________________________________________________________________________________________ ________________________________________________________________________________________ ________________________________________________________________________________________ ________________________________________________________________________________________ ________________________________________________________________________________________ ________________________________________________________________________________________ ________________________________________________________________________________________ ________________________________________________________________________________________ ________________________________________________________________________________________ ________________________________________________________________________________________ ________________________________________________________________________________________ ________________________________________________________________________________________ ________________________________________________________________________________________ ________________________________________________________________________________________... -
Page 26: Notes
Notes ________________________________________________________________________________________ ________________________________________________________________________________________ ________________________________________________________________________________________ ________________________________________________________________________________________ ________________________________________________________________________________________ ________________________________________________________________________________________ ________________________________________________________________________________________ ________________________________________________________________________________________ ________________________________________________________________________________________ ________________________________________________________________________________________ ________________________________________________________________________________________ ________________________________________________________________________________________ ________________________________________________________________________________________ ________________________________________________________________________________________ ________________________________________________________________________________________ ________________________________________________________________________________________ ________________________________________________________________________________________ ________________________________________________________________________________________ ________________________________________________________________________________________ ________________________________________________________________________________________ ________________________________________________________________________________________ ________________________________________________________________________________________ ________________________________________________________________________________________ ________________________________________________________________________________________... -
Page 27: Warranty Registration
Warranty Registration Thank you for purchasing an Omcan product. To register your warranty for this product, complete the information below, tear off the card at the perforation and then send to the address specified below. You can also register online by visiting: Merci d’avoir acheté... - Page 28 Since 1951 Omcan has grown to become a leading distributor of equipment and supplies to the North American food service industry. Our success over these many years can be attributed to our commitment to strengthen and develop new and existing relationships with our valued customers and manufacturers.
Need help?
Do you have a question about the MX-CN-0020-G and is the answer not in the manual?
Questions and answers