Table of Contents
Advertisement
Quick Links
Download this manual
See also:
User Manual
Advertisement
Table of Contents

Related Manuals for Fluke 983


Summary of Contents for Fluke 983
- Page 1 ® Advanced Test Equipment Rentals www.atecorp.com 800-404-ATEC (2832) ® Fluke 983 Particle Counter Users Manual PN 2414721 January 2005 © 2005 Fluke Corporation. All rights reserved. Printed in U.S.A. All product names are trademarks of their respective companies.
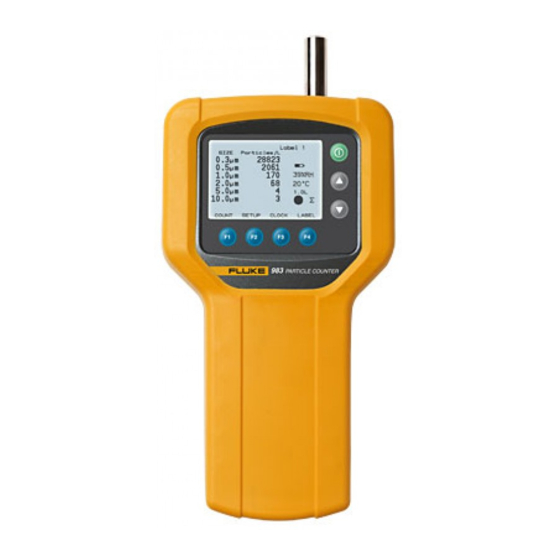
- Page 2 Read “Safety Information” before using the • Indoor air quality investigations Fluke 983 Particle Counter. • Monitoring gowning rooms The Fluke 983 Particle Counter (“The Particle Counter”) is • Testing filter seals a portable instrument that measures and reports air • Locating particle contamination sources contamination.
-
Page 3: Safety Information
• Do not use the Particle Counter in explosive atmospheres. • The Particle Counter contains no user- serviceable parts. Do not open the instrument. For service and battery replacement, the instrument must be sent to Fluke. See “Contacting Fluke”. -
Page 4: Quick Start
Particle Counter Compliance WCaution Compliance To avoid possible damage to the Particle The Particle Counter complies with: Counter: P, JIS B9921: 1997, 89/336/EEC, 73/23/EEC, EN61326: • Avoid using the Particle Counter in an 1997, EN60825-1:2001, Federal Standard 209E excessively dirty or dusty atmosphere. Excessive particle intake can damage the Quick Start Particle Counter. -
Page 5: Shipping Contents
Shipping Contents The Particle Counter ships with the items shown in Figure 1. bak07f.eps I Users Manual (English) Fluke 983 Particle Counter and Holster with Hand Strap J Safety Information (Multi-language) Isokinetic Probe and Cap K Intake Nozzle and Cap... - Page 6 Arrow Keys control the display contrast when on the Main Screen. Each function key corresponds to a name above each function key. Different menus have different labels above the Function keys. Keys Figure 2. Fluke 983 Keypad...
- Page 7 Main Screen • Setup Screen (pages 1 and 2) • Clock Setup Menu • Label Setup Menu The bottom of the display includes information about the corresponding function keys. IOIOI Tripod Mount bak08f.eps Figure 3. The Base of the Fluke 983...
-
Page 8: The Main Screen
Particle Counter The Display The Main Screen The Main Screen (see Figure 4) appears after the Particle Counter is turned on and after the opening screen appears. The Main Screen includes: • Six particle-size channels • Particle counts • Relative humidity (%RH) •... - Page 9 Fluke 983 Users Manual The Setup Screens To use the Setup Screens: From the Main Screen, press 2 (SETUP). The Setup Screen 1 appears, see Figure 5. To get to Setup Screen 2 while on Setup Screen 1, press 1 (PAGE 2), see Figure 6.
- Page 10 Particle Counter The Display The Clock Setup Menu To change the format of the date from dd/mm/yyyy to mm/dd/yyyy: To use the Clock Setup Menu: Move the cursor down to Date. From the Main Screen, press (CLOCK). From the Clock Setup Menu, the user can change the Particle Select (PROGRAM).
- Page 11 (RETURN) to return to the Main Screen. Notice that the Main screen now has the sample label in the upper right hand corner. Use these labels 1-75, or use the Fluke 983 Utility bak05f.eps software provided to change the label names. Refer to Figure 8.
-
Page 12: Using The Particle Counter
Particle Counter Using the Particle Counter Using the Particle Counter sampling. If the unit fails, see “Purging the Particle Counter Sensor”. The following sections give detailed information about Set Up using the Particle Counter. Purging the Particle Counter To set up the Particle Counter: Before taking particle samples, the Particle Counter Go through the different screens and set the desired should be purged using the Zero Count Filter. - Page 13 Fluke 983 Users Manual To use the Particle Counter in hard to reach areas, do the following: High-Purity Tubing Unscrew the threaded Isokinetic Probe. Intake Nozzle Replace it with the intake nozzle. Barbed Isokinetic Connect the high purity tubing to the intake nozzle.
- Page 14 Particle Counter Using the Particle Counter Setting the Particle Counting Mode (left arrow) and (right arrow) to select other modes. The Particle Counting Mode choices are: When the desired mode shows on the screen, press Concentration Mode (RETURN) to select that mode and return to the In Concentration Mode, the Particle Counter samples Main Screen.
- Page 15 Fluke 983 Users Manual Setting the Method of Counting Data If Sample Time CF or Sample Time L is selected: Press (EDIT) to edit the sampling time. The choices for data counting are: Press (Min) to highlight the minutes digit.
- Page 16 Particle Counter Using the Particle Counter Setting the Number of Samples Select the desired particle size and press (RETURN) to return to the Main Screen. From the Main Screen, press (SETUP). From page one of the Setup Screen, use Note highlight “Number of Samples".
-
Page 17: Restoring Default Settings
(PC) Go to setup screen 2 and press to move the using the Fluke 983 Utility Software included on the CD. cursor to “Temperature". The records are saved in a comma-separated variable (left arrow) and (right arrow) to select “°F”... -
Page 18: Connecting The Particle Counter To A Pc
Particle Counter Connecting the Particle Counter to a PC About the Software Note To use the utility software, the Particle Counter The software allows the Particle Counter to be used via must be connected to a PC. PC interface. The software screen (Figure 10) is separated into different sections: Control, Labels, Data, Connecting the Particle Counter to a PC Download Format, Time, and Delay Time. - Page 19 Fluke 983 Users Manual bak11s.bmp Figure 10. Particle Counter Utility Software Screen...
- Page 20 Particle Counter About the Software Control Note Start Count If the Particle Counter is turned off while the software screen is active, or there are no Press “Start Count” to start the Particle Counter counting. samples stored in the memory buffer, the “Get Stop Count Buffer”...
- Page 21 Fluke 983 Users Manual Get Time The CSV File Press “Get Time” to read the date and time on the Particle The data from the Particle Counter is stored in a comma- Counter and display it to the right of the “Get Time” button separated variable (CSV) file.
-
Page 22: Storing Samples
.CSV file. See battery replacement, the instrument must be “The CSV File” for more information. sent to Fluke. See “Contacting Fluke”. View or print the .CSV file using any program that Use the Zero Count Filter to ensure that the Particle can view .CSV files and the PC’s normal print... - Page 23 Fluke 983 Users Manual Cleaning the Case To connect the ac adapter/charger: Periodically wipe the case and holster with a damp cloth Attach the power cord to the end of the charger. and mild detergent. Plug the charger into the 12V jack on the base of the Particle Counter.
- Page 24 A problem with the battery is indicated. Disconnect the Particle Counter from the ac charge adapter/charger. Check the line cord. If the problem persists, contact Fluke. Display is too dark or light The display contrast is set too low or too high. Turn the unit on, press...
- Page 25 Fluke 983 Users Manual Table 2. Troubleshooting (cont.) Problem Possible Reason and Recommended Actions Unable to download data in the buffer There is a problem with the connections from the PC to the Particle Counter. Check those connections. There may be a problem with the software. Refer to the Readme.txt file on the software.
-
Page 26: Specifications
Particle Counter Specifications Specifications Count Modes Concentration, totalize, audio 6 Particle-Size Channels: Delay Time 0.3, 0.5, 1.0, 2.0, 5.0, 10.0 µm 0 to 24 hours Flow Rate Sample Inlet 0.1 cfm (2.83 L/min) Isokinetic probe Light Source Interface Laser diode; index guided (26,000 MTBF at 25 °C) RS-232 and RS-485 via RJ-45 Calibration Vacuum Source... -
Page 27: Parts And Accessories
Fluke 983 Users Manual Parts and Accessories To order parts and accessories for the Particle Counter, refer to the following table and figure. bak09f.eps Figure 11. Fluke 983 Replaceable Parts... - Page 28 Particle Counter Parts and Accessories Table 3. Replaceable Parts and Accessories Part Callout Description Number 2414654 Holster 2421437 Isokinetic Probe 2421481 Isokinetic Probe Cap 2421350 AC Adapter/Charger 2421377 RS-232 Modular Cable 2421455 ¼” High Purity Tubing (2 ft.) 2421392 RJ-45 to DB-9 Connector 2421428 Zero Count Filter 2414717...
Need help?
Do you have a question about the 983 and is the answer not in the manual?
Questions and answers