
Related Manuals for Fluke 983


Summary of Contents for Fluke 983
- Page 1 ® Fluke 983 Particle Counter Users Manual PN 2414721 January 2005 Rev. 2, 1/07 © 2005-2007 Fluke Corporation. All rights reserved. Printed in U.S.A. All product names are trademarks of their respective companies.
- Page 2 LIMITED WARRANTY AND LIMITATION OF LIABILITY Each Fluke product is warranted to be free from defects in material and workmanship under normal use and service. The warranty period is 1 year and begins on the date of shipment. Parts, product repairs, and services are warranted for 90 days. This warranty extends only to the...
-
Page 3: Table Of Contents
Table of Contents Title Page Introduction........................1 Applications ........................1 Contacting Fluke ......................1 Safety Information ......................2 Compliance ........................4 Quick Start ........................4 Shipping Contents ......................5 The Keypad ........................6 The Backlight........................6 The Base........................7 The Display ........................7 The Main Screen ....................... - Page 4 Fluke 983 Users Manual Purging the Particle Counter ..................12 Set Up ........................12 Setting the Particle Counting Mode................14 Setting the Air Sampling Volume or Sampling Time..........14 Setting the Method of Counting Data ................ 15 Setting the Number of Samples ................16 Enabling and Setting a Password for the First Time ..........
- Page 5 (continued) Contents Purging the Particle Counter Sensor ................. 23 Troubleshooting......................24 Specifications ......................... 26 Parts and Accessories....................27...
- Page 6 Fluke 983 Users Manual...
-
Page 7: List Of Tables
List of Tables Table Title Page Symbols..........................2 Troubleshooting........................25 Replaceable Parts and Accessories ..................29... - Page 8 Fluke 983 Users Manual...
-
Page 9: List Of Figures
Figure Title Page Fluke 983 Shipping Contents....................5 Fluke 983 Keypad........................6 The Base of the Fluke 983 ....................7 Main Screen .......................... 8 Setup Screen 1........................9 Setup Screen 2........................9 Clock Setup Menu ......................... 10 Label Menu..........................12 Using the High-Purity Tubing and Barbed Isokinetic Probe ........... - Page 10 Fluke 983 Users Manual viii...
-
Page 11: Introduction
Contacting Fluke temperature, and relative humidity of each sample. The data can be easily downloaded to a personal computer To contact Fluke or for service, call one of the following ® using the interface cable adapter, cable, and FlukeView telephone numbers: Forms Documenting Software provided with the unit. -
Page 12: Safety Information
Table 1. Symbols Symbol Meaning Risk of Danger. Important information. Refer to manual. Hazardous voltage. Risk of electrical shock. Do not dispose of this product as unsorted municipal waste. Go to Fluke’s website for recycling information. Conforms to relevant European Union directives. - Page 13 For service and battery If using the tilt stand, hold the replacement, the instrument must be instrument while using the keypad. sent to Fluke. See “Contacting Fluke”. Have the Particle Counter serviced only by qualified service personnel. Inspect the Particle Counter before use.
-
Page 14: Compliance
Fluke 983 Users Manual Compliance Quick Start The Particle Counter complies with: The Particle Counter may be used directly out of the box. To immediately use the Particle Counter: P, JIS B9921: 1997, 89/336/EEC, 73/23/EEC, EN61326: 1997, EN60825-1:2001, Federal Standard 209E Read “Safety Information”... -
Page 15: Shipping Contents
Shipping Contents The Particle Counter ships with the items shown in Figure 1. bak07f.eps I Users Manual (English) Fluke 983 Particle Counter and Holster with Hand Strap J Safety Information (Multi-language) Isokinetic Probe and Cap K Intake Nozzle and Cap... -
Page 16: The Keypad
Arrow Keys control the display contrast when on the Main Screen. Each function key corresponds to a name above each function key. Different menus have different labels above the Function keys. Keys Figure 2. Fluke 983 Keypad... -
Page 17: The Base
External Power Main Screen Setup Screen (pages 1 and 2) Clock Setup Menu Label Setup Menu The bottom of the display includes information about the corresponding function keys. IOIOI Tripod Mount bak08f.eps Figure 3. The Base of the Fluke 983... -
Page 18: The Main Screen
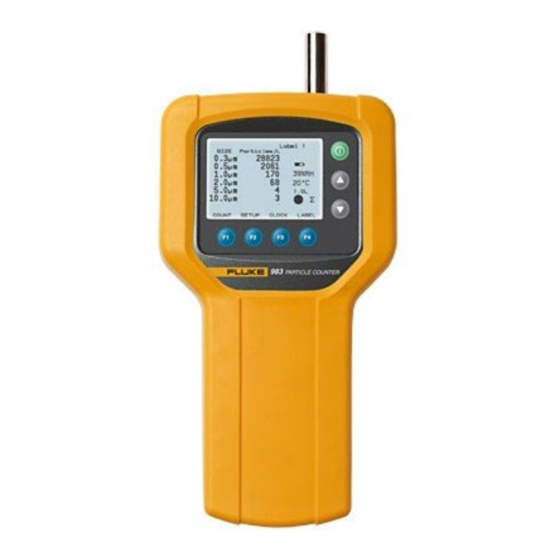
Fluke 983 Users Manual The Main Screen The Main Screen (see Figure 4) appears after the Particle Counter is turned on and after the opening screen appears. The Main Screen includes: Six particle-size channels Particle counts Relative humidity (%RH) Air-sample temperature ( C or F) -
Page 19: The Setup Screens
Particle Counter The Display The Setup Screens To use the Setup Screens: From the Main Screen, press 2 (SETUP). The Setup Screen 1 appears, see Figure 5. To get to Setup Screen 2 while on Setup Screen 1, press 1 (PAGE 2), see Figure 6. -
Page 20: The Clock Setup Menu
Fluke 983 Users Manual The Clock Setup Menu To change the format of the date from dd/mm/yyyy to mm/dd/yyyy: To use the Clock Setup Menu: Move the cursor down to Date. From the Main Screen, press (CLOCK). From the Clock Setup Menu, the user can change the Particle Select (PROGRAM). -
Page 21: Reviewing The Buffer
Particle Counter The Display The large cursor changes to a single-character cursor. Use to change the individual characters. Press 2 (left arrow) and 3 (right arrow) to change to the next character in the series. Once the desired label name is entered, press SAVE, which has now changed to to store the new... -
Page 22: Using The Particle Counter
Fluke 983 Users Manual Using the Particle Counter sampling. If the unit fails, see “Purging the Particle Counter Sensor”. The following sections give detailed information about Set Up using the Particle Counter. Purging the Particle Counter To set up the Particle Counter:... - Page 23 Particle Counter Using the Particle Counter To use the Particle Counter in hard to reach areas, do the following: High-Purity Tubing Unscrew the threaded Isokinetic Probe. Intake Nozzle Replace it with the intake nozzle. Barbed Isokinetic Probe Connect the high purity tubing to the intake nozzle. Connect the Barbed Isokinetic Probe to the open end of the tubing.
-
Page 24: Setting The Particle Counting Mode
Fluke 983 Users Manual Setting the Particle Counting Mode (left arrow) and (right arrow) to select other modes. The Particle Counting Mode choices are: When the desired mode shows on the screen, press Concentration Mode (RETURN) to select that mode and return to the In Concentration Mode, the Particle Counter samples Main Screen. -
Page 25: Setting The Method Of Counting Data
Particle Counter Using the Particle Counter Setting the Method of Counting Data If Sample Time CF or Sample Time L is selected: Press (EDIT) to edit the sampling time. The choices for data counting are: Press (Min) to highlight the minutes digit. Cumulative Press (Sec) to highlight the seconds digit. -
Page 26: Setting The Number Of Samples
Fluke 983 Users Manual Setting the Number of Samples to change the selected character of the password. From the Main Screen, press (SETUP). Press (left arrow) or (right arrow) to move the From page one of the Setup Screen, use cursor to the next character. -
Page 27: Lost Passwords
(STOP) If the administrator password is forgotten or lost, contact once will mute the alarm. Pressing (STOP) Fluke to receive a new password. Refer to “Contacting again will stop the sample. Fluke”. Setting a Delay Between Samples Technical support will require the following information to... -
Page 28: Setting Temperature Mode
Fluke 983 Users Manual Setting the I/O Port to Download Data to a Setting Temperature Mode To set the Temperature Mode to Fahrenheit or Celsius: Go to Setup Screen 2 and press to move Go to setup screen 2 and press to move the the cursor to “I/O Port". -
Page 29: Control
Particle Counter Transferring Data to a Personal Computer Connect the modular RS-232 cable to the RJ-45 The user-defined alarm limit has been converter and to the Particle Counter. Make sure the exceeded. Particle Counter is off when making the connection. 4 = Low Battery Turn the Particle Counter on. -
Page 30: Labels
Fluke 983 Users Manual Click “Meter” then “Logging” then press the “Schedule” Fluke offers a complete Thermal Printer Kit to take tab to either schedule a datalogging session or begin advantage of the printing capabilities of the Particle datalogging remotely. -
Page 31: To Print A Single Sample Stored In The Buffer
For service and the cursor to “I/O Port". battery replacement, the instrument must be sent to Fluke. See “Contacting Fluke”. Use 2 (left arrow) and 3 (right arrow) to select “Print Buffer”. Use the Zero Count Filter to ensure that the Particle Press 4 (RETURN) to return to the Main Screen. -
Page 32: Charging The Battery And Using The Ac Adapter
Fluke 983 Users Manual WCaution Plug the charger into the 12V jack on the base of the Particle Counter. To avoid damaging the Particle Counter, do not use abrasives or solvents to clean the Plug the ac adapter into an ac outlet. The Particle Particle Counter case. -
Page 33: Purging The Particle Counter Sensor
Particle Counter Maintenance Purging the Particle Counter Sensor Operate the unit for approximately 15 minutes. On the average, not more than one particle greater WCaution than 0.3 µm in five minutes or not more than one To avoid possible damage to the Particle particle per 0.5 cubic foot should be apparent. -
Page 34: Troubleshooting
A problem with the battery is indicated. Disconnect the Particle Counter from the ac charge adapter/charger. Check the line cord. If the problem persists, contact Fluke. After fully charging the battery in The Particle Counter needs to be turned on and the charger connected for the trickle charge mode, the display does charge circuitry to update the battery status symbol. - Page 35 The sensor is contaminated. Refer to “Purging the Particle Counter Sensor”. The laser has dropped below acceptable levels. If the problem persists, contact Fluke. No temperature/humidity reading or Temperature and humidity appear after the sample is in progress. Allow the unit to an incorrect reading acclimate to the sampling environment for greater accuracy.
-
Page 36: Specifications
Fluke 983 Users Manual Specifications Delay Time 0 to 24 hours 6 Particle-Size Channels: Sample Inlet 0.3, 0.5, 1.0, 2.0, 5.0, 10.0 µm Isokinetic probe Flow Rate Interface 0.1 cfm (2.83 L/min) RS-232 and RS-485 via RJ-45 Light Source Vacuum Source Laser diode;... -
Page 37: Parts And Accessories
Particle Counter Parts and Accessories Parts and Accessories To order parts and accessories for the Particle Counter, refer to Table 3 and Figure 10. bak09f.eps Figure 10. Fluke 983 Replaceable Parts... - Page 38 RS-232 Modular Cable 2421455 ¼” High Purity Tubing (2 ft.) 2421392 RJ-45 to DB-9 Connector 2421428 Zero Count Filter 2414717 983 Users Manual CD 2414721 Users Manual (English) 2414700 Safety Information (Multi-language) 2421443 Intake Nozzle and Cap 2421361 US Power Cord...
- Page 39 Not Shown 669069 Hand Strap (located on the back of the holster) Not Shown 2543469 983 US Printer Kit 120V version: Seiko DPU-414 Thermal Printer Seiko PW-4007-U1 120 V AC Adapter Seiko BP-4005 Battery Pack 1-Roll Thermal Paper RJ-45 to DB-9 serial Printer Adapter...
- Page 40 Fluke 983 Users Manual...
Need help?
Do you have a question about the 983 and is the answer not in the manual?
Questions and answers