Table of Contents
Advertisement
Advertisement
Table of Contents

Related Manuals for Husqvarna Viking Sapphire 960Q


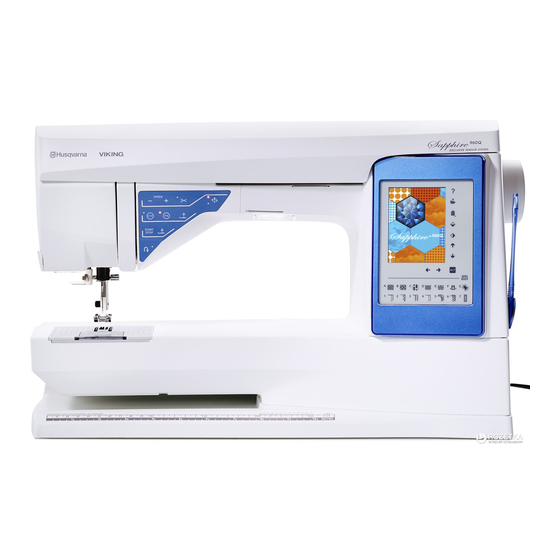
Summary of Contents for Husqvarna Viking Sapphire 960Q
- Page 1 User’s Guide K E E P I N G T H E W O R L D S E W I N G ™...
-
Page 2: Important Safety Instructions
This household sewing machine is designed to comply with IEC/EN 60335-2-28 and UL1594. IMPORTANT SAFETY INSTRUCTIONS When using an electrical appliance, basic safety precautions should always be followed, including the following: Read all instructions before using this household sewing machine. Keep the instructions at a suitable place close to the machine. - Page 3 FOR EUROPE ONLY: This appliance can be used by children aged from 8 years and above and persons with reduced physical, sensory or mental capabilities or lack of experience and knowledge if they have been given supervision or instruction concerning use of the appliance in a safe way and understand the hazards involved.
-
Page 5: Table Of Contents
TABLE OF CONTENTS ........3:4 Delete ................3:4 Getting to know your machine Mirror end-to-end/mirror side-to-side ......3:4 ALT and function arrows ..........3:4 MACHINE OVERVIEW Exclusive SEWING ADVISOR ™ ........3:4 ................1:6 COLOR TOUCH SCREEN Needle Area ..............1:6 ................3:5 Accessory Box ..............1:7 Toolbar ................3:5 ACCESSORIES SET MENU Included Accessories ............1:7... - Page 6 Program PROGRAM EDIT YOUR STITCH OR LETTERING PROGRAM Tabs in Program mode ...........5:3 ..........5:3 SEWING A STITCH PROGRAM SAVE TO MY STITCHES TO RE-LOAD A STITCH PROGRAM PROGRAM POP-UP MESSAGES File Manager FILE MANAGER AVAILABLE MEMORY BROWSE FILE MANAGER List/Thumbnail View .............6:3 MY FILES ...................6:3 ..............6:3...
-
Page 7: Getting To Know Your Machine
GETTING TO KNOW YOUR MACHINE This section of the User’s Guide will give you an overview of your machine, its accessories and stitches. -
Page 8: Machine Overview 1:6
MACHINE OVERVIEW Pre-Tension Thread guide Thread tension discs Thread take-up lever Thread slots Thread tension disc for bobbin winding Thread cutter LED-lights 10. Bobbin cover 11. Button ruler and built-in tape measure 12. Base plate 14. Main spool pin 15. Bobbin winding thread guide 16. -
Page 9: Accessory Box
ACCESSORY BOX The accessory box features special compartments for presser feet and bobbins, plus space for needles and other easily accessible. 35. Removable presser feet and bobbin tray ACCESSORIES INCLUDED ACCESSORIES 41. Brush 42. Edge/Quilting guide 43. 2 spool caps, large 46. - Page 10 PRESSER FEET Utility Foot A zigzag stitching with a stitch length longer than 1.0. Decorative Stitch Foot B and decorative stitches.The tunnel on the underside of the foot is designed to feed smoothly over the stitches. Buttonhole Foot C measures a 5 / 8 cording for corded buttonholes.
- Page 11 Quilter’s 1/4” Piecing foot P Clear Open Toe Foot of the foot feeds smoothly over the stitches and the transparent foot with open front gives greater visibility for accuracy. Embroidery/Darning Foot R This foot is used for Side Motion Foot S This foot is used for side-motion/Omnimotion stitches.
- Page 12 STITCHES A – Utility Stitches Stitch Presser Stitch Stitch name Application Foot center needle position left needle position needle position the needle to any of 29 positions. and adjust the needle position to any of 29 positions. fabric by moving to the next baste position when sensor foot lifts. Zigzag right.
- Page 13 Application Bartack Reinforce pockets, shirts openings, belt loops as well as at lower end of a zipper. fabrics. press reverse for continuous darning and auto stop. Bartack Buttonhole Round End Buttonhole Medium Reinforced Buttonhole Heirloom Buttonhole Buttonhole Rounded Heirloom Buttonhole Keyhole Buttonhole Heavy Duty...
- Page 14 A - Utility B - Satin Stitches 1:12...
- Page 15 C - Heirloom Stitches D - Quilt Stitches 1:13 ETTING TO KNOW YOUR MACHINE...
- Page 16 E - Vintage Stitches and decorative stitching. F - Decorative Stitches 1:14...
- Page 17 G - Omnimotion stitches H - Specialty stitches edging. Extra accessories may be needed. Use Quick Help for detailed information. 1:15 ETTING TO KNOW YOUR MACHINE...
-
Page 18: Alphabets 1:16
J - Tapering stitches These stitches can be used for tapering. ALPHABETS Block Brush Line Script Cyrillic and Hiragana 1:16... -
Page 19: Set Up
SET UP This section of the User’s Guide will help you get started with your machine. Learn how to thread your machine, wind the bobbin, change needle and presser foot. -
Page 20: Unpacking
3. The machine is delivered with an accessory bag, a power cord and a foot control cord. 4. Wipe the machine, particularly around the needle and stitch plate to remove any soil before sewing. Note: Your HUSQVARNA VIKING SAPPHIRE 960Q ®... -
Page 21: Pack Away After Sewing
USB PORT Note: Make sure that the USB stick you use has the format FAT32. CONNECT TO AND REMOVE FROM USB PORT Insert the do not force it into the port! Note: Do not remove the USB stick when the hourglass is shown on PACK AWAY AFTER SEWING Press the Unplug the cord from the wall socket and then from... -
Page 22: Spool Pins
SPOOL PINS main spool pin and an auxiliary spool pin. The spool pins are designed for all types of thread. The main spool pin is adjustable and can Use the horizontal position for regular sewing threads and the vertical position for specialty threads. HORIZONTAL POSITION Place a spool cap and the thread spool on the spool pin. -
Page 23: Threading The Upper Thread
THREADING THE UPPER THREAD Make sure that the presser foot is raised and the needle is in the up position. Place the thread on the spool pin and the spool cap on the spool as described on page 2:4. Spool pin in horizontal position: Bring the thread over and behind the pre-tension Spool pin in vertical position: Instead of bringing the thread into the pre-tension... -
Page 24: Threading For Twin Needle
THREADING FOR TWIN NEEDLE Replace the sewing needle with a twin needle. Make sure the presser foot is raised and the needle is in the up position. Lift the spool pin up and all the way to the right. Lock the spool pin in the vertical position by slightly spools smaller than the medium size spool cap, place a felt pad under the thread spool. -
Page 25: Bobbin Winding
When the bobbin is full, it will stop winding. Release the foot control or touch the start/stop button to stop the bobbin winder motor from running. Move the Note: When using earlier version of HUSQVARNA VIKING ® bobbin winder spindle to the left and the pop-up will bobbins that do not have a hole, wind several turns of thread on the close. -
Page 26: Changing The Needle Plate
CHANGING THE NEEDLE PLATE Remove the presser foot and slide off the bobbin cover. Make sure that the feed teeth are lowered. Place the screwdriver under the needle plate as shown in the picture and gently turn the screwdriver to pop off the needle plate. -
Page 27: Changing The Needle
CHANGING THE NEEDLE Use the hole in the multipurpose tool to hold the needle. Loosen the needle screw. Remove the needle. Insert the new needle using the multipurpose tool. from you until it will go no further. Tighten the needle screw. NEEDLES The sewing machine needle plays an important role in needles of system 130/705H. -
Page 28: Threads 2:10
THREADS STABILIZERS There are many threads on the market today developed for Tear-Away Stabilizers different purposes. Tear-away stabilizers are used with stable woven fabrics. Place underneath fabric for decorative stitching or hoop All Purpose Sewing Thread with the fabric when embroidering. Tear away excess All purpose sewing thread is made of synthetic, cotton or stabilizer after stitching. -
Page 29: How To Update Your Machine
HOW TO UPDATE YOUR MACHINE ® retailer for updates and upgrades for your machine and User’s Guide. UPDATE INSTRUCTIONS web site at ® machine. following the instructions on the web site. Make sure that your machine is turned off. Connect the While pressing and holding the reverse button, turn your machine on. - Page 30 2:12...
-
Page 31: Settings & Functions
SETTINGS & FUNCTIONS This section of the User’s Guide will guide you through the basic settings and function buttons of your machine. Learn how to navigate the functions and settings on the Interactive Color Touch Screen and how to use the function buttons on the sewing machine head. -
Page 32: Function Buttons
FUNCTION BUTTONS Selective Thread Cutter Speed + and - Needle Stop Up/Down STOP Sensor Foot Up and Extra Lift Start/Stop Sensor Foot Down and Pivot Reverse SPEED + AND - NEEDLE STOP UP/DOWN All stitches in your machine have a pre-set, recommended sewing speed. -
Page 33: Reverse
FUNCTION BUTTONS Selective Thread Cutter Speed + and - Needle Stop Up/Down STOP Sensor Foot Up and Extra Lift Start/Stop Sensor Foot Down and Pivot Reverse SENSOR FOOT DOWN AND PIVOT presser foot will be completely lowered. The machine At the beginning, your machine sews a few tie-off stitches get the Pivot position. -
Page 34: Overview Touch Area
OVERVIEW TOUCH AREA 960Q is very easy to work with - just touch it with your stylus ® ™ will not change its appearance. Quick Help Save to My Stitches/ My Files Delete Mirror End-to-End Mirror Side-to-Side Function arrows Function arrows Exclusive SEWING ADVISOR ™... -
Page 35: Color Touch Screen
COLOR TOUCH SCREEN Start Menu START MENU Toolbar is used for selecting and activating different windows. TOOLBAR Touch the function you want to activate. Start Menu Stitch Menu Stitch Menu Stitch Font Menu Stitch Font Menu Program a font is selected, you will automatically enter the Program mode. -
Page 36: Set Menu
SET MENU SET Menu Touch the icons to activate a function or open a list of are saved after turning off the machine. If you make after turning off the machine. Sewing Settings Stitch Settings MACHINE SETTINGS Machine Settings Information icon The information icon opens a window which contains the machine’s software version, memory usage and license information. - Page 37 STITCH SETTINGS pressure and balance a stitch or buttonhole. These settings will only be valid for the stitch that is currently selected. If another stitch is selected or the same stitch is selected again, the stitch value is reset to the default value. The default number is shown in black, if the number has been changed it will be shown in red.
- Page 38 SEWING SETTINGS Twin Needle Touch the Twin Needle icon to open a list for twin needle width selections. When a twin needle size is selected, the width of all stitches is limited for the selected twin needle size to prevent needle breakage. The setting is kept until you turn the twin needle width to off.
-
Page 39: Sewing 4:1
SEWING program and sew them. -
Page 40: Tabs 4:2
Sewing Information TABS Stitch Menu where you can make changes to your stitch such as the length and width and see what is recommended for the different categories of stitches and the stitches that are found in each one. STITCH MENU TAB the tab a stitch selection menu will open. -
Page 41: Sewing Information Tab
SEWING INFORMATION TAB Your machine will choose the best stitch settings for the three parts. Exclusive SEWING AVISOR ™ setting ™ Sewing recommendations setting you ™ will see what needle to use, if stabilizer and/or glide sole is needed. Stitch adjustment adjustments. - Page 42 Free Motion Technique will appear allowing you to choose between two options: Free Motion Floating You can use presser foot R or an optional foot. The feed teeth will lower automatically. Thread tension When sewing free motion at low speed the presser foot will raise and lower with each stitch to hold the fabric on Stitch the needle plate while the stitch is being formed.
-
Page 43: Alt And Function Arrows
STITCH ALTERING Your machine will set the best settings for each selected stitch. You can make your own adjustments on the selected stitch. The setting changes will only affect the selected stitch. Your changed settings will be reset to default when selecting another stitch. - Page 44 Buttonhole size When sewing a buttonhole with the Buttonhole foot, you can set the button size. Measure your button and set the button size on screen. Note: There is a guide in front of your machine where you can measure the size of the button. Buttonhole size Button Sew On When sewing a button, you can set the number of stitch...
-
Page 45: Exclusive Sewing Advisor Feature
EXCLUSIVE SEWING ADVISOR ™ FEATURE Your new sewing machine has the HUSQVARNA VIKING ® Exclusive SEWING ADVISOR feature. It is always active in ™ and is located at the bottom of the Touch Screen. When beginning a sewing project, touch your fabric type and weight, then touch the technique you desire. -
Page 46: Sewing Techniques
SEWING TECHNIQUES : sews two pieces of fabric together. SEAM : overcast fabric edges to prevent them from OVERCAST : sews the seam and overcasts the edge all SEAM OVERCAST at one time. BASTE gathering and marking. : creates an invisible hem on garments. Is not BLIND HEM recommended for light weight fabric or for leather/vinyl. -
Page 47: Sewing Techniques
SEWING TECHNIQUES SEAM A seam sews two pieces of fabric together with a seam allowance that will usually be pressed open. In most cases, stitch before sewing the seam. stretch stitch makes a stretchy seam that is suitable for sewing together pieces of light stretch fabric. : Woven medium, cut in two. -
Page 48: Overcast
OVERCAST Overcast fabric edges to prevent fraying and to help is sewn together. Presser foot J is recommended for light and medium weight fabric to prevent puckering along the edge. Presser foot B is used for heavy weight fabric. Your feature will select the ™... - Page 49 SEAM AND OVERCAST the edges all at one time. There are a number of different ™ feature will select the best one for your fabric and make all adjustments automatically. FABRIC SELECT ™ feature. : Presser foot J and size 75 stretch needle as recommended.
-
Page 50: Baste
BASTE and marking. feature automatically sets a ™ long stitch length and reduces the tension so the threads are easy to remove or to pull for gathering. : Woven medium, cut in two. FABRIC : Woven medium fabric and Baste. SELECT : Presser foot A and size 80 needle as recommended. -
Page 51: Hem
feature will select the visible or topstitch hem ™ stretch fabrics, stitches that stretch are selected. Jeans Hem When sewing over seams in extra heavy fabric or a blue jeans hem, the foot can tip as it rides over the seam. The needle can hit the tipped foot and break. - Page 52 PERFECTLY BALANCED SENSOR ONE-STEP BUTTONHOLE ™ feature will select the should be interfaced and/or stabilized where buttonholes are to be sewn. You can also select your buttonhole directly from the Buttonhole Menu B. : Woven medium and stabilizer. FABRIC : Woven medium fabric and Buttonhole. SELECT Sensor One-Step Buttonhole Foot socket...
-
Page 53: Manual Buttonhole
When sewing buttonholes without satin stitches or when Note: If you are sewing buttonholes in a very narrow area, snap on the standard foot C and sew your buttonhole according to the instructions below. 2. Sewing direction for buttonholes without satin stitches or satin stitch buttonholes sewn with presser foot C MANUAL BUTTONHOLE To sew a manual buttonhole, use buttonhole foot C. -
Page 54: Manual Bartack
MANUAL BARTACK Decide the length of your bartack manually with stitch A22. Down and Pivot twice and adjust the fabric if necessary. automatically and stitch. • Your machine will sew a straight stitch until you touch Reverse . • Your machine will then sew in reverse until you touch reverse again. -
Page 55: Free Motion Quilting
FREE MOTION QUILTING Free Motion Floating When sewing free motion at a low speed, the foot will raise and lower with each stitch to hold the fabric on the stitch plate while the stitch is being formed. When sewing at a The feed teeth must be lowered and the fabric is moved manually. -
Page 56: Sewing Pop-Up Messages
SEWING POP-UP MESSAGES Bobbin Thread Low When the bobbin thread is running low, a pop-up message appears giving you an advanced notice that you’ll soon need to change the bobbin. This gives you an opportunity to plan when you want to change your bobbin. If you want to continue sewing just touch the foot control without touching the ok in the pop-up. -
Page 57: Program
PROGRAM This section of the Users Guide will help you make beautiful combinations of stitches and letters to decorate your fabric. -
Page 58: Program
PROGRAM Sewing Information You can combine stitches and/or letters and numbers to Stitch Menu create programs. Combine various decorative stitches and Font Menu stitch fonts from the machine or from an external device. • Enter the Program window by touching the PROG icon on the •... -
Page 59: Edit Your Stitch Or Lettering Program
EDIT YOUR STITCH OR LETTERING Sewing Information Tab PROGRAM Stitch Menu Font Menu TABS IN PROGRAM MODE to each individual stitch that you have programmed. The Menu Tab where you can choose which font you want to Delete Menu to open more stitches and fonts. Mirror End- to-End Insert a Stitch or Letter... -
Page 60: Sewing A Stitch Program
SEWING A STITCH PROGRAM To sew the stitch program, load it by touching the OK icon at the top right corner in the program window. You can Save to My also press on the foot control and the stitch will load and Stitches you will start to sew. -
Page 61: To Re-Load A Stitch Program
TO RE-LOAD A STITCH PROGRAM OK, it will be loaded and is ready to be sewn. If selecting another stitch and then re-opening the Program mode, your stitch program will remain unchanged. Every time Program mode is closed, the stitch program will be loaded and ready to be sewn. -
Page 63: File Manager
FILE MANAGER sewing machine. -
Page 64: File Manager
FILE MANAGER Start Menu open, organize, add, move, remove and an external device connected to your machine for storing File Manager SET Menu AVAILABLE MEMORY check how much memory is used in the built-in memory, Information icon shows how much memory is used. -
Page 65: Browse File Manager
BROWSE FILE MANAGER Folder Touch any of these icons to display their contents in the selection area. LIST/THUMBNAIL VIEW Thumbnail view icon again to switch back to Thumbnail view. List/Thumbnail view Drop Down Menu MY FILES Move up one organized. folder level OPEN A FOLDER Touch &... -
Page 66: Organize
ORGANIZE CREATE A NEW FOLDER Touch the create new folder icon to create a new folder. A pop-up message opens where you can enter a name for your folder. MOVE A FILE OR FOLDER storage location. location and is removed from the previous location. COPY A FILE OR FOLDER place. -
Page 67: Maintenance
MAINTENANCE machine and also a troobleshooting guide. -
Page 68: Cleaning The Machine
CLEANING THE MACHINE To keep your sewing machine operating well, clean it often. Wipe the exterior surface of your machine with a soft cloth to remove any dust or lint build up. with your machine. Cleaning the Bobbin Area Remove the presser foot and slide off the bobbin cover. Lower the feed teeth. -
Page 69: Troubleshooting
TROUBLESHOOTING ® retailer who will be happy to help you. Have Your Sewing Machine Serviced Regularly by your Local Authorized Dealer! If you have followed this troubleshooting information and still have problems, take your sewing machine to your dealer. your dealer. A sewing sample will often give much better information than words. General Problems Bobbin alarm does not work? VIKING... - Page 70 Is the bobbin wound correctly? Wind a new bobbin. Are you using the correct bobbin? The Machine Skips Stitches Is the needle bent or blunt? Insert a new needle. Did you insert the needle properly? Insert needle correctly as described in chapter 2. Did you insert a wrong needle? Use needle system 130/705 H.
- Page 71 Index Changing the Needle ............2:9 Changing the needle plate ............2:8 ..........2:8 Check Needle Thread ............4:18 Accessories ................1:7 Cleaning the Bobbin Area............7:2 Accessory Box ...............1:7 Cleaning the machine ............7:2 Accessory box, Remove ............. 2:3 Cleaning under the Bobbin Area ........7:2 ...................6:2 ............1:9 ............5:3 ..............3:5...
- Page 72 ................3:2, 3:3, 5:3 ................3:8 Machine needs to rest ............4:18 ..................1:8 Machine overview ..............1:6 ..............6:4 ..............3:6 ..............5:2, 5:3 Magnifying glass ..............2:8 ................1:7 Main spool pin ............1:6, 2:4, 2:7 ..............2:2 Manual Buttonhole .............4:15 .................1:6 ..............1:7 ................1:9 Mirror End to End ...............5:3 ..........
- Page 73 Plastic ..................1:8 ..........7:2 ...........1:9 Pop-up messages ..........3:3 ................6:4 ............3:7 Program ..................5:5 ...........3:3 ..................4:18 Power cord ................1:7 ..1:6, 1:9, 2:5, 4:6, 4:14 ......1:6 Connect ..................2:2 Presser feet and bobbin holder ...........1:7 ............3:8 ................4:4 ..............1:6, 1:8 ............3:2, 3:3, 3:6, 7:3 Changing ..................
- Page 74 ...............2:9 ..................1:7 Vertical spool pin ........... 2:4, 2:5, 2:6 ................1:6 ..............1:14 ................6:4 Vinyl ..................1:8 Tab ...................4:2 Warranty card .................1:7 Tabs in Program mode ............5:3 ............2:10 Take-up lever................2:5 Width balance adjustment ...........3:7 Tape measure .................1:6 Winding Bobbin ..............2:7 Tapering ..................4:4 ..........2:7 ............
- Page 75 Intellectual Property Patents protecting this product are listed on a label positioned underneath the Please note that on disposal, this product must be safely recycled in accordance with relevant National legislation relating to electrical/electronic products. Do not dispose of electrical appliances as unsorted muncipal waste, use separate collection facilities.
- Page 76 ww w. h us qv a r n av ik i n g . c o m www.husqvarnaviking.com...
Need help?
Do you have a question about the Viking Sapphire 960Q and is the answer not in the manual?
Questions and answers
How can I see sewing hours on my machine?