Sartorius Signum 1 Service Manual
Signum series complete scales
Hide thumbs
Also See for Signum 1:
- Operating instructions manual (124 pages) ,
- Operating instruction (116 pages)

Related Manuals for Sartorius Signum 1


Summary of Contents for Sartorius Signum 1
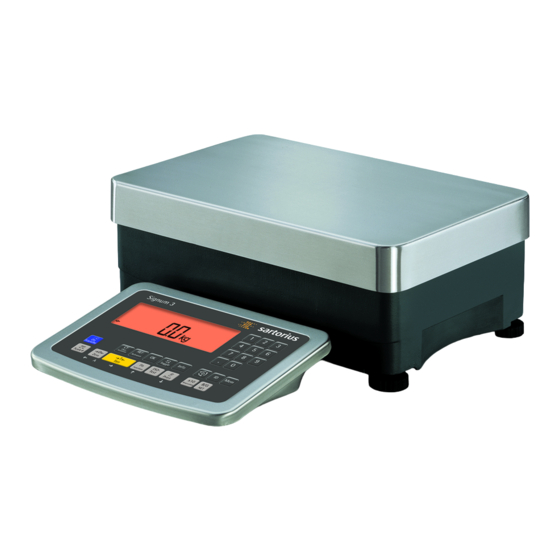
- Page 1 Service Manual ® ® ® Sartorius Signum 1 | Signum 2 | Signum Models SIWR | SIWA | SIWS Signum Series Complete Scales WSI5007-e12036...
-
Page 2: Table Of Contents
Contents Activating the Service Mode Activating the Service Mode Introductory Remarks Additional Menus in the Service Mode In the Text Menu (Setup) Notes on Using this Manual Calibration/Adjustment Functions Printing the Manual Symbols 1-9-1External Calibration/Adjustment with Safety Instructions Default Weights Model Designation 1-9-3External Calibration/Adjustment with Model Codes:... - Page 3 Replacing the Display Unit COM 1 Port SIWAEDG Opening the Display Unit Error Codes Closing the Display Unit Additional Tools / Programs, etc. Replacing the Front Panel Block Diagram Replacing the Cable Working with the Service Software Replacing the Display PCB Service Switches Function of the Service Switches Replacing Components...
-
Page 4: Introductory Remarks
Signum series scales, as well as on error messages. If you have any comments or require more detailed information, please write to us at: Int.Service@Sartorius.com. Printing the Manual To save paper, we recommend configuring the printer settings in the Adobe Acrobat... -
Page 5: Symbols
Introductory Remark Symbols The following symbols are used in this manual: Warning Indicates safety instructions. Please make sure to observe these instructions; otherwise, physical injury or material damage may result. Note The light bulb symbol indicates important information that will help prevent errors, as well as other useful tips. -
Page 6: Safety Instructions
Introductory Remarks Safety Instructions The Signum series scale is in conformance with the applicable directives and standards. Use of the scale for other than its intended purpose, however, can result in physical injury or material damage. Repairs must be performed by service technicians who have been trained at the factory. -
Page 7: Model Designation
Introductory Remarks Model Designation Model Codes: – Series name R / A / S – Featured technology (R=Regular; A=Advanced with strain gauge technology; S=Supreme with electromagnetic force compensation) 1,2,3 – Application level (display unit); later a 4 display unit will be available in addition –... -
Page 8: Models With Special Weighing Systems
Introductory Remarks Models with Special Weighing Systems Model Design 1 System Regular weighing system: Strain gauge technology (to the right) Without built-in motorized calibration weight Nominal load 20kg | 50kg | 100kg PW_Sys_DMS_01.eps AUT22923a.JPG Design 2 Advanced weighing system: Strain gauge technology (to the right) Without built-in motorized calibration weight Nominal load 20kg | 50kg | 100kg SIWAEDG... -
Page 9: Design 5
Introductory Remarks Model Design 4 System Supreme weighing system: Narrow forked-lever system (to the right) With built-in motorized calibration weight Nominal load 40kg Design 5 AUT22923a.JPG PW_Sys_GHS_04.eps Regular weighing system: Strain gauge technology (to the right) Without built-in motorized calibration weight PW15-EX | Nominal load up to 30kg Design 6 PW_Sys_DMS_05.eps... -
Page 10: Additional Tools / Programs, Etc
- Torx screwdriver set 10/15/20 Accompanying Literature Designation Order No. Operating instructions WSI6007-e07074 Service manuals, spare parts lists, etc. can be downloaded from the Internet at http://iss.sartoserver.de. Registration is required: please contact Malte.Pramann@ Sartorius.com for details.http://iss.sartoserver.de hinterlegt. 10 Service Manual Signum... -
Page 11: Description Of The Equipment
Description of the Equipment Description of the Equipment Display Units Flat Screen Display Unit These are available with various screen types. The display unit can be hung on the load cell or secured to the scale using a stand or column. - Page 12 Description of the Equipment Clear Function Toggle unit between normal and 10-fold higher resolution On/off Signum 2 and 3 only: (in standby mode, is displayed). Netto-Bruttowert-Taste Signum 2 and 3 only: Nur Signum 2 und 3 If a second weighing platform is connec- Toggle between display modes within an ted, this key toggles the display between application program...
-
Page 13: Overview Of The Signum Series Scale Featuring Strain Gauge Technology
Description of the Equipment The Sartorius Signum series advanced scale (SIWA) with a mechatronic weighing system Overview of the Signum Series Scale Featuring Strain Gauge Technology System cable Cable to main PCB AUT24188.JPG A Power supply B Data output (various interfaces... -
Page 14: Overview Of The Signum Series Scale Featuring Electromagnetic Force Compensation
Description of the Equipment The Sartorius Signum Series Supreme Scale (SIWS) with a Monolithic Weighing System Overview of the Signum Series Scale (Featuring Electromagnetic Force Compensation) System cable Cable to main PCB AUT24188a.JPG A Power supply B Data output (various interfaces... -
Page 15: Activating The Service Mode
Description of the Equipment Activating the Service Mode Important note: When performing maintenance on an existing system, you must access the service mode for linearization, to set or clear a preload, or to enter the date of service. disp_8888_d.eps – Switch the Signum scale off (press the e). –... - Page 16 Working with the Service Mode – Press the ) key. A blinking cursor is displayed. – Using the k key, select 2 and press the ) key to confirm. When the cursor jumps to the second field, enter the next number. Follow these steps to enter the service code 202122.
-
Page 17: Additional Menus In The Service Mode
Working with the Service Mode Additional Menus in the Service Mode In the Text Menu (Setup) In consecutive order following the menu items » DATE « and Code » 202122 « – Service date » S-DATE « – Memory number » MEM-NO « –... - Page 18 Working with the Service Mode Important note: Once the necessary settings have been configured, set the menu to the particular calibration/adjustment function that the customer wishes to perform. 1-10 Calibration/adjustment sequence 1-10-1: Calibration with automatic adjustment 1-10-2: Calibration with manual adjustment 1-18 Entry of calibration and linearization weights 1-18-1: Ext.
-
Page 19: Calibration/Adjustment Functions
Working with the Service Mode Calibration/Adjustment Functions Important note: When using a verified weighing platform, open the cover on the back, left-hand side of the indicator housing. Then slide the menu access switch to the right (»free« setting). – Activate the service mode (see page 15). 1-9-1 External Calibration/Adjustment with Default Weights –... -
Page 20: External Calibration/Adjustment With User-Defined Weights
Working with the Service Mode – After taring or zeroing the display of the scale, press and hold the J key until »C.EXT.DEF« is displayed. Press the J key to continue the calibration/adjustment routine. cal_def.eps – After approx. 2 seconds, the required calibration weight is shown in the display. –... - Page 21 Working with the Service Mode – Press the ) and k ) keys repeatedly to select menu code »1-9-3« (Ex- ternal calibration/adjustment with a user-defined weight) and confirm by briefly pressing the ) key. menu_193.eps – You can jump to the first columns in the number menu by pressing the ( key. –...
-
Page 22: Internal Weight 2)
Working with the Service Mode 1-9-4 Calibration/Adjustment with an Internal Weight – Select weighing platform »WP1«. – Press the ) key to access the number menu. – Press the ) and k ) keys repeatedly to select menu code »1-9-4« Display_WP1_Serv.eps ). -
Page 23: External Linearization With Default Weights
Working with the Service Mode 1-9-6 External Linearization with Default Weights – Activate the service mode (see page 15). – Select weighing platform »WP1«. display_wps1_serv.eps – Press the ) key to access the number menu. display_serv_01.eps – Press the ) and k)) keys repeatedly to select menu code »1-9-6« (Ext. Linearization with Default Weight). - Page 24 Working with the Service Mode – After approx. 2 seconds, the 1 required linearization weight (defined weight) is displayed. You can enter the weights for linearization via menus »1-18-2« through »1-18-5« 2.5kg.eps – Place the required weight on the scale. After a brief pause, the difference between the current value and the value from the last adjustment (calibration) procedure is displayed.
- Page 25 Working with the Service Mode – Press the J key to store the 3 linearization weight. The 4 required weight is now displayed. – Place the required weight on the scale. After a brief pause, the difference between the current value and the value from the last adjustment (calibration) procedure is displayed –...
-
Page 26: User-Defined Weights
Working with the Service Mode 1-9-7 External Linearization with User-Defined Weights – Activate the service mode (see page 15). – Select weighing platform »WP1«. – Press the ) key to access the number menu. display_wps1_serv.eps – Press the ) and k ) keys repeatedly to select menu code »1-9-7« (Ext. linearization with user-defined weight) and confirm by briefly pressing the ( key. - Page 27 Working with the Service Mode – After approx. 2 seconds, the 1 required linearization weight (user-defined weight) is displayed. You can enter the linearization weights via menus »1-18-2« through »1-18-5« 2.5kg.eps – Place the required weight on the scale. After a brief pause, the difference between the current value and the value from the last adjustment (calibration) procedure is displayed –...
-
Page 28: 1-9-8Setting The Preload
Working with the Service Mode now displayed. – Place the required weight on the scale. After a brief pause, the difference between the current value and the value from the last adjustment (calibration) procedure is displayed – Press the J key to store the 4 linearization weight. - Page 29 Working with the Service Mode Important note: Remove the cover on the back, left-hand side of the indicator housing and slide the menu access switch to the right (»free« setting, see page 19 for more information). – Activate the service mode (see page 15). –...
-
Page 30: 1-9-9Clearing The Preload
Working with the Service Mode – Press the ) key. After a brief pause, the Signum indicator returns to the weighing mode. set_vor.eps 1-9-9 Clearing the Preload Important note: 0kg.eps Remove the cover on the back, left-hand side of the indicator housing and slide the menu access switch to the right (»free«... - Page 31 Working with the Service Mode – Press the J key until »CLr Vor« is displayed. – Press the ) key. The preload is cleared, and after a brief pause, the scale returns to the weighing mode. Clr_vor.eps 0kg.eps Service Manual Signum...
-
Page 32: 1-18 Entering Calibration/Linearization Weights
Working with the Service Mode 1-18 Entering Calibration/Linearization Weights 1-18-1 External User-Defined Calibration Weight (service mode not required) – Activate the service mode (see page 15). – Select weighing platform »WP1«. display_wps1_serv.eps – Press the ) key to access the number menu. display_serv_01.eps –... -
Page 33: Weight
Working with the Service Mode 1-18-2 Entering the 1 Linearization Weight – Scroll to menu code »1-18-2 « (by pressing the k key). Important note: The service mode must be active. menu_1182.eps linearization weight by briefly pressing the ) – Access the input mode for the 1 key. -
Page 34: Replacing The Display Unit
Repairing the Display Unit Repairing the Display Unit Opening the Display Unit Warning Disconnect the cable from the power source. 1 You must loosen four nuts (see the picture on the left) to open the display unit. 2 Cut through the warranty stickers (seals). 3 Open the housing. -
Page 35: Replacing The Front Panel
Repairing the Display Unit Replacing the Front Panel In the case of a defective keypad overlay, keys, or display, the entire front panel must be replaced (see the picture on the left). – Open the display unit (see page 34) - Replace the entire front panel with a new one - Close the display unit (see page 34) AUT23301a.JPG... -
Page 36: Replacing The Display Pcb
Repairing the Display Unit Replacing the Display PCB Important note: Do not connect or disconnect live power cables to or from the equipment; always disconnect the power cable from the wall socket (mains supply) first. Otherwise, components could be destroyed. –... -
Page 37: Replacing Components
Replacing Components Repairing the Scale Opening a Scale Featuring Strain Gauge Technology IP44 IP65 Warning: Disconnect the cable from the power source. 1 Remove the load cell. 2 Loosen and remove the two screws (Q) from the support plate. 3 Remove the four screws (R) from the O-ring (see picture on the right). -
Page 38: Opening A Scale Featuring Electromagnetic Force Compensation
Replacing Components Opening a Scale Featuring Electromagnetic Force Compensation Warning Disconnect the cable from the power source. AUT24260a.JPG 1 Remove the load cell plate. 2 Loosen the two screws (Q) on the load cell and remove the load cell. 3 Place the load cell to the side (see picture on the right). -
Page 39: Closing The Scale
Replacing Components Closing the Scale 1 Plug the connectors back in. 2 Reassemble the parts of the housing in order. 3 If necessary, be sure to include the all O-rings and gaskets. 4 Replace and tighten the screws (P). 5 Plug the unit back into AC power. 6 Check the scale to ensure that it is functioning properly. -
Page 40: Replacing The Power Pcb
Replacing Components Replacing the Power PCB Warning Disconnect the cable from the power source. Important note: Do not connect or disconnect live power cables to or from the equipment; always disconnect the power cable from the wall socket (mains supply) first. Otherwise, components could be destroyed. -
Page 41: Replacing The Data Output Pcb
Replacing Components Replacing the Data Output PCB Warning Disconnect the cable from the power source. Important note: Do not connect or disconnect live power cables to or from the equipment; always disconnect the power cable from the wall socket (mains supply) first. -
Page 42: Replacing The Main Pcb
Replacing Components Replacing the Main PCB Warning Disconnect the cable from the power source. Important note: Do not connect or disconnect live power cables to or from the equipment; always disconnect the power cable from the wall AUT24188.JPG socket (mains supply) first. Otherwise, components could be destroyed. -
Page 43: Replacing The System Pcb
Replacing Components Replacing the System PCB Important note: Please refer to page 37, „Opening a Scale Featuring Strain Gauge Technology AUT24197a.JPG – Strain gauge scale with system PCB – When you replace the system PCB, make sure that all cables have been reconnected. -
Page 44: Replacing Comonents Of Siwaedg
Component Replacement SIWAEDG Replacing the Power Supply PCB Opening the Display Unit ( see page 34 ) Caution: Unplug the power cord – The protective cover needs to be lifted when replacing the power supply PCB. To do this, insert a regular screwdriver into the four openings of the protective cover and carefully press the clips located at the bottom to the side. - Page 45 Component Replacement SIWAEDG Replacing the System Board Caution: Unplug the power cord – Remove the ribbon cable and system plug – Remove the screws and replace the PCB – Check to make sure that the plug connections are connected properly after replacement. Replacing the Data Output PCB –...
-
Page 46: Optional Data Output Ports/Interfaces
Optional Data Output Ports/Interfaces Installation of the Profibus Module St1a Profibus Module Plate with IP65 Protection St2a Important note: After installation of the Profibus module, the cable connectors must be equipped with a flat ferrite and glued with silicone. DSC03658.JPG (see pictures on the rigth). -
Page 47: Data Output Plate With Ip44 Protection
Optional Data Output Ports/Interfaces Data Output Plate with IP44 Protection Com1: RS232 Com1: RS232 + Option COM2 Com1: RS232 Com1: RS232 + Option COM2 Com1: RS232+ Com1: RS232+ + Option COM2 Option Clock Com1: RS232++ Com1: RS232++ + Option COM2 Com1: RS232++ + Option COM2... -
Page 48: Data Output Plate With Ip65 Protection
Optional Data Output Ports/Interfaces Data Output Plate with IP65 Protection Com1: RS232 Com1: RS232 + Option COM2 nicht benutzt Com1: RS232 Com1: RS232 + Option COM2 nicht benutzt Com1: RS232+ Com1: RS232+ + Option COM2 nicht benutzt 48 Service Manual Signum... -
Page 49: Com 1 Port Siwaedg
sten und Programmieren wird ein Adapter bzw. Adapterkabel benötigt, das die Verbingung zu nalen TxD, RxD, CTS, DTR und GND ermöglicht. Zum Progammieren müssen diese Signale zu sprechenden Gegenstellen einer RS232-Schnittstelle eines PCs geführtwerden. Zum Testen TxD mit RxD und DTR mit CTS verbunden werden. Com1 Interface SIWAEDG Schnittstelle Screw Terminal Assignment... -
Page 50: Error Codes
Solution Key is stuck Release key or Err 101 - 104 Key pressed at power on Contact your local Sartorius Service Center Program memory defective Contact your local Sartorius Service Center Err 320 Verified weighing platform not compatible Connect a compatible weighing platform... - Page 51 Error Codes Display Cause Solution Function not allowed in scales Contact your local Sartorius Service Center Inf 07 verified for use in legal metrology for details on changing settings The load on the scale is too heavy to zero the readout Check whether “Tare/zero at power on”...
-
Page 52: Additional Tools / Programs, Etc
NO WP In addition to standard tools, you will need the following special tools and programs to work on Signum series scales Designation Order No. - Sartorius Service Software (H8S) 6740-88 with USB dongle - Sartorius Service Software (H8S) 6740-89... -
Page 53: Block Diagram
Block Diagram Block Diagram Service Manual Signum... -
Page 54: Working With The Service Software
„closed“ position. Men-Swi-Re.eps This switch must be open in order to work with the Sartorius Service Software. If Upper switch the switch remains closed, the error message „ACCESS SWITCH LOCKED“ will be Left open displayed in the service program. -
Page 55: Boot Switch (Flash Switch)
Important note: The COM 1 interface must be set to XBPI (eXtended Binary Processor Interface) protocol before you can perform calibration/ adjustment procedures or program the scale using the Sartorius Service Software (see page 22). Close Function After using the service software, select the „Close“ function to reactivate write- protection and return the weighing system to SBI mode for data output. -
Page 56: Setting The Xbpi-232 Protocol
Working with the Service Software Setting the XBPI-232 Protocol You need to set the scale to the XBPI protocol (BPI-232) in order to perform calibration/adjustment procedures or program the scale using the service software. – Switch the Signum scale off (press the e key). –... - Page 57 Working with the Service Software – Mit der Taste k bis COM-1 scrollen. – Use the k key to scroll to COM-1. disp_com-1_d.eps – Press the ) key. DATPROT is displayed. disp_datprot_d.eps – Press the ) key again. BPI-232 appears in the display. disp_xbpi_d.eps Important note: The X is not displayed when BPI-232 is selected.
-
Page 58: Calibration/Adjustment Data For The Siwr
Calibration/Adjustment Data Calibration/Adjustment Data for the SIWR SIWRDCP-1-15-L or SIWRDCP-3-15-NCE Example for the order number of a Signum full range scale: Model type | Sensor | Platform | Type of/ Application- | Capacity | Display | Verifiable/ | technology dimensions material level (kg) -
Page 59: Calibration/Adjustment Data For The Siwr
Calibration/Adjustment Data Calibration/Adjustment Data for the SIWR SIWRDCP-2-60-R oder SIWRDCP-3-60-RCE Example for the order number of a Signum full range scale: Model type | Sensor | Platform | Type of/ Application- | Capacity | Display | Verifiable/ | technology dimensions material level (kg) -
Page 60: Calibration/Adjustment Data For The Siwa
Calibration/Adjustment Data Calibration/Adjustment Data for the SIWA SIWADCP-2-35-S Example for the order number of a Signum full range scale: Model type | Sensor | Platform | Type of/ Application- | Capacity | Display | Verifiable/ | technology dimensions material level (kg) resolution verified... -
Page 61: Calibration/Adjustment Data For The Siws
Calibration/Adjustment Data Calibration/Adjustment Data for the SIWS SIWSDCP-3-16-H oder SIWSDCP-3-16-HCE Example for the order number of a Signum full range scale: Model type | Sensor | Platform | Type of/ Application- | Capacity | Display | Verifiable/ | technology dimensions material level (kg) - Page 62 All rights reserved. No part of this publication may be reprinted or translated in any form or by any means without the prior written permission of Sartorius. The status of the information, specifications and illustrations in this manual is indicated by the date given below.
Need help?
Do you have a question about the Signum 1 and is the answer not in the manual?
Questions and answers