Table of Contents
Advertisement
Chillgard
Refrigerant Monitor
Instruction Manual
THIS MANUAL MUST BE CAREFULLY READ BY ALL INDIVIDUALS WHO HAVE OR WILL
HAVE THE RESPONSIBILITY FOR USING OR SERVICING THE PRODUCT. Like any piece
of complex equipment, this instrument will perform as designed only if it is used and
serviced in accordance with the manufacturer's instructions. OTHERWISE, IT COULD
FAIL TO PERFORM AS DESIGNED AND PERSONS WHO RELY ON THIS PRODUCT FOR
THEIR SAFETY COULD SUSTAIN SEVERE PERSONAL INJURY OR DEATH.
The warranties made by Mine Safety Appliances Company with respect to the product
are voided if the product is not used and serviced in accordance with the instructions in
this manual. Please protect yourself and others by following them. We encourage our
customers to write or call regarding this equipment prior to use or for any additional
information relative to use or repairs.
IN NORTH AMERICA: 1-800-MSA-INST. or FAX (724) 776-9783
IN CANADA: 1-800-267-0672 or FAX (416) 663-5908
MSA INTERNATIONAL (412) 967-3354 or FAX (412) 967-3373
© MINE SAFETY APPLIANCES COMPANY 2009 - All Rights Reserved
This manual is available on the internet at www.msanet.com
Manufactured by
MSA NORTH AMERICA
P.O. Box 427, Pittsburgh, Pennsylvania 15230
(L) Rev 7
®
LS
" WARNING
10035164
Advertisement
Table of Contents

Related Manuals for MSA Chillgard LS


Summary of Contents for MSA Chillgard LS
- Page 1 IN NORTH AMERICA: 1-800-MSA-INST. or FAX (724) 776-9783 IN CANADA: 1-800-267-0672 or FAX (416) 663-5908 MSA INTERNATIONAL (412) 967-3354 or FAX (412) 967-3373 ©...
- Page 2 Chillgard LS Diffusion Refrigerant Monitor Chillgard LS Pumped Refrigerant Monitor...
- Page 3 MSA Permanent Instrument Warranty 1. Warranty- Seller warrants that this product will be free from mechanical defect or faulty workmanship for a period of two years from date of shipment, provided it is maintained and used in accordance with Seller's instructions and/or recommendations. This...
- Page 4 9. Ensure that the Chillgard LS Refrigerant Monitor is installed in a clean and dry area as possible.Install splash or rain shields on the instrument to keep water and other contaminants away from the instrument.
- Page 5 10.Ensure that the Chillgard LS Refrigerant Monitor and the area the instrument is monitoring is at the same temperature before operation of the instrument; otherwise, condensation will form and possibly clog or fill the gas sensor in the instrument rendering the instrument inoperable.
-
Page 6: Table Of Contents
Table 1-5. Typical Chillgard LS / R-123 Cross-Sensitivity Response Data ..1-6 Table 1-6. Typical Chillgard LS / R-134 A Cross-Sensitivity Response Data ..1-7 Chapter 2 Installation and Set-up . - Page 7 Figure 4-2. Applying Calibration Gas to the Chillgard LS Refrigerant Monitor ..4-3 Calibration Guidelines ......4-4 Calibration Equipment .
- Page 8 " CAUTION ......4-5 Four-Point Pumped Version Calibration ... . .4-6 Introduction .
- Page 9 Installation Outline Drawings ... .A-1 Figure A-1. Diffusion Style Chillgard LS Installation Drawing ....A-1 Appendix B RS-485 Output .
-
Page 10: General Information
Also, the sensors are not poisoned or degraded in the presence of most silicon or sulfur compounds. Each Chillgard LS Refrigerant Monitor is placed in an area where a refrigerant is anticipated or must be controlled. The Monitor operates in... -
Page 11: Terminology Used In This Manual
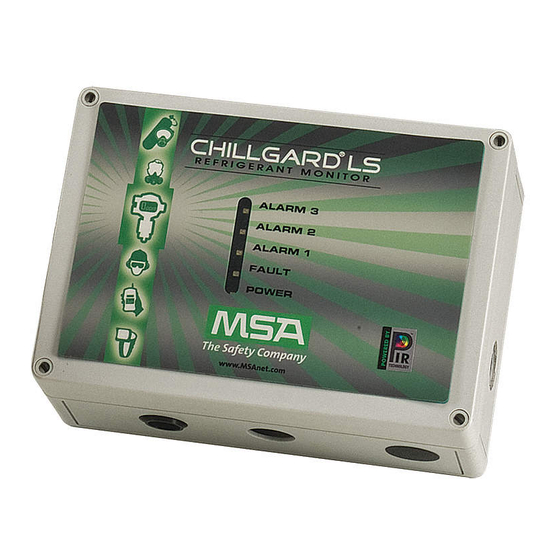
This label contains: • model number • the refrigerant that the unit will detect • information concerning proper voltages and frequency required to power the unit Terminology Used in this Manual FLOW RATE: Volume of gas drawn through the sample line per minute. EXHAUST GAS: Sample gas after it passes through the sensor. -
Page 12: General Description
It may be used for applications requiring long-term stability and low maintenance. Applications The Chillgard LS Refrigerant Monitor is factory-calibrated for a refrigerant and can be used for applications such as: • ventilation control •... -
Page 13: For All Models
Table 1-1. General Operating Specifications for all Models PERFORMANCE SPECIFICATIONS LINEARITY 20 to 100 ppm +5 ppm 100 to 1000 ppm +6% of reading REPEATABILITY +8 ppm WARM-UP TIME 10 minutes RESPONSE TIME 50% of a step-change in < 70 seconds OPERATING TEMP. -
Page 14: Cross-Sensitivity Response Data
Table 1-2. Typical Chillgard LS / R-11 Cross-Sensitivity Response Data CONCENTRATION (PPM) EQUIVALENT PPM R-11 Acetone Methyl Ethyl Ketone Methanol 1000 iso-Propanol Methylene Chloride Xylene Ammonia R-113 R-11 R-22 R-12 R-134 A R-123 Propane 0.6% Ethylene TEST CONDITIONS: Calibrated 0-1000 PPM R-11 in N 2; Temperature: 25 Table 1-3. -
Page 15: Cross-Sensitivity Response Data
Table 1-4. Typical Chillgard LS / R-22 Cross-Sensitivity Response Data CONCENTRATION (PPM) EQUIVALENT PPM R-22 Acetone <1 R-11 R-123 R-134 A R-132 A R-22 R-113 TEST CONDITIONS: Calibrated 0-1000 PPM R-22 in N 2; Temperature: 25 Table 1-5. Typical Chillgard LS / R-123 Cross-Sensitivity Response Data... -
Page 16: Table 1-6. Typical Chillgard Ls / R-134 A Cross-Sensitivity Response Data
Table 1-6. Typical Chillgard LS / R-134 A Cross-Sensitivity Response Data CONCENTRATION (PPM) EQUIVALENT PPM R-134 A Acetone Methyl Ethyl Ketone Methanol iso-Propanol Methylene Chloride 1000 Trichloroethylene 1000 Ethyl Acetate Xylene (ortho-Xylene) 1000 Ammonia Natural Gas 1000 R-113 R-11 <1... -
Page 17: Installation And Set-Up
• Remove the plastic screws holding the cover to the enclosure. • Remove the front cover from the Chillgard LS Refrigerant Monitor to expose the electrical printed circuit board. Initial Inspection With the front cover open, carefully inspect the components and assemblies inside the enclosure. -
Page 18: Diffusion Units
1. Most refrigerants are heavier than air and sink to the floor or accumulate in low areas. 2. Place the end of the sampling line in an area that provides the instrument with a representative sample; ventilation Smoke Tubes (P/N 458480) are useful in determining air flow patterns in ambient sampling areas. -
Page 19: Mounting The Unit
Do not locate these units in an area that may contain a flammable mixture of gas and air; otherwise, an explosion may occur. Install the Chillgard LS Refrigerant Infrared Monitor in the area where a refrigerant is anticipated or control of the gas is desired. -
Page 20: Figure 2-1. Diffusion Style Mounting Dimensions
1. Open the unit by removing the plastic screws securing the lid to the enclosure. 2. Using #10 mounting screws or bolts (FIGURES 2-1 and 2-2), securely mount the Chillgard LS Refrigerant Monitor to a wall or flat mounting surface via the four holes that run through the enclosure base. -
Page 21: Mounting Dimensions
Figure 2-2. Four-Point Pumped Style Mounting Dimensions... -
Page 22: Wiring Connections
Wiring The Chillgard LS Refrigerant Monitor is factory-wired with either a universal power supply for 110/220 VAC operation or no power supply for 24 V AC/DC operation. Refer to FIGURE 1-1 to determine power requirement for the unit. -
Page 23: Figure 2-3. Diffusion Style Electrical Connections
Figure 2-3. Diffusion Style Electrical Connections Figure 2-4. Four-Point Pumped Style Electrical Connections... -
Page 24: For 24 V Dc Or Ac Wiring
Figure 2-5. Sensor Board Connections For 24 V DC or AC Wiring NOTE: The 24-volt power source used with this equipment must be separated from mains by double or reinforced insulation. All power wiring is connected to the terminal block for 24 V DC/AC input shown in FIGURE 2-5. -
Page 25: Analog Signal Output Wiring
Analog Signal Output Wiring The Chillgard LS Refrigerant Monitor is factory-configured with an analog output. The analog output for your Chillgard LS Refrigerant Monitor (FIGURE 1-1) is 4-20 mA, current sourcing type (standard) (4 mA = 0 ppm gas, 20 mA = 1000 ppm gas). -
Page 26: Start-Up And Initial Adjustments
Increase the calibration frequency when any calibration differs as much as 10% from the test concentration. More frequent calibrations may be required when the Chillgard LS Refrigerant Monitor is new. Calibration frequency depends on the operating time and chemical exposures of the instrument. - Page 27 If this calibration procedure cannot be performed at any step: • See Section 5, "Troubleshooting" • Localize the problem • Replace the inoperative component. Calibrate newly installed instruments on a frequency until calibration records prove instrument stability. Calibration frequency is then reduced in accordance with a schedule established by the safety officer or facility manager.
-
Page 28: Chapter 4 Calibration
Both ZERO gas and SPAN gas must be carefully applied to the unit to avoid pressurizing the internally mounted optical bench. See TABLE 5-2, Calibration Accessories Parts List for the appropriate calibration parts and calibration gases available for the Chillgard LS Refrigerant Monitor. " WARNING Exercise care during the span calibration to ensure that the unit can accurately detect refrigerant gas. -
Page 29: Initial Calibration Procedures
2. Deactivate the equipment connected to the outputs, or disconnect the wiring to the outputs. " CAUTION If any control instruments connected to the Chillgard LS Refrigerant Monitor are wired to external devices (e.g., horns, exhaust fans, and fire suppression systems), these devices may activate while adjustments or repairs are performed during the following procedures. -
Page 30: To The Chillgard Ls Refrigerant Monitor
Figure 4-2. Applying Calibration Gas to the Chillgard LS Refrigerant Monitor 2. Using a multimeter to read the 4-20 mA output, use the Calibration Box to move the zero up or down, until the unit output reads 4 mA +0.1 mA with the zero gas applied. -
Page 31: Calibration Guidelines
Keep written records of the calibration readings obtained and any adjustments made. Analysis of these records enables review and control of the time between checks. Check a new Chillgard LS Refrigerant Monitor installation at least once a week by performing the steps outlined in the following section. Calibration Equipment Calibration of the monitor requires a supply of: •... -
Page 32: Calibration Check Procedure
1. Connect the mA current meter to the instrument output, terminals (+) and (-). " CAUTION During calibration, the Chillgard LS Refrigerant Monitor is not sampling and monitoring the intended area. Exercise caution in the area as appropriate. 2. Connect the ZERO gas cylinder to the sample tubing. -
Page 33: Four-Point Pumped Version Calibration
9. Re-connect or enable all equipment and alarm devices connected to any control equipment monitoring the Chillgard LS Refrigerant Monitor. 10.Reinstall the light gray cover. " CAUTION Do not leave any alarm device or equipment disabled or disconnected during normal operation of the instrument; otherwise, the instrument will not function as intended when it detects an alarm situation. -
Page 34: Caution
Figure 4-3. Kit Components The Calibration Kit contains a ZERO gas scrubber which can be used in place of a ZERO gas cylinder if the ambient air around the Chillgard LS contains little or no refrigerant. Relative humidity may have a small effect on the output of the unit. If dry gas is used, Nafion Tubing (P/N 813628) can be used to humidify the sample stream going to the monitor. -
Page 35: Calibration Procedures
2. Deactivate the equipment connected to the outputs, or disconnect the wiring to the outputs. "! CAUTION If any control instruments connected to the Chillgard LS Refrigerant Monitor are wired to external devices (e.g., horns, exhaust fans, and fire suppression systems), these devices may activate while adjustments or repairs are performed during the following procedures. -
Page 36: Initial Calibration
7. Remove all calibration accessories from the unit to return to normal operation. Calibration Guidelines Once the Chillgard LS Refrigerant Monitor is operating, perform periodic calibration checks to ensure proper instrument operation. Perform calibration to monitor long-term changes (drift) in both the ZERO and SPAN readings. -
Page 37: Calibration Equipment
Keep written records of the calibration readings obtained and any adjustments made. Analysis of these records enables review and control of the time between checks. Check a new Chillgard LS Refrigerant Monitor installation at least once a week by performing the steps outlined in the following section. Calibration Equipment Calibration of the monitor requires a supply of: •... -
Page 38: For Zero Calibration
Figure 4-4. Using Zero Scrubber for Zero Calibration Figure 4-5. Using Zero Gas Cylinder for Zero Calibration 4-11... -
Page 39: Caution
1. Connect the mA current meter to the instrument output, terminals (+) and (-). "! CAUTION During calibration, the Chillgard LS Refrigerant Monitor is not sampling and monitoring the intended area. Exercise caution in the area as appropriate. 2. Connect the ZERO gas cylinder (if used) to the sample tubing. -
Page 40: Caution
8. Remove tubing from the sensing cell on the unit. 9. Re-connect or enable all equipment and alarm devices connected to any control equipment monitoring the Chillgard LS Refrigerant Monitor. 10.Reinstall the light gray cover. " CAUTION Do not leave any alarm device or equipment disabled or disconnected during normal operation of the instrument;... -
Page 41: Service And Replacement Parts
Chapter 5 Service and Replacement Parts Troubleshooting Guidelines The Chillgard LS Refrigerant Monitor is designed to provide long and trouble-free monitoring. If repairs are indicated, it is possible the user can diagnose and correct the problem using the following: •... -
Page 42: Table 5-2. Calibration Accessories Parts List
Table 5-1.Troubleshooting Guidelines (cont.) SYMPTOM SOLUTION Noisy Output Check input power Check tubing connection between optical bench and sound dampening element Replace optical bench Calibration has Significantly Changed from Previous Reading Check that gas is properly applied Clear inlet of particle matter Replace optical bench Pump Not Running Cycle the power and observe the pump;... -
Page 43: Table 5-3. Replacement Parts List
Table 5-3. Replacement Parts List COMPONENT/ASSEMBLY PART NO. Diffusion R-11 Optical Bench 10052377 Diffusion R-12 Optical Bench 10052378 Diffusion R-22 Optical Bench 10052379 Diffusion R-123 Optical Bench 10052380 Diffusion R-134 A Optical Bench 10052421 Diffusion Sound Dampening Element 10032706 Calibration Cap 10034395 Power Supply 10034190... -
Page 44: Service And Assistance
Service and Assistance When ordering replacement parts or to obtain assistance regarding any problem with the Chillgard LS Refrigerant Monitor, please provide the following information (found on a label located on the side of the instrument): • serial number •... -
Page 45: Installation Drawing
Appendix A Installation Outline Drawings Figure A-1. Diffusion Style Chillgard LS Installation Drawing... - Page 46 For Four-Point Pumped Style Chillgard LS Unit, see: • Mounting Dimensions given in FIGURE 2-2 • Electrical Connections given in FIGURE 2-4.
-
Page 47: Rs-485 Output
Appendix B RS-485 Output The sensor module uses an RS-485 serial interface with Modbus protocol. To communicate to the RS-485 output via a computer interface, an isolated RS-485 converter (such as P/N 10014359) should be used. The baud rate is 19,200 baud with RTU format sent. Each byte has eight bits with no parity and two stop bits. -
Page 48: Table B-2. Sensor Unit Register Addresses
Table B-2. Sensor Unit Register Addresses TITLE REGISTER READ/ DEFINITION OF ADDRESS WRITE ENCODED DATA Fault & Module State 40001 Cal Sum 1 msb Under Range 2 msb Flow Loss 4 msb Under Voltage 8 msb Temperature 10 msb Prog Cksum 20 msb Lamp Fail 40 msb...
Need help?
Do you have a question about the Chillgard LS and is the answer not in the manual?
Questions and answers