
Subscribe to Our Youtube Channel
Related Manuals for Riello INSIEME CONDENS 26 B


Summary of Contents for Riello INSIEME CONDENS 26 B
- Page 1 CONDENSING BOILERS 26 B - 26 BK 35 B - 35 BK INSTALLATION AND MAINTENANCE MANUAL 26 BK 35 BK 26 B 35 B...
- Page 2 • Efficiency Directive 92/42/EEC (HHHH) • Electromagnetic Compatibility Directive 2004/108EEC • Low Voltage Directive 2006/95EEC 0694 RANGE MODEL CODE INSIEME CONDENS 26 B 20039620 INSIEME CONDENS 35 B 20039590 INSIEME CONDENS 26 BK 20040647 INSIEME CONDENS 35 BK 20040447...
- Page 3 Used in conjunction with your own knowledge and expertise it will enable you to install the appliance quickly, easily, and correctly. Once again, please accept our thanks and our congratulations on your choice of product. Riello S.p.A.
-
Page 4: Table Of Contents
CONTENTS GENERAL Page TECHNICAL ASSISTANCE SERVICE Page General Safety Information Preparing for initial start-up Precautions Initial start-up Description of the appliance Checks during and after initial start-up Safety devices Temporary shutdown Identification Preparing for extended periods of disuse Data plate Maintenance Layout Oil burner... -
Page 5: General
- Close the fuel shut-off cock. - Report the fault immediately to your local RIELLO Do not switch the boiler off if outside temperature Technical Assistance Service or a professionally drops below ZERO (risk of freezing). -
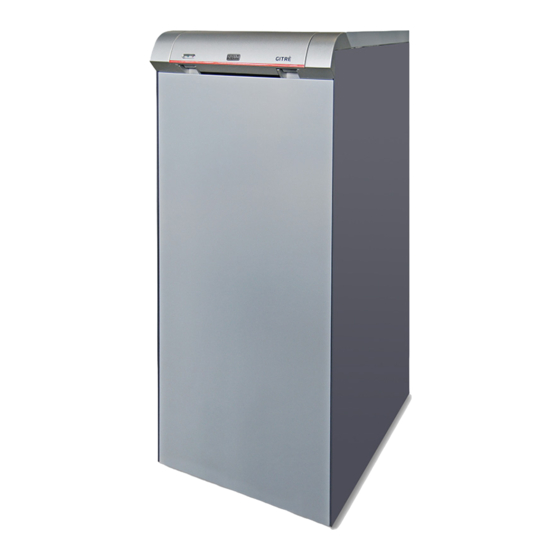
Page 6: Description Of The Appliance
PRODuCT DESCRIPTION INSIEME CONDENS boilers are high efficiency, oil fuelled - The secondary heat exchanger is made from AISI 904L condensing boilers. “B” models are designed for heating stainless steel and recovers latent heat from the flue only. “BK” models come with a 120 litre vitrified storage gases, boosting efficiency to up to 101.4 % (50°C –... -
Page 7: Identification
INSIEME CONDENS boilers are identified by two plates: - Data plate This lists the appliance’s technical specifications and performance data. T067676G1 RIELLO S.p.A. Via Ing.Pilade Riello 7 37045 Legnago (VR) - ITALY Mod. Cod. N° PAESE DI DESTINAZIONE/PAYS DE DESTINATION/BESTIMMUNGSLAND/LAND VON BESTEMMING COUNTRY OF DESTINATION/PAÍS DE DESTINO/PAÍS DE DESTINO:... -
Page 8: Layout
INSIEME CONDENS 26 B - 35 B SIDE VIEW FRONT VIEW TOP VIEW 1 - Control panel 2 - Side panel 3 - Automatic vent valve 4 - Automatic vent valve collector 5 - Boiler sensor sockets 6 - Fitting for CH circuit safety valve... - Page 9 INSIEME CONDENS 26 BK - 35 BK SIDE VIEW FRONT VIEW 1 - Control panel 2 - Side panel 3 - Automatic vent valve 4 - Automatic vent valve collector TOP VIEW 5 - Boiler sensor sockets 6 - Fitting for CH circuit safety valve 7 - Fitting for CH circuit expansion vessel 8 - Flame inspection window 9 - Burner...
-
Page 10: Technical Specifications
TECHNICAl SPECIFICATIONS INSIEME CONDENS Description 26 B 26 BK 35 B 35 BK Fuel Type of boiler B23 - B23P - C13 - C33 - C63 Heat input at furnace (rated) 26,0 34,5 Useful heat output (rated) 33,3 Useful efficiency at max Pn (80-60°C) 96,1 96,5 Useful efficiency at 30% Pn (return temp. -
Page 11: Accessories
80/80 flue kit for sealed room installation of INSIEME CONDENS 26 - 35 boilers 20042211 80/125 flue kit for the sealed room installation of INSIEME CONDENS 26 - 35 boilers 20042213 WATER CIRCuIT INSIEME CONDENS 26 B - 35 B - Boiler body - Secondary heat exchanger - Automatic vent valve - Burner... -
Page 12: Location Of Sensors
OF SENSORS INSIEME CONDENS 26 B - 35 B INSIEME CONDENS 26 BK - 35 BK INSIEME CONDENS 26 B - 35 B INSIEME CONDENS 26 BK - 35 BK 1 - Boiler thermostat sensor 1 - Boiler thermostat sensor... -
Page 13: Pumps
PuMPS r INSIEME CONDENS boilers come without a pump. A pump must therefore be provided as part of the installation. In order to choose a pump of the right size, bear in mind the boiler’s water-side pressure drop, as shown in the figure below. 35 B - BK 26 B - BK 1000... -
Page 14: Functional Wiring Diagrams
FuNCTIONAl WIRING DIAGRAMS INSIEME CONDENS 26 B - 35 B GENERAL... - Page 15 INSIEME CONDENS 26 BK - 35 BK GENERAL...
-
Page 16: Control Panel
CONTROl PANEl INSIEME CONDENS 26 B - 35 B 1 - Function selector II On III On IIII Automatic mode (only active with temperature control kit installed) 2 - Boiler temperature gauge Displays the temperature of the central heating water. - Page 17 INSIEME CONDENS 26 BK - 35 BK 1 - Function selector II On III On IIII Automatic mode (only active with temperature control kit installed) 2 - Boiler temperature gauge Displays the temperature of the central heating water. Boiler control thermostat Allows you to set the temperature of the central heating water.
-
Page 18: Installer
uNPACKING THE PRODuCT r INSIEME CONDENS boilers come in a robust INSIEME CONDENS wooden cage, protected by a PVC sheet. 26 BK - 35 BK The following items are delivered in a plastic bag inside the boiler: - Installation, operation and maintenance manual - Spare parts catalogue - Warranty certificate INSIEME CONDENS... -
Page 19: Handling
HANDlING Once you have removed the packaging, proceed as follows to handle the boiler. - Remove the front panel (1) by pulling it forwards. - Remove the screws (2) securing the boiler to the wooden pallet. - Make sure that the equipment used to move the boiler is adequate for the weight involved. - Insert two 3/4"... -
Page 20: Place Of Installation
Sludge, limescale and other contaminants in water can cause irreversible damage to boilers even in relatively short times, and despite the use of top quality materials in their manufacture. Contact RIELLO’s Technical Assistance Service for fur- ther information on water additives and their use. INSTALLER... - Page 21 WATER IN CENTRAL HEATING SYSTEMS: INSTRUCTIONS FOR THE DESIGN, INSTALLATION AND MANAGEMENT OF CENTRAL HEATING SYSTEMS 1. Chemical and physical characteristics of water The chemical and physical characteristics of water used in central heating systems must conform to the requirements of EN 14868 standard and to the following tables: STEEL BOILERS STEEL BOILERS...
- Page 22 2.2 Reconditioning old central heating systems If a boiler has to be replaced, do not refill the entire central heating circuit if the quality of water in it conforms to requi- rements. If the quality of water fails to conform to requirements, either recondition the old water or separate the water circuits (water in the boiler circuit must conform to requirements).
-
Page 23: Water Connections
The following table lists the specifications of the water fittings. INSIEME CONDENS 26 BK - 35 BK Install the non-return valve supplied with the boiler in the central heating flow pipe. INSIEME CONDENS 26 B - 35 B INSIEME CONDENS Description 26 B... - Page 24 TYPICAL WATER SYSTEM SCHEMATICS INSIEME CONDENS 26 B - 35 B 1 - Isolating valve 2 - Non-return valve 3 - CH circuit pump 4 - CH circuit expansion vessel (also available as accessory) 5 - CH circuit safety valve...
- Page 25 TYPICAL WATER SYSTEM SCHEMATIC for INSIEME CONDENS 26 B - 35 B with DEDICATED ACCESSORIES 40 60 80 °C Valve group - Solar collector 15 - Softener filter PB - Solar storage cylinder - Collector sensor socket 16 - Non-return valve...
-
Page 26: Draining The Condensate
DRAINING THE CONDENSATE Always maintain a slope “i” of over 3° and ensure i≥3° that the diameter of any hose used is greater than that of the boiler’s own condensate drain pipe. The connection to the waste water drain must be made in compliance with national and local legisla- tion and standards. -
Page 27: Electrical Connections
ElECTRICAl CONNECTIONS r INSIEME CONDENS boilers are fully cabled in the factory. The only connections required for installation are those to the control panel terminal strip. Proceed as follows to access the control panel terminal strip: - Remove the front and top panels (A) and (B) - Unscrew the screws (C) and remove the cover (D) - Route the power cable (E) through the cable clamp (F) and fix it in place... - Page 28 - Make the electrical connections as shown in the dia- gram alongside. PE TA Remove the jumper (TA-TA) before connecting a room thermostat. PE TA On completion of the electrical connections, replace all removed components in the opposite order. 230 V~50 Hz Power supply Alimentazione elettrica Automatic shut-off device (DAI)
-
Page 29: Fuel Connections
FuEl CONNECTIONS r INSIEME CONDENS boilers have their fuel connec- tions at the rear. Fuel supply hoses must pass through the gap between the boiler base and the floor before being connected to the fuel pump. If the oil feed system is in negative pressure, the return line must reach the same height as the suction line. -
Page 30: Flue Gas Vent And Comburent Air Intake
FluE GAS VENT AND COMBuRENT AIR INTAKE The flue and the connection to the stack must be made in compliance with applicable laws and standards. Use of heat resistant, condensate resistant and stress resistant rigid pipe and sealed joints is mandatory. r INSIEME CONDENS boilers can be installed as "sealed"... - Page 31 Residual pressure INSIEME CONDENS 26 B - 26 BK 35 B - 35 BK Maximum residual pres- sure in flue gas vent (*) (*) Values referred to atmospheric pressure at sea level. Maximum equivalent length of pipes INSIEME CONDENS 26 B - 26 BK 35 B - 35 BK Flue Ø...
- Page 32 A check on the quality of combustion must be made on initial start-up. Combustion quality can be affect- ed by parameters other than the length, height and position of the flue pipes. All flue seals must be made from condensate (acid) resistant materials.
-
Page 33: Filling And Emptying The System
FIllING AND EMPTYING THE SYSTEM INSIEME CONDENS 26 B and 35 B boilers need a fill- INSIEME CONDENS 26 B and 35 B ing pipe to be connected to the central heating circuit return pipe. Models 26 BK and 35 BK are equipped with a filling cock (1) for the central heating system and stor- age cylinder primary circuit. - Page 34 Non-return valve OPEN On models 26 B and 35 B: - Open the water supply shut-off cocks and slowly fill the central heating system until the pressure gauge reads out a value of 1.5 bar (cold). Non-return valve OPEN INSIEME CONDENS 26 BK and 35 BK On models 26 BK and 35 BK: - Open the filling cock (1) and slowly fill the central heat- ing system until the pressure gauge installed as part of...
- Page 35 (3) too. Open the cocks. - When the system is completely empty, close the cock INSIEME CONDENS 26 B and 35 B (2). On models 26 BK and 35 BK, close the cock (3) too. INSTALLER...
- Page 36 INSIEME CONDENS 26 BK and 35 BK - Close the non-return valve (4) on the CH flow pipe. On models 26 BK and 35 BK, close the non-return valve (5) too. See the figure to ascertain the correct position for the dot on the screw.
-
Page 37: Technical Assistance Service
PREPARING FOR INITIAl START-uP It is essential to perform the following checks before start- ing up or testing the functioning of the boiler. - Check that the water supply and fuel shut-off cocks are open. - Check that the water pressure gauge shows a pressure over 1 bar with the system cold. - Page 38 On models 26 BK and 35 BK: - Turn the (I)Summer/(II)Winter selector to (II) Winter. 40 60 80 - Turn the function selector to ON (II) and make sure that the green power indicator lights. The burner should ignite and remain in operation until the temperature setpoint is reached.
- Page 39 If the problems persist, proceed as follows to make sure that the flue gas thermostat has not tripped. - Wait about 5 minutes, then remove the cover from the flue gas thermostat reset button (8) and push the button. - Wait for the burner to complete the entire start-up cycle again, up to the ignition of the flame.
-
Page 40: Checks During And After Initial Start-Up
CHECKS DuRING AND AFTER INITIAl START-uP Once the boiler has started up, make sure that it shuts down and re-starts properly when: 40 60 80 - The boiler thermostat and storage cylinder thermostat settings are changed. - The function selector is moved from position (II) to (I) and back. -
Page 41: Temporary Shutdown
TEMPORARY SHuTDOWN If you are going away for a short period of time like a weekend or a short holiday, etc., and outdoor tempera- tures are going to remain above ZERO, proceed as fol- lows: - Turn the function selector to OFF (I) and make sure that the green power indicator goes out. -
Page 42: Maintenance
MAINTENANCE Regular maintenance is a legal requirement. In Italy it is required by Presidential Decree 412 of the 26th August 1993. It is also essential for the safety, efficiency and durability of the boiler. Proper maintenance keeps consumption and emissions down, and ensures that the boiler continues to operate reliably over time. -
Page 43: Oil Burner
OIl BuRNER LAYOUT 1 - Photoresistor 2 - Flange with seal 3 - Blast tube 4 - Oil pump pressure adjuster screw 7 - Motor 5 - Pressure gauge fitting 8 - Reset button with lockout indicator 6 - Oil pump 9 - Burner control box REMOVING THE BURNER Proceed as follows to remove the burner:... -
Page 44: Accessing The Nozzle, Flame Guide And Electrodes
ACCESSING THE NOZZLE, FLAME GUIDE AND ELECTRODES Proceed as follows to access the nozzle, flame guide and electrodes: - Unscrew and remove the fixing nut from the flange and remove the burner. - Loosen the screws (1) and pull out the blast tube as- sembly (2) - Loosen the screw (4) and remove the flame guide hold- er (6) from the nozzle holder (7). -
Page 45: Oil Pump
OIL PUMP 1 - Suction port 2 - Return port 3 - By-pass screw 4 - Pressure gauge fitting 5 - Pressure regulator 6 - Vacuum gauge fitting 7 - Valve 8 - Auxiliary pressure measurement fitting ADJUSTING PUMP PRESSURE Turn the adjuster screw (1) to achieve the pressure setting specified in the table on page 42. -
Page 46: Removing The Burner Control Box
REMOVING THE BURNER CONTROL BOX The burner cover has to be removed first in order to remove the control box. Proceed as follows. - Loosen the screw (1), open the cover (2) and remove all the components inside. - Remove the coil (3). - Unscrew and remove the two screws (4) to remove the control box. -
Page 47: Functioning Program
FUNCTIONING PROGRAM Lockout because of ignition failure A normal functioning cycle Power supply Thermostat Heating element Motor Ignition transformer Valve Flame detected Lockout indicator 0 ÷ 150s 0 ÷ 150s A normal functioning cycle Power supply Thermostat Heating element Motor Ignition transformer Valve Flame detected... -
Page 48: Disassembling And Cleaning The Boiler
DISASSEMBlING AND ClEANING THE BOIlER Clean the boiler and remove any carbon deposits from the surfaces of the heat exchanger at least once a year. This not only extends the boiler’s working life, but also keeps it efficient in terms of heat output and consump- tion. - Page 49 Proceed as follows on completion of cleaning. - Refit the turbulators (5) in the flue gas pipes, making sure that they are correctly seated - Check the condition of the flame guard (6) and seal (7). Replace as necessary. On completion of cleaning, follow the above steps in the reverse order to refit all removed parts.
- Page 50 Cleaning the condensate drain siphon On the boiler’s right hand side panel: - Unscrew the screw (A). - Remove the access panel (B) to obtain easy access to the condensate drain siphon. - Disconnect the corrugated condensate drain hose (18), and remove the siphon. Unscrew the two caps (19) to disassemble the siphon.
-
Page 51: Troubleshooting
TROuBlESHOOTING FAulT CAuSE SOluTION The burner performs pre- Dirty photoresistor - Clean ventilation (pre-purging) and ignition correctly but enters - Replace Faulty photoresistor lockout about 5 seconds later. - Check fuel oil pressure Flickering or unstable flame - Check air damper setting - Replace nozzle - Check solenoid valve coil Blocked filter... - Page 52 FAulT CAuSE SOluTION Fumes escaping into the air - Check that burner body is clean There is a smell of fumes - Check that flue pipes are clean - Check condition of boiler seals - Check quality of combustion The boiler gets dirty - Check adjustment of burner Burner badly adjusted (perform flue gas analysis)
- Page 53 FAulT CAuSE SOluTION - Check CH circuit pressure Incorrect central heating circuit Central heating safety valves - Check pressure reducer pressure open frequently - Check efficiency of safety valve Problem in CH expansion vessel - Check efficiency of CH expan- (installed by heating engineer) sion vessel Problem in DHW safety valve...
- Page 56 RIELLO S.p.A. 37045 Legnago (VR) Tel. 0442630111 - Fax 0442630371 - www.riello.it As part of the company’s ongoing commitment to perfecting its range of products, the appearance, dimensions, technical data, equipment and accessories may be subject to variation.
Need help?
Do you have a question about the INSIEME CONDENS 26 B and is the answer not in the manual?
Questions and answers