Table of Contents
Advertisement
Quick Links
Advertisement
Table of Contents
Troubleshooting

Related Manuals for Fora COMFORT pro GD40


Summary of Contents for Fora COMFORT pro GD40
- Page 1 COMFORT pro GD40 Blood Glucose Monitoring System Owner’s Manual...
- Page 3 Dear FORA COMFORT pro GD40 System Owner: Thank you for purchasing the FORA COMFORT pro GD40 Blood Glucose Monitoring System. This manual provides important information to help you to use the system properly. Before using this product, please read the following contents thoroughly and carefully.
-
Page 4: Before Use
IMPORTANT SAFTY INSTRUCTIONS READ BEFORE USE 1. Use this device ONLY for the intended use described in this manual. 2. Do NOT use accessories which are not specified by the manufacturer. 3. Do NOT use the device if it is not working properly or if it is damaged. -
Page 5: Table Of Contents
TABLE OF CONTENTS BEFORE YOU BEGIN Important Information Intended Use Test Principle Meter Overview Display Screen Test Strip Setting the Meter THE FOUR MEASURING MODES BEFORE TESTING Calibration How to Code Your Meter Checking the Code Number Control Solution Testing Performing a Control Solution Test TESTING WITH BLOOD SAMPLE Preparing the Puncture Site... -
Page 6: Before You Begin
BEFORE YOU BEGIN Important Information ● Severe dehydration and excessive water loss may cause readings which are lower than actual values. ● Use only fresh whole blood samples to test patient s blood glucose. Using other substances will lead to incorrect results. ●... -
Page 7: Intended Use
Capillary samples may be drawn from the fingertip, and in the case of neonates, from the heel. The system is only used with single-use, auto-disabling lancing devices. It can only be used with FORA COMFORT pro GD40 test strips and FORA control solutions. Test Principle Your system measures the amount of sugar (glucose) in whole blood. -
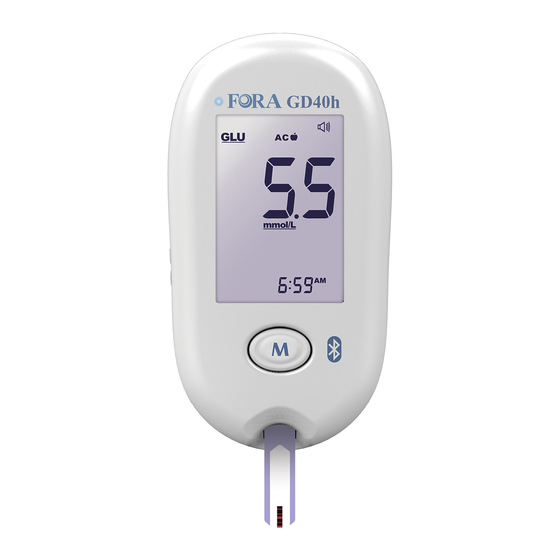
Page 8: Meter Overview
Meter Overview Side Front Back Rear Test Slot Insert test strip here to turn the meter on for testing. Main Button Enter the meter memory and silence a reminder alarm. Display Screen Test Strip Ejector Eject the used strip by pushing up this button. Data Port (for GD40a) Download test results with a cable connection. -
Page 9: Display Screen
Display Screen Blood Drop Symbol Date Code Time Test Result Day Average Ketone Warning Alarm Symbol Warning Symbol Measurement Unit Face/Low/High Symbol Low Battery Symbol Memory Symbol Test Strip Symbol Measurement Mode... -
Page 10: Test Strip
Test results might be wrong if the contact bar is not fully inserted into the test slot. Front NOTE: The FORA COMFORT pro GD40 monitor should only be used with FORA COMFORT pro GD40 Test Strips. Using other test strips with this meter can produce inaccurate results. -
Page 11: Setting The Meter
Setting the Meter Before using your meter for the first time or if you change the meter battery, you should check and update these settings. Make sure you complete the steps below and have your desired settings saved. Entering the Setting Mode Start with the meter off (no test strip inserted). - Page 12 3. Setting the time With the hour flashing, press Main button until the correct hour appears. Press SET. With the minute flashing, press Main button until the correct minute appears. Press SET. 4. Deleting the memory With dEL and a flashing on the display, press Main button and select no to keep the results in memory then press...
- Page 13 Press SET to confirm and go to minutes, press Main button to add one minute. Hold Main button longer to add faster. Press SET to confirm and go to the next alarm setting. If you do not want to set an alarm, press SET to skip this step. If you want to turn off an alarm, find the alarm number by pressing SET in the setting mode, press Main button to change from ON to OFF .
-
Page 14: The Four Measuring Modes
THE FOUR MEASURING MODES The meter provides you with four modes for measuring, General, AC, PC and QC. USE WHEN MODES any time of day without regard to time since last General meal (displays as Gen ) no food intake for at least 8 hours 2 hours after a meal testing with the control solution You can switch between each mode by:... -
Page 15: Before Testing
BEFORE TESTING Calibration You must calibrate the meter every time you begin to use a new vial of test strips by setting the meter with the correct code. Test results may be inaccurate if the code number displayed on the monitor does not match the number printed on the strip vial. -
Page 16: Checking The Code Number
Checking the Code Number You need to make sure that the code number displayed on the meter matches the number on the test strip vial before you proceed. If it matches, you can proceed with your test. If the codes do not match, please stop testing and repeat the calibration procedure. -
Page 17: Control Solution Testing
Control Solution Testing Our Control Solution contains a known amount of glucose that reacts with test strips and is used to ensure your meter and test strips are working together correctly. Do a control solution test when: ● you first receive the meter, ●... - Page 18 2. Press Main button to mark this test as a control solution test With QC displayed, the meter will store your test result in memory under QC . If you press the Main button three times, the QC will disappear and this test is no longer a control solution test.
- Page 19 4. Read and compare the result After counting down to 0, the control solution test result will appear on the display. Compare this result with the range printed on the test strip vial and it should fall within this range. If not, please read the instructions again and repeat 100~165 the control solution test.
-
Page 20: Testing With Blood Sample
TESTING WITH BLOOD SAMPLE WARNING: Potential Biohazard! Healthcare professionals using this system on multiple patients should follow the infection control procedure approved by their facility. All products or objects which come in contact with human blood, even after cleaning, should be handled as if capable of transmitting viral diseases. -
Page 21: Preparing The Puncture Site
Please refer to the following practice guidelines for more information about the correct procedure: ● Biosafety in Microbiological and Biomedical Laboratories (BMBL) found at http://www.cdc.gov/biosafety/publications/bmbl5/ ● Protection of Laboratory Workers from Occupationally Acquired Infections; Approved Guideline-Third Edition Clinical and Laboratory Standards Institute (CLSI) M29-A3. -
Page 22: Performing A Blood Glucose Test
● Fingertip testing Press the lancing device s tip firmly against the lower side of patient s fingertip. Press the release button to prick patient s finger, then a click indicates that the puncture is complete. Performing a Blood Glucose Test You will need: Meter Test Strip... - Page 23 3. Obtaining a blood sample Use the pre-set lancing device to puncture the desired site. Wipe off the first appeared drop of blood with a clean cotton swab. The size of the drop should be at least as big as (actual size), which is 1.1 microliter ( μ...
- Page 24 • If you have trouble filling the confirmation window, please contact the place of purchase or call the Customer Service for assistance. 5. Read your result The result of the blood glucose test will appear after the meter counts down to 0. The blood glucose result will be stored in the memory automatically.
-
Page 25: Meter Memory
METER MEMORY The meter stores the 1000 most recent blood glucose test results along with respective dates and times in its memory. To enter the meter memory, start with the meter switched off. Reviewing Test Results 1. Press and release Main button will appear on the display. -
Page 26: Reviewing Blood Glucose Day Average Results
Reviewing Blood Glucose Day Average Results 1. Press and release Main button. When appears on the display, keep pressing Main button for 3 seconds until the flashing appears. Release Main button and then your 7-day average result measured in general mode will appear on the display. -
Page 27: Downloading Results
Downloading Results FORA COMFORAT pro GD40 has 2 types of transmission methods; your meter uses either serial or Bluetooth to transmit the data, please check your meter box for the transmission method of your meter. Data Transmission Via Cable(for GD40a) You can use the meter with an serial cable and the Health Care Software System to view test results on your personal computer. - Page 28 Data Transmission Via Bluetooth (for GD40b) You can transmit your data from the meter to your devices (e.g. smart phone, tablet, PC...) via Bluetooth. Please contact your local customer service or place of purchase for assistance. Please note that you must complete the pairing between the meter and Bluetooth receiver before transmitting data.
-
Page 29: Maintenance
MAINTENANCE Battery Your meter comes with two 1.5V AAA size alkaline batteries. Low Battery Signal The meter will display one of the messages below to alert you when the meter power is getting low. 1. The appears with E-b, Error and low: The power is not enough to do a test. -
Page 30: Caring For Your Meter
NOTE: • Replacing the battery does not affect the test results stored in the memory. • As with all small battery, these batteries should be kept away from children. If swallowed, promptly seek medical assistance. • Battery might leak chemicals if unused for a long time. Remove the batteries if you are not going to use the device for an extended period (i.e., 3 months or more). - Page 31 Disinfecting Procedures 1. Put on non-sterile gloves. 2. Take out one disinfecting wipe from the package and squeeze out any excess liquid in order to prevent damage to the meter. 3. Wipe all meter s exterior surface display and buttons. Hold the meter with the test strip slot pointing down and wipe the area around the test slot but be careful not to allow excess liquid to get inside.
- Page 32 NOTE: • Do NOT clean and disinfect the meter while performing tests. • Do NOT allow cleaning and disinfecting solution to get in the test slot, battery compartment, or strip-ejection button. • If you do get moisture in the test strip slot, wipe it away with a corner of tissue. •...
-
Page 33: Caring For Your Test Strips
Caring for Your Test Strips ● Storage conditions: 2°C to 32°C (35.6°F to 89.6°F), below 85% relative humidity. Do NOT freeze. ● Store your test strips in their original vial only. Do not transfer to another container. ● Store test strip packages in a cool dry place. Keep away from direct sunlight and heat. -
Page 34: Important Control Solution Information
Important Control Solution Information ● Use only our control solutions with your meter. ● Do not use the control solution after the expiration date or 3 months after first opening. Write the opening date on the control solution vial and discard the remaining solution after 3 months. ●... -
Page 35: System Troubleshooting
SYSTEM TROUBLESHOOTING If you follow the recommended action but the problem persists, or error messages other than the ones below appear, please contact local customer service. Do not attempt to repair by yourself and never try to disassemble the meter under any circumstances. Result Readings MESSAGE WHAT IT MEANS... -
Page 36: Error Messages
Error Messages MESSAGE WHAT IT MEAN WHAT TO DO Appears when the Replace the batteries batteries cannot provide immediately. enough power for a test. Appears when a used test Repeat the test with a new test strip is inserted. strip. Repeat the test with a new test strip. - Page 37 MESSAGE WHAT IT MEAN WHAT TO DO Appears when ambient System operation range is 10 ° C temperature is below to 40 ° C (50 ° F to 104 ° F). system operation range. Repeat the test after the meter and test strip are in the above Appears when ambient temperature range.
-
Page 38: Troubleshooting
Troubleshooting 1. If the meter does not display a message after inserting a test strip: POSSIBLE CAUSE WHAT TO DO Battery exhausted. Replace the battery. Test strip inserted upside down or Insert the test strip with contact incompletely. bars end first and facing up. Defective meter or test strips. -
Page 39: Detailed Information
DETAILED INFORMATION Blood glucose monitoring plays an important role in diabetes control. A long-term study showed that maintaining blood glucose levels close to normal can reduce the risk of diabetes complications by up to 60% The meter provides you with plasma equivalent results. Time of day Normal plasma glucose range for people without diabetes... -
Page 40: Specifications
SPECIFICATIONS Model No.: TD-4272 Dimension & Weight: 110 (L) x 57 (W) x 25 (H) mm, 71g Power Source: two 1.5V AAA alkaline batteries Display: LCD Memory: 1000 measurement results with respective date and time External Output: Serial Cable (for GD40a) or Bluetooth (for GD40b) Auto electrode insertion detection Auto sample loading detection Auto reaction time count-down... -
Page 44: Blood Glucose Monitoring System
COMFORT pro GD40 Blood Glucose Monitoring System Designed & Authorized by ForaCare Suisse AG CH-9000 St. Gallen, Switzerland www.foracare.ch TaiDoc Technology Corporation For self-testing B1-7F, No.127, Wugong 2nd Rd., Wugu Dist., 24888, New Taipei City, Taiwan 0123 www.taidoc.com...
Need help?
Do you have a question about the COMFORT pro GD40 and is the answer not in the manual?
Questions and answers
What is the meaning when E-U appear on screen