Chapters
Table of Contents

Related Manuals for Elvox 52L5


Summary of Contents for Elvox 52L5
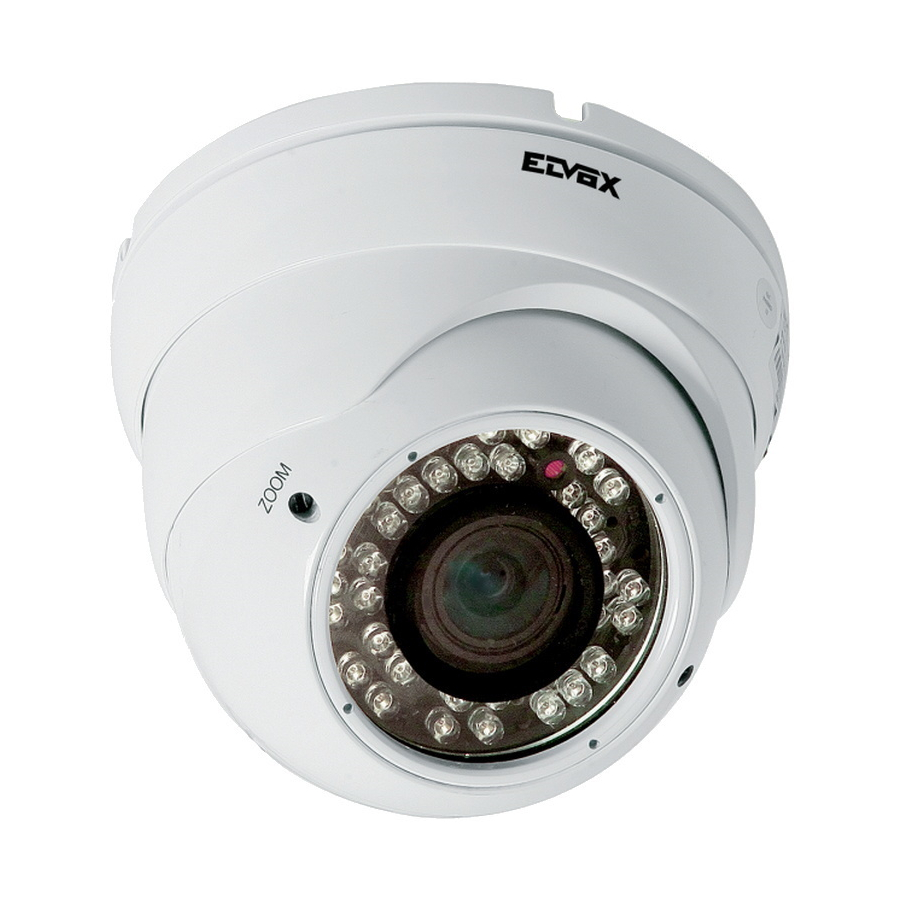
- Page 1 Manuale per il collegamento e l’uso Installation and operation manual Art. 52L5 Telecamera ad alta risoluzione 600 TVL con obiettivo 2,8-12 mm Hi-resolution camera 600 TVL with 2.8-12 mm lens...
- Page 2 Limitazione di responsabilità: le informazioni contenute nel presente manuale sono riferite alla versione corrente del prodotto e non rappresentano alcuna dichiarazione o garanzia. Inoltre il contenuto del manuale è soggetto a modifiche senza preavviso. Il produttore si riserva il diritto di apportare modifiche alla presente pubblicazione. Precauzioni di sicurezza Questo simbolo indica la possibile presenza di tensioni pericolose non isolate all'interno del corpo dei prodotti che potrebbero causare scosse elettriche.
-
Page 3: Avvertenze Di Sicurezza Per Gli Installatori
AVVERTENZE PER L'INSTALLATORE - Leggere attentamente le av ver ten ze contenute nel pre sen te do cu men to in quanto for ni sco no importanti in- dicazioni ri guar dan ti la sicurezza di in stal la zio ne, d'uso e di ma nu ten zio ne. - Dopo aver tolto l'imballaggio assicurarsi dell'integrità... -
Page 4: Table Of Contents
Indice Avvertenze di sicurezza per gli installatori....................3 Descrizione del prodotto..........................5 Specifiche tecniche............................6 Manuale OSD..............................6 OSD...............................7 LENS (obiettivo).............................7 EXPOSURE (esposizione)........................7 WHITE BALANCE (bilanciamento del bianco)..................8 BACKLIGHT (controluce)........................9 DAY & NIGHT (giorno e notte)......................9 DPC (dpc)............................10 SPECIAL (funzioni speciali).......................10 Cam title (titolo telecamera)......................10 Motion (movimento)..........................10 7.2.1 AREA (zona)............................11 PRIVACY... -
Page 5: Descrizione Del Prodotto
DESCRIZIONE DEL PRODOTTO: Sensore (CCD): Sensore CCD Sony Super HAD II da 1/3”. Controllo automatico del guadagno (AGC) Circuito di controllo automatico del guadagno (AGC) incorporato. La telecamera a colori è in grado di fornire immagini ad alta definizione in condizioni di bassa illuminazione. Otturatore elettronico automatico (AES) Funzionalità... -
Page 6: Specifiche Tecniche
Specifiche tecniche: Modello 52L5 Sensore CCD Sony Super HAD II da 1/3” Pixel effettivi ( H*V ) NTSC:811×508, PAL:795×596 Risoluzione orizzontale 600 linee TV Impostazione OSD tramite pulsante cablato Menu OSD > 48 dB Rapporto S/N Frequenza di clock (MHz) NTSC: 28.636, PAL: 28.375... -
Page 7: Manuale Osd
MANUALE OSD Avvertenza: Leggere attentamente questo manuale prima di procedere all'installazione e all'uso. CONTROLLO OSD A 5 PULSANTI CONTROLLO OSD A 1 PULSANTE SET (impostazione): premere (SET) nel menu principale SU e GIÙ: i pulsanti (SU) e (GIÙ) consentono di spostarsi verso l'alto e verso il basso SINISTRA/DESTRA: i pulsanti (SINISTRA)/(DESTRA) consentono di modificare i parametri dei menu. -
Page 8: White Balance (Bilanciamento Del Bianco)
1. SHUTTER (otturatore) (condizione e controllo velocità) È possibile selezionare il controllo automatico o manuale. Quando sullo schermo è visualizzato il menu SETUP (impostazione), selezionare “SHUTTER” (otturatore) tramite i tasti SU e GIÙ. Selezionare la modalità dell'otturatore premendo i tasti SINISTRA o DESTRA. - AUTO (automatico): Viene attivato il controllo automatico della velocità... -
Page 9: Backlight (Controluce)
4. BACKLIGHT (Controluce) BLC (compensazione controluce) In presenza di un'intensa sorgente luminosa posta dietro l'oggetto (controluce), è possibile rendere nitidi lo sfondo e l'oggetto ripreso utilizzando la funzione BACKLIGHT (controluce). 1. Selezionare “BACKLIGHT” (controluce) nel menu SETUP (impostazione) tramite i tasti SU e GIÙ. 2. -
Page 10: Dpc (Dpc)
3. Impostazioni B/W to Color (passaggio dalla modalità bianco e nero alla modalità colore) Quando la modalità è “external control” (controllo esterno), l'utente non può effettuare la regolazione. Quando l'intensità della luce è ad un livello critico, la telecamera passa dalla modalità bianco e nero alla modalità co- lore. -
Page 11: Area (Zona)
7.2.1 AREA (zona di rilevamento movimento) Selezionare AREA e premere ENTER per effettuare l'impostazione della zona di rilevamento del movimento, se- lezionare la zona in cui si vuole attivare il Motion Detection (rilevamento del movimento) e premere ENTER per confermarla. Una volta premuto ENTER il colore della zona selezionata cambia. Ripetere il procedimento per se- lezionare le altre zone. -
Page 12: Comm Adj (Impostazione Comunicazione)
6. SHARPNESS (Nitidezza) Regolabile tra 0 e 255 secondi 7. DISPLAY: CTR/LCD USER (utente): Gamma Consente di regolare il valore della curva gamma. Sono disponibili diverse modalità per gestire adeguatamente le aree luminose e le aree oscure dell'immagine e ottimizzare l'immagine in diverse situazioni. 8 NEG IMAGE (immagine negativa) - OFF: La modalità... -
Page 13: Reset (Reset)
8. RESET 8.1 FACTORY (preimpostazioni di fabbrica) Ripristina le impostazioni iniziali di fabbrica 8.2 RETURN (ritorna al menu precedente) 9. EXIT (esci) Salva tutte le impostazioni effettuate ed esce dal menu principale. -
Page 14: Anomalie E Possibili Soluzioni
TROUBLE AND SOLUTION (anomalie e possibili soluzioni) 1. Assenza di immagini nel monitor quando la telecamera è alimentata . Può trattarsi di un'anomalia o di un sovraccarico dell'alimentazione, verificare che la tensione e la polarità di alimentazione siano esatte. . Controllare tutti i cavi di collegamento e verificare se il monitor è collegato correttamente o meno. 2. - Page 15 The limited stated: The information included in this article is according to the current edition content establi- shment, regarding this contains, the content doesn’t make any statement or the guarantee. In addition this ar- ticle will possibly not contain the information which will be changed, without notice situation. The company has the revision power to this publication.
-
Page 16: Safety Instructions For Installers
SAFETY INSTRUCTIONS FOR INSTALLERS - Carefully read the instructions on this leaflet: they give important information on the safety, use and mainte- nance of the installation. - After removing the packing, check the integrity of the set. Packing components (plastic bags, expanded po- lystyrene etc.) are dangerous for children. - Page 17 Contents Safety instructions for installers..........................16 Brief of product............................18 Specification..............................19 OSD Manual..............................20... OSD............................20 LENS...............................20 EXPOSURE............................20 WHITE BALANCE...........................21 BACKLIGHT............................22 DAY & NIGHT...........................22 DPC..............................23 SPECIAL............................23 CAM TITLE..............................23 MOTION..............................23 7.2.1 AREA................................24 PRIVACY..............................24 PARK LINE..............................24 IMAGE ADJ..............................24 COMM ADJ..............................25 LANGUAGE...............................25 VERSION..............................25 RETURN..............................25 RESET.............................26 EXIT..............................26 TROUBLE AND SOLUTION............................27...
-
Page 18: Brief Of Product
BRIEF OF PRODUCT: Sensor (CCD): 1/3” Sony SuperHADII CCD Sensor. Auto Gain Control (AGC) Built-in auto gain control (AGC) circuit. The color camera can get high definition picture in low Lux condition. Auto Electronic Shutter (AES) Built-in auto electronic shutter function. The color camera’s AES speed can reach 1/100,000s. Gamma Characteristic Camera Gamma characteristic is 0.45. -
Page 19: Specification
Specification Model 52L5 Pick Up Element 1/3” Sony SuperHAD II CCD Effective Picture Elements ( H*V ) NTSC:811×508, PAL:795×596 Horizontal Resolution 600 TV Lines OSD Menu OSD setting by cable button More than 48dB S/N Ratio NTSC:28.636, PAL:.28.375 Clock Frequency (MHZ) -
Page 20: Osd Manual
OSD MANUAL Warning: Please read this manual carefully before installation and use! OSD CONTROL BY ONE SWITCH OSD CONTROL BY FIVE SWITCH SET: push (SET) into Main Menu UP/DOWN (UP) or (DOWN) for move up and down LEFT/RIGHT: (LEFT) or (RIGHT) for modifying the menu parameters. 1. -
Page 21: White Balance
1. SHUTTER (Condition and speed control) Auto or manual control caan be selected. When the SETUP menu is on the screen, select “SHUTTER” by the UP or DOWN button. Select the shutter mode by pressing the LEFT or RIGHT button. - AUTO: Auto control of the shutter speed is enabled. -
Page 22: Backlight
4. BACKLIGHT BLC (Backlight Compensation) When there is a strong backlight behind the object, clear images of the backgraound as well as the object can still be obtained by using the BACKLIGHT function. 1. Select “BACKLIGHT” on the SETUP menu by the UP or DOWN button. 2. -
Page 23: Dpc
3. B/W to Color Settings When the mode is “external control”, user can’t adjust it. This is B/W to color accumulated light intensity, when it reach “alternating light” state, camera could be da- maged by frequent switch. It might cause to not correct judgment of image and reduction of span life of the device. -
Page 24: Area
7.2.1 AREA Select AREA and press ENTER to enter Motion Area setting, choose the area where you want to set Motion Detection, press ENTER to confirm the area (Once ENTER is pressed, the color of the chooosing area will change), repeat this step to choose the other areas. After finishing setting the area, press ENTER button for 1 second to the below menu. -
Page 25: Comm Adj
6. SHARPNESS Adjusted from 0 to 255 seconds 7. DISPLAY: CTR/LCD USER: Gamma Adjust the gamma value, there are several different modes of curves for option, different modes will give dif- ferent handling way to the appropriate mode to achieve the most optimized image on different occasions. 8. -
Page 26: Reset
8. RESET 8.1 FACTORY Return to the camera’s initial setting in factory 8,2 RETURN 9. EXIT Save all setting menus and exit the main menu. -
Page 27: Trouble And Solution
TROUBLE AND SOLUTION 1. No Picture after providing power . May be the power supply voltage abnormity, please check the power supply voltage and pole whether exac- titude. . Please check all the connecting cable and monitors whether be connected correctly or not. 2. - Page 28 Via Pontarola, 14/a 35011 Campodarsego PD Tel. +39 049 920 2511 S6I.52L.500 RL. 01 13 02 Fax +39 049 920 2603 ELVOX - Campodarsego - Italy www.elvox.com...
Need help?
Do you have a question about the 52L5 and is the answer not in the manual?
Questions and answers