
Related Manuals for Elvox 46535.020B.01


Summary of Contents for Elvox 46535.020B.01
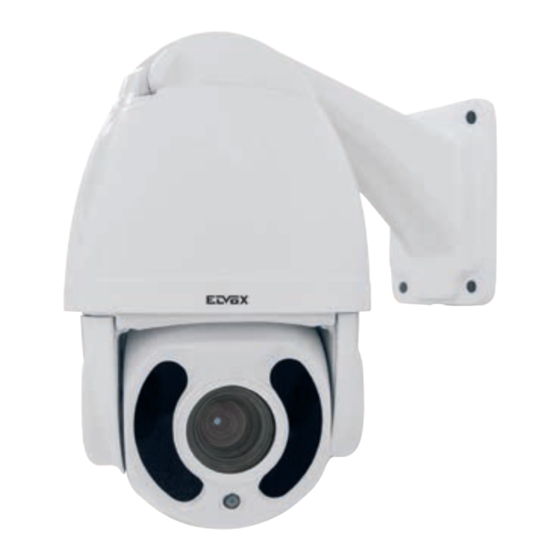
- Page 1 Manuale per il collegamento e l’uso Installation and operation manual 46535.020B.01 Telecamera Speed Dome 20X AHD 2 Mpx IR 150 m 20X AHD 2 Mpx IR 150 m Speed Dome Camera...
- Page 2 46535.020B.01 PRECAUZIONI: 1. Se non si ha la preparazione tecnica adeguata, non tentare di utilizzare questo dispositivo elettronico senza leggere questo manuale con attenzione. 2. Rimuovere l'alimentazione dal dispositivo prima di tentare qualsiasi operazione o regolazione all'interno del coperchio della telecamera, per evitare di danneggiare il meccanismo.
-
Page 3: Table Of Contents
46535.020B.01 INDICE 1 Presentazione del prodotto ..................................... 2 1.1 Specifiche ..........................................2 1.2 Descrizione delle funzioni ....................................2 2 Installazione..........................................4 2.1 Dimensioni del prodotto...................................... 4 2.2 Montaggio a parete ......................................5 2.3 Montaggio ad angolo ......................................5 2.4 Montaggio su palo......................................6 2.5 Montaggio a soffitto ...................................... -
Page 4: Presentazione Del Prodotto
46535.020B.01 1 Presentazione del prodotto 1.1 Specifiche Sensore 1/3" CMOS Sony IMX 323 Risoluzione 1080P, 25/30 Fps Obiettivo 5,35 - 107 mm +/-5% 20x Rapporto segnale rumore ≥ 50 dB Velocità brandeggio orizzontale 0,02-480°/s Velocità brandeggio verticale 0,02-160°/s Portata brandeggio orizzontale 360°... -
Page 5: Descrizione Delle Funzioni
46535.020B.01 1.2 Descrizione delle funzioni Multilanguage OSD Menu (Menu OSD multilingua) Lingua visualizzata nel menu a video, disponibile inglese ecc. L'utente può impostare la funzione o il parametro o verificare le informazioni correlate tramite l'OSD. Alarming Set (Impostazione allarme) Per maggiori informazioni fare riferimento al menu OSD. -
Page 6: Installazione
46535.020B.01 2 Installazione 2.1 Dimensioni del prodotto 2.2 Montaggio a parete Fig.1 Condizioni per l'installazione: La telecamera dome con montaggio a parete è installabile su strutture murarie di spessore tale da consentire l'utilizzo dei tasselli a espansione sia in interno che in esterno. La parete deve sopportare almeno 4 volte il peso della telecamera dome. Installazione della staffa da parete: a. -
Page 7: Montaggio A Parete
46535.020B.01 Fig. 3 2.3 Montaggio ad angolo Fig. 4 Condizioni per l'installazione: La telecamera dome con montaggio ad angolo è installabile su strutture murarie con angolo di 90° e di spessore tale da consentire l'utilizzo dei tasselli a espansione sia in interno che in esterno. La parete deve sopportare almeno 4 volte il peso della telecamera dome. Installazione degli accessori per il montaggio ad angolo e la staffa da parete: a. -
Page 8: Montaggio Su Palo
46535.020B.01 Fig. 6 b. Come mostrato in Fig. 7, passare i cavi di alimentazione attraverso l'accessorio di montaggio ad angolo prima di fissare a muro la staffa. Fig. 7 2.4 Montaggio su palo Fig. 8 Condizioni per l'installazione: La telecamera con montaggio su palo è installabile su pali rigidi in interno ed esterno il cui diametro deve corrispondere alla misura delle fascette strin- gitubo utilizzate. -
Page 9: Montaggio A Soffitto
46535.020B.01 Fascette stringitubo in acciaio (15,24 cm) Fig. 9 b. Come mostrato in Fig. 10, passare i cavi attraverso l'accessorio di montaggio su palo prima di fissare a muro la staffa. Vite Staffa da fissare a muro Vite Fig. 10 2.5 Montaggio a soffitto... - Page 10 46535.020B.01 b. Come mostrato in Fig. 13, allentare le viti da M4 poste sulla base dell'accessorio di montaggio a soffitto e separare la base dall'asta. Passare i tre cavi di alimentazione, video/comando e allarme all'interno della scanalatura laterale che si trova sul fondo della base di collegamento al soffitto e quindi attraverso il foro al centro della base del supporto.
-
Page 11: Istruzioni Di Funzionamento
46535.020B.01 3. Istruzioni di funzionamento 3.1 Operazioni all'accensione <SYSTEM> <SYSTEM> PROTOCOL Auto PROTOCOL Auto DOME ID DOME ID COMM COMM TEMPERATURE TEMPERATURE VERSION VERSION PAN: XXX TILT: XXX EXIT Autodiagnosi all'accensione Pan, Tilt, Completamento autodiagnosi della telecamera - Azione obiettivo: l'obiettivo esegue lo zoom indietro fino all'angolo di visuale più ampio. -
Page 12: Menu Osd
46535.020B.01 4 Menu OSD 4.1 Indice dei menu... -
Page 13: Informazioni Di Sistema
46535.020B.01 4.2 Informazioni di sistema <MAIN MENU> <SYSTEM> <SYSTEM> <DOME> PROTOCOL PELCO D-P <CAMERA> DOME ID <DISPLAY> COMM 2400.N.8.1 <LANGUAGE> TEMPERATURE 41.8 °C <TIMING TASK> VERSION <ALARM> <RESET> EXIT EXIT Visualizzato quando si accede al menu OSD Visualizzato quando si accede al menu SYSTEM: MFG (Produttore): sullo schermo sono visualizzati 15 caratteri al massimo. -
Page 14: Giri Di Sorveglianza
46535.020B.01 4.3.2 IR <IR DISPLAY> WORKING MODE AUTO TESTING TIME OUTPUT POWER 100% ILLUMINATION ON AMBIENT LIGHT IR SWITCH ZOOM EXIT WORKING MODE (Modalità funzionamento): per la modalità funzionamento è possibile selezionare auto, B/N, colore. L'impostazione predefinita è auto. TESTING TIME (Durata Test): in modalità funzionamento IR automatico e con orario programmato, IR esegue l'azione programmata, p.es. commutazio- ne da giorno a notte o viceversa. -
Page 15: Scansione Pan
46535.020B.01 4.3.5 Scansione Pan <PAN SCAN> PAN SCAN PAN SCAN SPEED RUNNING…. INIT RUNNING EXIT PAN SCAN SPEED (Velocità scansione orizzontale): per la velocità di scansione orizzontale è possibile selezionare da 1 a 64 graduazioni. INIT (Inizializzazione): reimposta la velocità di scansione e il grado di inclinazione ai valori predefiniti. -
Page 16: Telecamera
46535.020B.01 4.4 Telecamera <CAMERA> AUTO ZOOM SPEED QUICK DIGITAL ZOOM FOCUS AUTO IRIS AUTO FREEZE EXIT CAM (Telecamera): visualizza le informazioni del modulo supportato dalla telecamera dome. ZOOM SPEED (Velocità zoom): la velocità dello zoom può essere impostata su veloce o lenta. -
Page 17: Allarme
46535.020B.01 4.8 Allarme <ALARM> ALARM NO ALARM MODE PRIORITY LEVEL ALARM IN ALARM ACTIO PRESET 1 ALARM OUT RELEASE TIME PATROL TIME EXIT ALARM NO (Allarme n°): è possibile selezionare OFF e ON. ALARM MODE (Modalità allarme): l'attivazione allarme può essere impostata su OFF e ON. -
Page 18: Appendice 1, Protezione Contro I Fulmini E Sovratensione
46535.020B.01 Appendice 1, Protezione contro i fulmini e sovratensione. Questo prodotto è dotato di tecnologia TVS di protezione da fulmini e scariche aeree per evitare in modo efficiente i fulmini transienti con tensione infe- riore a 6000V, sovratensioni e danni causati da altri tipi di segnali ad impulso. - Page 19 46535.020B.01 PRECAUTIONS: 1. Persons without technical qualifications should not attempt to operate this dome device before reading this manual thoroughly. 2. Remove any power to the dome before attempting any operations or adjustments inside the dome cover to avoid potential damage to the mechanism.
- Page 20 46535.020B.01 INDEX 1 Product Introduction ......................................19 1.1 Specification ........................................19 1.2 Function Description ......................................20 2 Installation..........................................21 2.1 Product Dimension ......................................21 2.2 Wall mounted ........................................21 2.3 Corner mounted ........................................ 22 2.4 Pole mounted........................................23 2.5 Ceiling mounted ........................................
- Page 21 46535.020B.01 1 Product Introduction 1.1 Specification Sensor 1/3" CMOS Sony IMX 323 Resolution 1080P-25/30Fps Lens 5,35 - 107 mm +/-5% 20x ≥ 50 dB Horizontal Rotation Speed 0.02-480°/s Tilt Rotation Speed 0.02-160°/s Horizontal Rotation Range 360° Tilt Rotation Range 93°...
- Page 22 46535.020B.01 1.2 Function Description Multilanguage OSD Menu The language display on screen menu, the available language is English etc.. User can set the function or parameter, or check the related information through the OSD. Alarming Set Details please refer to the OSD menu.
- Page 23 46535.020B.01 2 Installation 2.1 Product Dimension 2.2 Wall Mounted Fig.1 Installation conditions: Wall mounted dome can be used in the hard wall structure whose thickness should be enough to install expansion bolt in indoor and outdoor environ- ment. The wall can bear at least 4 times the weight of the dome. Install wall hanging bracket: a.
- Page 24 46535.020B.01 Fig. 3 2.3 Corner Mounted Fig. 4 Installation conditions: Corner mounted dome can be used in the hard wall structure with an angle of 90° whose thickness should be enough to install expansion bolt in indoor and outdoor environment. The wall can bear at least 4 times the weight of the dome. Install corner mounted attachment and wall hanging bracket: a.
- Page 25 46535.020B.01 Fig. 6 c. As shown in Fig7, fix the wall hanging bracket with all cables power through it on the corner mounted attachment. Fig. 7 2.4 Pole Mounted Fig. 8 Installation conditions: Pole mounted dome can be used in the hard pole structure in indoor and outdoor environment whose diameter should match the installation size of stainless hose clamps.
- Page 26 46535.020B.01 Stainless Hose Clamp (6 inches) Fig. 9 b. As shown in Fig 10, fix the wall hanging bracket with all cables through it on the pole mounted attachment. Fig. 10 2.5 Ceiling Mounted Fig. 11 Installation conditions: Ceiling mounted dome with thick pole can be used in the hard ceiling structure whose thickness should be enough to install expansion bolt in indoor and outdoor environment.
- Page 27 46535.020B.01 b. As shown in Fig 13, at first unscrew the M4 screw at the side of the base of ceiling and split the base of ceiling and boom. Then make the three groups of cables of power, video/control and alarming into the side recessing seal groove of the ceiling connector bottom and through the core hole of the base of ceiling mounted.
- Page 28 46535.020B.01 3. Function Instruction 3.1 Power Up Action <SYSTEM> <SYSTEM> PROTOCOL AUTO PROTOCOL AUTO DOME ID DOME ID COMM COMM TEMPERATURE TEMPERATURE VERSION VERSION PAN: XXX TILT: XXX EXIT Power Up Self Testing Pan, Tilt, Camera Self-test Completion - Lens action: Lens zooms out to the widest angle.
- Page 29 46535.020B.01 4 OSD Menu 4.1 Menu index...
- Page 30 46535.020B.01 4.2 System Information <MAIN MENU> <SYSTEM> <SYSTEM> <DOME> PROTOCOL PELCO D-P <CAMERA> DOME ID <DISPLAY> <LANGUAGE> COMM 2400.N.8.1 <TIMING TASK> TEMPERATURE 41.8 °C <ALARM> VERSION <RESET> EXIT EXIT When enter the OSD, it display Enter to the SYSTEM, you will see: MFG: Max 15 characters displayed on the screen.
- Page 31 46535.020B.01 4.3.2 IR Display <IR DISPLAY> WORKING MODE AUTO TESTING TIME OUTPUT POWER 100% ILLUMINATION ON AMBIENT LIGHT IR SWITCH ZOOM EXIT WORKING MODE: Working mode has auto, black/white, color selectable. Default is auto. TESTING TIME: On IR auto working mode and the programmed time, the IR will execute the programmed action, eg. Switch from day to night or from night to day.
- Page 32 46535.020B.01 4.3.5 Pan Scan <PAN SCAN> PAN SCAN PAN SCAN SPEED RUNNING…. INIT RUNNING EXIT PAN SCAN SPEED: Pan scan speed is 1 to 64 grade selectable. INIT: Reset the scan speed and tilt degree as default setting. RUNNING: Running the scan speed and tilt degree set.
- Page 33 46535.020B.01 4.4 Camera <CAMERA> AUTO ZOOM SPEED QUICK DIGITAL ZOOM FOCUS AUTO IRIS AUTO FREEZE EXIT CAM: Display the information of module supported by this dome. ZOOM SPEED: Zoom speed is quick and slow selectable. DIGITAL ZOOM: Digital zoom is NOT AVAILABLE...
- Page 34 46535.020B.01 4.7 Timing task <TIMING TASK> <TIME SETTING> <TIMING TASK> EXIT <TIMING TASK> <TIMING SETTING> START FUNCTION TIME-YEAR 2016 - 00 00 - 00 00 TIME-MONTH - 00 00 - 00 00 TIME-DATE - 00 00 - 00 00 TIME-HOUR...
- Page 35 46535.020B.01 Appendix 1 Anti-lightning, Anti-surge This product is extremely air discharge and lightning protection with TVS tube technology, which can effectively prevent the transient lightning below voltage 6000V, surge and damages caused by other types of pulse signals. However, necessary protective measures should be made in the premise of ensuring electrical safety for outdoor installation according to the actual situation : ·...
- Page 36 Viale Vicenza, 14 36063 Marostica VI - Italy 49401259A0 00 1803 www.vimar.com...
Need help?
Do you have a question about the 46535.020B.01 and is the answer not in the manual?
Questions and answers