Advertisement
Quick Links
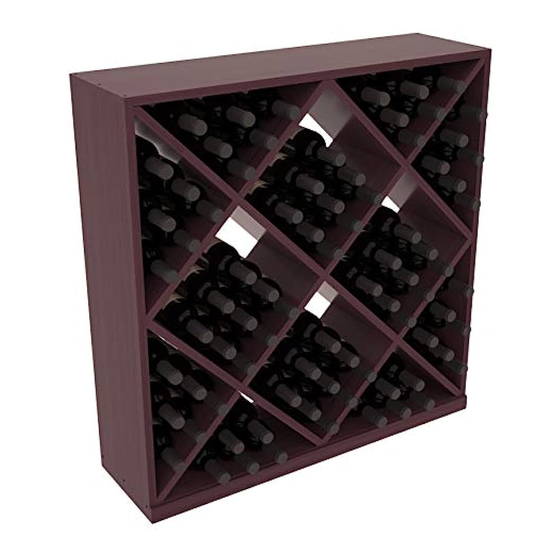
Solid Diamond Cube
Assembly GUIDE
*Please verify that you have the correct number of parts before proceeding.
Depending on the model you purchased, your bundle should contain the following:
TOP PANEL (x1)
34 7/8"
34 7/8"
LONG MIDDLE (x2)
47 1/4"
47 1/4"
BOTTOM PANEL (x1)
33 7/8"
33 7/8"
Top Panel
Side Panel
Bottom Panel
Package Contents
TRIM PIECE (x1)
SHIM (x1)
10"
WOOD SCREWS FINISH NAILS
Page 1
Short Middle
Long Middle
Trim Piece
SIDE PANEL (x2)
35 5/16"
SMALL MIDDLE (x4)
23 5/8"
34 7/8"
WOOD PUTTY
Questions?
888.373.6057
or visit
wineracksamerica.com
SCAN FOR
ASSEMBLY VIDEO
tools for assembly
Required
Screwdriver
Wood Glue
Suggested
Finish Nailer
Cordless Drill
Nail Setter
Hammer
Rubber Mallet
Advertisement

Subscribe to Our Youtube Channel
Related Manuals for Wine racks America Solid Diamond Cube


Summary of Contents for Wine racks America Solid Diamond Cube
- Page 1 Solid Diamond Cube Questions? 888.373.6057 Assembly GUIDE or visit wineracksamerica.com Page 1 Top Panel Side Panel Short Middle Long Middle SCAN FOR ASSEMBLY VIDEO Bottom Panel Trim Piece Package Contents tools for assembly *Please verify that you have the correct number of parts before proceeding.
- Page 2 Solid Diamond Cube Questions? 888.373.6057 Assembly GUIDE or visit wineracksamerica.com Page 2 1. Find an open, flat area in which to work. Carefully remove all components from the box and remove banding or protective wrapping. Check the parts list to verify package contents.
- Page 3 Solid Diamond Cube Questions? 888.373.6057 Assembly GUIDE or visit wineracksamerica.com Page 3 4. Now that the frame of the rack is assembled, insert the first long middle into the frame of the rack with the notches facing upward. (figure 3) Insert the second long middle into the frame.
- Page 4 Solid Diamond Cube Questions? 888.373.6057 Assembly GUIDE or visit wineracksamerica.com Page 4 7. At this point, there is no specific front of the rack. Choose the side of the rack that you would like to be the front and secure the bottom trim piece. The bottom trim piece should be flush with the bottom of the rack. (figure 7) We recommend that you use a finish nailer to drive a nail through the trim piece into each side frame piece.
Need help?
Do you have a question about the Solid Diamond Cube and is the answer not in the manual?
Questions and answers