Table of Contents

Related Manuals for mundoclima Bibloc Aerotherm V17


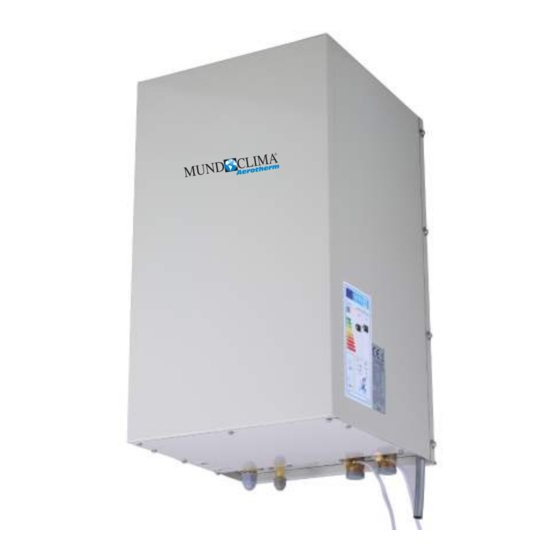
Summary of Contents for mundoclima Bibloc Aerotherm V17
- Page 1 BIBLOC UNIT - AEROTHERM V17 Service Manual Thank you very much for purchasing our product. Before using your unit, please read this manual carefully SO30160 to SO30172 and keep it for future reference. English www.mundoclima.com...
-
Page 2: Table Of Contents
Service Manual Aerotherm V17 Content 1. General Information ..................3 1.1 Measurements ................3 1.2 External appearance ..............4 1.3 Nomenclature ................5 2. Features ....................... 6 3. Specifications ....................8 3.1 220-240/1/50 products ..............8 3.2 380-415/3/50 products ..............12 3.3 Hydronic box ................ - Page 3 Service Manual Aerotherm V17 11. Installation ....................47 11.1 Installation for outdoor unit ............47 11.
-
Page 4: General Information
Model name Power supply (mm) weight (kg) Width: 400 Height: 865 51/57 220~240-50Hz 1Ph UI BIBLOC AEROTHERM V17 (4 ~ 8KW) Depth: 427 Width: 400 Height: 865 54/60 220~240-50Hz 1Ph UI BIBLOC AEROTHERM V17 (10 ~ 16KW) Depth: 427 Width: 400... -
Page 5: External Appearance
Service Manual Aerotherm V17 1.2 External appearance 1.2.1 Outdoor units 4/6kW 1Ph 10-16kW & 3Ph 12-16kW... -
Page 6: Nomenclature
Service Manual Aerotherm V17 1.2.1 Hydronic box... -
Page 7: Features
Service Manual Aerotherm V17 2. Features Outdoor unit Compact structure, independent hydronic box, flexible installation. Refrigerant pipes run indoors from the outdoor unit, no need extra insulation of water piping to protect from freezing up. No need extra refrigerant within 10m refrigerant pipe length. Heating, cooling &... - Page 8 Service Manual Aerotherm V17 Weather dependent operation with climate correlation to ensure absolute comfort Climate correlation curve curves for choice. Once the curve is selected, the unit set the outlet water temperature automatically according to the outdoor ambient temperature. Two zones control for more flexibility Temperature of each zone is separately controlled.
-
Page 9: Specifications
Service Manual Aerotherm V17 3. Specifications 3.1 220-240/1/50 products Outdoor Split type (Bibloc) Capacity 4.10 6.10 8.00 Heating Rated input 0.82 1.29 1.73 5.00 4.73 4.62 Capacity 4.01 5.96 7.34 Heating Rated input 1.13 1.68 2.13 3.55 3.55 3.45 Capacity 4.10 6.10 8.00... - Page 10 Service Manual Aerotherm V17 Outdoor Split type (Bibloc) Number of rows Tube pitch(a)x row pitch(b) 25.4/22 25.4/22 25.4/22 Φ9.52 inner grooved copper Tube dia. and type Air side heat exchanger Fin space Fin type (code) Hydrophilic aluminum Coil length x height 760×813 760×813 880×914...
- Page 11 Service Manual Aerotherm V17 Outdoor Split type (Bibloc) 10KW 12KW 14KW 16KW Capacity 10.00 12.10 14.00 15.50 Heating Rated input 2.17 2.74 3.39 3.82 4.61 4.42 4.13 4.06 Capacity 10.12 11.85 14.05 16.05 Heating Rated input 2.93 3.48 4.41 5.03 3.45 3.41 3.19...
- Page 12 Service Manual Aerotherm V17 Outdoor Split type (Bibloc) 10KW 12KW 14KW 16KW Number of rows Tube pitch(a)x row pitch(b) 25.4/22 25.4/22 25.4/22 25.4/22 Φ9.52 inner grooved copper Tube dia. and type Air side heat Fin space exchanger Fin type (code) Hydrophilic aluminum Coil length x height 845×1270...
-
Page 13: 380-415/3/50 Products
Service Manual Aerotherm V17 3.2 380-415/3/50 products Outdoor Split type (Bibloc) 12KW 14KW 16KW Capacity 12.10 14.00 15.50 Heating Rated input 2.68 3.26 3.79 4.51 4.29 4.09 Capacity 11.97 13.93 15.48 Heating Rated input 3.50 4.21 4.87 3.42 3.31 3.18 Capacity 12.10 13.00... - Page 14 Service Manual Aerotherm V17 12KW 14KW 16KW Outdoor Split type (Bibloc) Number of rows Tube pitch(a)x row pitch(b) 25.4/22 25.4/22 25.4/22 Φ9.52 inner grooved copper Tube dia. and type Air side heat exchanger Fin space Fin type (code) Hydrophilic aluminum Coil length x height 845×1270 845×1270...
-
Page 15: Hydronic Box
Service Manual Aerotherm V17 3.3 Hydronic box Indoor Split type (Bibloc) 4 ~ 8KW 10 ~ 16KW 10 ~ 16KW (TRIF.) Type Heating & Cooling Space ° C 25~55, default 35 heating High ° C 35~60, default 45 Leaving water Space °... -
Page 16: Operation Range
Service Manual Aerotherm 4. Operation range Heating mode Cooling mode T1: Leaving water temperature (℃) T4 : Ambient temperature(℃) ■ No heat pump operation, backup E-heater or boiler only. Domestic hot water mode 5 12 T1: Leaving water temperature (℃) T4 : Ambient temperature(℃) ■... -
Page 17: Sound Pressure Levels
Microphone 1.4m 1.0m Heating dB(A) Cooling dB(A) Model UE BIBLOC AEROTHERM V17 (4KW) UE BIBLOC AEROTHERM V17 (6KW) UE BIBLOC AEROTHERM V17 (8KW) UE BIBLOC AEROTHERM V17 (10KW) UE BIBLOC AEROTHERM V17 (12KW) UE BIBLOC AEROTHERM V17 (14KW) UE BIBLOC AEROTHERM V17 (16KW) (TRIF.) -
Page 18: Accessories
Service Manual Aerotherm V17 6. Accessories 6.1 Accessories for outdoor unit Name Shape Quantity Note For outdoor unit Outdoor unit installation &owner’s manual installation Product technical manual For Erp description Drainage pipe connector For drainage Only for 1 Phase 10~16 kW, used on the signal Magnet ring wire between outdoor... -
Page 19: Performance Data
Service Manual Aerotherm V17 7. Performance data 7.1 Heating capacity for 220-240/1/50 products Model: BIBLOC AEROTHERM V17 (4KW) Integrated value capacity table Tamb -20/- 1.85 0.88 2.10 1.65 0.88 1.88 1.51 0.88 1.72 -15/- 2.10 0.82 2.57 2.08 0.89 2.35 2.08... - Page 20 Service Manual Aerotherm V17 Model: BIBLOC AEROTHERM V17 (6KW) Integrated value capacity table Tamb -20/- 2.61 1.31 1.99 2.32 1.31 1.77 2.15 1.34 1.61 -15/- 3.08 1.27 2.43 3.06 1.36 2.25 3.05 1.46 2.09 3.02 1.59 1.90 -7/-8 5.24 1.62 3.23...
- Page 21 Service Manual Aerotherm V17 Model: BIBLOC AEROTHERM V17 (8KW) Integrated value capacity table Tamb -20/- 3.12 1.73 1.80 3.00 2.07 1.45 2.25 1.73 1.30 -15/- 3.25 1.62 2.01 3.07 1.97 1.56 3.45 2.25 1.53 3.81 2.53 1.51 -7/-8 6.22 2.32 2.68...
- Page 22 Service Manual Aerotherm V17 Model: BIBLOC AEROTHERM V17 (10KW) Integrated value capacity table Tamb -20/- 3.96 2.11 1.88 3.73 2.25 1.66 3.09 1.99 1.55 -15/- 5.24 2.17 2.41 4.99 2.34 2.13 4.44 2.30 1.93 4.24 2.47 1.72 -7/-8 8.04 2.73 2.94...
- Page 23 Service Manual Aerotherm V17 Model: BIBLOC AEROTHERM V17 (12KW) Integrated value capacity table Tamb -20/- 4.68 2.59 1.81 4.40 2.73 1.61 3.66 2.44 1.50 -15/- 6.19 2.67 2.32 5.90 2.86 2.06 5.25 2.82 1.86 5.01 3.02 1.66 -7/-8 9.51 3.35 2.84...
- Page 24 Service Manual Aerotherm V17 Model: BIBLOC AEROTHERM V17 (14KW) Integrated value capacity table Tamb -20/- 5.22 3.05 1.71 4.91 3.23 1.52 4.08 2.87 1.42 -15/- 6.91 3.14 2.20 6.58 3.39 1.94 5.86 3.33 1.76 5.59 3.56 1.57 -7/-8 10.60 3.96 2.68...
- Page 25 Service Manual Aerotherm V17 Model: BIBLOC AEROTHERM V17 (16KW) Integrated value capacity table Tamb -20/- 5.75 3.40 1.69 5.42 3.61 1.50 4.50 3.21 1.40 -15/- 7.62 3.52 2.17 7.26 3.78 1.92 6.46 3.70 1.74 6.17 3.97 1.55 -7/-8 11.70 4.42 2.65...
-
Page 26: Heating Capacity For 380-415/3/50 Products
Service Manual Aerotherm V17 7.2 Heating capacity for 380-415/3/50 products Model: BIBLOC AEROTHERM V17 (12KW) (TRIF.) Integrated value capacity table Tamb -20/- 4.93 2.72 1.81 4.64 2.70 1.72 4.50 2.69 1.67 -15/- 6.71 2.78 2.41 6.19 2.85 2.17 5.77 2.94 1.96... - Page 27 Service Manual Aerotherm V17 Model: BIBLOC AEROTHERM V17 (14KW) (TRIF.) Integrated value capacity table Tamb -20/- 5.68 3.25 1.75 5.34 3.24 1.65 5.17 3.21 1.61 -15/- 7.72 3.31 2.33 7.13 3.41 2.09 6.64 3.51 1.89 6.06 3.63 1.67 -7/-8 11.84 4.07...
- Page 28 Service Manual Aerotherm V17 Model: BIBLOC AEROTHERM V17 (16KW) (TRIF.) Integrated value capacity table Tamb -20/- 6.07 3.55 1.71 5.71 3.52 1.62 5.53 3.21 1.58 -15/- 8.25 3.62 2.28 7.62 3.72 2.05 7.10 3.70 1.85 6.48 3.95 1.64 -7/-8 12.66 4.44...
-
Page 29: System Diagram
Service Manual Aerotherm V17 8. System diagram 8.1 System diagram for outdoor unit... -
Page 30: System Diagram For Hydronic Box
Service Manual Aerotherm V17 8.2 System diagram for hydronic box... -
Page 31: Wiring Diagrams
Service Manual Aerotherm V17 9. Wiring diagrams 9.1 Wring diagram for outdoor unit For 4/6/8kW 1Ph... - Page 32 Service Manual Aerotherm V17 For 10-16kW, 1Ph 16025300002594 FAN-UP FAN-DOWN CN26 CN19 CN17 CN51 BLUE CN18 XS5XP5 BLACK FORCE COOL CHECK CN12 XS6XP6 DIS1 L-PRO POWER DRIVER BOARD HEAT1 CN24 1 2 3 1 2 3 CN14 CN28 CAP1 BLACK STF1 MAIN BOARD BLACK...
- Page 33 Service Manual Aerotherm V17 For 10-16kW, 3Ph...
- Page 34 Service Manual Aerotherm V17...
-
Page 35: Wring Diagram For Hydronic Box
Service Manual Aerotherm V17 9.2 Wring diagram for hydronic box For 1Ph hydronic box BLACK BLACK... - Page 36 Service Manual Aerotherm V17 For 3Ph hydronic box...
-
Page 37: Overview Of The Unit
Service Manual Aerotherm V17 10. Overview of the unit 10.1 Overview of the outdoor unit 4-8kW 10-16kW Push the grill to the left until it stops. Then pull its right edge, the grill can now be removed. You can also reverse the procedure. Exercise caution to avoid a possible hand injury. -
Page 38: Overview Of Hydronic Box
Service Manual Aerotherm V17 10.2 Overview of hydronic box 10.2.1 Hydronic box opening The front flap on the indoor unit cover gives access to the manometer and user interface. The indoor unit cover can be removed by removing the 6 side screws and unhitching the cover. - Page 39 Service Manual Aerotherm V17 10.2.2 Hydronic compartments & functional diagram 1. Air vent valve Remaining air in the water circuit will be automatically removed via the air vent valve. 2. Backup heater The backup heater consists of an electrical heating element that will provide additional heating capacity to the water circuit if the heating capacity of the unit is insufficient due to low outdoor temperatures;...
- Page 40 Service Manual Aerotherm V17 12.1 Air vent valve 13. Water inlet connection 13.1 Drain valve 14. Safety valve The pressure relief valve prevents excessive water pressure in the water circuit by opening at 43.5psi (g)/3bar (g) and discharging some water. 15.
-
Page 41: Electric Box Lay Out For Outdoor Unit
Service Manual Aerotherm V17 10.3 Electric box lay out for outdoor unit 1Ph 4-8kW products PCB A discription 1 Rectifier bridge input port L24 2 Hydraulic compartment input port2 3 Rectifier bridge input port N 4 Power supply N 5 Power supply L 6 Transformer output port 7 BLACK: T3 temperature sensor port WHITE: T4 temperature sensor... - Page 42 Service Manual Aerotherm V17 PCB B description 1 To main board (CN101,CN105) 2 Compressor connection port U V W (U,V,W) 3 Input port N for IPM module(N) 4 Input port P for IPM module(P) 5 Input port for PFC inductance( P1) 6 Input port for bridge Rectifiers(P5) 7 Input port for Bridge Rectifiers(P6) 8 Output port P of PFC(P2)
- Page 43 Service Manual Aerotherm V17 1Ph 10-16kW products PCB A description PCB A...
- Page 44 Service Manual Aerotherm V17 PCB B description 14 13 3Ph 12-16kW products 43 ...
- Page 45 Service Manual Aerotherm V17 PCB A description PCB A 1 Power supply L3 2 Power supply L2 3 Power supply L1 4 Power supply N...
- Page 46 Service Manual Aerotherm V17 1 Power supply for the main PCB(CN250) 2 Port for pressure sensor (CN36) 3 Port for suction Temp. sensor (CN4) 4 Port for discharge Temp. sensor(CN8) 5.1 Port for outdoor Temp. sensor (CN9) 5.2 Port for condenser outlet Temp. sensor (CN9) 6.1 Port for high pressure switch (CN6) 6.2 Port for low pressure switch (CN6) 7.
-
Page 47: Electric Box Lay Out For Hydronic Box
Service Manual Aerotherm V17 10.4 Electric box lay out for hydronic box Hydronic box PCB description 1 Input port for solar energy (CN5) and user interface (CN19) 2 Output port for transformer (CN4) 8 Port for temperature sensors 3 Power supply port for user interface (CN36) (TW_out, TW_in, T1, T2, T2B) (CN6) 4 Port for remote switch (CN12) 9 Port for temperature sensor (CN13) -
Page 48: Installation
Service Manual Aerotherm V17 13 DIP switch (S1, S2) 19 Port for external circulated pump/pipe pump/ 14 output port for defrost (CN34) mix pump/2-way valve SV2(CN37) 15 Port for anti-freeze electric heating tape (inter 20 Port for SV1 (3-way valve) and SV3 (CN24) nal)(CN40) 21 Port for internal pump (CN28) 16 Port for anti-freeze electric heating tape (inter... - Page 49 Service Manual Aerotherm V17 outdoor unit, power cord and connecting wire at least 1m away from TV set or radio to prevent noise or picture interference. Caution: When the outdoor unit is installed in a place that is always exposed to a strong wind like a coast or on a high story of a building, secure a normal fan operation by using a duct or a wind shield.
- Page 50 Service Manual Aerotherm V17 4/6kW Note: The drain hole is covered by rubber plug; the bigger hole can be opened in field if necessary.
- Page 51 Service Manual Aerotherm V17 10-16kW Unit installation dimensions Single unit installation...
-
Page 52: Installation For Hydronic Box
Service Manual Aerotherm V17 Parallel connect the two units or above Parallel connect the front with rear sides 11.2 Installation for hydronic box 11.2.1 Installation place for hydronic box The hydronic box is to be wall mounted in an indoor location that meets the following requirements: The installation location is frost-free. - Page 53 Service Manual Aerotherm V17 11.2 .2 Unit dimensions and service space (unit: mm) Front view Back view Upward view Dimensions of the wall bracket Required service space...
- Page 54 Service Manual Aerotherm V17 11.2 .3 Inspecting, handling and unpacking The indoor unit is packed in a box. At delivery, the unit must be checked and any damage must be reported immediately to the carrier claims agent. Check if all indoor unit accessories are enclosed. Bring the unit as close as possible to the final installation position in its original package in order to prevent damage during transport.
-
Page 55: Refrigerant Pipework
Service Manual Aerotherm V17 11.3 Refrigerant pipework 11.3.1 Refrigerant piping connection Check whether the difference in height between the indoor unit and outdoor unit, the length of refrigerant pipe, and the number of the bends meet the following requirements. Models 4/6kW 8kW 10-16kW Max. - Page 56 Service Manual Aerotherm V17...
- Page 57 Service Manual Aerotherm V17 Size of pipes of Gas side and Liquid side Models Refrigerant Gas side Liquid side Φ15.9 Φ9.52 4-16kW R410A Connection method Models Gas side Liquid side 4-16kW outdoor unit Flare Flare Indoor unit Flare Flare 11.3.2 Clean pipes and airtight test After refrigerant piping connection, it is necessary to remove dirt or water in the pipes.
-
Page 58: Electrical Wiring
Service Manual Aerotherm V17 11.3.4 Refrigerant amount to be added Calculate the added refrigerant according to the diameter and the length of the liquid side pipe of the outdoor unit/indoor unit connection. If the length of the liquid side pipe is less than 10 meters it is no need to add more refrigerant, so calculating the added refrigerant the length of the liquid side pipe must subtract 10 meters. - Page 59 Service Manual Aerotherm V17 11.4.1 Outdoor unit wiring The specification of power Capacity(kW) 4-8kW 10-16kW 12-16kW Phase Voltage 220-240V 380-415V Outdoor unit power Frequency 50Hz Power wiring(mm 3*2.5 3*4.0 5*2.5 Circuit breaker(A) Outdoor / hydronic box signal wire 3-core shield wire(3*0.75) Flexible cord must meet 60245IEC (H05RN-F) standards.
-
Page 60: Water Pipework
Service Manual Aerotherm V17 When power cord is parallel with signal wire, please put them into separate wire distribution pipes, and leave a proper distance. (Reference distance: It is 300mm when current capacity of power cord is less than 10A, or 500mm when 50A). - Page 61 Service Manual Aerotherm V17 Before installation of the unit, check the following: The maximum water pressure = 3 bar. The maximum water temperature is 70℃ according to safety device setting. Always use materials that are compatible with the water used in the system and with the materials used in the unit.
- Page 62 Service Manual Aerotherm V17 The pre-pressure (Pg) to be set depends on the maximum installation height difference (H) and is calculated as follows: Pg(bar)=(H(m)/10+0.3) bar 3. Using the table and instructions below, determine if the total water volume in the installation is below the maximum allowed water volume. Water volume ≤160L Installation Water volume >160L...
- Page 63 Service Manual Aerotherm V17 [1 bar], keep in mind the following guidelines: Use only dry nitrogen to set the expansion vessel pre-pressure. Inappropriate setting of the expansion vessel pre-pressure will lead to malfunction of the system. Therefore, the pre-pressure should only be adjusted by a licensed installer.
- Page 64 Service Manual Aerotherm V17 Example 1 The unit is installed 5 m below the highest point in the water circuit. The total water volume in the water circuit is 100 L. In this example, no action or adjustment is required. Example 2 The unit is installed at the highest point in the water circuit.
- Page 65 Service Manual Aerotherm V17 Cover the pipe end when inserting it through a wall so that no dust and dirt enter. Use a good thread sealant for sealing the connections. The sealing must be able to withstand the pressures and temperatures of the system. When using non-brass metallic piping, make sure to insulate both materials from each other to prevent galvanic corrosion.
- Page 66 Service Manual Aerotherm V17 the heat pump, the electric heating tap, or the backup heater. The freeze protection function will turn off only when the temperature increases to a certain value. In case of a power failure, the features mentioned above cannot protect the unit from freezing.
- Page 67 Service Manual Aerotherm V17 Corrosion in the system due to glycol Uninhibited glycol will turn acidic under the influence of oxygen. This process is accelerated by presence of copper and at higher temperatures. The acidic uninhibited glycol attacks metal surfaces and forms galvanic corrosion cells that cause severe damage to the system.
-
Page 68: Fill The Water
Service Manual Aerotherm V17 11.5 Fill the water 1. Connect the water supply to the fill valve and open the valve. 2. Make sure the automatic air purge valve is open (at least 2 turns). 3. Fill with water until the manometer indicates a pressure of approximately 2.0 bars. - Page 69 Service Manual Aerotherm V17 The field wiring must be carried out in accordance with the wiring diagram supplied with the unit. Be sure to use a dedicated power supply. Never use a power supply shared by another appliance. Be sure to establish a ground. Do not ground the unit to a utility pipe, surge protector, or telephone ground.
- Page 70 Service Manual Aerotherm V17 11.7.2 Wiring overview A: Outdoor unit B: Solar energy kit (field supply) C: User interface D: Room thermostat (field supply) E:Boiler (field supply) F: P_s: Solar pump (field supply) G: P_c: Mixing pump (field supply) H: P_o: Outside circulation pump (field supply) I P_d: DHW pump (field supply) J: SV2: 2-way valve (field supply) K: SV1: 3-way valve for domestic hot water tank (field supply)
- Page 71 Service Manual Aerotherm V17 Required number of Maximum Item Description Current conductors running current Solar energy kit signal cable 200mA User interface cable 200mA Room thermostat cable 2 or 3 200mA(a) Boiler control cable 200mA Thermistor cable Solar pump control cable 200mA Mix pump control cable 200mA...
- Page 72 Service Manual Aerotherm V17 Specifications of standard wiring components Stated values above are maximum values Model 4-16kW 1Ph 12-16kW 3Ph Maximum overcurrent protector (MOP) Wiring size must comply with the Wiring size applicable local laws and regulations Connection of the backup heater power supply This power circuit must be protected with the required safety devices according to local laws and regulations.
- Page 73 Service Manual Aerotherm V17 Electrical parts of the hydraulic compartment: The XT4/XT5 contains terminals for solar energy, remote alarm, 2-way valve, 3-way valve, pump, booster heater and external heating source. All high-voltage external loads, if it is metal or a grounded port must be grounded.
- Page 74 Service Manual Aerotherm V17 2. Fix the cable with cable ties to the cable tie mountings to ensure stress relief. For 2-way valve SV2 Voltage 220-240VAC Maximum running current 0.2A Wiring size 0.75mm NOTE: Only a normal closing valve is available for this unit Procedure: 1.
- Page 75 Service Manual Aerotherm V17 install the valve as should in the picture. Make sure to connect it to the correct terminal numbers. Procedure: 1. Connect the cable to the appropriate terminals as shown in the picture 2. Fix the cable with cable ties to the cable tie mountings to ensure stress relief. For remote shutdown For tank loop pump P_d and mix pump P_c Voltage...
- Page 76 Service Manual Aerotherm V17 External thermostat There are three methods for connecting the thermostat cable (as described in the picture above) and it depends on the application. If method “A” is selected, the space operation mode can be selected on the room thermostat.
- Page 77 Service Manual Aerotherm V17 For booster heater in water tank Voltage 220-240VAC Maximum running current 0.2A Wiring size 0.75mm Connection of the booster heater cable depends on the application. Only when the domestic hot water tank is installed will this wiring be needed. The unit only sends a turn on/off signal to the booster heater.
- Page 78 Service Manual Aerotherm V17 Voltage 220-240VAC Maximum running current 0.2A Wiring size 0.75mm Procedure: 1. Connect the cable to the appropriate terminals as shown in the picture. 2. Fix the cable with cable ties to the cable tie mountings to ensure stress relief For user interface Please use shield wire and earth the wire Wire type...
-
Page 79: Start-Up And Configuration
Service Manual Aerotherm V17 to port A in the user interface. Port B corresponds to port B. Port X corresponds to port X. Port Y corresponds to port Y, and port E corresponds to port E. Procedure: 1. Remove the rear part of the user interface. 2. - Page 80 Service Manual Aerotherm V17 Low temperature curves for heating mode Target outlet water temperature(° C) Curve 1 Curve 2 Curve 3 Curve 4 Curve 5 Curve 6 Curve 7 Curve 8 Ambient temperature(° C) Low temperature curves for heating mode High temperature curves for heating mode Target outlet water temperature(°...
- Page 81 Service Manual Aerotherm V17 Low temperature curves for cooling mode Target outlet water temperature(° C) Curve 1 Curve 2 Curve 3 Curve 4 Curve 5 Curve 6 Curve 7 Curve 8 Ambient temperature(° C) Low temperature curves for cooling mode High temperature curves for cooling mode Target outlet water temperature(°...
-
Page 82: Dip Switch Settings
Service Manual Aerotherm V17 12.2 DIP switch settings DIP switch 26 is located on the switch box PCB and allows configuration of additional heating source thermistor installation, the second inner backup heater installation, etc. Description switch ≥60% of <60% of S1-1 Selection of refrigerant pipe length Max. -
Page 83: Pre-Operation Checks
Service Manual Aerotherm V17 12.4 Pre-operation checks After the installation of the unit, check the following before switching on the circuit breaker: Field wiring: Make sure that the field wiring between the local supply panel and unit and valves (when applicable), unit and room thermostat (when applicable), unit and domestic hot water tank, and unit and backup heater box have been connected according to the instructions, according to the wiring diagrams and to local laws and regulations. -
Page 84: Powering Up The Unit
Service Manual Aerotherm V17 panel. The voltage must correspond to the voltage on the identification label of the unit. Air purge valve: Make sure the air purge valve is open (at least 2 turns). Shut-off valves: Make sure that the shut-off valves are fully open 12.5 Powering up the unit When power to the unit is turned on, "1%~99%"... - Page 85 Service Manual Aerotherm V17 Models 4 to 8kW Constant speed ⅠⅡⅢ p/kPa Wilo-Yonos PARA R5 4300 /min 15/6,25/6,30/6 1~230V-Rp1/2. RP1. Rp1/4 3400 /min 2390 /min /min Q/m /h Q/l/s Q/lgpm 1-phase 5/7 kW...
- Page 86 Service Manual Aerotherm V17 Models 10 to 16kW Constant speed ⅠⅡⅢ Wilo-Yonos PARA R5 25/7.5 1~230V-Rp1/2. RP1. Rp1/4 4640 /min p/kPa 2970 /min 1270 /min Q/m3/h Q/l/s 16 Q/lgpm 1-phase 10~16kW 3-phase 12~16kW Pump LED diagnosis and solutions The pump has an LED operating status display. This makes it easy for the technician to search for the cause of a fault in the heating system.
-
Page 87: Failure Diagnosis At The Moment Of First Installation
Service Manual Aerotherm V17 If the LED display is flashing green, it means the pump is running the venting function. The pump runs during the 10 minute venting function. After its cycle, the installer needs to adjust the targeted performance. If the LED is flashing green/red, it means that the pump has stopped operating due to an external reason. -
Page 88: Field Setting
Service Manual Aerotherm V17 12.8 Field setting The unit shall be configured by the installer to match the installation environment (outdoor climate, installed options, etc.) and user demand. A number of field settings are available. These settings are accessible and programmable through “FOR SERVICEMAN”... - Page 89 Service Manual Aerotherm V17 The password is 666. Use ◄ ► to navigate and use ▼ ▲ to adjust the numerical value. Press OK. The following page is displayed: Use ▼ ▲ to scroll and use “OK” to enter submenu for setting the parameters.
- Page 90 Service Manual Aerotherm V17 Use ◄ ► to scroll and OK for enter. When the cursor is in YES, Press OK to set the DHW MODE as effective. When the cursor is in NON, press OK to set the DHW MODE as ineffective. Go to MENU>...
- Page 91 Service Manual Aerotherm V17 temperature drops below it in water heating mode. The relationship between operation of the unit and ambient temperature can be illustrated in the picture below: T_INTERVAL_DHW is the start time interval of the compressor in DHW mode. When the compressor stops running, the next time the compressor turns on it should be T_INTERVAL_DHW plus one minute later at least.
- Page 92 Service Manual Aerotherm V17 In the picture, T5stop is a parameter related to ambient temperature, which cannot be changed in the user interface. When T5≥T5stop,the heat pump will turn off. Note: the booster heater and backup heater can’t operate simultaneously, if the booster heater has been on, the backup heater will be off.
- Page 93 Service Manual Aerotherm V17 Be aware that the domestic hot water temperature at the hot water tap will be equal to the value selected in FOR SERVICEMAN “T5S_DI” after a disinfection operation. To set the priority between domestic water heating and space operation Go to SERVICEMAN>DHW MODE SETTING>1.4DHW PRIORITY: The function of the DHW PRIORITY is used to set the operation priority between domestic water heating and space (heating/cooling) operation.
- Page 94 Service Manual Aerotherm V17 If NON is selected in the DHW PRIORITY mode, when it is available and the space heating/cooling is OFF, the heat pump will heat the water as required. If space heating/cooling is ON, the water will be heated as required when the booster heater is unavailable.
- Page 95 Service Manual Aerotherm V17 12.8.3 COOL MODE SETTING COOL MODE SETTING typically consists of the following: COOL MODE: Set the COOL mode effective or non-effective T1S RANGE: Select the range of target outlet water temperature T4CMAX: Sett the maximum ambient operation temperature ...
- Page 96 Service Manual Aerotherm V17 between the operation of the unit and ambient temperature is shown in the picture below: dT1SC is the temperature difference between T1 (actual outlet water temperature) and T1S (target outlet water temperature) for starting the unit in cool mode.
- Page 97 Service Manual Aerotherm V17 SERVICEMAN> HEAT MODE SETTING. Press OK. The following page be displayed: When the cursor is on HEAT MODE, use◄► to scroll to YES or NON and press OK to enable or disable the heat mode. When the cursor is on the T1S RANGE, use ◄►...
- Page 98 Service Manual Aerotherm V17 in heat mode. When the target outlet water temperature T1S<47, the unit will turn on or off as described below: When the target outlet water temperature T1S≥47, the unit will on or off as described below: dTSH is the temperature difference between Ta (Ta is the room temperature) and TS for starting the unit when ROOM TEMP is enabled in TEMP.TYPE SETTING.
- Page 99 Service Manual Aerotherm V17 SERVICEMAN> AUTO MODE SETTING. Press OK. The following page is displayed. Use ◄ ► and ▼ ▲ to scroll and adjust the parameter. T4AUTOCMIN is the minimum operating ambient temperature for cooling in auto mode. The unit will turn off if the ambient temperature is lower when in space cooling operation.
- Page 100 Service Manual Aerotherm V17 If the room thermostat is available, select YES and press OK. In MODE SETTING, if YES is selected, the mode setting and the on/off function cannot be performed from the user interface. The timer function is unavailable; the operation mode and the on/off function are decided by the room thermostat.
- Page 101 Service Manual Aerotherm V17 If backup heater is available, please select YES at BACKUP HEATER. Press OK and the following page is displayed: When the cursor is on HEAT MODE or DHW MODE, Use ◄ ► to select YES or NON. If YES is selected, the backup heater will be available in the corresponding mode, otherwise it will be unavailable.
- Page 102 Service Manual Aerotherm V17 t_IBH_DELAY is the time that the compressor has run before the first backup heater turns on (if T1<T1S). t_IBH12_DELAY is the time that the first backup heater has run before the second backup heater turns on. If an additional heating source is available, please select YES at the corresponding position.
- Page 103 Service Manual Aerotherm V17 When the cursor is on T4_AHS_ON、dT1_AHS_ON、dT1_AHS_OFF or t_AHS_DELAY, Use ◄ ► and ▼ ▲ to scroll and adjust the parameter. T4_AHS_ON is the ambient temperature for starting the additional heating source. When the ambient temperature rises above T4_AHS_ON, the additional heating source will be unavailable.
- Page 104 Service Manual Aerotherm V17 prevent freezing when away for holiday. To enter the HOLIDAY AWAY SETTING, go to MENU> FOR SERVICEMAN> HOLIDAY AWAY SETTING. Press OK. The following picture is displayed: When the cursor is on T1S_H.A._H or T5S_H.M_DHW, Use◄ ► and ▼ ▲ to scroll and adjust the parameter, T1S_H.A._H is the target outlet water temperature for space heating when in holiday away mode.
- Page 105 Service Manual Aerotherm V17 FLOW TEMP. - COMFORT COOL ROOM TEMP. - COMFORT HEAT FLOW TEMP. or COMFORT HEAT ROOM TEMP, Use ◄ ► and ▼ ▲ to scroll and adjust the parameter. ECO COOL FLOW TEMP. is the target outlet water temperature when in ECO COOL mode.
- Page 106 Service Manual Aerotherm V17 Use ▼ ▲ to scroll and set the phone number. The maximum length of the phone number is 13 digits, if the length of phone number is short than 12, please input ■, as shown below: The number displayed on the user interface is the phone number of your local dealer.
-
Page 107: Test Run And Final Check
Service Manual Aerotherm V17 Use ◄ ► to scroll the cursor to YES and press OK, the following page will display: After a few seconds, all the parameters set in the user interface will be restored to factory settings. 12.9 Test run and final check Before switching on the unit, read following recommendations: When the complete installation and all necessary settings have been carried out, close all front panels of the unit and refit the unit cover. -
Page 108: Maintenance And Service
In order to ensure optimal availability of the unit, a number of checks and inspections on the unit and the field wiring have to be carried out at regular intervals. This maintenance needs to be carried out by your local Mundoclima technician. - Page 109 Service Manual Aerotherm V17 and look for obvious defects such as loose connections or defective wiring. Check for correct operation of contactors with an ohm meter. All contacts of these contactors must be in open position. Use of glycol: Document the glycol concentration and the pH-value in the system at least once a year.
-
Page 110: Troubleshooting
Service Manual Aerotherm V17 14. Troubleshooting Before starting the troubleshooting procedure, carry out a thorough visual inspection of the unit and look for obvious defects such as loose connections or defective wiring. When a safety device was activated, stop the unit and find out why the safety device was activated before resetting it. - Page 111 Service Manual Aerotherm V17 Symptom 2: The unit is turned on but the compressor is not starting (space heating or domestic water heating) Possible causes Corrective action The unit must start up In case of low water temperature, the system utilizes the out of its operation backup heater to reach the minimum water temperature first range (the water...
-
Page 112: Parameters Check
Service Manual Aerotherm V17 Symptom 6: Space heating capacity shortage at low outdoor temperatures Possible causes Corrective action Backup heater operation is not Check that the "OTHER HEATING SOURCE/ activated. BACKUP HEATER" is enabled. Check whether or not the thermal protector of the backup heater has been activated. - Page 113 Service Manual Aerotherm V17 Check sequence table Number Implication Temperature of outlet water when unit is on, when the unit is off, display ‘0’ Operation mode(0—OFF,2—COOL,3—HEAT,5—Water heating) Capacity requirement before correction Capacity requirement after correction Outlet water temperature of backup heater Outlet water temperature of additional heating source Target outlet water temperature calculated from climate-related curves Room temperature...
- Page 114 Service Manual Aerotherm V17 14.2.2 Check the parameters of outdoor unit To check the parameters on the refrigerant side, open the door and you’ll see the PCB like the following (different for 1-phase and 3-phase unit): the digital display will show the present compressor frequency (‘0’ will display if the unit is off or error code will display if error occurs).
- Page 115 Service Manual Aerotherm V17 Check sequence table Number Implication Frequency of compressor at present Operation mode (0—Standby, 2—COOL, 3—HEAT, 5—refrigerant recovery) Fan speed Frequency from hydraulic module Frequency after restriction by the outdoor unit Temperature of tube at outlet/inlet of condenser when in cool/heat mode Ambient temperature Discharge temperature “.”...
-
Page 116: Error Codes And Troubleshooting
Service Manual Aerotherm V17 14.3 Error codes and troubleshooting Malfunction or Code Failure cause and corrective action protection Flow switch error 1. The wire circuit is short connected or open. (E8 displayed 3 Reconnect the wire to assure effective connection. times) 2. - Page 117 Service Manual Aerotherm V17 • Charging water • Make sure there is no air in the system (purge air). • Check on the manometer that there is sufficient water pressure. The water pressure must be >1 bar. • Check that the pump speed setting is on the highest speed.
- Page 118 Service Manual Aerotherm V17 sensor (Ta) error 2. The Ta sensor failure,change a new sensor or change a new interface. The DC fan failure 1. Strong wind or typhoon below toward to the fan, to make the fan running in the opposite direction. Change the unit direction or make shelter to avoid typhoon below to the fan.
- Page 119 Service Manual Aerotherm V17 exchanger is dirty or something is block on the surface. Clean the heat exchanger or remove the obstruction. 3. The water flow is low in cooling mode. 4. Electrical expansion valve locked or winding connector loosens. Tap-tap the valve body and plug in/ plug off the connector for several times to make sure the valve is working correctly.
- Page 120 Service Manual Aerotherm V17 • Check on the manometer that there is sufficient water exchanger. pressure. The water pressure must be >1 bar (water is cold). • Check that the pump speed setting is on the highest speed. • Make sure that the expansion vessel is not broken. •...
- Page 121 Service Manual Aerotherm V17 4. Fan motor is broken, replace a new one. Water inlet Temp. is 1. The water inlet/outlet sensor wire connector is higher than water loosening. Reconnect it. outlet in heating 2.The water inlet/outlet(Twin /Twout)sensor is broken, mode Change a new sensor.
- Page 122 ASK FOR MORE INFORMATION Phone: (+34) 93 446 27 81 eMail: info@mundoclima.com TECHNICAL ASSISTANCE Phone: (+34) 93 652 53 57 www.mundoclima.com...
Need help?
Do you have a question about the Bibloc Aerotherm V17 and is the answer not in the manual?
Questions and answers