Intermec CK30 User Manual
Hide thumbs
Also See for CK30:
- Programmer's manual (448 pages) ,
- User manual (210 pages) ,
- Service manual (113 pages)
Table of Contents
Advertisement
Quick Links
Advertisement
Table of Contents

Related Manuals for Intermec CK30


Summary of Contents for Intermec CK30
- Page 2 Intermec. Information and specifications contained in this document are subject to change without prior notice and do not represent a commitment on the part of Intermec Technologies Corporation. 2003 by Intermec Technologies Corporation. All rights reserved.
-
Page 3: Table Of Contents
Who Should Read This Document? ............ix Related Documents ...................ix Patent Information ..................ix Using the CK30 Handheld Computer ..........1 Introducing the CK30 Handheld Computer .............2 Understanding the CK30 Models and Options...........3 Using the CK30 Battery ...................4 Maximizing Battery Life ................5 Checking the Battery Status................6 Charging and Installing the Battery ............6... - Page 4 Configuring the CK30 With the Configuration Utility......28 Configuring the CK30 With Commands Through the Network ....31 Configuring the CK30 With the Intermec Configuration Utility (ICU) ...31 Configuring the CK30 by Scanning Bar Codes.........31 How the CK30 Fits Into Your Network..............32 Using Serial Communications on the CK30 ..........33...
- Page 5 Problems Transmitting Data Through the DCS 30X or G4000 ....63 Problems While Scanning Bar Codes............64 Booting the CK30 ....................66 Warm Booting the CK30 .................66 Cold Booting the CK30 ................67 Cleaning the Scanner Window and CK30 Screen ...........67 Appendix ........................69 Physical and Environmental Specifications..............70 Accessories for the CK30 ..................71 Using Hidden Key Sequences .................73...
-
Page 6: Before You Begin
Your safety is extremely important. Read and follow all warnings and cautions in this document before handling and operating Intermec equipment. You can be seriously injured, and equipment and data can be damaged if you do not follow the safety warnings and cautions. -
Page 7: Safety Icons
Global Services and Support Warranty Information To understand the warranty for your Intermec product, visit the Intermec web site at http://www.intermec.com, click Support, and then click Warranty. CK30 Handheld Computer User’s Manual... - Page 8 Web Support Visit the Intermec web site at http://www.intermec.com to download many of our current manuals in PDF format. To order printed versions of the Intermec manuals, contact your local Intermec representative or distributor. Visit the Intermec technical knowledge base (Knowledge Central) at http://intermec.custhelp.com to review technical...
-
Page 9: Who Should Read This Document
Who Should Read This Document? The CK30 Handheld Computer User’s Manual provides you with information about the features of the CK30, and how to install, operate, maintain, and troubleshoot them. Before you install and configure the CK30, you should be familiar with your network and general networking terms, such as IP address. - Page 10 Before You Begin CK30 Handheld Computer User’s Manual...
-
Page 11: Using The Ck30 Handheld Computer
Using the CK30 Handheld Computer Use this chapter to familiarize yourself with the CK30 Handheld Computer. In this chapter you will find these sections: • Introducing the CK30 Handheld Computer • Using the CK30 Battery • Using the Keypad • Using the Screen •... -
Page 12: Introducing The Ck30 Handheld Computer
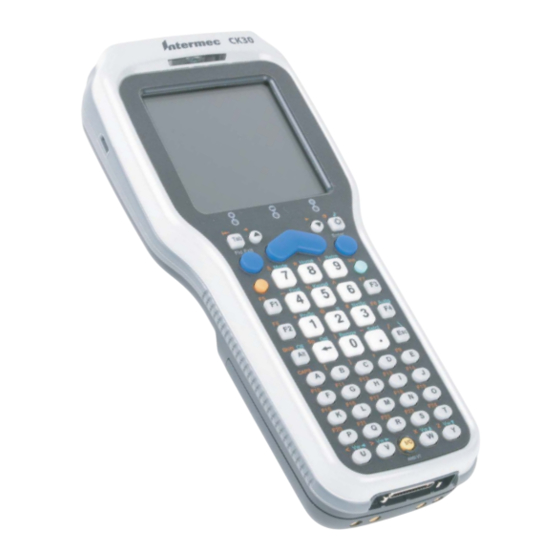
Chapter 1 — Using the CK30 Handheld Computer Introducing the CK30 Handheld Computer The Intermec CK30 is the first in a new line of ergonomically designed handheld computers built on the Microsoft® Windows® CE .NET operating system. It is a lightweight, easy-... -
Page 13: Understanding The Ck30 Models And Options
The CK30 computer is available in three different models that consist of different options. To find out which model of the CK30 you have, locate the configuration label on the back of the computer. The first five letters of the configuration number indicate the model of CK30 you ordered. -
Page 14: Using The Ck30 Battery
For additional help using IBrowse, see ?????? Using the CK30 Battery The CK30 uses an AB1 lithium-ion battery as its main power source. You must fully charge the main battery before you can use the CK30. -
Page 15: Maximizing Battery Life
10 minutes or you may Battery light comes on. lose data. Or, you can insert the CK30 into a powered AC1, AC2, AD1, or AD2. Stop using the CK30 1 Make sure the Low Battery icon is not on the for 5 minutes or longer. -
Page 16: Checking The Battery Status
To charge the battery • Either insert the battery into the AC1 4-slot battery charger or place the CK30 with battery installed in the AC2, AD1, or AD2. Use the following table to understand how long it will take to charge your batteries in each of the CK30 charging or communications dock accessories. -
Page 17: Using The Keypad
Battery latch battery Using the Keypad Your CK30 has one of the following keypad overlay options: • 42-key large numeric and function • 50-key full alphanumeric • 52-key full alphanumeric Each of these keypads also comes in an International version. -
Page 18: Using The 42-Key Large Numeric And Function Keypad
Chapter 1 — Using the CK30 Handheld Computer Using the 42-Key Large Numeric and Function Keypad Backlight key Scan button Enter Enter Orange key Green key CAPS Home < > Power key PROG 42-key large numeric and function keypad: Use this keypad to easily print numbers (0-9) and access function keys F1 through F12. -
Page 19: Using The 50-Key Full Alphanumeric Keypad
Chapter 1 — Using the CK30 Handheld Computer Using the 50-Key Full Alphanumeric Keypad Backlight key Power key ‘ “ Green key Orange key 50-key full alphanumeric keypad: Use this keypad to easily print numbers (0-9) and the entire alphabet. You can access Function keys (F1-F9) and special characters, symbols, and functions by pressing color-coded key sequences. -
Page 20: Using The 52-Key Full Alphanumeric Keypad
Chapter 1 — Using the CK30 Handheld Computer Using the 52-key Full Alphanumeric Keypad Backlight key Scan button Enter Enter & Home Orange key Green key Shift CAPS < > Power key 52-key full alphanumeric keypad: Use this keypad to easily print numbers (0-9) and the entire alphabet. -
Page 21: Understanding How To Use The Keypad
There are two color-coded modifier keys on the CK30: the Green key and the Orange key. Use the CK30 modifier keys in these two ways: •... -
Page 22: Capitalizing All Characters
• Enable the Caps lock feature. For help, see the next procedure. • Use the Keypad Caps Lock configuration command. For help, see "Keypad Caps Lock" in Chapter 6 of the CK30 Handheld Computer Configuration Manual. To enable Caps lock 1 Press Orange key to activate the modifier key. -
Page 23: Using The Te 2000 Keypad
This power-saving feature is designed to prolong battery life. When you press the Power key to turn the CK30 back on, your computer resumes where it was when you turned it off. If you are using 802.1x security, the computer may reauthenticate before it starts your application. -
Page 24: Using The Screen
Chapter 1 — Using the CK30 Handheld Computer Using the Screen The CK30 can have either a color or monochrome display depending on the model. Both screens are 160 x 160 pixels: the client area is 160 x 140 pixels and the status bar is 160 x 20 pixels. -
Page 25: Rotating The Screen
The CK30 is connected using ActiveSync. Mouse pointer turned on. Rotating the Screen If you turn the CK30 sideways to scan information, you might find it useful to rotate the screen 90 degrees clockwise for easier readability. CK30 Handheld Computer User’s Manual... -
Page 26: Using The Mouse Pointer
Chapter 1 — Using the CK30 Handheld Computer To rotate the screen 90 degrees clockwise • Press Alt, Programs Using the Mouse Pointer If you need to use a mouse to perform an action in the Windows environment, you can use the mouse pointer that came on your CK30. -
Page 27: Understanding The Leds
• Press and hold the number key that corresponds to the direction you want to move. Understanding the LEDs The LEDs on the CK30 turn on to indicate the status of the battery, a successful decode of a bar code, or a user-defined function. -
Page 28: Understanding The Ck30 Beeps
This LED comes on when the CK30 successfully decodes a bar code. Understanding the CK30 Beeps The CK30 uses beeps to provide you with audio feedback when it performs some functions. For example, you hear a beep each time you scan a valid bar code. -
Page 29: Scanning Bar Codes
The CK30 supports the scanning of 1D linear bar codes and 2D images depending on your model of CK30. Plus, if you have are using an integrated handle or a tethered scanner, the way you scan bar codes will be different. -
Page 30: Scanning With The Integrated Laser Scanner And 1D Linear Imager
1D linear imager and the 2D imager. Scanning With the Integrated Laser Scanner and 1D Linear Imager If the CK30 has a laser scanner or 1D linear imager, use the following procedure to understand how to scan a bar code. The... -
Page 31: Scanning Bar Codes With The 2D Area Imager
The CK30C may have a 2D area imager instead of the conventional laser scanner. Omni-directional (360°) scanning means that you can position the CK30 in any direction to scan a bar code label. To scan a bar code label with the 2D area imager 1 Press Power to turn on the CK30. -
Page 32: Attaching A Tethered Scanner
4 Release the Scan button. Attaching a Tethered Scanner You can use a tethered scanner with the CK30 if you ordered it with a 10-pin tethered scanner port in place of the integrated scanner. The following devices are currently supported by the CK30: •... -
Page 33: Using The Sd Card
The CK30 supports the following type of SD card: • SanDisk SD cards supporting 1-bit mode only The SD card slot is located on the top of the CK30 just above the laser scanner window. The SD card will appear in the File Manager as "SDMMC Disk."... - Page 34 Chapter 1 — Using the CK30 Handheld Computer 3 Gently insert the SD card into the CK30 with the printed side facing the front of the CK30. 4 Push the card into the slot until it fits firmly. 5 Replace the cover and two screws.
-
Page 35: Configuring The Ck30
Configuring the CK30 Use this chapter to understand how to configure the CK30 to communicate in your network. In this chapter, you will find these sections: • How to Configure the CK30 • How the CK30 Fits Into Your Network... -
Page 36: How To Configure The Ck30
Chapter 2 — Configuring the CK30 How to Configure the CK30 You can configure many operation characteristics of the CK30, such as the bar code symbologies it decodes or the network settings. These characteristics are controlled by configuration parameters. The values you set for these configuration parameters determine how the computer operates. -
Page 37: Configuring The Ck30 With The Setup Assistant
Chapter 2 — Configuring the CK30 Configuring the CK30 With the Setup Assistant When first setting up the CK30, use the Setup Assistant to set or enable basic network parameters and connect your CK30 to the network. The Setup Assistant is a wizard that guides you through setting the following basic network parameters: •... -
Page 38: Configuring The Ck30 With The Configuration Utility
DHCP. You may also not see a parameter if your computer does not support a particular feature. To open the Configuration Utility 1 From the CK30 splash screen, press Green key, Orange key. 2 In the password dialog box, type and press Enter. - Page 39 Communications Set up network settings including the 802.11b radio and the Bluetooth printer. CK30 Settings Configure settings specific to the CK30 such as the date, time, beeper volume, and backlight timeout. SNMP About the CK30 View the part number, firmware version, radio, and RF protocol loaded on your CK30.
- Page 40 Backspace ( ) key when highlighted Restoring Default Settings You can restore the CK30 to factory default settings from the Configuration Utility. Note: Using the Restore Defaults option resets all network parameters. As a result, you may lose network communications.
-
Page 41: Configuring The Ck30 With Commands Through The Network
If you are using a network, you can configure one or more CK30 at a time. For help, see Chapter 2 of the CK30 Handheld Computer Configuration Manual. Configuring the CK30 With the Intermec Configuration Utility (ICU) I don’t have any information to put here yet…. -
Page 42: How The Ck30 Fits Into Your Network
Ck30, or use the Intermec Configuration Utility. For example, you can use the Beep Volume configuration command to adjust the beep volume of the CK30. Scan this bar code label to set the volume to the lowest level: Set Beep Volume to Low... -
Page 43: Using Serial Communications On The Ck30
Chapter 2 — Configuring the CK30 Using Serial Communications on the CK30 The CK30 has a serial port to transfer data to and receive data from another device via RS-232 communications. You can also insert the CK30 into a communications dock to transmit data to and receive data from a host computer or PC using serial communications. -
Page 44: Using Rf Communications On The Ck30
électrique, faute de quoi vous risquez d’endommager votre installation. The CK30 has an internal antenna to transfer data using RF communications. This section of the manual assumes that you have already set up your RF communications network including your access points. - Page 45 Chapter 2 — Configuring the CK30 Configuring the Network Parameters for a TCP/IP Network In a TCP/IP network, the CK30 communicates with a host computer directly using TCP/IP for the RF protocol. The access point acts as a bridge to allow communications between the wired network and the RF network.
- Page 46 “Configuring the CK30 With the Configuration Utility” on page 28. Configuring the Network Parameters for a UDP Plus Network In a UDP Plus network, the CK30 communicates with a host computer through the DCS 30X or the G4000. Host UDP Plus...
- Page 47 The access point acts as a bridge to allow communications between the wired network and the RF network. To use RF communications in a UDP Plus network 1 Configure these network parameters on each CK30 in the network: • Network Name (SSID) •...
-
Page 48: Using Ethernet Communications On The Ck30
Chapter 2 — Configuring the CK30 Using Ethernet Communications on the CK30 You can use the CK30 directly in an Ethernet network if you have ordered Ethernet on your CK30 and you insert it into an AD1 or AD2 communications dock. The communications dock has an Ethernet connector that makes it possible for the CK30 to connect to your Ethernet network. -
Page 49: Configuring The Ck30 For Bluetooth Wireless Printing
Bluetooth qualified module by Socket Communications. The Bluetooth technology uses short-range radio links and allows for communications over a ten-meter range. To configure the CK30 for wireless printing 1 Go to Configuration Utility > Communications > Bluetooth. 2 Select Set Wireless Printer to start the Bluetooth device discovery. -
Page 50: Configuring Security On The Ck30
To use 802.11 security, you need: • An Intermec MobileLAN access point with an 802.11b radio and software release 1.80 or later. • A CK30 handheld computer with an 802.11b radio and the wireless security option. To enable WEP security on the CK30 1 Make sure you have configured the communications and radio parameters on your CK30. - Page 51 Chapter 2 — Configuring the CK30 You can enter either an ASCII key or a hex key that is either 5 bytes or 13 bytes long depending on the capability of the radio. Set a 5-byte value for WEP 64-bit or a 13-byte value for WEP 128-bit.
- Page 52 Chapter 2 — Configuring the CK30 CK30 Handheld Computer User’s Manual...
-
Page 53: Managing The Ck30
Managing the CK30 Use this chapter to understand how to manage information on the CK30. In this chapter, you will find these sections: • Accessing the System Main Menu • Using File Manager • Using Task Manager • Using ActiveSync on the CK30 •... -
Page 54: Accessing The System Main Menu
Accessing the System Main Menu You need to access the System Main Menu to be able to use most of the tools for managing the CK30. Access to the System Main Menu is password protected to ensure that only authorized individuals can use it. -
Page 55: Using File Manager
Chapter 3 — Managing the CK30 Using File Manager File Manager provides the ability to run an executable file, delete a file, or view the properties of a file. To open File Manager • From the System Main Menu, select File Manager. - Page 56 Chapter 3 — Managing the CK30 To delete a file 1 Navigate to the folder containing the file you want to delete. 2 Select the file by pressing its associated number or by scrolling to it and pressing Enter. 3 From the dialog box, select Delete and press Enter.
-
Page 57: Using Task Manager
Using Task Manager Task Manager provides information about applications running on the CK30. You do not need to use the System Main Menu to access Task Manager - you can access Task Manager at any time. Use Task Manager to perform several tasks, such as: •... -
Page 58: Using Activesync On The Ck30
Installing ActiveSync and Establishing a Partnership You must use a USB cable to establish your initial partnership between the CK30 and your desktop PC. If you are running Windows NT on your desktop PC, you cannot connect to your CK30 with ActiveSync. - Page 59 Chapter 3 — Managing the CK30 The ActiveSync Get Connected dialog box 2 Connect the AD1 to your desktop PC with the USB cable 3 Click Next in the Get Connected dialog box. ActiveSync detects a device on the USB port and prompts you to set up a new partnership.
- Page 60 Connected status. The Microsoft ActiveSync screen An icon also appears in the CK30 status bar indicating that it has established an ActiveSync partnership with your desktop PC. Note: If ActiveSync does not establish a partnership on the first try, the Get Connected dialog box appears on your desktop with the message “Your device was not detected.”...
-
Page 61: Using Activesync To Copy Files And Install Applications
You can use ActiveSync to copy files to the CK30 and to install applications. Basically, to install an application, you need to copy the .cab file to a directory on the CK30 and then run it. Use the following procedures to learn how to copy files and install applications on the CK30 using ActiveSync. -
Page 62: Installing Applications Using Autocab
5 Place the cursor in the desired folder for your device, right- click, and click Paste. The file has now been copied to the CK30 and you will be able to see it using File Manager. To install an application on the CK30 1 Open File Manager on the CK30. -
Page 63: Saving Your Configuration Or Application To Flash
Chapter 3 — Managing the CK30 3 From the System Main Menu, select Change Password. The Change Password dialog box appears: 4 Type in the Old Password field. intermec 5 Press Tab to move to the New Password field. 6 Type your new password and then press Tab to move to the Retype New field. - Page 64 Chapter 3 — Managing the CK30 CK30 Handheld Computer User’s Manual...
-
Page 65: Troubleshooting And Maintaining The Ck30
Troubleshooting and Maintaining the CK30 Use this chapter to solve problems you may encounter while using the CK30. You will also find information on booting the computer and routine maintenance. -
Page 66: Problems And Solutions
If you have problems with the TE 2000 terminal emulation applications, see the appropriate TE 2000 guide. If you send the CK30 in for service, it is your responsibility to save the terminal data and configuration. Intermec is responsible only for ensuring that the keypad and other hardware features match the original configuration when repairing or replacing your computer. -
Page 67: Problems While Operating The Terminal
Immediately replace the battery with a spare charged battery pack, or charge the battery. The terminal appears to be locked up • Press Power to turn on the CK30. The CK30 boots all the and you cannot enter data. systems, clears RAM memory, and starts the application. -
Page 68: Problems While Configuring 802.1X Security
Scanner Selection command again and select an option for the type of module you have installed. You scan a configuration command, such If you are working in the CK30 System Main Menu, as Keypad Caps Lock, and you hear three you cannot scan configuration commands. Use the low beeps. - Page 69 MobileLAN access point. Make sure the network name on connection icon is not in the status bar. the CK30 is the same as the network name (SSID) of the access point that you are trying to communicate with. The default network name is “INTERMEC.”...
- Page 70 Logger screen: 0x37B The CK30 indicates that it is not The time and date on your CK30 does not fall within the range authenticated by emitting a high beep of valid dates indicated on the server certificate. Modify the and a low beep.
-
Page 71: Problems With Rf Connectivity
Chapter 4 — Troubleshooting and Maintaining the CK30 Problems While Configuring 802.1x Security (continued) Problem Possible Solution The terminal indicates that it is not The root Certificate Authority certificate on your terminal authenticated by emitting a high beep and cannot validate the server certificate. - Page 72 The no network connection icon appears The CK30 is not connected to the access point. Make in the status bar. The CK30 is not sure the access point is turned on and operating. You communicating with the access point.
-
Page 73: Problems Transmitting Data Through The Serial Port
Chapter 4 — Troubleshooting and Maintaining the CK30 Problems With RF Connectivity (continued) Problem Possible Solution The network connection icon is in the There may be a problem with the host computer, a status bar, but you cannot establish a... -
Page 74: Problems While Scanning Bar Codes
Chapter 4 — Troubleshooting and Maintaining the CK30 Problems Transmitting Data Through the DCS 30X or G4000 (continued) Problem Solution Sending Buffer Transactions. This is an information message to tell you that buffered transactions are now being sent to the DCS 30X or G4000. - Page 75 Chapter 4 — Troubleshooting and Maintaining the CK30 Problems While Scanning Bar Codes (continued) Problem Solution When you release the Scan button, the The Good Read LED will remain on if you configure Good Read LED does not turn off.
-
Page 76: Booting The Ck30
Booting the CK30 You seldom need to warm or cold boot the CK30. The CK30 uses the configuration currently saved in flash memory during the boot process. Once the CK30 finishes booting, your application appears on the screen. -
Page 77: Cold Booting The Ck30
Chapter 4 — Troubleshooting and Maintaining the CK30 Cold Booting the CK30 If the CK30 or application is locked up, follow this procedure to perform a cold boot: To cold boot the CK30 1 Remove the battery. 2 Using a small pointed device (such as the end of a paper clip), press the reset switch on the back side of the CK30. - Page 78 Chapter 4 — Troubleshooting and Maintaining the CK30 Clean the scanner window and CK30 screen as often as needed for the environment in which you are using the terminal. To clean the CK30, use a solution of ammonia and water.
-
Page 79: Appendix
Appendix... -
Page 80: Physical And Environmental Specifications
Chapter A — Appendix Physical and Environmental Specifications Use the tables in this section to locate technical information about the CK30 and its available features and options. Physical Dimensions Length: 20.3 cm (8.0 in) Width: 8.9 cm (3.5 in) Depth: 5.5 cm (2.15 in), 6.2 cm (2.45 in) with large... -
Page 81: Accessories For The Ck30
AC2 4-Bay Battery Charging Dock Use the AC2 to charge up to four AB1 batteries without having to remove them from the CK30. You can insert up to four CK30s with batteries installed making it easy to remember to charge your batteries overnight. - Page 82 The holster and belt provide an easy way for you to carry the CK30 while not using it. The holster and belt support either right or left-handed use and you can use it with a CK30 with or without a handle.
-
Page 83: Using Hidden Key Sequences
To Type: 42-Key 50-Key 52-Key Green key, 6 Green key, S Green key, 9 Green key, Green key, T Green key, 0 Green key, < Green key, > Green key, Green key, 9 Green key, Tab CK30 Handheld Computer User’s Manual... - Page 84 Chapter A — Appendix CK30 Handheld Computer User’s Manual...
- Page 85 Corporate Headquarters 6001 36th Avenue West Everett, Washington 98203 U.S.A. tel 425.348.2600 fax 425.355.9551 www.intermec.com CK30 Handheld Computer User's Manual *067670-003* P/N 073528-001...
Need help?
Do you have a question about the CK30 and is the answer not in the manual?
Questions and answers