Table of Contents
Advertisement
Quick Links
Download this manual
See also:
Instruction Manual
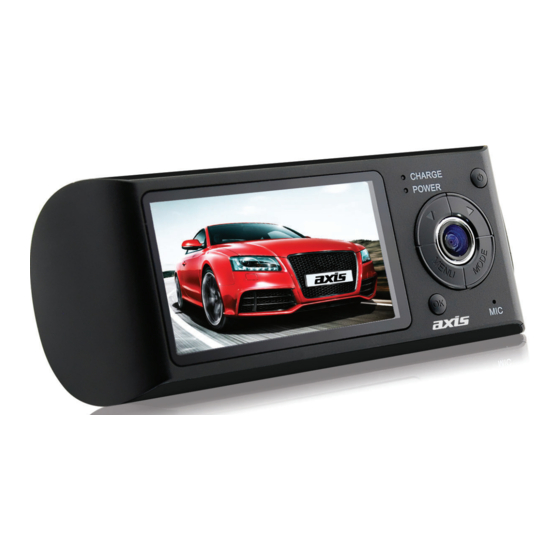
DUAL CAMERA HD DASH CAM with GPS
GENERAL
- Display:
- Image Sensor:
- Resolutions:
- Display Format:
- Picture Format:
- Functions:
- Viewing Angle:
- Camera Adjustment:
- Memory Support:
- GPS Function:
- Google Maps Data:
- G-Sensor:
- Loop Recording:
- Auto Record:
- Power Supply:
- Battery:
- Mounting:
INCLUDED
- Suction Bracket
- 12/24V Car Charger
- GPS Antenna
- 2 Year Warranty
(Battery - 12 Months)
DVR2
2.7" LCD TFT
3 Megapixel (Front)
HD 720p (Front), 480p (Rear)
16:9
JPEG
Digital Video Camera/Digital Voice Recorder
120° (Front), 140° (Rear)
Front - 7 Point (Vertical)
1 x 32GB Micro SD Card (Not Included)
Yes
Speed, G-Sensor Data
Yes
Yes
Yes - After Power On
12/24V Cig Lead
Built-in 500mAh Lithium Battery
Suction Bracket
2
YEAR
WARRANTY
Advertisement
Table of Contents

Related Manuals for Axis dvr2


Summary of Contents for Axis dvr2
- Page 1 DVR2 DUAL CAMERA HD DASH CAM with GPS GENERAL - Display: 2.7” LCD TFT - Image Sensor: 3 Megapixel (Front) - Resolutions: HD 720p (Front), 480p (Rear) - Display Format: 16:9 - Picture Format: JPEG - Functions: Digital Video Camera/Digital Voice Recorder - Viewing Angle: 120°...
-
Page 2: Table Of Contents
CONTENTS Preface ..................Page 3 Features..................Page 3 1. Product Structure ..............Page 4 2. Beginning to use DVR recorder .......... Page 6 a) Battery Charging b) Insert a memory card c) Adjust the lens position d) Turn on and o 3. -
Page 3: Preface
PREFACE This advanced DVR system has 3 exciting features: (1) Built-in double lens to simultaneously capture two images at front and back. (2) Newly added GPS module can record the whole driving route. Using specialized software, you can play the video on a computer and at the same time connect to Google Maps. -
Page 4: Product Structure
1. PRODUCT STRUCTURE... -
Page 6: Beginning To Use Dvr Recorder
2. Beginning to use DVR recorder a) Battery Charging There are two methods for battery charging: 1: Using the USB cable to connect the DVR to a computer. 2: Using the vehicle power socket. During charging, using the supplied cigarette power lead, the indicator glows blue. When charging is complete, the indicator automatically extinguishes. -
Page 7: B) Setup Menu
b) Setup menu Press MENU button to enter MENU page. Now the “Menu setting” is in blue background. In the menu setting page, click left and right keys to select the required elds. Click “OK” button to accept the settings. Press the MENU key to exit the menu. - Page 8 This DVR device does not support USB protocol. Computer access to the recorded le of this machine can be done by a device supporting TF card (such as a card reader). Notice: (1) For easy use and to avoid software damage, it is recommended that a backup be taken.
- Page 9 4. Select double lens channel: Clicking the ActiveX can select double lens channel of video playing: double lens / front lens / back lens. 5. Video on le: Select video le for save and click and click to pop up saving le path picture.
- Page 10 9. Google map: Click and the computer will connect to Google Maps via the Internet and show travel path. You can then trace the path of the vehicle. 10. Gravity Sensor: Click to watch the video on the computer and at the same time read and display the gravity sensing data, trace accidents and any abnormal events when driving.
-
Page 11: Reset Unit
5. Reset unit When the unit functions abnormally or freezes, press the reset button and then restart the unit. Now the original factory settings are restored. 6. Product features - Dual Lens: The front lens has a viewing angle of 120° that can be adjusted up and down 20°. - Page 12 DVR2...
Need help?
Do you have a question about the dvr2 and is the answer not in the manual?
Questions and answers