Unitech PA500 User Manual
Portable data collection terminal
Hide thumbs
Also See for PA500:
- Operation manual (123 pages) ,
- User manual (84 pages) ,
- Quick reference manual (55 pages)
Table of Contents
Advertisement
Quick Links
Advertisement
Table of Contents

Related Manuals for Unitech PA500


Summary of Contents for Unitech PA500
- Page 1 Portable Data Collection Terminal User Guide...
- Page 2 Unitech PA500 may not power-on due to battery discharge as a result of storage. In the above situation, plug the PA500 to the USB charging cable which is with DC in port or put the unit into the cradle or docking station (with 5V/3A AC-DC adapter), and recharge the unit for 16 hours in order to fully charge its backup battery.
- Page 3 Federal Communication Commission Interference Statement This equipment has been tested and found to comply with the limits for a Class B digital device, pursuant to Part 15 of the FCC Rules. These limits are designed to provide reasonable protection against harmful interference in a residential installation. This equipment generates, uses and can radiate radio frequency energy and, if not installed and used in accordance with the instructions,...
-
Page 4: Important Note
INFORMATION TO USER To assure continued compliance, any changes or modifications not expressly approved by the party responsible for compliance could void the user’ s authority to operate this equipment. IMPORTANT NOTE: This equipment complies with FCC radiation exposure limits set forth for an uncontrolled environment. -
Page 5: Table Of Contents
PA500 Tour Front View Rear View Left and Right View Top and Bottom View First Steps with PA500 Chapter 2 Hardware and Command Interface Using the Stylus Using the SDIO/MMC Slot Using the Laser Scanner Using the Software Keyboard Button... - Page 6 Accessing Programs Opening a Program Switching Between Programs Accessory Programs Scan2Key Scanner Settings Chapter 5 Customizing PA500 Adjusting Settings Checking Main and Backup Battery Status How to Save Battery Life Changing the Automatic Power Settings Adjusting Backlight Setting Resetting the Device...
-
Page 7: Chapter 1 Introduction
LCD with touch screen, keypad, IrDA interface, Bluetooth, and wireless communication capability. It provides the user with a standard Windows-based environment for customizing and operating the device. This PA500 product reference guide will guide you to access your PA500. Unitech PA500... -
Page 8: Pa500 & Accessories
Chapter 1 Introduction PA500 & Accessories After opening the box, please make sure the following accessories for the PA500 are present: Unitech PA500 Quick PA500 Main Body Reference Guide PA500 CD Battery pack Stylus USB charging cable Earphone AC adapter*... -
Page 9: Pa500 Features
PA500 Features Powerful System • Microsoft Windows Mobile 5.0 operating system • Intel PXA270 processor with speed of up to 520 MHz • System memory: • 64 MB SDRAM • 64 MB Flash ROM Display • 3.5” QVGA LCD touch-sensitive screen •... -
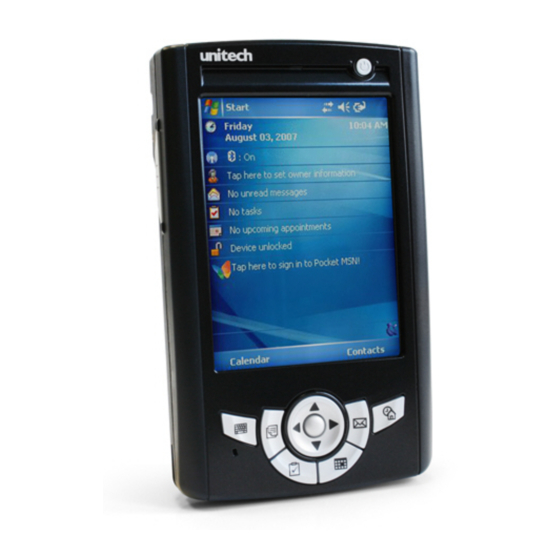
Page 10: Pa500 Tour
Chapter 1 Introduction PA500 Tour The following section gives you a tour of the PA500 hardware interface. Front View Component Description Power button If the device is off, press this button to turn it on. Alternatively, when the unit is on, this key must be pressed and held down for about two seconds in order to turn the device off. - Page 11 Component Description Today button Customize the look and information that is displayed on the Today screen. Calendar button Press to bring up Calendar. Calendar enables you to conveniently manage your schedules and appointments or any other activities associated with a date and time. Tasks button Keep track of what you have to do and prioritize them based on their importance and urgency.
-
Page 12: Rear View
Chapter 1 Introduction Rear View Component Description Speaker Listen to audio media. When speaker phone is active, sounds are emitted here. Strap holder Eyelet for holding strap. Reset button Press the end of the stylus into the button to reset your device. -
Page 13: Left And Right View
Left and Right View Component Description Infrared (IR) port Uses infrared technology to transmit and receive data from other IR-enabled devices. Right side scanner Press to activate the barcode laser scanner. trigger button Earphone jack Lift the rubber cover from the earphone jack and connect an audio line-out device (earphone or headphone). -
Page 14: Top And Bottom View
Chapter 1 Introduction Top and Bottom View Component Description Barcode laser Reads and captures information on a barcode scanner (optional) label. SDIO/MMC slot Accepts an SD (Secure Digital), MMC (Multimedia Card) or SDIO (Secure Digital Input Output) cards, allowing you to add more memory. Install add-on applications or use audio text files stored in it for use with internal applications. -
Page 15: First Steps With Pa500
First Steps with PA500 Perform the following easy installation steps to start using your device: Install the battery pack WARNING! There is a risk of fire and burns if the battery pack is handled improperly. DO NOT disassemble, crush, puncture, short external contacts, or dispose the battery pack in fire or water. - Page 16 Chapter 1 Introduction CAUTION: Operating the PA500 for the first time without the AC adapter, and without fully charging the backup battery may result in loss of data stored in RAM memory. NOTE: Data you enter may not be properly stored until the built-in backup battery has been adequately charged.
- Page 17 To charge the device using the docking station: (1) Plug the AC adapter cable into the power jack on the docking station. (2) Connect the AC adapter into an electrical outlet. (3) Slide the device into the docking station until it clicks into place. The connection is secure when the bottom edge of the device is aligned smoothly with the docking station, and the LED indicator on the device lights up red.
- Page 18 (1) Turn on your device by pressing the power button on the front panel. NOTE: The PA500 screen ships with a protective plastic film. You may remove this if desired by peeling from one corner. The screen will be more susceptible to scratching without the film, but will be more...
- Page 19 Start > Settings > System tab > Screen. The PA500 will prompt you to calibrate the unit by tapping a sequence of screen locations. Tap gently but firmly. When you have completed the series of taps, press the Action button to confirm it.
- Page 20 Chapter 1 Introduction...
-
Page 21: Chapter 2 Hardware And Command Interface
This chapter describes basic hardware procedures in using your PA500. Information on the device’s command interface is also discussed. Using the Stylus CAUTION: Never use anything other than the PA500 stylus on the screen. Using another object as a stylus could cause permanent damage. -
Page 22: Using The Sdio/Mmc Slot
Chapter 2 Hardware and Command Interface Using the SDIO/MMC Slot Your device has an expansion slot compatible with a range of SD, SDIO, and MMC storage cards, which are primarily used to back up or transfer files and data. To insert a storage card: Hold the device securely, then lift the rubber cover from the SDIO/ MMC slot. -
Page 23: Using The Laser Scanner
NOTE: The reading software must be enabled in order to operate the scanner. This can be a user-loaded application or a pre-loaded utility such as Scanner Settings. PA500 has a built-in Scanner Settings utility that allows you to test the device’s barcode scan function. To launch Scanner Settings: Tap Start >... - Page 24 Chapter 2 Hardware and Command Interface Tap Test tab. Activate the laser scanner by pressing either one of the trigger keys located on the left and right side of the unit. Aim the laser scanner at the selected barcode and press both trigger keys to scan.
-
Page 25: Using The Software Keyboard Button
Using the Software Keyboard Button The Windows CE software provides a touch screen keyboard for input of other characters. The Windows based keyboard replicates the layout of a standard PC keyboard. To open the Windows CE keyboard: Do either of the following: •... -
Page 26: Command Interface
Chapter 2 Hardware and Command Interface Command Interface Today Screen When you turn on your device for the first time each day or after a preset period of inactivity, you’ll see the Today screen. You can also display it by doing either of the following: •... - Page 27 To define a preset period of inactivity after which the Today screen is displayed: Tap Start > Settings. On the Personal tab, tap Today.
- Page 28 Chapter 2 Hardware and Command Interface On the Items tab, select the Today timeout check box. Tap the pick list beside the check box to set the period of inactivity. Tap OK. Today screen provides an at-a-glance view of the important reminders and details for the day.
-
Page 29: Status Icons
Description Turns all sounds on and off. Indicates Bluetooth wireless technology is on. Indicates that the main battery is charging. The PA500 is either plugged-in via the AC adapter or docking station. Indicates the main battery is fully charged. Indicates the main battery is low and needs to be charged. -
Page 30: Navigation Bar
Chapter 2 Hardware and Command Interface Navigation Bar The navigation bar is located at the top of the screen. It displays the active program and current time, and allows you to switch to other programs and close screens. Command Bar Use the command bar at the bottom of the screen to perform tasks in programs. -
Page 31: Pop-Up Menus
Pop-up Menus With pop-up menus, you can quickly choose an action for an item. The actions in the pop-up menus vary from program to program. To access a pop-up menu: Tap and hold the stylus on the item that you want to perform the action When the menu appears, lift the stylus, then do any of the following: •... -
Page 32: Notifications
Chapter 2 Hardware and Command Interface Notifications Your device reminds you in a variety of ways when you have something to do or receive a message. For example, if you’ve set up an appointment in Calendar, a task with a due date in Tasks, or an alarm in Clock, you’ll be notified in any of the following ways: •... - Page 33 (3) On the Notifications tab, select the kind of events you want to be notified of and the manner of notification you prefer. The options you choose here are applied globally in your device. (4) Tap OK.
- Page 34 Chapter 2 Hardware and Command Interface...
-
Page 35: Chapter 3 Getting Connected
Establishing Device-PC Connection Installing Microsoft ActiveSync In order to exchange data between your computer and PA500, Microsoft ActiveSync must be installed on your computer. The USB charging cable that comes with your device enables you to connect the device to your computer. -
Page 36: Connecting The Device To Your Computer
Plug the other end of the USB charging cable into a USB port on your computer. Turn the device on. After ActiveSync should start automatically and recognize your PA500 and configure the USB port. The New Partnership setup wizard will automatically start. - Page 37 Synchronization will be initialized and will take place if you’ve chosen to synchronize periodically or upon connection. NOTE: Your computer can create a partnership with multiple PA500. Also, the PA500 can create a partnership with up to two computers.
-
Page 38: Synchronizing With Your Computer
ActiveSync on your computer. If you accept the default (On Connect) synchronization option in the Microsoft ActiveSync Setup Wizard, you’ll be able to simply connect your PA500 to your desktop computer and sychronization will take place. If you have not enabled the On Connect feature in ActiveSync, you can start ActiveSync in either of the following ways: •... - Page 39 USB Connection To synchronize with your computer using USB connection: Open ActiveSync on your computer. Connect your device to your computer using the USB charging cable. See “Connecting the Device to Your Computer” on page 30. Initiate connection by tapping Start > Programs > ActiveSync. Tap Menu, then Connections.
- Page 40 Chapter 3 Getting Connected Infrared Connection The infrared (IR) port allows you to synchronize information with an infrared-enabled computer. Simply align the infrared port of your device with that on the computer. This method is ideal for quickly switching between multiple devices since there are no cables or adapters to change. Perform the steps below on your computer.
- Page 41 Bluetooth Connection Your device is equipped with Bluetooth wireless technology that you can use to synchronize information with a computer equipped with a Bluetooth adapter or access point. Bluetooth wireless technology allows you to communicate with the computer whenever it is within range. Perform the steps below on your computer.
- Page 42 Chapter 3 Getting Connected (b) Tap Bluetooth. (c) Tap Done. Using the Bluetooth program (a) Tap Start > Settings. (b) On the Connections tab, tap Bluetooth.
- Page 43 (c) On the Mode tab, select all the check boxes. (d) Tap Devices tab and create a Bluetooth partnership. Refer to page 47 for more information. (2) Make sure that the device and computer are within close range. (3) Initiate connection by tapping Start > ActiveSync > Menu > Connect via Bluetooth.
- Page 44 - Make sure you have remote access account. Ask your network administrator for assistance on setting up a wireless connection. - First establish ActiveSync partnership with the PA500 using serial, USB or Bluetooth connection. Perform the steps below on your computer.
- Page 45 Perform the steps below on your device. (1) Enable WiFi access on your device. Using Today screen (a) On the Today screen, tap WiFi. (b) Tap Wi-Fi to enable. (c) Tap Done.
- Page 46 Chapter 3 Getting Connected Using the Wireless Manager (a) Tap Start > Settings. (b) On the Connections tab, tap Wireless Manager. (c) Tap Wi-Fi to enable. (d) Tap Done.
- Page 47 (2) If there are networks already detected, tap and hold network name, then select Connect. If none, tap Add New and follow all onscreen instructions. (3) Under the Network to access drop-down menu, select Only computer-to-computer. (4) When finished, tap OK. For more information on how to configure the wireless network settings, tap Start >...
-
Page 48: Synchronizing Information
Chapter 3 Getting Connected Synchronizing Information By default, ActiveSync does not enable automatic synchronization of all types of information. To select the types of information you want synchronized, on either your device or your computer, go to Menu, then Options. This section gives you an overview of the types of Outlook information you can synchronize. - Page 49 Synchronizing Contacts • Contacts created on your device are copied to your computer or on a Microsoft Exchange server during synchronization, and vice versa. By default, all of your contacts will be synchronized. • Similarly, contacts that are deleted from your device are deleted from your computer and/or server during synchronization, and vice versa.
-
Page 50: Using Activesync To Exchange Files
Chapter 3 Getting Connected Using ActiveSync to Exchange Files You can use ActiveSync to exchange information from your device your computer and vice versa. Changes you make to the information on one location will not affect the information on the other one. If you want to automatically update information on both your device and computer, synchronize the information instead. -
Page 51: Sharing Information
Sharing Information You can use your PA500 to exchange information with other mobile devices and connect to your computer, a network, or the Internet. You have the following options: • Infrared connection • Bluetooth connection • WiFi connection • VPN connection •... - Page 52 Chapter 3 Getting Connected Align the IR port of your device with that of the IR-enabled device so that they are unobstructed and within a close range. Do any one of the following: • Tap and hold the item, then tap Beam Task on the pop-up menu. •...
- Page 53 Bluetooth connection Your device allows you to connect to a Bluetooth-enabled device, such as a handheld, headset, or computer. Once connected you can do the following: • Beam files and information in Calendar, Contacts, Notes, Tasks, Excel Mobile, Word Mobile, PowerPoint Mobile, and Pictures & Videos programs, to other Bluetooth-enabled device.
- Page 54 Chapter 3 Getting Connected Your device will search for other devices with Bluetooth capabilities and displays them in the device list. (4) Tap the name of the device in the list, then tap Next. (5) If you want to use a passkey, enter the alphanumeric passkey, then tap Next.
- Page 55 (7) In the “Select services to use from this device” list, select a service. (8) Tap Finish. Sending and receiving information via Bluetooth To send information via Bluetooth: Switch to the program where you created the item you want to send and locate the item in the list.
- Page 56 Ethernet will also function utilizing WLAN without any special wireless network software. With PA500 integrated WiFi, you can scan for existing wireless network access point or hot spot. Wireless network access point or hot spot can be found in homes and offices or public areas such as inside the airport, restaurant, coffee shops, hotels, subway stations, or campus.
- Page 57 If there are networks already detected, tap and hold network name, then select Connect. If none, tap Add New and follow all onscreen instructions. Under the Network to access drop-down menu, select from the following network connection options: • All available •...
- Page 58 Chapter 3 Getting Connected • Password • Domain name • TCP/IP settings • Host name or IP address of the VPN server Tap Start > Settings. On the Connections tab, tap Connections. On the Tasks tab, tap Add a new VPN server connection. Follow all onscreen instruction in the New Connection wizard.
-
Page 59: Connecting To The Internet
Connecting to the Internet Your PA500 allows you to connect to your ISP (Internet Service Provider) and use the connection to do the following: • Send and receive email messages • View the Internet and Intranet • Access Web pages •... - Page 60 Chapter 3 Getting Connected...
-
Page 61: Chapter 4 Managing Programs
Chapter 4 Managing Programs This chapter describes the procedures for launching programs. It also shows how to use the Scan2Key and Scanner Setting accessory programs. Accessing Programs Opening a Program You can open programs in any one of the following ways: •... -
Page 62: Accessory Programs
Chapter 4 Managing Programs Accessory Programs Scan2Key The Scan2Key application can route input from a scanner port to keypad buffer, so that all input from scanner will be treated as they are just input from touch screen keyboard. With this router, scanned data can be directly input into scanner port aware application, like MS Pocket Word. -
Page 63: Scanner Settings
To exit Scan2Key: Tap and hold the Scan2Key icon then tap Exit on the pop-up menu. The Quit Scan2Key dialog box appears. Tap Yes. Scanner Settings When it is necessary for the user to change the default barcode symbology for a different application, the Scanner Control Panel provides the ability to change default symbology. - Page 64 Chapter 4 Managing Programs On the Settings tab, tap the plus sign in front of Barcode Symbologies to expand and display the list of barcode symbologies. Below table lists the standard protocol for a particular type of barcode symbology. Check Transmit Transmit Barcode...
- Page 65 Check Transmit Transmit Barcode Enable/ Char/ Digit check start & Other Symbology Disable Verification char/digit stop bits EAN 128 Transmit code ID Fields separator EAN 13 Transmit leading char/ digit EAN 8 Transmit leading digit Interleaved Not Suppress start or 2 of 5 stop digit Fixed length...
- Page 66 Chapter 4 Managing Programs...
-
Page 67: Chapter 5 Customizing Pa500
Chapter 5 Customizing PA500 This chapter describes the procedures on how to adjust the settings of your device. Adjusting Settings You can adjust the settings of your device to suit the way you work. Adjusting certain settings, such as backlight, auto power off timer, system volume, and processor speed. -
Page 68: Checking Main And Backup Battery Status
NOTE: It is necessary to charge the main battery when the Low displayed. To prevent data loss, replace or recharge the device when the Very Low status icons are displayed. If both icons are still displayed after charging, pls. contact Unitech Technical Support. -
Page 69: How To Save Battery Life
Minimize use of backlight Changing the Automatic Power Settings The PA500 will enter idle mode when there is no task, or all tasks are waiting for input. In default setting, the PA500 will automatically turn itself off if it remains idle for 3 minutes and when there is no external charging power applied. -
Page 70: Adjusting Backlight Setting
This function can also be activated when the PA500 is plugged into the power adapter or placed in its docking station. On the Advanced tab, tap the “On external power turn off device if not used for”... - Page 71 On the System tab, tap Backlight. On the Battery Power tab, do either of the following: • Tap the “Turn off the backlight if device is not used for” check box and change the amount of time before the unit turns off the backlight while running in battery power mode.
- Page 72 Chapter 5 Customizing PA500 • Tap the “Turn on backlight when a button is pressed or the screen is tapped” check box.
-
Page 73: Resetting The Device
Resetting the Device There are three kinds of reset that you can perform on your device when the device’s operating system stops responding or the system becomes corrupted. Depending on the situation, a warm boot, clean boot, or cold boot can be performed. Warm Boot You may have to perform a warm boot if the device freezes (i.e., device no longer responds to the buttons on the screen). -
Page 74: Clean Boot
Chapter 5 Customizing PA500 Clean Boot A clean boot allows your device to load the main operating system and perform diagnostic tests to determine the boot process problems. To perform a clean boot: Hold down the right and left scanner trigger buttons. -
Page 75: Viewing Flash Rom Files
Flash ROM (read-only memory) is a rewritable storage for programs and data files. The benefit of this feature is that files and programs saved in Flash ROM are unaffected by the PA500 power status. To access the Flash Memory files: Connect the device to your computer. -
Page 76: Adding Programs
Programs bundled with your device at the factory are stored in Flash ROM. You cannot remove these programs, and you’ll never accidentally lose Flash ROM contents. Software programs and data files added to your PA500 after factory installation can be stored in RAM (random access memory). To add programs using ActiveSync: Before installing a program on your device, you must first install the appropriate software to your device on your computer. -
Page 77: Adding A Program To The Start Menu
• If the file is not an installer, you will see an error message stating the program is valid but is designed for a different type of computer. You will need to move this file to your device. If you cannot find any installation instructions for the program in the Read Me file or documentation, use ActiveSync Explore button to copy the program file to the Program Files folder on your device. - Page 78 Chapter 5 Customizing PA500 On the Personal tab, tap Menus. Select the check box for the programs you wish to add. If you do not see the program you want, you can either use File Explorer on your device to move the program to the Start Menu folder, or use ActiveSync on your computer to create a shortcut to the program and place the shortcut in the Start Menu folder.
- Page 79 Open the path: Windows | Start Menu | Programs. Tap and hold the program you want to add to the menu, then tap Cut on the pop-up menu. Open the path: Windows | Start Menu.
- Page 80 Chapter 5 Customizing PA500 Tap and hold a blank area of the screen, then tap Paste on the pop-up menu. A Confirm File Move dialog box appears, tap Yes. The program will now appear on the Start menu. To add a Start menu program using ActiveSync on your computer: In the ActiveSync on your computer, click Explore to explore your device’s files and locate the program.
-
Page 81: Removing Programs
your computer. Removing Programs Tap Start > Settings. On the System tab, tap Remove Programs. Tap the program you wish to remove. Tap the Remove button. If the program does not appear in the list of installed programs, use File Explorer on your device to locate the program: Tap and hold the program. - Page 82 Chapter 5 Customizing PA500...
-
Page 83: Chapter 6 Regulatory And Safety Notices
Chapter 6 Regulatory and Safety Notices This chapter lists the specifications and regulatory and safety notices of PA500. System Specifications CPU/Memory Intel PXA270 processor with speed of up to 520 MHz Flash ROM 64 MB Built-in (Flash Memory Manager included) - Page 84 Chapter 6 Regulatory and Safety Notices Input/Output Scan Engine • Light Source: Visible Laser Diode(VLD) 650 nm. • Min. print contrast: 25% absolute dark/light reflectance at 650 nm • Power Consumption: 65 mA typical@5 V Connectivity • USB port • SDIO/MMC slot Wireless connectivity •...
-
Page 85: Power
Power Main battery Standard battery: 3.7 V, 2200 mAh Battery life 6 hours Battery charge • 3.5 hours with external AC adapter • 3.5 hours with docking station Backup battery One hour data retaining time when main battery is removed Power management •... -
Page 86: Barcode/Symbology
Chapter 6 Regulatory and Safety Notices Barcode/Symbology Barcode Scanner Symbol SE950 Symbology • Bookland EAN • EAN 8 • Codabar • Interleaved 2 of 5 • Code 11 • Label Code IV & V • Code 128 • MSI/Plessy • Code 32 (Pharmacy •... -
Page 87: Regulatory Compliance Statements
89/336/ EEC directives. Laser Information The Unitech PA500 series is certified in the U.S. to conform to the requirements of DHHS/CDRH 21CFR Subchapter J and to the requirements of IEC 825-1. Class II and Class 2 products are considered to be hazardous. - Page 88 Chapter 6 Regulatory and Safety Notices...
-
Page 89: Index
Bluetooth sharing connect to email server synchronizing connect to network infrared infrared activate receive items WiFi send items customize features installing remove program battery pack customizing PA500 Microsoft ActiveSync add programs interface adjusting settings command check backup battery status hardware... - Page 90 Index Internet Scan2Key connect Scanner Settings introduction SDIO/MMC slot sharing information Bluetooth laser information infrared laser scanner options LED status WiFi software keyboard manage programs specifications accessing barcode symbology accessory programs opening a program input/output switching between programs mechanical environmental Microsoft ActiveSync installing memory...
- Page 91 WiFi set up set up...
- Page 92 Index...
Need help?
Do you have a question about the PA500 and is the answer not in the manual?
Questions and answers