
Related Manuals for Basler DGC-500


Summary of Contents for Basler DGC-500
- Page 1 INSTRUCTION MANUAL DIGITAL GENSET CONTROLLER DGC-500 Publication: 9355400990 Revision: H 02/14...
- Page 3 NOTE Be sure that the DGC-500 is hard-wired to earth ground with no smaller than 12 AWG copper wire attached to the ground terminal on the rear of the unit case. When the DGC-500 is configured in a system with other devices, it is recommended to use a separate lead to the ground bus from each unit.
- Page 4 Illinois corporation. It is loaned for confidential use, subject to return on request, and with the mutual understanding that it will not be used in any manner detrimental to the interests of Basler Electric Company and used strictly for the purpose intended.
- Page 5 REVISION HISTORY The following information provides a historical summary of the changes made to the DGC-500 hardware, firmware, and software. The corresponding revisions made to this instruction manual (9355400990) are also summarized. Revisions are listed in reverse chronological order. BESTCOMS Software...
- Page 6 Added information about ECU contact configuration and pulsing settings. • Changed all “Volvo Penta EDC” references to “Volvo Penta EDC III”. • Added J1939 interface parameters to Appendix C, DGC-500 Settings Record. • E, 09/04 Added text and illustrations describing added real-time clock, generator run statistics, event log, and generator protection functions.
- Page 7 Revised the maximum setting of Sender Failure Alarm Time from 10 seconds to 30 seconds in Tables 3-1 and 3-2. • Replaced actual BESTCOMS version number in Figure 4-2 with generic version number. • —, 02/02 Initial release 9355400990 Rev H DGC-500 Introduction...
- Page 8 This page intentionally left blank. DGC-500 Introduction 9355400990 Rev H...
-
Page 9: Table Of Contents
SECTION 5 • INSTALLATION ........................5-1 SECTION 6 • MAINTENANCE AND TROUBLESHOOTING ..............6-1 APPENDIX A • TIME OVERCURRENT CHARACTERISTIC CURVES ........... A-1 APPENDIX B • PARAMETERS AND SETTINGS ..................B-1 APPENDIX C • SETTINGS RECORD ...................... C-1 9355400990 Rev H DGC-500 Introduction... - Page 10 This page intentionally left blank. viii DGC-500 Introduction 9355400990 Rev H...
- Page 11 Type Tests ............................1-6 UL Recognition ........................... 1-6 CSA Certification ..........................1-6 NFPA Compliance ..........................1-7 Physical .............................. 1-7 Figures Figure 1-1. Style Number Identification Chart ................... 1-2 Table Table 1-1. Special-Order DGC-500 Controllers ..................1-3 9355400990 Rev H DGC-500 General Information...
- Page 12 This page intentionally left blank. DGC-500 General Information 9355400990 Rev H...
-
Page 13: Section 1 • General Information
Front panel controls and indicators enable quick and simple DGC-500 operation. Basler Electric communication software (BESTCOMS-DGC500-32) allows units to be easily customized for each application. Because of the low sensing burden in the DGC-500, neither dedicated potential transformers (PTs) nor current transformers (CTs) are required. A wide temperature-range liquid crystal display (LCD) with backlighting can be viewed under a wide range of ambient light and temperature conditions. -
Page 14: Part Numbers
1…. Multifunction generator protection The DGC-500 style number is printed on a label located on the circuit board near the voltage and current input connections. Upon receipt of a unit, be sure to check the style number against the requisition and the packing list to ensure that they agree. -
Page 15: Specifications
Table 1-1. Special-Order DGC-500 Controllers Part Number Style Number Special Features 9355400111 F5J0 400 Hz nominal frequency 9355400112 F1J0 9355400127 F5J1 9355400128 F1J1 9355400113 F5J0 cURus recognized for use in hazardous locations 9355400114 F1J0 9355400129 F5J1 9355400130 F1J1 SPECIFICATIONS Current Sensing ±1% of full scale or ±2 A, whichever is greater... -
Page 16: Engine System Inputs
Pickup Range: 70 to 576 Vac Pickup Increment: 1 Vac Inhibit Frequency Range: 20 to 400 Hz (applies to 27 function only) Time Delay Range: 0 to 30 s Time Delay Increment: 0.1 s DGC-500 General Information 9355400990 Rev H... -
Page 17: Output Contacts
Data Bits: Parity: None, Odd, or Even Stop Bit: SAE J1939 Interface Differential Bus Voltage: 1.5 to 3 Vdc Maximum Voltage: –32 to 32 Vdc (with respect to negative battery terminal) Communication Rate: 250 kb/s 9355400990 Rev H DGC-500 General Information... -
Page 18: Environment
RS-232 Port: 6 mA UL Recognition All DGC-500 controllers are UL recognized per Standard 508, Standard for Industrial Control Equipment (UL File E97035). Part Numbers 9355400113 and 9355400114 cURus recognized per Standard 1604, Electrical Equipment for Use in Class I and II, Division 2, and Class III Hazardous (Classified) Locations, Class I, Division 2, Groups A, B, C, D, Zone 2, Temperature Code T5. -
Page 19: Nfpa Compliance
NFPA Compliance All DGC-500 controllers comply with NFPA Standard 110, Standard for Emergency and Standby Power Systems. Physical Weight: 680 g (1.5 lb) 9355400990 Rev H DGC-500 General Information... - Page 20 This page intentionally left blank. DGC-500 General Information 9355400990 Rev H...
- Page 21 REAR PANEL ............................2-2 Figures Figure 2-1. Front Panel HMI ........................2-1 Figure 2-2. Rear Panel HMI ........................2-3 Tables Table 2-1. Front Panel HMI Descriptions ....................2-2 Table 2-2. Rear Panel HMI Descriptions ....................2-4 9355400990 Rev H DGC-500 Human-Machine Interface...
- Page 22 This page intentionally left blank. DGC-500 Human-Machine Interface 9355400990 Rev H...
-
Page 23: Section 2 • Human-Machine Interface
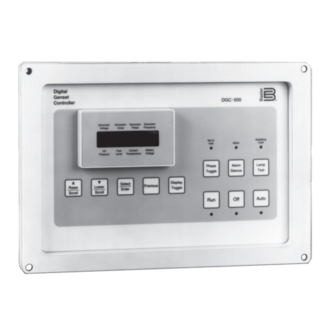
(controls and indicators) and the rear panel (terminals and connectors). FRONT PANEL Figure 2-1 illustrates the front panel HMI of the DGC-500. Table 2-1 lists the call-outs of Figure 2-1 along with a description of each HMI component. Figure 2-1. Front Panel HMI... -
Page 24: Rear Panel
Parameters mode, the LCD scrolls through genset parameters (metered from the ECU) and engine configuration parameters. Not in Auto Indicator. This red LED lights when the DGC-500 is not operating in Auto mode. Phase Toggle Pushbutton. Pressing this control scrolls through the parameters available in Normal display mode. - Page 25 Figure 2-2. Rear Panel HMI 9355400990 Rev H DGC-500 Human-Machine Interface...
-
Page 26: Table 2-2. Rear Panel Hmi Descriptions
Contact Sensing Terminals P35 (+), P37 (–) ESTOP. These terminals function as the Emergency Stop input. Power is removed from all DGC-500 output relays when this input is open. P2, P3, P4 PROG INPUT1, PROG INPUT2, PROG INPUT3. These three inputs... - Page 27 DGC-500 setup. A standard serial cable connects the DGC-500 to a PC. Output Contact Terminals K1-N.O., K1-COM CRANK. This output is closed when the DGC-500 is initiating engine cranking. K2-N.O., K2-COM FUEL. This output closes when engine cranking is initiated and remains closed until a stop command is received by the DGC-500.
- Page 28 This page intentionally left blank. DGC-500 Human-Machine Interface 9355400990 Rev H...
-
Page 29: Section 3 • Functional Description
SECTION 3 • FUNCTIONAL DESCRIPTION TABLE OF CONTENTS SECTION 3 • FUNCTIONAL DESCRIPTION ................... 3-1 INTRODUCTION............................ 3-1 DGC-500 FUNCTION BLOCKS ......................3-1 Power Supply ............................. 3-1 Microprocessor ........................... 3-1 Voltage Sensing Inputs ........................3-2 Current Sensing Inputs ........................3-2 Transducer Inputs ..........................3-2 Speed Signal Inputs ........................... - Page 30 Table 3-1. ECU Parameters Obtained from CAN Interface ............... 3-5 Table 3-2. Engine Configuration Parameters Obtained from CAN Interface ..........3-6 Table 3-3. Diagnostic Information Obtained Over the CAN Interface ............3-7 Table 3-4. Front Panel Adjustable Settings ..................... 3-26 DGC-500 Functional Description 9355400990 Rev H...
-
Page 31: Section 3 • Functional Description
The internal, switch-mode power supply uses the applied battery voltage to generate operating power for the internal circuitry of the DGC-500. The power supply accepts a nominal battery voltage of 12 or 24 Vdc and has an operating range of 8 to 32 Vdc. Battery voltage is applied to terminals P20 (+) and P21 (–). -
Page 32: Voltage Sensing Inputs
P15 and P17 (C-phase). Transducer Inputs Programmable transducer inputs give the DGC-500 user the flexibility to select the transducer to be used in an application. Information about programming the transducer inputs is provided in Section 4, BESTCOMS Software. -
Page 33: Speed Signal Inputs
Speed Signal Inputs The DGC-500 uses signals from the voltage sensing inputs and magnetic pickup input to detect machine speed. Voltage Sensing Inputs Generator voltage applied to the DGC-500 voltage sensing inputs is used to measure frequency and can be used to measure machine speed. -
Page 34: Remote Display Panel
• Fuel leak/fuel level sender failure • Overcrank • Engine sender unit failure Additionally, the RDP-110 indicates when the DGC-500 is not operating in Auto mode and when the generator is supplying load. For more information about the RDP-110, request Basler Product Bulletin SNE-2. - Page 35 °C °F Intake manifold temperature 500 ms none Air filter differential pressure 500 ms °C °F Exhaust gas temperature 500 ms Battery voltage Switched battery voltage (at ECU) ∗ SPN is Suspect Parameter Number. 9355400990 Rev H DGC-500 Functional Description...
- Page 36 † SPN is Suspect Parameter Number. CAUTION When the CAN interface is enabled, the DGC-500 will ignore the following sender inputs: oil pressure, coolant temperature, and magnetic pickup. Diagnostic Trouble Codes (DTCs) The DGC-500 obtains the diagnostics condition of the transmitting electronic components. The DGC-500 will receive an unsolicited message of a currently active diagnostic trouble code (DTC).
-
Page 37: Horn Output
Crank This output closes when engine cranking is initiated by the DGC-500. The length of time that the contacts remain closed is determined by the cranking style selected (either continuous or cycle). Cranking continues until the magnetic pickup or generator frequency indicates that the engine has started. -
Page 38: Software Operation
Power-Up Sequence When battery power is applied, the DGC-500 initiates a power-up sequence. During power-up, DGC-500 memory is checked and the LCD displays the embedded software version followed by a prompt to set the real-time clock. -
Page 39: Pre-Alarms
A maximum of seven cranking cycles (five cycles for NFPA compliant units) are allowed by the DGC-500. A crank disconnect limit setting (10 to 100% of nominal engine speed) selects the desired engine speed above which cranking is terminated. -
Page 40: Alarms
BESTCOMS. When configured to alarm, annunciation occurs when CAN communication stops due to a lost connection between the DGC-500 and ECU, or an ECU malfunction. If CAN communication is lost and the annunciation is a pre-alarm, a screen stating the pre-alarm will appear in the Alternate Display menu. -
Page 41: Real-Time Clock
BESTCOMS. When configured to pre-alarm, annunciation occurs when CAN communication stops due to a lost connection between the DGC-500 and ECU, or an ECU malfunction. If CAN communication is lost and the annunciation is configured as an alarm, then a normal alarm sequence will occur, including a CANBUS FAILURE message that appears on the HMI display. -
Page 42: Generator Run Statistics
Run Statistics screen of BESTCOMS. When the DGC-500 and/or genset are commissioned, a date is entered for the DGC-500 to use as a starting point for tracking generator run statistics. The logs for session run and cumulative run statistics track loaded run hours, unloaded run hours, and total run hours. - Page 43 An overvoltage annunciation can also be user-configured to close one or both of the programmable outputs. When a Single-Phase Override contact input is received, the DGC-500 automatically switches from the three-phase overvoltage settings to the single-phase overvoltage settings. Undervoltage (27) Two sets of undervoltage settings are provided: one for three-phase generator connections and one for single-phase generator connections.
-
Page 44: Display Operation
An overcurrent annunciation can also be user-configured to close one or both of the programmable outputs. When a Single-Phase Override contact input is received by the DGC-500, the overcurrent pickup setting automatically switches from the three-phase overcurrent setting to the single-phase overcurrent setting. - Page 45 Alternate mode display list. If there are no DTCs to be sent to the DGC-500, pressing the Select/Enter pushbutton will have no effect, and the messages ACTIVE DTC LIST and NO DTCS TO VIEW will be displayed. If at least one DTC is communicating with the DGC-500, pressing the Select/Enter pushbutton will display ACTIVE DTC LIST and VIEW WITH SELECT.
-
Page 46: Ecu Parameters Mode
If a parameter is never sent after communication is established, or the ECU has sent information notifying the DGC-500 that the parameter is not supported (non-applicable), then the parameter’s screen will be hidden and skipped when scrolling from screen to screen in the ECU Parameters menu. - Page 47 30. Previously active diagnostic codes 15. Engine oil level ∗ This parameter may be monitored either directly by the DGC-500 itself or by the DGC-500 and the appropriate analog sender when the SAE J1939 interface is disabled. Figure 3-6 illustrates the screens of the ECU Parameters menu after the DGC-500 has established communication with the ECU.
- Page 48 18. Requested torque control range lower limit 10. Percent torque at point 5 19. Requested torque control range upper limit Figure 3-7 illustrates the Engine Configuration Parameter menus after the DGC-500 has established communication with the ECU. 3-18 DGC-500 Functional Description...
-
Page 49: Menu Mode
Within Menu 1, 2, 3, 4, or 5, use the Select/Enter pushbutton to move right, the Previous pushbutton to move left, the Raise/Scroll pushbutton to move up, and the Lower/Scroll pushbutton to move down. Figure 3-8. Menu Mode Navigation 9355400990 Rev H DGC-500 Functional Description 3-19... - Page 50 Menu mode is entered. Sleep Mode Sleep mode serves as a power saving feature. If the DGC-500 is in Off mode for more than 15 minutes, the front panel LEDs, LCD, and LCD backlight are turned off. The DGC-500 resumes normal display operation when any front panel button is pressed or the genset is started remotely via the ATS input.
- Page 51 Figure 3-9. Menu 1 Navigation 9355400990 Rev H DGC-500 Functional Description 3-21...
- Page 52 Figure 3-10. Menu 2 Navigation 3-22 DGC-500 Functional Description 9355400990 Rev H...
- Page 53 Figure 3-11. Menu 3 Navigation 9355400990 Rev H DGC-500 Functional Description 3-23...
- Page 54 Figure 3-12. Menu 4 Navigation Figure 3-13. Menu 5 Navigation 3-24 DGC-500 Functional Description 9355400990 Rev H...
-
Page 55: Changing Settings
The time and date setting screen is exited by pressing Select/Enter. The user can then press Select/Enter to save the settings or Previous to discard the changes. Key Code The DGC-500 is delivered with a key code consisting of the following pushbutton sequence. 1. Raise/Scroll 5. Display Toggle 2. -
Page 56: Front Panel Adjustable Parameters
Front Panel Adjustable Parameters Most DGC-500 settings can be viewed at the front panel display. The settings that can be adjusted at the front panel are listed in Table 3-4. With the exception of the time and date, all of the listed settings are protected by the front-panel key code. -
Page 57: Alarms And Pre-Alarms
ECU when going from Running to Shutdown before starting the first pulse. This timer should allow enough time for the engine to slow down so that when the DGC-500 pulses, the ECU will not restart the engine. -
Page 58: Ecus With An External Fuel Solenoid
DGC-500 will not pulse the ECU. The same goes for Connecting, except that the DGC-500 remembers if it skipped the Connecting state. If it did, then the DGC-500 will also skip the Engine Shutting Down state when it stops the engine. -
Page 59: State Transitions
• LED output is controlled by the system configuration setting, active alarm/pre-alarms, and by the supplying load criteria. • The LCD is controlled by the value of data being displayed, the state of the DGC-500, and by the viewing mode (Normal, Alternate Display, ECU Parameters, or Menu). -
Page 60: Initial State - Power Up/Reset
Initial State - Power Up/Reset This state begins after cycling power to the DGC-500, or after a software reset (i.e. a watchdog timeout) has occurred. The unit will stay in reset for a short time. During this time, the firmware version number appears on the front panel LCD and the DGC-500 averages out enough data counts to calculate accurate analog data. -
Page 61: Ready State
Going to Off or Auto-Off If the DGC-500 is in the Connecting, Pre-Start, Resting or Cooling state when the unit goes to Off or Auto- Off mode, then the state will transition to the Ready state. If ECU support is enabled, then the unit will go to the Pulsing state immediately after transitioning to the Ready state. -
Page 62: Pulsing State
The Pulsing State follows the sequence of events shown in Figure 3-20. The Pulsing state will momentarily power up the ECU to update the DGC-500 internal variables. Once a connection is established with the ECU, GATHERING DATA will appear on the LCD for the duration of the settling time. -
Page 63: Cranking State
Power Support diagram is being followed, engine speed is checked to see if it is above crank-disconnect. If it is, the unit will transition into the Running state. Figure 3-24 illustrates the Resting State flowchart. 9355400990 Rev H DGC-500 Functional Description 3-33... - Page 64 After the Cool-Down timer expires, if the unit is following the ECU Power Support diagram, the state will transition to the Shutting Down state. Otherwise, it will go to the Ready state. Figure 3-26 illustrates the Cooling state flowchart. 3-34 DGC-500 Functional Description 9355400990 Rev H...
- Page 65 ECU to not have power to update the internal variables. To clear an alarm in this event, the user must remotely place the unit in Off mode through BESTCOMS or go from Auto-Off to Off via the front panel HMI to force a pulse of the ECU. 9355400990 Rev H DGC-500 Functional Description 3-35...
- Page 66 Figure 3-28. Alarm State Diagram 3-36 DGC-500 Functional Description 9355400990 Rev H...
-
Page 67: Section 4 • Bestcoms Software
TABLE OF CONTENTS SECTION 4 • BESTCOMS SOFTWARE ....................4-1 INTRODUCTION............................ 4-1 INSTALLATION............................4-1 Installing DGC-500 BESTCOMS ......................4-1 Connecting the DGC-500 and PC ...................... 4-1 STARTING BESTCOMS ........................4-1 Establishing Communication ......................4-1 Establishing Communication ......................4-2 CHANGING SETTINGS ......................... 4-2 SENDING AND RECEIVING SETTINGS .................... - Page 68 Figure 4-24. Run Statistics Screen ......................4-22 Figure 4-25. Event Log Screen ........................ 4-23 Figure 4-29. Embedded Firmware Upgrade Dialog Box ................. 4-26 Figure 4-30. Firmware File Information ....................4-27 Figure 4-31. File Transfer Status ......................4-27 DGC-500 BESTCOMS Software 9355400990 Rev H...
-
Page 69: Section 4 • Bestcoms Software
Connect a communication cable between the rear RS-232 connector of the DGC-500 and the appropriate communication port of the PC. Refer to Figure 2-2 for the location of the DGC-500 RS-232 connector and Figure 5-4 for the required connections between the DGC-500 and a PC. -
Page 70: Establishing Communication
DGC-500. The following paragraphs describe how settings are sent to the DGC-500. -
Page 71: Sending And Receiving Settings
When communication is enabled, DGC-500 settings can be sent or received through BESTCOMS. Sending Settings Setting changes are sent to the DGC-500 by clicking the Send Settings button. This causes all settings to become the DGC-500 settings. Settings can also be sent to the DGC-500 by clicking Communications on the menu bar and clicking Send to DGC. -
Page 72: Pre-Alarms
Battery Over Voltage Pre-Alarm - Threshold (Volts). This read-only setting displays the voltage level that will trigger a battery overvoltage pre-alarm. The threshold setting is fixed at 15 Vdc for systems operating at 12 Vdc and 30 Vdc for systems operating at 24 Vdc. DGC-500 BESTCOMS Software 9355400990 Rev H... - Page 73 A time delay of 1 to 10 seconds may be entered. Audible-Fuel Level Sender Tab The Audible-Battery Charger-Fuel Level Sender Tab settings are shown in Figure 4-8. Each tab setting is described in the following paragraphs. 9355400990 Rev H DGC-500 BESTCOMS Software...
- Page 74 Maint. Interv.-Hi Cool Tab The Maint. Interv.-Hi Cool Tab settings are shown in Figure 4-9. Each tab setting is described in the following paragraphs. Figure 4-9. Pre-Alarms Screen, Maint. Interv.-Hi Cool Tab DGC-500 BESTCOMS Software 9355400990 Rev H...
-
Page 75: Alarms
Figure 4-10. Pre-Alarms Screen, CAN Bus-Diagnostic Trouble Codes Loss of ECU Communication - Pre-Alarm Selection. This setting enables annunciation of a pre-alarm when communication between the DGC-500 and engine control unit (ECU) is interrupted. Diagnostic Trouble Code Pre-Alarm. This setting enables and disables annunciation of a diagnostic trouble code (DTC) pre-alarm. - Page 76 The Overspeed-Sender Fail Tab settings are shown in Figure 4-12. Each tab setting is described in the following paragraphs. Overspeed Alarm - Alarm Enable. This setting enables and disables alarm annunciation and engine shutdown for an overspeed condition. DGC-500 BESTCOMS Software 9355400990 Rev H...
-
Page 77: Engine Cranking
Cranking Style. This setting selects the cranking method as either continuous or cycle. Crank Disconnect Limit (% of Rated). This setting selects the percentage of rated engine speed at which cranking is terminated. A disconnect limit of 10 to 100 percent may be entered. 9355400990 Rev H DGC-500 BESTCOMS Software... -
Page 78: System
Maintenance Interval Timer Reset. Selecting this checkbox terminates the maintenance interval pre-alarm and resets the maintenance interval timer back to the programmed value. The Send Settings button must be clicked for the reset to take effect. 4-10 DGC-500 BESTCOMS Software 9355400990 Rev H... - Page 79 Front Panel Sleep Mode Enabled. Selecting this checkbox enables the activation of Sleep mode when the DGC-500 is in Off mode for more than 15 minutes. When Sleep mode is active, the front panel LEDs, LCD, and LCD backlight are turned off to reduce power consumption.
-
Page 80: Programmable Inputs And Outputs
120 rpm above the base speed. The Accelerator Position setting is linear with a gain of 2.4 rpm/%. This setting in not saved in nonvolatile memory and defaults back to 50% after DGC-500 operation power is cycled. This setting is enabled only when Volvo Penta is selected as the Start/Stop Config. - Page 81 Programmable Output 1 or 2. An output selected by clicking the checkbox in the appropriate row and column. The following pre-alarms, alarms, and conditions can be assigned to one of the two programmable outputs. 9355400990 Rev H DGC-500 BESTCOMS Software 4-13...
-
Page 82: Generator Protection
Weak Battery Voltage Pre-alarm Generator Protection Multifunction generator protection is provided on DGC-500 controllers with a style number of XXX1. Click the Gen Protect button to access the Generator Protection screen or click Screens on the menu bar and click Generator Protection. The Generator Protection screen consists of five tabs: 51, 47, 27, 59, and 81. - Page 83 • I1, Inverse Single Phase – 51 Alarm Configuration. This setting selects how a single-phase overcurrent condition is annunciated. An overcurrent condition can be configured to trigger a pre-alarm, alarm, or no annunciation. 9355400990 Rev H DGC-500 BESTCOMS Software 4-15...
- Page 84 47 – Alarm Configuration. This setting selects how a phase imbalance condition is annunciated. A phase imbalance condition can be configured to trigger a pre-alarm, alarm, or no annunciation. 27 Tab the 27 tab contains the undervoltage settings shown in Figure 4-19 and described in the following paragraphs. 4-16 DGC-500 BESTCOMS Software 9355400990 Rev H...
- Page 85 An undervoltage condition can be configured to trigger a pre-alarm, alarm, or no annunciation. 59 Tab The 59 tab contains the overvoltage settings shown in Figure 4-20 and described in the following paragraphs. 9355400990 Rev H DGC-500 BESTCOMS Software 4-17...
- Page 86 An overvoltage condition can be configured to trigger a pre-alarm, alarm, or no annunciation. 81 Tab The 81 tab contains the underfrequency and overfrequency settings shown in Figure 4-21 and described in the following paragraphs. 4-18 DGC-500 BESTCOMS Software 9355400990 Rev H...
-
Page 87: Real-Time Clock
4-22). Click Configure on the menu bar and click Real Time Clock. To set the DGC-500 real-time clock with the PC's time and date settings, perform the following steps. 1. Click the Display PC Date and Time button. The PC clock settings are displayed in the date and time fields. -
Page 88: Programmable Senders
2. Select the Automatically adjust for Daylight Savings Time check box if automatic compensation for daylight savings time is desired. 3. Click the Send Settings to DGC button to set the DGC-500 real-time clock with the PC's time and date. -
Page 89: Fuel Level Type
Reset Factory Settings. Clicking this button restores the factory-default data points in the Degrees F/Degrees C column and graph. This does not update the data points in the DGC-500. The DGC-500 is updated by clicking the Send Cool. Data to DGC button. -
Page 90: Event Log
The number of engine starts and time remaining until maintenance is also displayed. Each field in the Cumulative Run Statistics area can be adjusted by the user and sent to the DGC-500 by clicking the Update DGC Cumulative Run Statistics button. -
Page 91: Settings Files
A printout of DGC-500 settings can be useful for record keeping or comparison purposes. Click the Print Settings File button or click File on the menu bar and click Print to access the Print DGC-500 Settings screen. This print screen contains a print-preview pane and settings for selecting the printer, content of the printout, and printout orientation. -
Page 92: Opening Settings Files
Opening Settings Files To open a DGC-500 settings file, click the Open Settings File button or click File on the menu bar and click Open. An Open dialog box will appear and enable you to select a DGC-500 settings file (DG5 extension) for retrieval into BESTCOMS. -
Page 93: Password Protection
5,500 to 30,000 milliseconds. ECU Related Time Values – Pulse Cycle Time (Min.). This setting adjusts the time that the DGC-500 waits to pulse the ECU again. The Pulse Cycle Time setting range is 1 to 60 minutes. -
Page 94: Embedded Firmware
Updating the Firmware Future enhancements to DGC-500 functionality may make a firmware update desirable. Because default settings are loaded when DGC-500 firmware is updated, your settings should be saved in a file prior to CAUTION If power is lost or communication is interrupted during file transfer, the DGC-500 will not recover and will cease operating. - Page 95 Before You Continue!!!! dialog boxes appear and confirm that you want to continue. Click Yes in both dialog boxes to begin transferring the firmware file to the DGC-500. The file transfer status is displayed in the Embedded Firmware Upgrade dialog box (Figure 4-31).
-
Page 97: Section 5 • Installation
Figures Figure 5-1. DGC-500 Cutout Dimensions ....................5-1 Figure 5-2. DGC-500 Overall Dimensions ....................5-2 Figure 5-3. DGC-500 Communication Port Pin Assignments ..............5-3 Figure 5-4. Personal Computer to DGC-500 Connections ................ 5-4 Figure 5-5. CAN Cable Assembly ......................5-4 Figure 5-6. - Page 98 This page intentionally left blank. DGC-500 Installation 9355400990 Rev H...
-
Page 99: Section 5 • Installation
Inspect for damage, and if there is evidence of such, immediately file a claim with the carrier and notify the Basler Electric Regional Sales Office, your Sales Representative, or a Sales Representative at Basler Electric, Highland, Illinois. -
Page 100: Dgc-500 Isolator Kit
The optional DGC Isolator Kit provides an economical way to reduce the level of shock and vibration transmitted from a generator to the DGC-500. The DGC Isolator Kit eliminates the need to mount an isolator box on top of the generator conduit box and simplifies wiring considerations. Isolator kits are available with either black- or gray-colored gaskets. -
Page 101: Connections
DGC-500 will not operate. DGC-500 Terminations All DGC-500 terminals are located on the rear panel of the controller. There are three types of interface terminals. J1, a DB9 connector, is used as a temporary communication interface with IBM compatible PCs. -
Page 102: Can Connections
Drain Uninsulated Wire † ∗ If the DGC-500 is not providing one end of the J1939 backbone, cut the jumper connected across pins 1 and 2 to disconnect the internal terminating resistor. † The J1939 drain (shield) should be grounded at one point only. If grounded elsewhere, cut the drain connection to the DGC-500. -
Page 103: Dgc-500 Connections For Typical Applications
Figure 5-6. Typical DGC-500 CAN Interface Connections DGC-500 Connections for Typical Applications Figures 5-7 through 5-9 illustrate typical applications using the DGC-500. Figure 5-7 shows a DGC-500 application using single-phase sensing. Figure 5-8 shows a DGC-500 application using three-phase, delta sensing. - Page 104 Figure 5-7. DGC-500 Connections, Single-Phase, A-B DGC-500 Installation 9355400990 Rev H...
- Page 105 Figure 5-8. DGC-500 Connections, Single-Phase, A-C 9355400990 Rev H DGC-500 Installation...
- Page 106 Figure 5-9. DGC-500 Connections, Three-Phase Delta DGC-500 Installation 9355400990 Rev H...
- Page 107 Figure 5-10. DGC-500 Connections, Three-Phase Wye 9355400990 Rev H DGC-500 Installation...
-
Page 108: Volvo Penta Edc Iii Applications
The interconnection diagrams of Figures 5-11 through 5-14 illustrate the DGC-500 and EDC III connections that allow the DGC-500 to awaken the EDC III and start the engine, or simply acquire engine status information. Wake-up of the EDC III is initiated by using the DGC-500 Fuel output contacts to apply battery power to the EDC. - Page 109 Figure 5-11. Volvo Penta EDC III Application, Single-Phase, A-B Connections 9355400990 Rev H DGC-500 Installation 5-11...
- Page 110 Figure 5-12. Volvo Penta EDC III Application, Single-Phase, A-C Connections 5-12 DGC-500 Installation 9355400990 Rev H...
- Page 111 Figure 5-13. Volvo Penta EDC III Application, Three-Phase, Delta Connections 9355400990 Rev H DGC-500 Installation 5-13...
- Page 112 Figure 5-14. Volvo Penta EDC III Application, Three-Phase, Wye Connections 5-14 DGC-500 Installation 9355400990 Rev H...
-
Page 113: Special Contact Sensing Input Considerations
Figure 5-15. Contact Sensing Input Connections with Noise Suppression Diodes CALIBRATION Prior to delivery, each DGC-500 is factory calibrated and subjected to thorough testing to ensure quality, accuracy, and performance. DGC-500 units should not require field calibration. However, the following procedure is provided for those users desiring to perform field calibration of their DGC-500. -
Page 114: Entering Calibration Mode
Figure 5-16. Calibration Mode Navigation Calibration Procedure Once calibration is enabled, the following steps are performed to calibrate the DGC-500. After each calibration step is performed, a screen indicating the success of the previous step is displayed. Figure 5-17 shows the screens resulting from a successful calibration step and an unsuccessful calibration step. - Page 115 21. Press the Raise/Scroll pushbutton. The screen at right is displayed. 150 OHM TO 0-P Connect a resistance of 150 ohms across the oil pressure sender input PRESS LOWER KEY (P13 and P19). Press the Lower/Scroll pushbutton. 9355400990 Rev H DGC-500 Installation 5-17...
- Page 116 PRESS LOWER KEY (P13 and P19). Press the Lower/Scroll pushbutton. After step 24 is completed successfully and the Raise/Scroll pushbutton is pressed, the INPUT CALIBRATE FUNCTION screen appears and signals that calibration is complete. 5-18 DGC-500 Installation 9355400990 Rev H...
-
Page 117: Section 6 • Maintenance And Troubleshooting
Incorrect Display of Engine RPM ....................... 6-1 Programmable Inputs Do Not Operate as Expected ................6-2 Programmable Outputs Do Not Operate as Expected ............... 6-2 Communication Port Does Not Operate Properly ................6-2 9355400990 Rev H DGC-500 Maintenance and Troubleshooting... - Page 118 This page intentionally left blank. DGC-500 Maintenance and Troubleshooting 9355400990 Rev H...
- Page 119 TROUBLESHOOTING If you do not get the results that you expect from the DGC-500, first check the programmable settings for the appropriate function. Use the following troubleshooting procedures when difficulties are encountered in the operation of your genset control system.
- Page 120 Step 2. Confirm that the inputs are programmed properly. Step 3. Ensure that the input at the DGC-500 is actually connected to the BATT– terminal (P21). Programmable Outputs Do Not Operate as Expected Step 1. Verify that all wiring is properly connected. Refer to Figures 5-7 through 5-14.
-
Page 121: Appendix A • Time Overcurrent Characteristic Curves
Figure A-16. Time Characteristic Curve G, Long Time Inverse .............. A-20 Tables Table A-1. Time Characteristic Curve Constants ..................A-2 Table A-2. Characteristic Curve Cross-Reference ..................A-3 Table A-3 .Time Dial Setting Cross-Reference ..................A-4 9355400990 Rev H DGC-500 Time Overcurrent Characteristic Curves... - Page 122 This page intentionally left blank. DGC-500 Time Overcurrent Characteristic Curves 9355400990 Rev H...
- Page 123 APPENDIX A • TIME OVERCURRENT CHARACTERISTIC CURVES INTRODUCTION The inverse time overcurrent characteristic curves provided by the DGC-500 (style xxx1 only) closely emulate most of the common electromechanical, induction-disk, overcurrent relays sold in North America. CURVE SPECIFICATIONS Timing Accuracy: Within ±500 milliseconds of indicated operating point.
- Page 124 ∗ Curve F has a fixed delay of one second times the Time Dial setting. TIME OVERCURRENT CHARACTERISTIC CURVE GRAPHS Figures A-1 through A-16 illustrate the characteristic curves of the DGC-500. Table A-2 cross-references each curve to existing electromechanical relay characteristics. Equivalent time dial settings were calculated at a value of five times pickup.
- Page 125 (estimate the correct intermediate value) between the electromechanical setting and the Basler Electric setting. The DGC-500 has a maximum time dial setting of 9.9. The Basler Electric equivalent time dial setting for the electromechanical maximum setting is provided in the cross-reference table even if it exceeds 9.9.
- Page 126 Table A-3 .Time Dial Setting Cross-Reference Electromechanical Relay Time Dial Setting Equivalent Curve 10.0 11.0 Basler Electric Equivalent Time Dial Setting S, S1 ABB CO-2 L, L1 ABB CO-5 ABB CO-6 10.1 ABB CO-7 ABB CO-8 10.0 I, I1 V, V1...
- Page 127 Figure A-1. Time Characteristic Curve S, S1, Short Inverse (Similar to ABB CO-2) 9355400990 Rev H DGC-500 Time Overcurrent Characteristic Curves...
- Page 128 Figure A-2. Time Characteristic Curve S2, Short Inverse (Similar To GE IAC-55) DGC-500 Time Overcurrent Characteristic Curves 9355400990 Rev H...
- Page 129 Figure A-3. Time Characteristic Curve L, L1, Long Inverse (Similar to ABB CO-5) 9355400990 Rev H DGC-500 Time Overcurrent Characteristic Curves...
- Page 130 Figure A-4. Time Characteristic Curve L2, Long Inverse (Similar To GE IAC-66) DGC-500 Time Overcurrent Characteristic Curves 9355400990 Rev H...
- Page 131 Figure A-5. Time Characteristic Curve D, Definite Time (Similar To ABB CO-6) 9355400990 Rev H DGC-500 Time Overcurrent Characteristic Curves...
- Page 132 Figure A-6. Time Characteristic Curve M, Moderately Inverse (Similar to ABB CO-7) A-10 DGC-500 Time Overcurrent Characteristic Curves 9355400990 Rev H...
- Page 133 Figure A-7. Time Characteristic Curve I, I1, Inverse Time (Similar to ABB CO-8) 9355400990 Rev H DGC-500 Time Overcurrent Characteristic Curves A-11...
- Page 134 Figure A-8. Time Characteristic Curve I2, Inverse Time (Similar to GE IAC-51) A-12 DGC-500 Time Overcurrent Characteristic Curves 9355400990 Rev H...
- Page 135 Figure A-9. Time Characteristic Curve V, V1, Very Inverse (Similar to ABB CO-9) 9355400990 Rev H DGC-500 Time Overcurrent Characteristic Curves A-13...
- Page 136 Figure A-10. Time Characteristic Curve V2, Very Inverse (Similar to GE IAC-53) A-14 DGC-500 Time Overcurrent Characteristic Curves 9355400990 Rev H...
- Page 137 Figure A-11. Time Characteristic Curve E, E1, Extremely Inverse (Similar to ABB CO-11) 9355400990 Rev H DGC-500 Time Overcurrent Characteristic Curves A-15...
- Page 138 Figure A-12. Time Characteristic Curve E2, Extremely Inverse (Similar to GE IAC-77) A-16 DGC-500 Time Overcurrent Characteristic Curves 9355400990 Rev H...
- Page 139 Figure A-13. Time Characteristic Curve A, Standard Inverse 9355400990 Rev H DGC-500 Time Overcurrent Characteristic Curves A-17...
- Page 140 Figure A-14. Time Characteristic Curve B, Very Inverse A-18 DGC-500 Time Overcurrent Characteristic Curves 9355400990 Rev H...
- Page 141 Figure A-15. Time Characteristic Curve C, Extremely Inverse 9355400990 Rev H DGC-500 Time Overcurrent Characteristic Curves A-19...
- Page 142 Figure A-16. Time Characteristic Curve G, Long Time Inverse A-20 DGC-500 Time Overcurrent Characteristic Curves 9355400990 Rev H...
-
Page 143: Appendix B • Parameters And Settings
1 - 30 sec Time 00:00:00 to 23:59:59 ALL PARAMETERS Table B-2 lists each DGC-500 parameter in alphabetical order. The setting range or nomenclature used by the HMI and the BESTCOMS interface is listed beside each parameter. Table B-2. DGC-500 Settings Parameter... - Page 144 Low Oil Pressure Arming Delay 5 - 15 sec Low Oil Pressure Pre-Alarm Enable On or Off Low Oil Pressure Pre-Alarm Threshold 3 - 150 psi Low Oil Pressure Alarm Enable On or Off DGC-500 Parameters and Settings 9355400990 Rev H...
- Page 145 Underfrequency Pickup 45 - 65 Hz (50/60 Hz sensing) 360 - 440 Hz (400 Hz sensing) Undervoltage Pickup 70 - 576 Vac Undervoltage Time 0 - 30 s Undervoltage Alarm Configuration Pre-Alarm, Alarm, None 9355400990 Rev H DGC-500 Parameters and Settings...
- Page 146 English or Metric Weak Battery Voltage Pre-Alarm Threshold 4 - 8 Vdc or 8 - 16 Vdc Weak Battery Voltage Pre-Alarm Delay 1 - 10 sec Weak Battery Voltage Pre-Alarm Enable On or Off DGC-500 Parameters and Settings 9355400990 Rev H...
-
Page 147: Appendix C • Settings Record
APPENDIX C • SETTINGS RECORD INTRODUCTION This appendix provides a complete list of DGC-500 settings. This list is provided in the form of a settings record that you can use to record information relative to your application. DGC-500 settings are organized in the following groups. - Page 148 DGC-500 SETTINGS RECORD Genset ID __________________________________ Date __________________________________ DGC-500 Serial Number ______________________ Firmware Version _______________________ Sensing Transformer Settings Parameter Setting Generator CT Primary Amps Generator PT Primary Volts Generator PT Secondary Volts System Settings Parameter Setting Battery Voltage Generator Connection...
- Page 149 Global Sender Failure Alarm Delay High Coolant Temperature Alarm Enable High Coolant Temperature Alarm Threshold Loss of Generator Voltage Alarm Enable Low Fuel Level Alarm Enable Low Fuel Level Alarm Threshold Low Oil Pressure Alarm Enable 9355400990 Rev H DGC-500 Settings Record...
- Page 150 Overvoltage Time - 3 Phase Phase Imbalance Pickup Phase Imbalance Alarm Configuration Phase Imbalance Time Underfrequency Inhibit Underfrequency Time Underfrequency Pickup Underfrequency Alarm Configuration Undervoltage Inhibit - 3 Phase Undervoltage Pickup - 3 Phase DGC-500 Settings Record 9355400990 Rev H...
- Page 151 Engine Start/Stop Configuration Speed Select Accelerator Position ECU Control Output Select ECU Pulsing Engine Shutdown Timer Settling Time Pulse Cycle Time Response Timeout Miscellaneous Settings Parameter Setting Accumulated Engine Runtime LCD Contrast Daylight Saving Time 9355400990 Rev H DGC-500 Settings Record...
- Page 152 This page intentionally left blank. DGC-500 Settings Record 9355400990 Rev H...
- Page 154 15-06 Peninsula Plaza Tel: +1 618.654.2341 FRANCE 215122 Suzhou Singapore 179098 Fax: +1 618.654.2351 Tel: +33 3.88.87.1010 P.R. CHINA Tel: +65 68.44.6445 email: info@basler.com Fax: +33 3.88.87.0808 Tel: +86 512.8227.2888 Fax: +65 68.44.8902 email: franceinfo@basler.com Fax: +86 512.8227.2887 email: singaporeinfo@basler.com email:...
Need help?
Do you have a question about the DGC-500 and is the answer not in the manual?
Questions and answers