Table of Contents
Advertisement
Advertisement
Table of Contents
Troubleshooting

Related Manuals for Technicolor TG788v v3


Summary of Contents for Technicolor TG788v v3
- Page 1 TG788v v3 Setup and User Guide...
- Page 2 Distribution and copying of this document, use and communication of its contents are not permitted without written authorization from Technicolor. The content of this document is furnished for informational use only, may be subject to change without notice, and should not be construed as a commitment by Technicolor.
-
Page 3: Table Of Contents
Contents Contents 1 Getting started......................2 1.1 Features at a glance ...........................3 1.2 Product overview............................4 1.2.1 Power ....................................5 1.2.2 Local network connections............................6 1.2.3 Broadband connections..............................7 1.2.4 Telephone services ................................ 8 1.2.5 Buttons..................................... 9 1.2.6 Status LEDs .................................. 10 2 Setting up your TG788v v3.................. - Page 4 Contents 4.3 Cards................................36 4.3.1 Gateway ..................................38 4.3.2 Broadband..................................39 4.3.3 Internet Access ................................40 4.3.4 Wireless ..................................41 4.3.5 Local Network................................42 4.3.6 Devices ..................................43 4.3.7 WAN Services ................................44 4.3.8 Firewall................................... 45 4.3.9 Telephony ..................................46 4.3.10 Diagnostics..................................47 4.3.11 Assistance..................................
- Page 5 Following typographical convention is used throughout this manual: • This sample text indicates a hyperlink to a website. Example: For more information, visit us at www.technicolor.com. • This sample text indicates an internal link. Example: If you want to know more about this Setup and User Guide, see “About this Setup and User Guide”...
-
Page 6: Getting Started
1 Getting started 1 Getting started Introduction This chapter gives you a brief overview of the main features and components of your TG788v v3. After this chapter we will start with the installation. Do not connect any cables, or power on your TG788v v3 until instructed to do so in this Setup and User Guide. Before you start Carefully read the Safety Instructions and Regulatory Notices document included in your package before you continue with the installation of your TG788v v3. -
Page 7: Features At A Glance
1 Getting started 1.1 Features at a glance Introduction This section provides a brief overview of the main features of your TG788v v3. Internet connection features • Broadband Internet access via the integrated VDSL2 modem. • (Fallback) mobile Internet access via the optional mobile Internet dongle. For more information, see “2.7 Set up a mobile fallback connection”... -
Page 8: Product Overview
1 Getting started 1.2 Product overview Overview This section provides an overview of the different components of your TG788v v3: Topic Page 1.2.1 Power 1.2.2 Local network connections 1.2.3 Broadband connections 1.2.5 Buttons 1.2.6 Status LEDs DMS3-CTC-25-281 v2.0... -
Page 9: Power
1 Getting started 1.2.1 Power Overview Power inlet The power inlet allows you to connect the power supply unit. Only use the power supply unit that is supplied with this product, is supplied by your service provider or local product dealer, or a replacement power supply unit provided by your service provider or local product dealer. -
Page 10: Local Network Connections
1 Getting started 1.2.2 Local network connections Overview Wireless access point The built-in IEEE802.11n wireless access point provides wireless access to your wireless clients. For more information, see “3 Wireless networking” on page Ethernet switch The Ethernet switch ( ) allows you to connect Ethernet devices (a computer, a smart TV, a Network-Attached Storage (NAS), a set-top box, etc.) to your local network. -
Page 11: Broadband Connections
1 Getting started 1.2.3 Broadband connections Overview DSL port This port allows you to connect your TG788v v3 to your service provider’s DSL network. For more information, see “2.2 Connecting your TG788v v3 to your service provider’s network” on page Mobile Internet dongle (optional) If you purchased the optional mobile Internet dongle, and you have a mobile Internet subscription, you can set-up a mobile data connection that can serve as a fallback Internet connection. -
Page 12: Telephone Services
1 Getting started 1.2.4 Telephone services Overview Phone Phone Port The Phone ( ) port(s) allow(s) you to connect a traditional phone, DECT base station or fax to your TG788v v3. For more information, see “2.5 Setting up your telephone network” on page DMS3-CTC-25-281 v2.0... -
Page 13: Buttons
1 Getting started 1.2.5 Buttons Overview Wireless Reset Power button The Power ( ) button allows you turn your TG788v v3 on or off. Wireless button The Wireless ( ) button allows you to manually disable the wireless interface of your TG788v v3. You can do this when nobody is using the wireless network. -
Page 14: Status Leds
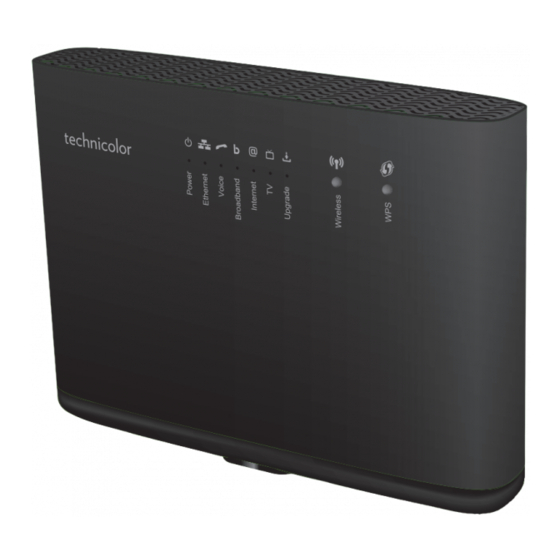
1 Getting started 1.2.6 Status LEDs Introduction On your TG788v v3 you can find a number of status LEDs that indicates the state of your TG788v v3. Power LED Colour State Description Green Solid on Power on, normal operation. Solid on Power on, self-test failed, indicating device malfunction. Orange Solid on Your TG788v v3 is starting up. - Page 15 1 Getting started Internet LED Colour State Description Green Solid on Connected to the Internet, no activity. Blinking Connected to the Internet, sending/receiving data. Blinking Trying to connect to the Internet. No Internet connection. Wireless LED Colour State Description Green Solid on The wireless interface is enabled, no wireless activity.
- Page 16 1 Getting started Ethernet LED Colour State Description Green Solid on At least one active network device is connected to the Ethernet switch. Blinking At least one Network device is connected to the Ethernet switch and sending/receiving data. No active Ethernet devices connected to the Ethernet switch. TV LED Colour State...
-
Page 17: Setting Up Your Tg788V V3
2 Setting up your TG788v v3 2 Setting up your TG788v v3 Always follow the specific instructions of the service provider if provided. Setting up your main services Proceed as follows: 1 Attach the vertical stand. For more information, see “2.1 Attach the vertical stand” on page 2 Connect your TG788v v3 to your service provider’s network. -
Page 18: Attach The Vertical Stand
2 Setting up your TG788v v3 2.1 Attach the vertical stand Procedure Place the locking catches of the vertical stand into the slots on the TG788v v3 and slide the mountable stand into place. DMS3-CTC-25-281 v2.0... -
Page 19: Connecting Your Tg788V V3 To Your Service Provider's Network
2 Setting up your TG788v v3 2.2 Connecting your TG788v v3 to your service provider’s network Introduction This section helps you to connect your TG788v v3 to your service provider’s network. Connecting the cables Proceed as follows: 1 Take the DSL cable. Only use the DSL cable provided in your package. Other DSL cables may not work optimally with the DSL subscription that you purchased. -
Page 20: Powering On Your Tg788V V3
2 Setting up your TG788v v3 2.3 Powering on your TG788v v3 Only use the power supply unit that is supplied with this product, is supplied by your service provider or local product dealer, or a replacement power supply unit provided by your service provider or local product dealer. The use of other types of supplies is prohibited. -
Page 21: Connecting Your Wired Devices
2 Setting up your TG788v v3 2.4 Connecting your wired devices To connect wireless clients, see “3 Wireless networking” on page To connect a set-top box for digital TV, first look for instructions in the documentation included in your package. In some cases the set-top box will have to be connected to a dedicated Ethernet port (typically Ethernet port 4). Requirements •... -
Page 22: Setting Up Your Telephone Network
2 Setting up your TG788v v3 2.5 Setting up your telephone network Connecting corded phones Connect your corded phone, DECT base station or fax to the green Phone port of your TG788v v3. Be aware that emergency calls will not be possible when your Internet connection is down or your TG788v v3 is powered off. -
Page 23: Configure Your Tg788V V3 Services
2 Setting up your TG788v v3 2.6 Configure your TG788v v3 services Step 1: Browse to the TG788v v3 web interface Proceed as follows: 1 Browse to http://192.168.1.1 (this is the default IP address of your TG788v v3) on a computer or device that is currently connected to your TG788v v3 (either wired or wirelessly). -
Page 24: Set Up A Mobile Fallback Connection
2 Setting up your TG788v v3 2.7 Set up a mobile fallback connection Mobile fallback Your TG788v v3 allows you to use mobile Internet as fallback for your main Internet connection. This means that your TG788v v3 will automatically switch to the mobile Internet connection when your main Internet connection is down. Depending on your subscription, downloading and uploading over the mobile Internet connection may results in additional charges. - Page 25 2 Setting up your TG788v v3 3 The Mobile 3G/4G page appears. Click the Configuration tab. 4 Under Mobile Configuration, update the following fields if necessary: APN: Enter the Access Point Name (APN) of your service provider. Operator Mode: We recommend you to use the default setting, Automatic (let the TG788v v3 choose the best operator mode), unless your service provider instructed you to select another mode.
-
Page 26: Wireless Networking
3 Wireless networking 3 Wireless networking Introduction This section provides all information on how to use the wireless features of your TG788v v3. Wireless access point Your TG788v v3 comes with an integrated IEEE 802.11n wireless access point. Configuring your wireless clients For more information on how to make a wireless connection to your TG788v v3, see: •... -
Page 27: Connecting Your Wireless Client Via Wps
3 Wireless networking 3.1 Connecting your wireless client via WPS Wi-Fi Protected Setup (WPS) allows you to add new wireless clients to your local network in a secure and easy way, without the need to enter any of your wireless settings (network name, wireless key, encryption type). Requirements •... - Page 28 3 Wireless networking 2 The WPS LED starts blinking orange. This indicates that your TG788v v3 is now searching for wireless clients that are in registration mode. You now have two minutes to start WPS on your wireless client. 3 Start WPS PBC on your wireless client. 4 Your TG788v v3 provides its wireless settings to the wireless client.
-
Page 29: How To Manually Connect A Wireless Client
3 Wireless networking 3.2 How to manually connect a wireless client Procedure To connect a wireless client to the wireless network, configure that wireless client with the wireless settings (network name and wireless key) of your access point. If your TG788v v3 is still using the default wireless settings, use the network name (SSID) and wireless key that is printed on the label on your TG788v v3 (or product ID card if included). -
Page 30: Securing Your Wireless Connection
3 Wireless networking 3.3 Securing your wireless connection Introduction We strongly recommend you to protect all wireless communication between any wireless client and your TG788v v3 with a wireless key. This ensures that: • Only clients that use the correct Network Name (SSID) and wireless key can connect to access point of your TG788v v3. •... -
Page 31: Configuring Wpa(2)-Psk Encryption
3 Wireless networking 3.3.1 Configuring WPA(2)-PSK encryption Procedure Proceed as follows: 1 Browse to the TG788v v3. For more information, see “4.1.1 Accessing the TG788v v3 web interface from your local network” on page 2 Click Wireless. The Wireless page appears. 3 In the Security Mode list under Access Point, select one of the following modes: ... -
Page 32: Configuring Wpa-Enterprise Encryption
3 Wireless networking 3.3.2 Configuring WPA-Enterprise encryption Requirements • A RADIUS server must be readily set up on your local network. Procedure Proceed as follows: 1 Browse to the TG788v v3 web interface. For more information, see “4.1.1 Accessing the TG788v v3 web interface from your local network” on page 2 Click Wireless. -
Page 33: Turning The Wireless Radio Off/On At Scheduled Times
3 Wireless networking 3.4 Turning the wireless radio off/on at scheduled times Wireless control Wireless control is a feature that allows you to turn of the wireless radio at specific times. For example, you can disable the wireless radio during the night reduce power consumption. Warning Wireless control causes wireless service interruptions. - Page 34 3 Wireless networking 3 Click the Wireless Control tab and then click: to edit an existing rule. to delete an existing rule. DMS3-CTC-25-281 v2.0...
-
Page 35: Tg788V V3 Web Interface
4 TG788v v3 web interface 4 TG788v v3 web interface Introduction The TG788v v3 web interface allows you to configure your TG788v v3 using your web browser. Overview This chapter contains the following topics: Topic Page “4.1 Accessing the TG788v v3 web interface” “4.2 Account settings” “4.3 Cards”... -
Page 36: Accessing The Tg788V V3 Web Interface
4 TG788v v3 web interface 4.1 Accessing the TG788v v3 web interface Introduction You can access the TG788v v3 web interface from the following locations: • From your local network. For more information, see “4.1.1 Accessing the TG788v v3 web interface from your local network” on page •... -
Page 37: Accessing The Tg788V V3 Web Interface From Your Local Network
4 TG788v v3 web interface 4.1.1 Accessing the TG788v v3 web interface from your local network Procedure Proceed as follows: 1 Browse to http://192.168.1.1 on a computer or device that is currently connected to your TG788v v3 (either wired or wirelessly). 192.168.1.1 is the default IP address of your TG788v v3. If you have changed the IP address of your TG788v v3, use this IP address instead. -
Page 38: Accessing Your Tg788V V3 From The Internet (Remote Assistance)
4 TG788v v3 web interface 4.1.2 Accessing your TG788v v3 from the Internet (Remote Assistance) Introduction Remote assistance allows you to make your TG788v v3 web interface temporarily accessible from the Internet. Security The following security measures are applied: • When activating remote assistance, a dedicated user account will be created. Only users who use this dedicated user name and password can access the TG788v v3 web interface. -
Page 39: Account Settings
4 TG788v v3 web interface 4.2 Account settings After logging in on the web interface of the TG788v v3, you can see the user name you used in the upper-right corner of the page. When you click the arrow next to your user name, the following options appear: •... -
Page 40: Cards
4 TG788v v3 web interface 4.3 Cards Overview The home page contains the following cards: Card For more information, see… Gateway “4.3.1 Gateway” on page 38 Broadband “4.3.2 Broadband” on page 39 Internet Access “4.3.3 Internet Access” on page 40 Wireless “4.3.4 Wireless”... - Page 41 4 TG788v v3 web interface Toggle buttons Some cards have an on/off switch in the header: Button Description The service is currently enabled. Clicking this button will disable the service. The service is currently disabled. Clicking this button will enable the service. DMS3-CTC-25-281 v2.0...
-
Page 42: Gateway
4 TG788v v3 web interface 4.3.1 Gateway The Gateway card The Gateway card displays the current version of the TG788v v3 firmware. The Gateway page To open the Gateway page, click the Gateway card header: The Gateway page allows you to: • View basic information about your TG788v v3. •... -
Page 43: Broadband
4 TG788v v3 web interface 4.3.2 Broadband The Broadband card The Broadband card displays the current status of your broadband interface. Broadband switch In the Broadband card header, you can see whether your broadband interface is enabled or not. If the switch is set to: •... -
Page 44: Internet Access
4 TG788v v3 web interface 4.3.3 Internet Access The Internet Access card The Internet Access card displays: • The current status of your Internet connection. • The WAN IP address This is the IP address that your TG788v v3 uses for its communication on the Internet. Internet Access switch In the Internet Access card header, you can see whether your broadband interface is enabled or not. -
Page 45: Wireless
4 TG788v v3 web interface 4.3.4 Wireless The Wireless card The Wireless card displays: • The status of the wireless access point (enabled or disabled). • The network name (SSID) of the wireless access point. The Wireless page Click the Wireless card header to open the Wireless page. On the left of the Wireless page you can select the access point that you want to configure: For each access point, you can: •... -
Page 46: Local Network
4 TG788v v3 web interface 4.3.5 Local Network The Local Network card The Local Network card displays: • The status of the DHCP server (enabled or disabled). • The local IP address and netmask of your TG788v v3. The Local Network page To open the Local Network page, click the Local Network card header. -
Page 47: Devices
4 TG788v v3 web interface 4.3.6 Devices The Devices card The Devices card displays the number of devices connected to: • The Ethernet interface. • Wireless interface. Viewing additional settings Click Devices card and click . The Devices page appears and allows you to: •... -
Page 48: Wan Services
4 TG788v v3 web interface 4.3.7 WAN Services The WAN Services card The WAN Services card displays: • The DMZ status For more information, see “6.3 DMZ” on page • The number of port forwarding rules that are defined. Port forwarding allows you to forward incoming Internet traffic arriving on a specific port to a local device. •... -
Page 49: Firewall
4 TG788v v3 web interface 4.3.8 Firewall Introduction Your TG788v v3 comes with an integrated firewall that helps you protect your network from attacks from the Internet. This firewall has a number of predefined levels to allow you to adjust the firewall to your needs. The default mode is normal. -
Page 50: Telephony
4 TG788v v3 web interface 4.3.9 Telephony The Telephony card The Telephony card displays the status of your voice subscriptions. The Telephony page To open the Telephony page, click the Telephony. The Telephony page allows you to: • Configure your voice service and options. •... -
Page 51: Diagnostics
4 TG788v v3 web interface 4.3.10 Diagnostics The Diagnostics card The Diagnostics card displays the following troubleshooting tools. Tool Function Icon Name xDSL View DSL connection statistics. Ping & Traceroute Run ping and trace route test. Connection Run connection checks. Network View port state and network statistics. -
Page 52: Assistance
4 TG788v v3 web interface 4.3.11 Assistance Introduction Remote assistance allows you to make your TG788v v3 web interface temporarily accessible from the Internet. For more information, see “4.1.2 Accessing your TG788v v3 from the Internet (Remote Assistance)” on page DMS3-CTC-25-281 v2.0... -
Page 53: Mobile
4 TG788v v3 web interface 4.3.12 Mobile Mobile fallback Your TG788v v3 allows you to use a mobile Internet connection (3G, LTE or 4G) as fallback connection for your main Internet access. This means that your TG788v v3 offers you the possibility to automatically switch to the mobile Internet connection when your main Internet connection is down. -
Page 54: Management
4 TG788v v3 web interface 4.3.13 Management The Management card The Management page To open the Management page, click Management. The Management page allows you to: • Manage the user accounts of the TG788v v3 web interface. • View event logs. DMS3-CTC-25-281 v2.0... -
Page 55: Content Sharing
4 TG788v v3 web interface 4.3.14 Content Sharing Introduction If you connect a USB storage device to the USB port of your TG788v v3, you can share the content on your USB storage device(s) with other devices that are connected to your local network (mostly computers). For more information, see “5.1 Content sharing”... -
Page 56: Printer Sharing
4 TG788v v3 web interface 4.3.15 Printer Sharing The Printer Sharing card The Printer Sharing page To open the Printer Sharing page, click Printer Sharing. The Printer Sharing page allows you to: • Enable or disable printer sharing. • View a list of the connected printers. DMS3-CTC-25-281 v2.0... -
Page 57: Parental Controls
4 TG788v v3 web interface 4.3.16 Parental Controls The Parental Controls card The Parental Controls card displays: • The status of the website blocking feature. • The number of site blocking rules that are currently defined. The Parental Controls page To open the Parental Controls page, click Parental Controls. The Parental Controls page allows you to configure: •... -
Page 58: Ip Extras
4 TG788v v3 web interface 4.3.17 IP Extras The IP Extras card The IP Extras card displays: • The number of IPv4 routes • The number of DNS servers The IP Extras page To open the IP Extras page, click IP Extras. The IP Extras page displays: •... -
Page 59: Relay Setup
4 TG788v v3 web interface 4.3.18 Relay Setup This function is intended for technicians and network administrators only. The Relay Setup card The DHCP relay card displays: • The status of the PPP connection • The LAN IP address of your TG788v v3. •... -
Page 60: Backing Up/Restoring Your Configuration
4 TG788v v3 web interface 4.4 Backing up/restoring your configuration Introduction Once you have configured your TG788v v3 to your needs, it is recommended to back up the configuration of your TG788v v3 for later use. This way you can always return to the latest working configuration of your TG788v v3 in case of problems. -
Page 61: Content And Printer Sharing
5 Content and Printer Sharing 5 Content and Printer Sharing Topics This chapter describes the following topics: Topic Page 5.1 Content sharing 5.2 Printer sharing DMS3-CTC-25-281 v2.0... -
Page 62: Content Sharing
5 Content and Printer Sharing 5.1 Content sharing Introduction If you connect a USB storage device to the USB port of your TG788v v3, you can share the content on this USB storage device(s) with other devices that are connected to your local network (mostly computers and multimedia devices). This is in fact a cheaper alternative for a Network-Attached Storage (NAS). - Page 63 5 Content and Printer Sharing Customizing the content sharing settings To change the default settings, proceed as follows: 1 Browse to the TG788v v3 web interface. For more information, see “4.1.1 Accessing the TG788v v3 web interface from your local network” on page 2 Click Content Sharing.
-
Page 64: Accessing The Samba Server
Accessing the Samba server on a Mac Proceed as follows: 1 Open a Finder window. Under SHARED click Technicolor and then click usbdisk. 2 The storage devices that are attached to your TG788v v3 are listed as folders. DMS3-CTC-25-281 v2.0... -
Page 65: Accessing The Dlna Server
5 Content and Printer Sharing 5.1.2 Accessing the DLNA server Introduction The DLNA server lists all audio, video and picture files located on the connected USB storage device. All DLNA-certified renderers (for example, a DLNA-certified set-top box) that are connected to your network are able to view this list and stream or view items from this list. -
Page 66: Printer Sharing
5 Content and Printer Sharing 5.2 Printer sharing Introduction A TG788v v3 USB port allows you to share your USB printer in your local network. This way everyone in your network can use the same printer without having to buy an expensive network printer. Requirements The samba server must be enabled on the TG788v v3 (this is the default setting). -
Page 67: Enable The Printer Sharing Service On Your Tg788V V3
5 Content and Printer Sharing 5.2.2 Enable the printer sharing service on your TG788v v3 Proceed as follows: 1 Browse to the TG788v v3 web interface. For more information, see “4.1.1 Accessing the TG788v v3 web interface from your local network” on page 2 Click Printer Sharing. -
Page 68: Installing The Printer On Your Computer
1 Make sure that your computer is connected to the TG788v v3. 2 Open (File) Explorer and then click Network. 3 The Network window appears. Double-click Technicolor. You can also access the device by entering \\192.168.1.1 in the address bar. 4 Your printer should now appear. -
Page 69: Internet Security
6 Internet security 6 Internet security Overview The TG788v v3 offers various options to secure your network and network connection: Topic Page 6.1 Site blocking 6.2 Access control 6.3 DMZ DMS3-CTC-25-281 v2.0... -
Page 70: Site Blocking
6 Internet security 6.1 Site blocking Introduction site blocking function allows you to block access to specific websites. To only block websites at specific times or days (e.g. no access to facebook.com after 22:00), use Access Control instead. For more information, see “6.2 Access control”... -
Page 71: Access Control
6 Internet security 6.2 Access control Introduction Access control allows you to create access schedules for Internet access. By default, all devices that are connected to your local network have permanent access to the Internet without any restriction. Access control allows you to limit a device’s access to the Internet to specific times and days. Warning Make sure that the persons using these devices are aware of the time schedule, to avoid the loss of data due to unexpected service interruption. -
Page 72: Dmz
6 Internet security 6.3 DMZ Introduction The TG788v v3 allows you to configure one local device as a De-Militarized Zone (DMZ) host. This means that: • None of the TG788v v3 firewall rules will be applied to the DMZ host • All traffic originating from the Internet will be forwarded to the DMZ host unless there is a specific port forwarding rule defined or automatically created for a specific type of traffic. -
Page 73: Telephony
7 Telephony 7 Telephony Introduction This chapter will help you to setup and use the telephone functions of your TG788v v3. You can only use the telephone functions if telephony is included in your subscription. Voice over IP (VoIP) The TG788v v3 allows you to make phone calls via VoIP. VoIP is a technology in which telephone calls are made over the Internet. -
Page 74: Phone Book
7 Telephony 7.1 Phone book Introduction The Phone book page allows you to: • Store your contacts centrally on the TG788v v3. These contacts can also be used by phones that support the shared address book feature. • Initiate a call or send a message by clicking the phone number or e-mail address in the contact details. •... -
Page 75: Viewing Call Logs
7 Telephony 7.2 Viewing call logs Introduction The Call Logs page on the TG788v v3 web interface provides an overview of the last: • Successful incoming calls • Missed incoming calls • Successful outgoing calls. • Failed outgoing calls. How to view the call logs 1 Browse to the TG788v v3 web interface. -
Page 76: Support
8 Support 8 Support Introduction This chapter suggests solutions for issues that you may encounter while installing, configuring or using your TG788v v3. If the suggestions do not resolve the problem, contact your service provider. Topics This chapter describes the following topics: Topic Page 8.1 General TG788v v3 troubleshooting... -
Page 77: General Tg788V V3 Troubleshooting
8 Support 8.1 General TG788v v3 troubleshooting None of the LEDs light up (TG788v v3 does not work) Make sure that: • The TG788v v3 is plugged into a power socket outlet. • You are using the correct power supply for your TG788v v3 device. The power requirements for your TG788v v3 are clearly indicated on the identification label of the TG788v v3. -
Page 78: Ethernet Connection Troubleshooting
8 Support 8.2 Ethernet connection troubleshooting Ethernet LED does not light up Make sure that: • The Ethernet cable is correctly connected to the Ethernet port on your TG788v v3 and your computer. • You are using the correct cable type for your Ethernet equipment, which is at least UTP CAT5 with RJ-45 connectors. DMS3-CTC-25-281 v2.0... -
Page 79: Wireless Connection Troubleshooting
8 Support 8.3 Wireless connection troubleshooting Cannot connect via WPS If you have trouble connecting your wireless client via WPS, try one of the following: • The WPS session only lasts 2 minutes, make sure to press the WPS button on both devices within this time slot. •... -
Page 80: Change The Wireless Channel
8 Support The TG788v v3 does not appear in your wireless client’s access point list • Make sure that the TG788v v3 wireless interface is enabled. a Browse to the TG788v v3 web interface. For more information, see “4.1.1 Accessing the TG788v v3 web interface from your local network” on page b In the Wireless card header, make sure that the switch is •... -
Page 81: Reset To Factory Defaults
8 Support 8.4 Reset to factory defaults Resetting your TG788v v3 If at some point you can no longer connect to the TG788v v3 or you want to make a fresh install, it may be useful to perform a reset to factory defaults. A reset to factory default settings deletes all configuration changes you made. - Page 82 TECHNICOLOR Copyright © 2017 Technicolor. All rights reserved. DMS3-CTC-25-281 v2.0. 1-5 rue Jeanne d’ A rc All tradenames referenced are service marks, trademarks, or registered 92130 Issy les Moulineaux trademarks of their respective companies. France Specifications subject to change without notice.
Need help?
Do you have a question about the TG788v v3 and is the answer not in the manual?
Questions and answers