Zanussi ZWI 71201 WA User Manual
Hide thumbs
Also See for ZWI 71201 WA:
- User manual (28 pages) ,
- User manual (32 pages) ,
- User manual (32 pages)

Related Manuals for Zanussi ZWI 71201 WA


Summary of Contents for Zanussi ZWI 71201 WA
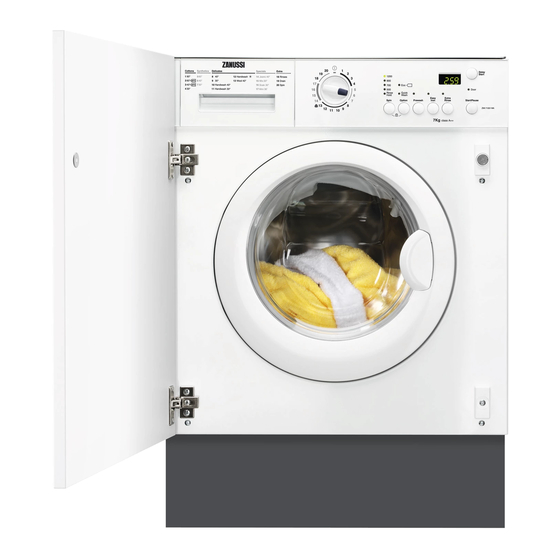
- Page 1 User Manual GETTING STARTED? EASY. ZWI 71201 WA ZWI 71401 WA EN User Manual Washing Machine...
-
Page 2: Safety Information
SAFETY INFORMATION Before the installation and use of the appliance, carefully read the supplied instructions. The manufacturer is not responsible for any injuries or damages that are the result of incorrect installation or usage. Always keep the instructions in a safe and accessible location for future reference. -
Page 3: Safety Instructions
The appliance must be connected to the water mains using the • new supplied hose sets, or other new hose sets supplied by the Authorised Service Centre. Old hose sets must not be reused. • If the mains power supply cable is damaged, it must be •... -
Page 4: Water Connection
WATER CONNECTION • Do not wash fabrics which are heavily soiled with oil, grease or other greasy substances. It • Do not cause damage to the water hoses. can damage rubber parts of the washing • Before connection to new pipes, pipes not used machine. -
Page 5: Child Safety
CHILD SAFETY INSTALLATION ON SUSPENDED FLOORING This device prevents children or pets to be closed Suspended wooden floors are particularly in the drum. susceptible to vibration. To limit vibration we recommend placing a • Turn the device clock- waterproof wooden panel, at least 15 mm thick, wise, until the groove under the appliance. -
Page 6: Programme Chart
DISPLAY • When the related option is selected, the indicator comes on the display. B - This area shows: • Programme time • End of programme • Delay start • Alarm codes (refer to the chapter 'Troubleshooting'). • Incorrect option selection: the display shows the message for some seconds if: •... - Page 7 Maximum load Programme Programme description Maximum spin Temperature range (Type of load and soil level) speed 3 kg Synthetic items or mixed fabric items. Synthetics 900 rpm Normal soil. 40°C 3 kg Synthetic items or mixed fabric items. Synthetics 900 rpm Normal soil.
- Page 8 Maximum load Programme Programme description Maximum spin Temperature range (Type of load and soil level) speed 7 kg To rinse and spin the laundry. All fabrics, ex- Rinses 1200 rpm cept woollens and very delicate fabrics. Re- (ZWI 71201 duce the spin speed accordingly to the type of laundry.
-
Page 9: Consumption Values
Programme options compatibility Programme ■ ■ ■ ■ ■ ■ ■ ■ Cottons ■ ■ ■ ■ ■ ■ ■ ■ Synthetics ■ ■ ■ ■ ■ Delicates ■ ■ ■ Handwash ■ ■ ■ Wool ■ ■ ■ ■ ■... -
Page 10: Programme Selection
/ 52 Standard 40°C cotton 0.61 / 52 1) At the end of spin phase. 2) For model ZWI 71201 WA. 3) For model ZWI 71401 WA. Off Mode (W) Left On Mode (W) 0,10 0,98 The information given in the chart above is compliant with the EU Commission regulation 1015/2010 implementing directive 2009/125/EC . -
Page 11: Before First Use
This option is recommended for heavily soiled RINSE HOLD laundry. • Set this option to prevent the laundry creases. • The related indicator comes on. EASY IRON • There is a water in the drum when the programme is completed. The appliance carefully washes and spins the •... -
Page 12: Daily Use
This activates the drain system. This removes all possible dirt from the drum and the 4. Put a small quantity of detergent in the tub. compartment for washing phase. 5. Set and start a programme for cotton at the highest temperature without laundry. DAILY USE DETERGENT COMPARTMENTS WARNING! Refer to Safety chapters. -
Page 13: Cancelling A Running Programme
1. Press the button Start/Pause to pause the b. Press the button Delay Start until the appliance. display shows 2. Wait until the indicator Door goes off. Press the button Start/Pause again to start 3. You can open the door. the programme immediately. -
Page 14: Hints And Tips
HINTS AND TIPS THE LAUNDRY LOAD – powder detergents for all types of fabric, – powder detergents for delicate fabrics (40 • Divide the laundry in: white, coloured, °C max) and woollens, synthetics, delicates and wool. – liquid detergents, preferably for low •... -
Page 15: Maintenance Wash
Regularly examine the drum to prevent limescale • Make sure that all and rust particles. washing powder resi- To remove rust particles use only special products due is removed from for washing machines. Do this separately from the the upper and lower laundry wash. -
Page 16: Frost Precautions
• Remove the filter. • Turn off the water tap. • Use pliers, if necessa- • Unscrew the hose from the tap. • When removing the • Clean the filter in the filter, always keep a hose with a stiff brush. rag nearby to dry up any water spillage. -
Page 17: Emergency Emptying Out
6. Screw the water inlet hose back on and re-fit 2. Close the water tap. the emergency emptying hose after having put 3. If necessary, wait until the water has cooled the cap on again. down. 4. Place a bowl on the floor and put the end of WARNING! Make sure that the the emergency emptying hose into the bowl. - Page 18 Problem Possible solution The appliance does not • Make sure that the sink spigot is not clogged. drain the water. • Make sure that the drain hose has no kinks or bends. • Make sure that the drain filter is not clogged. Clean the filter, if nec- essary.
-
Page 19: Installation
INSTALLATION • Remove the polystyr- WARNING! Refer to Safety chapters. ene block fitted on the door seal. Pull out all items from the drum. UNPACKING Remove all transit bolts and packing before you use the appliance. You are advised to keep all transit devices so t hat they can be refitted if the appliance •... -
Page 20: Water Inlet
WATER INLET • The inlet hose is supplied with the appliance and can been found inside the appliance drum. • Do not use the hose from your previous appliance to connect to the water supply. This appliance must be connected toa cold water supply. -
Page 21: Preparation And Assembly Of The Door
BUILDING IN OVERVIEW This appliance has been designed to be built into the kitchen furniture. The recess should have the dimensions shown in the picture below: 600 mm min. 596 mm 555 mm 560 mm min. 830 mm 818 mm 75 mm 60 mm 170 mm... - Page 22 The distance between the holes hobs fixing centres must be 416 mm. The distance from upper edge of the door to the centre of the hole depends on the adjacent furniture's dimensions. Door mounting To mount the door fix the hinges to the appliance using the M5x15 screws.
-
Page 23: Technical Data
Cotton 7 kg Energy Efficiency Class Spin Speed Maximum 1200 rpm (ZWI 71201 WA) 1400 rpm (ZWI 71401 WA) 1) Connect the water inlet hose to a water tap with a 3/4'' thread. ENVIRONMENTAL CONCERNS with the symbol with the household waste. - Page 24 WWW.ZANUSSI.COM/SHOP...
Need help?
Do you have a question about the ZWI 71201 WA and is the answer not in the manual?
Questions and answers