Zanussi ZWI 1125 User Manual
Hide thumbs
Also See for ZWI 1125:
- Brochure & specs (3 pages) ,
- Specifications (7 pages) ,
- User manual (28 pages)
Table of Contents
Advertisement
Quick Links
User
Manual
ZWI 1125
Washing
machine
Centr
Centrifuger
ifugeren
en
95°
95°
P P ompen
ompen
60°
60°
eco
eco
60°
60°
Spoelen
Spoelen
40°
40°
30°
30°
Inw
Inwek
eken
en
Gor
Gordijnen
dijnen
40°
40°
30°
30°
60°
60°
Sport t
Spor
40°
40°
intensief
intensief
40°
40°
W W ol ol
40°
40°
30°
30°
40°
40°
Anti-kr
Anti-kreuk
euk
Handw
Handwas
as
30°
30°
40°
40°
Handwas
Handw
as
40°
40°
30°
30°
Star
Startuits
tuitstel
tel
6u
6u
9u
9u
3u
3u
1300
1300
900
900
V V oorw
oorwas
as
Hoofdw
Hoofdwas
as
700
700
Spoelen
Spoelen / /
500
500
Centr
Centrifuger
ifugeren
en
Extra k
Extra kor ort t
Spoel-
Spoel-
Einde
Einde
s s top
top
Start t / / P P au
Star
auze ze
Opties
Opties
Extra spoelen
Extra spoelen
Centr
Centrifuger
ifugeren
en
Advertisement
Table of Contents

Related Manuals for Zanussi ZWI 1125


Summary of Contents for Zanussi ZWI 1125
- Page 1 Start t / / P P au auze ze Opties Opties Extra spoelen Extra spoelen Centr Centrifuger ifugeren 40° 40° W W ol ol 40° 40° 30° 30° 40° 40° Anti-kr Anti-kreuk Handw Handwas 30° 30° 40° 40° Handw Handwas 40° 40° 30° 30° ZWI 1125...
-
Page 2: Table Of Contents
Thank you for selecting our appliance We wish you lots of enjoyment with your new appliance and we hope that you will consider our brand again when purchasing household appliances. Please read this user manual carefully and keep it throughout the product life cycle as a reference document. -
Page 3: Safety Information
Safety information In the interest of your safety and to ensure Always unplug the appliance and turn off the ● the correct use, before installing and first water supply after use, clean and using the appliance, read this user manual maintenance. - Page 4 The packaging components (e.g. plastic film, ● polystyrene) can be dangerous to children - This appliance is designed for domestic use. ● danger of suffocation! Keep them out of It must not be used for purposes other than children’s reach those for which it was designed.
-
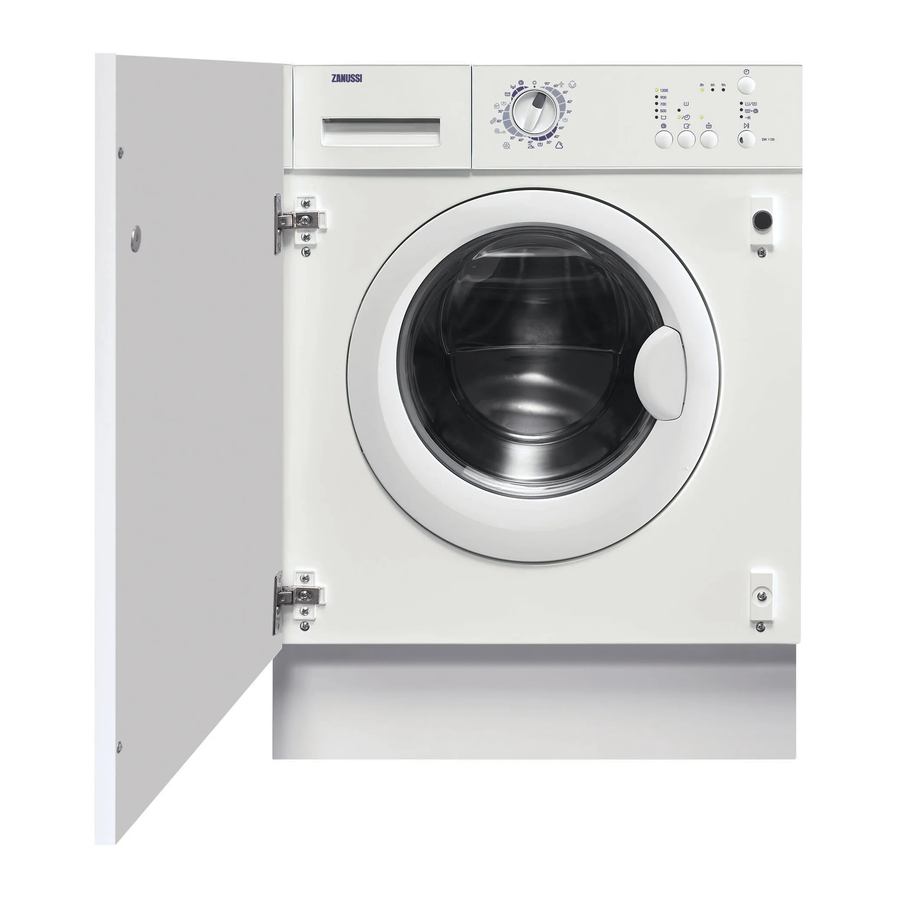
Page 5: Description Of The Appliance
Description of the appliance Detergent dispenser drawer Control panel Door opening handle Rating plate Drain pump Adjustable feet Detergent dispenser drawer Prewash Wash Fabric Softener... -
Page 6: Control Panel And Functions
Control panel and functions Important The programme selector dial, the different buttons and the programme progress display will be indicated in all the book with the relevant numbers given in this table. Symbols: = Cotton, = Synthetics, = Delicates = Rinse Hold, = Prewash, = Super Quick = Prewash/Wash,... - Page 7 By means of this button, you can select only one of the options. The relevant light will light up. PREWASH: Select this option if you wish your laundry to be prewashed at 30°C before the main wash. The prewash ends with a short spin in programmes for Cotton Option button: and Synthetic fabrics, whereas in the programmes for PREWASH...
-
Page 8: Programme Table
Programme table Programme / Suitable Temperature Spin Speed Detergent Programme Descripton Options Compartment Maximum Load Type of Laundry COTTONS from 90°C to Cold SPIN REDUCTION Spin speed: 1200 - 900 - 700 - 500 RINSE HOLD Main wash - Rinses - Long spin SUPER QUICK Max load: 6 Kg;... - Page 9 Programme table Programme / Suitable Temperature Spin Speed Detergent Programme Descripton Options Compartment Maximum Load Type of Laundry HANDWASH from 30°C to Cold Spin speed: 900 - 700 - 500 SPIN REDUCTION Main wash - Rinses - Short spin RINSE HOLD Max load: 2 Kg Special programme for delicate fabrics with the «hand washing»...
-
Page 10: Washing Hints
Washing hints Sorting the laundry Maximum loads Follow the wash code symbols on each Recommended loads are indicated in the garment label and the manufacturer’s washing programme charts. instructions. Sort the laundry as follows: whites, General rules: coloureds, synthetics, delicates, woolen. Cotton, linen: drum full but not too tightly packed;... - Page 11 Oil based paint: moisten with benzine stain the colour, washing temperature and degree of remover, lay the garment on a soft cloth and soiling. dab the stain; treat several times. All commonly available washing machine Dried grease stains: moisten with turpentine, detergents may be used in this appliance: lay the garment on a soft surface and dab the powder detergents for all types of fabric,...
-
Page 12: Before The First Use
Quantity of detergent to be used Degrees The type and quantity of detergent will depend Level Characteristic German French on the type of fabric, load size, degree of °dH °T.H. soiling and hardness of the water used. soft 0-15 Water hardness is classified in so-called «degrees»... -
Page 13: Operating Sequence
Operating sequence Load the laundry WARNING! Open the door by If you turn the programme selector dial to carefully pulling the another programme when the machine is door handle outwards. working, the red pilot light of button will blink Place the laundry in 3 times to indicate a wrong selection. - Page 14 Select the delayed start by pressing Altering an option or a running programme button It is possible to change some option before the programme carries it out. This option permits to delay the start of the Before you make any change, you must pause wash programme by 3, 6, 9 hours.
- Page 15 At the end of the programme The machine stops automatically. The pilot light of button goes off while the phase light illuminates. The door can be opened. If at the end of a programme there is water in the tub, to empty out the water follow the following instructions: turn the programme selector dial to «O»...
-
Page 16: Care And Cleaning
Care and cleaning IMPORTANT! Remove the drawer by pressing the catch downwards and by pulling it out. Flush it out You must DISCONNECT the appliance from under a tap, to remove any traces of the electricity supply, before you can carry out accumulated powder. - Page 17 The dangers of freezing If the machine is exposed to temperatures below 0°C, certain precautions should be taken. Turn off the water tap. ● Unscrew the inlet hose. ● Place the end of the emergency emptying ● hose and that of the inlet hose in a bowl placed on the floor and let water drain out.
-
Page 18: What To Do If
What to do if ... IMPORTANT! Certain problems are due to lack of simple maintenance or oversights, which can be solved easily without calling out an engineer. Before contacting your local Service Centre, please carry out the checks listed below. During machine operation it is possible that the red pilot light of button blinks to indicate that the machine is not working. - Page 19 Malfunction Possible Cause / Solution The end of the drain hose is too low. The machine fills then empties Refer to relevant paragraph in «water drainage» ● immediately: section. The drain hose is squashed or kinked. (Red pilot light blinks) Check the drain hose connection.
- Page 20 Malfunction Possible Cause / Solution The programme is still running. Wait the end of washing cycle. ● The door lock has not been released. The door will not open: Wait until the door is released. ● There is water in the drum. Select drain or spin programme to empty out the water.
-
Page 21: Technical Data
Technical data Dimensions Width 60 cm Height 82 cm Depth (including the porthole) 54 cm Electrical connection Information on the electrical connection is given on the rating Voltage - Overall power - Fuse plate on the inner edge of the appliance door Water supply pressure Minimum 0,05 MPa... -
Page 22: Installation Instruction
Installation instruction Unpacking 5. Remove the bracket D, refit the six smaller bolts C and slide out the relevant plastic All transit bolts and packing must be removed spacer E. before using the appliance. 6. Open the porthole, You are advised to keep all transit devices so take out the plastic that they can be refitted if the machine ever plug caps supplied in... - Page 23 for any unevenness in the floor. After having A minimum water pressure of 0.05 MPa (0.5 bar) is required for safe operation of the levelled the machine, tighen the lock nuts. appliance. If you cannot make the cold water connection direct from the rising mains, you may be able to operate the appliance from your cold water storage system.
- Page 24 Levelling Level the washing machine by raising or lowering the feet. The feet may be tight to Special Sport 40° 95° Cottons Sport Shoes 40° 60° Eco 1000 Silk 60° Wash Mini 30' 40° Eco Cold 40° Door Hand Wash Synthetics 30°...
- Page 25 If you require any further advice please The wires in the mains lead are coloured in contact your local water authority. accordance with the following code: Green and Yellow ......- Earth Blue ............- Neutral Brown..........- Live The wire coloured green GREEN &...
- Page 26 Building-in 35 Ø 12.5-14 depth This appliance has been designed to be built into the kitchen furniture. The recess should have the dimensions shown in picture A. 6 0 0 b) Hinges To mount the hinges it is necessary to drill two holes (dia.
- Page 27 Position the base into the recess with its front edge as far forward as the adjoining plinth line will allow. The reason for placing the base in this posi- tion is to allow a small strip of beading to be fitted in front of the appliance feet. Fix the base firmly to the floor using four appro- priate countersunk screws (see Fig.
-
Page 28: Environmental Concerns
Environmental concerns Packaging materials Ecological hints The materials marked with the symbol To save water, energy and to help protect the recyclable. environment, we recommend that you follow >PE<=polyethylene these tips: >PS<=polystyrene Normally soiled laundry may be washed ● >PP<=polypropylene without prewashing in order to save This means that they can be recycled by detergent, water and time (the environment... - Page 32 132 966 890 - 00 - 252008 Subject to change without notice...
Need help?
Do you have a question about the ZWI 1125 and is the answer not in the manual?
Questions and answers