Table of Contents
Advertisement
Advertisement
Table of Contents

Related Manuals for CCV VX 820 ITS


Summary of Contents for CCV VX 820 ITS
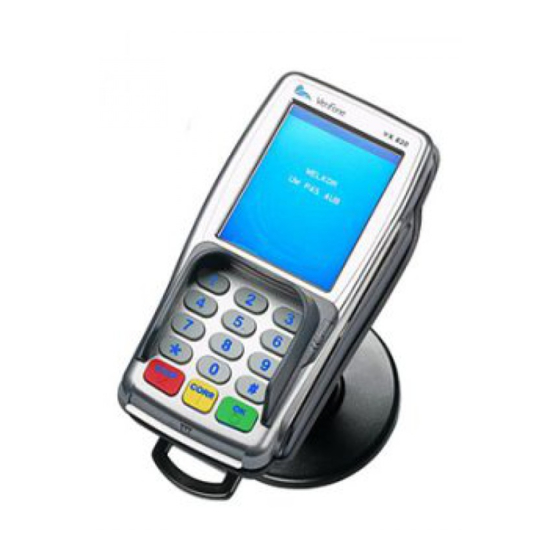
- Page 1 VX 820 ITS Installation & service manual (version 1.0)
- Page 2 CCV Services B.V.2015. All rights reserved. No part of this publication may be reproduced, stored in an automated data base, or published, in any form or by any means, whether electronic, mechanical, by photocopying, recording or otherwise, without the prior written permission of CCV Services B.V.
-
Page 3: Table Of Contents
Abbreviations and terms ..............................6 Related documents ................................. 7 INSTALLING THE PIN PAD ......................8 The difference between a VX 820 ITS PIN pad and a VX 820 PIN pad ..............8 Installation provisions ................................8 Positioning instructions ................................ 8 2.3.1 Positioning the PIN pad ............................8 2.3.2 Using the card reader ............................... - Page 4 4.4.4 Configure ................................... 41 4.4.5 Diagnostics ................................43 4.4.6 The PIN pad menu ..............................44 CONTACT INFORMATION ....................45 Telephone numbers CCV ..............................45 Opening hours CCV ................................45 General address information CCV ........................... 45 CID087A/15042015 © CCV Services B.V. 4 / 45...
-
Page 5: Introduction
Objective document This document describes step by step how a VX 820 ITS PIN pad is to be installed. Next, it describes how to open the menu of the PIN pad. And finally, it explains all menu options that are relevant for installation and service purposes. -
Page 6: Abbreviations And Terms
The port (default: 4101) to which the point-of-sale terminal is to listen for AdminLight commands. AdminLight Program with which the VX 820 ITS PIN pad can be operated remotely. Payment card A card with which payments can be made using a PIN code. -
Page 7: Related Documents
VX 820 ITS Installation & service manual (version 1.0) v1.0, Internal Abbreviation / Term Meaning PIN over open Internet The possibility to carry out transactions by means of an IP connection that is not certified by the Dutch payment association Betaalvereniging Nederland. -
Page 8: Installing The Pin Pad
To install the PIN pad and provide services on it, you make use of the program AdminLight. The conditions below must be met in order to use this program: • AdminLight must have been installed on a PC within the LAN network to which the VX 820 ITS PIN pad and the cash register are also connected; •... -
Page 9: Using The Card Reader
Placing of the terminal close to objects that cause excessive current fluctuations and/or electromagnetic fields Information required to be able to carry out an installation To be able to install the VX 820 ITS PIN pad, you need to have the following information at your disposal: •... -
Page 10: Step 1: Preparing For Installation
• Gateway Connect the VX 820 ITS PIN pad to the LAN network and a power supply connected to a wall socket with 220-230V. Then carry out the following actions to configure the communication settings of the PIN pad: Type in <*>, <#> and three times <OK> as soon as the notification 'START UP' appears on the display. Wait until the menu structure appears on the display and continue on to action 3. - Page 11 VX 820 ITS Installation & service manual (version 1.0) v1.0, Internal Choose the menu option <TERMINAL>. Choose the menu option <COMMUNICATION>. Choose the menu option <TCP/IP>. Choose the menu option <IP MODE>. Choose the menu option <STATIC IP ADDRESSES>. Choose the menu option <IP ADDRESSES.
-
Page 12: Step 4: Connecting The Pin Pad To Adminlight
VX 820 ITS Installation & service manual (version 1.0) v1.0, Internal Choose menu option <GATEWAY>. Press <CORR>. Enter the gateway and confirm with <OK>. To enter the gateway, you must enter multiple full stops (.).Enter this punctuation mark by entering <1> several times. Refer to sub-section 3.3.1... -
Page 13: New Pin Pad
Explanation Select the desired PIN pad in the drop- down menu and choose Start menu. The main menu of the VX 820 ITS PIN pad will now be opened. Choose menu option SERVICE MENU. A pop-up will be opened in which you must enter the password for the service menu. - Page 14 VX 820 ITS Installation & service manual (version 1.0) v1.0, Internal Action Explanation Choose menu option TERMINAL. Choose menu option HW INSTALLATION. Choose menu option TERMINAL INSTALL. A pop-up will be opened in which you must enter the TMS TID.
- Page 15 The default TMS port is given between brackets. Choose OK, or enter an alternative TMS port before choosing OK. The installation of the VX 820 ITS PIN pad will now be started. During the installation process, check the name and address information of the point of sale where you are installing the PIN pad.
- Page 16 VX 820 ITS Installation & service manual (version 1.0) v1.0, Internal Action Explanation Wait until the installation process is completed. When the installation has been completed successfully, the following notification will appear in AdminLight: 'INSTALLATION SUCCESSFUL'. The session with AdminLight will end automatically.
-
Page 17: Used Pin Pad
Explanation Select the desired PIN pad in the drop- down menu and choose Start menu. The main menu of the VX 820 ITS PIN pad will now be opened. Choose menu option SERVICE MENU. A pop-up will be opened in which you must enter the password for the service menu. - Page 18 VX 820 ITS Installation & service manual (version 1.0) v1.0, Internal Action Explanation Choose menu option TERMINAL. Choose menu option HW INSTALLATION. Choose menu option TERMINAL INSTALL. A pop-up will be opened in which you must enter the TMS TID.
- Page 19 The default TMS port is given between brackets. Choose OK, or enter an alternative TMS port before choosing OK. The installation of the VX 820 ITS PIN pad will now be started. During the installation process, check the name and address information of the point of sale where you are installing the PIN pad.
- Page 20 VX 820 ITS Installation & service manual (version 1.0) v1.0, Internal Action Explanation Wait until the installation process is completed. When the installation has been completed successfully, the following notification will appear in AdminLight: 'INSTALLATION SUCCESSFUL'. Next, a configuration session is started.
-
Page 21: Step 6: Activating The Pin Pad
Action Explanation Select the desired PIN pad in the drop- down menu and choose Start menu. The main menu of the VX 820 ITS PIN pad will now be opened. Choose the menu option <MERCHANT MENU>. Enter the password of the merchant menu (99999) and confirm with <OK>. - Page 22 VX 820 ITS Installation & service manual (version 1.0) v1.0, Internal Action Explanation Choose menu option FUNCTIONS. Choose menu option TERMINAL. Choose menu option ACTIVATE TERMINAL. Wait until the PIN pad is activated. The session with AdminLight will end automatically if the activation has been completed.
-
Page 23: Step 7: Configuring Opi Settings (Conditional)
Explanation Select the desired PIN pad in the drop- down menu and choose Start menu. The main menu of the VX 820 ITS PIN pad will now be opened. Choose menu option SERVICE MENU. A pop-up will be opened in which you must enter the password for the service menu. - Page 24 VX 820 ITS Installation & service manual (version 1.0) v1.0, Internal Action Explanation Choose menu option OPI SETTINGS. Choose menu option POS LISTEN PORT. A pop-up will be opened in which you must enter the POS listen port. Enter the desired COM port and choose Choose menu option POS DEVICE PORT.
-
Page 25: Step 8: Checking Whether The Pin Pad Operates Correctly
Always carry out a test transaction to check the operation of the installed PIN pad. You do not have to open the day to carry out the test transaction if the menu of the VX 820 ITS PIN pad is already opened. In that case, the day is automatically opened. - Page 26 VX 820 ITS Installation & service manual (version 1.0) v1.0, Internal Action Explanation Choose menu option ACTIVATE TERMINAL. Carry out a test transaction after the day opening to check the operation of the VX 820 ITS PIN pad. CID087A/15042015 © CCV Services B.V.
-
Page 27: Using The Pin Pad
Display When you open the menu of the VX 820 ITS PIN pad in local mode using AdminLight, you will operate the menu using the PIN pad. The menu and the actions you carry out will be shown on the display. -
Page 28: Opening The Menu Of The Pin Pad
For more information about the opening of the menu, please refer to the user manual of AdminLight. Operating the PIN pad You can operate the menu of the VX 820 ITS PIN pad using the keys and the touchscreen if you have opened the menu in local mode (see section 3.2). -
Page 29: Entering Alphanumerical Characters
Enter <6> six times = n The PIN pads supplied by CCV never show letters on the numerical keys! Please contact our Product Support Desk immediately if a VX 820 ITS PIN pad is provided with letters on the keypad. CID087A/15042015 ©... -
Page 30: The Touchscreen Of The Pin Pad
3.3.2 The touchscreen of the PIN pad The VX 820 ITS PIN pad is provided with a touchscreen with which you can operate the menu of the PIN pad. Touch a menu option to open it. The touchscreen also shows symbols with which you can carry out functions. Touch the desired symbol to carry out the corresponding function. -
Page 31: The Menu Of The Pin Pad
• the software-configuration version • which functionalities have been activated via the TMS of CCV You can open the menu using the program AdminLight. For more information, refer to the user manual of AdminLight (see section 1.6). The main menu... -
Page 32: Display Info
VX 820 ITS Installation & service manual (version 1.0) v1.0, Internal Display info The menu display info contains the following menu options: Menu option Menu option Description Display info Terminal Show general information of the PIN pad, for example the TMS-TID and the software-configuration version. -
Page 33: The Merchant Menu
To open the merchant menu, you have to enter a password. The default value of the password is 99999. For security reasons, CCV recommends you to change the password! After changing it, keep the password in a safe place in your administration. - Page 34 VX 820 ITS Installation & service manual (version 1.0) v1.0, Internal Menu Menu Menu Menu Menu Menu Menu Description option option option option option option option Merchant Reports C-TAP Financial Per terminal Previous Select Print the C-TAP totals of the previous period for a selected acquirer by...
- Page 35 VX 820 ITS Installation & service manual (version 1.0) v1.0, Internal Menu Menu Menu Menu Menu option Menu Menu Description option option option option option option Merchant Reports C-TAP Parameters Terminal Print a report with the information about the general C-TAP application menu parameters.
-
Page 36: Functions
VX 820 ITS Installation & service manual (version 1.0) v1.0, Internal 4.3.3 Functions Menu option Menu option Menu option Menu option Menu option Description Merchant menu Functions Terminal Activate terminal / Deactivate Activate terminal: open a new period for the financial reports. -
Page 37: Configure
VX 820 ITS Installation & service manual (version 1.0) v1.0, Internal 4.3.4 Configure Menu Menu option Menu Menu option Menu Menu option Menu option Description option option option Merchant Configure Terminal Communication TCP/IP Reset all Reset all communication settings to set the terminal to DHCP. -
Page 38: The Service Menu
VX 820 ITS Installation & service manual (version 1.0) v1.0, Internal The service menu 4.4.1 The password of the service menu Contact our Product Support Desk via +31 (0)88 228 9783 to have the password for the service menu calculated. - Page 39 VX 820 ITS Installation & service manual (version 1.0) v1.0, Internal Menu option Menu option Menu option Menu option Menu option Menu option Menu option Description Service menu Reports C-TAP Parameters Terminal Print the parameters of the C-TAP application. Per acquirer Select Print the parameters of the selected acquirer.
-
Page 40: Functions
VX 820 ITS Installation & service manual (version 1.0) v1.0, Internal 4.4.3 Functions Menu option Menu option Menu option Menu option Menu option Description Service menu Functions Terminal Normal Contact TMS for a normal version inspection. Emergency Contact TMS for an emergency call. TMS does not start a software download, but only retrieves the functional parameters. -
Page 41: Configure
VX 820 ITS Installation & service manual (version 1.0) v1.0, Internal 4.4.4 Configure Menu option Menu option Menu option Menu option Menu option Menu option Description Service menu Configure OPI settings POS listen port Set the port (default: 4100) to which the point-of-sale terminal is to listen for the POS system commands. - Page 42 VX 820 ITS Installation & service manual (version 1.0) v1.0, Internal Menu option Menu option Menu option Menu option Menu Menu Menu Description option option option Service menu Configure Print filter Level Configure the level of the ILS print filter.
-
Page 43: Diagnostics
VX 820 ITS Installation & service manual (version 1.0) v1.0, Internal 4.4.5 Diagnostics Menu option Menu option Menu option Menu option Menu option Menu option Description Service menu Diagnosis Magcard reader Test de magnet-strip reader. test Comm test Terminal Test the communication with the primary TMS configuration configuration server. -
Page 44: The Pin Pad Menu
Open the merchant menu. Refer to section for more information about the merchant menu. (*) You cannot choose the menu options in the PIN pad menu by means of AdminLight, but only on location via the VX 820 ITS PIN pad. CID087A/15042015 © CCV Services B.V. -
Page 45: Contact Information
5 CONTACT INFORMATION Telephone numbers CCV Product Support Desk for technical support +31 (0)88 228 9783 / ProductSupportDesk@nl.ccv.eu (*) Sales Support for ordering accessories and fittings +31 (0)88 228 9619 (*) Your e-mail will be answered within one working day.
Need help?
Do you have a question about the VX 820 ITS and is the answer not in the manual?
Questions and answers