Lennox LGM Series Manual
Hide thumbs
Also See for LGM Series:
- Manual (65 pages) ,
- Unit information (54 pages) ,
- Unit information (69 pages)
Table of Contents
Advertisement
Service Literature
The LGM, 092, 102U, 120U and 150U units are configure to
order units (CTO) with a wide selection of factory-installed
options. Units are available in 130,000 to 240,000 Btuh.
heating inputs. Gas heat sections are designed with alu
minized steel tube heat exchangers with stainless steel as
an option.
Cooling capacities range from 7.5 to 12.5 tons. Units come
standard with a fin tube condenser with two single-speed
compressors plumbed in tandem to form a single refriger
ant circuit. Units also offer mechanical cooling down to
40F.
All units are equipped with direct drive blowers. The blower
will operate at lower speeds when demand is low and in
crease to higher speeds when demand is high.
Variable speed VAV system is available as an option which
enables supply duct static measurement to control blower
CFM and discharge air temperature to control cooling
stages. All LGM units are designed to accept any of several
different energy management thermostat control systems
with minimum field wiring. Factory- or field-provided control
options connect to the unit through Smartwire connectors.
When "plugged in" the controls become an integral part of
the unit wiring.
The CORE Control System is designed to accelerate
equipment install and service. Standard with all Model L™
rooftop units, control system integrates key technologies
that lower installation costs, drive system efficiency, and
protect your investments. The CORE Unit Controller is a
microprocessor-based controller that provides flexible con
trol of all unit functions.
Information contained in this manual is intended for use by
qualified service technicians only. All specifications are
subject to change. Procedures outlined in this manual are
presented as a recommendation only and do not super
sede or replace local or state codes.
If the unit must be lifted for service, rig unit by attaching four
cables to the holes located in the unit base rail (two holes at
each corner). Refer to the installation instructions for the
proper rigging technique.
WARNING
Improper installation, adjustment, alteration, service
or maintenance can cause property va, personal in
jury or loss of life. Installation and service must be
performed by a licensed professional HVAC installer
or equivalent, service agency, or the gas supplier
100036
LGM092U through 1502U
To prevent serious injury or death:
1-Lock-out/tag out before performing maintenance.
2- If system power is required (e.g., smoke detector
maintenance, disable power to blower, remove fan
belt where applicable, and ensure all controllers and
thermostats are Set to the "OFF" position before per
forming maintenance.
3- Always keep hands, hair, clothing, jewelery, tools,
etc.,c away from moving parts.
As with any mechanical equipment, contact with
sharp sheet metal edges can result in personal in
jury. Take care while handling this equipment and
wear gloves and protective clothing.
LGM SERIES
7.5 to 12.5 ton
38.1 to 70.3 kW
WARNING
CAUTION
Table of Contents
. . . . . . . . . . . . . . . . . . . . .
. . . . . . . . . . . . . . . . . . . . . . . . . . . .
. . . . . . . . . . . . . . . . . . . . . . . . . . . . .
. . . . . . . . . . . . . . . . . . . . . . . . . . . . .
. . . . . . . . . . . . . . . . . . . . . . . . . .
. . . . . . . . . . . . . . . . . . . . . . .
. . . . . . . . . . . . . . .
. . . . . . . . . . . . . . . . . . . . . . . . . . . . . .
. . . . . . . . . . . . . . . . . . . .
. . . . . . . . . . . . . . . .
. . . . . . . . . . . . . . . . . . . . . . . . . .
. . . . . . . . . . . . . . . . . . . . . . . . . .
. . . . . . . . .
. . . . . . . . .
Page 2
Page 5
Page 6
Page 7
Page 10
Page 13
Page 37
Page 37
Page 38
Page 40
Page 42
Page 43
Page 49
Page 51
Advertisement
Table of Contents

Related Manuals for Lennox LGM Series


Summary of Contents for Lennox LGM Series
-
Page 1: Table Of Contents
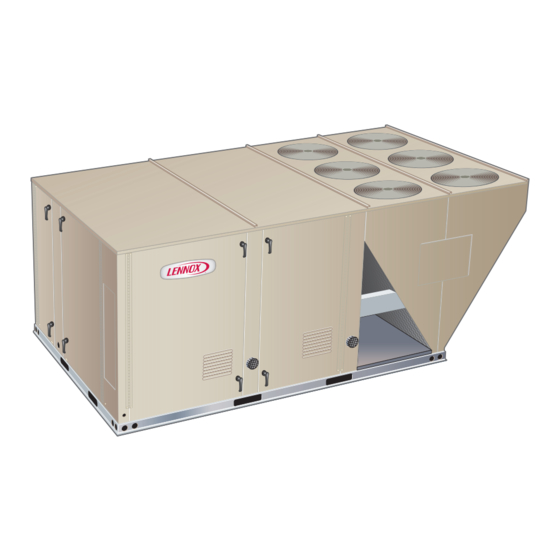
LGM SERIES 7.5 to 12.5 ton 100036 38.1 to 70.3 kW Service Literature LGM092U through 1502U The LGM, 092, 102U, 120U and 150U units are configure to order units (CTO) with a wide selection of factory-installed options. Units are available in 130,000 to 240,000 Btuh. -
Page 2: Options / Accessories
Horizontal Discharge Kit 51W25 54W96 Return Air Adaptor Plate (for LC/LG and TC/TG/TH unit replacement) CONTROLS Blower Proving Switch 21Z10 Commercial Controls LonTalk Module - For Lennox CORE Control System 54W27 ® ® Novar Factory ® Dirty Filter Switch 53W67... - Page 3 OPT IONS / A C C ESSORIES Unit Model No Catalog Item Description Number INDOOR AIR QUALITY Air Filters 50W61 Healthy Climate High Efficiency Air Filters MERV 8 (Order 4) ® 20 x 25 x 2 in. MERV 13 (Order 4) 52W41 MERV 16 (Order 4) 21U41...
- Page 4 OPT IONS / A C C ESSORIES Unit Model No Catalog Item Description Number ECONOMIZER High Performance Economizer (Approved for California Title 24 Building Standards / AMCA Class 1A Certified) High Performance Economizer 20U80 Downflow or Horizontal - Includes Outdoor Air Hood and Downflow Barometric Relief Dampers with Exhaust Hood NOTE - For horizontal economizer applications order optional Horizontal Low Profile Barometric Relief Dampers and Horizontal Discharge Kit...
-
Page 5: Specifications
SP EC IFIC ATIONS UNIT General Data Nominal Tonnage 7.5 Ton 8.5 Ton 10 Ton 12.5 Ton Efficiency Type Ultra-High Ultra-High Ultra-High Ultra-High Model Number LGM092U4E LGM102U4E LGM120U4E LGM150U4E Blower Type DirectPlus™ DirectPlus™ DirectPlus™ DirectPlus™ ECM Direct Drive ECM Direct Drive ECM Direct Drive ECM Direct Drive with SZVAV... -
Page 6: High Altitude
SP EC IFIC ATIONS G A S HEAT Heat Input Type Standard Medium High Number of Gas Heat Stages Gas Heating Input - Btuh First Stage 84,500 117,000 156,000 Performance Second Stage 130,000 180,000 240,000 Output - Btuh Second Stage 104,000 144,000 192,000... -
Page 7: Blower Data
BLOWER D ATA BLOWER TABLE INCLUDES RESISTANCE FOR BASE UNIT ONLY (NO HEAT SECTION) WITH DRY INDOOR COIL AND AIR FILTERS IN PLACE. FOR ALL UNITS ADD: 1 − Wet indoor coil air resistance of selected unit. 2 − Any factory installed options air resistance (heat section, Economizer, etc.) 3 −... - Page 8 BLO WER DATA POWER EXHAUST FAN PERFORMANCE Return Air System Static Pressure Air Volume Exhausted in. w.g. 3175 0.05 2955 0.10 2685 0.15 2410 0.20 2165 0.25 1920 0.30 1420 0.35 1200 FACTORY INSTALLED OPTIONS/FIELD INSTALLED ACCESSORY AIR RESISTANCE - in. w.g. Gas Heat Exchanger Filters Return...
- Page 9 BLO WER DATA CEILING DIFFUSERS AIR RESISTANCE - in. w.g. RTD11 Step-Down Diffuser FD11 Flush Air Volume 1 Side, 2 Ends All Ends & Sides Diffuser Unit Size 2 Ends Open Open Open 2400 0.21 0.18 0.15 0.14 2600 0.24 0.21 0.18 0.17...
-
Page 10: Electrical Data
ELECTRIC AL DATA 7 .5 TO N Model No. LGM092U4E/ LGM092U4P Voltage - 60Hz 208/230V-3ph 460V-3ph 575V-3ph Compressor 1 Rated Load Amps (Inverter) Locked Rotor Amps Compressor 2 Rated Load Amps 13.7 (Non-Inverter Locked Rotor Amps 83.1 Outdoor Fan Full Load Amps (2 ECM) Motors (2) Total Power Exhaust... - Page 11 ELECTRIC AL DATA 1 0 TO N Model No. LGM120U4E/ LGM120U4P Voltage - 60Hz 208/230V-3ph 460V-3ph 575V-3ph Compressor 1 Rated Load Amps 13.5 (Inverter) Locked Rotor Amps Compressor 2 Rated Load Amps (Non-Inverter Locked Rotor Amps 38.9 Outdoor Fan Full Load Amps (2 ECM) Motors (2) Total Power Exhaust...
- Page 12 PARTS ARRANGEMENT - 092U, 102U, 120U, 150U BLOWER CONDENSER REHEAT COIL EVAPORATOR (DIRECT DRIVE) (OPTIONAL) FANS COIL FILTERS (FOUR - 20 X 25 X 2”) CONDENSER COIL COMPRESSOR INVERTER (BEHIND THE HINGED PANEL) ECONOMIZER (OPTIONAL) UNIT CONTROLLER WIFI ANTENNA IGNITION (behind panel) CONTROL COMBUSTION...
-
Page 13: I-Unit Components
I-UNIT COMPONENTS 208/230V TRANSFORMER BLUE YELLOW SECONDARY WARNING Electric shock hazard. Can cause injury 208 VOLTS or death. Before attempting to perform any service or maintenance, turn the 230 VOLTS PRIMARY electrical power to unit OFF at discon ORANGE BLACK nect switch(es). - Page 14 9-Outdoor Fan Motor Fuse Block & Fuse 11-Ultraviolet Germicidal Lamp (UVC) Transformer T49 UVC transformer T49 is used by units of all voltages except STD SCCR 240V, 300V and higher rated SCCR units have 208/230V and 575V which are equipped with a UVC. The three line voltage fuses F10 provide overcurrent protection auto voltage to 230VAC transformer is installed in the con...
- Page 15 Temperature Sensors The return air (RT16) and discharge air (RT6) duct probes and the outdoor air (RT17) are all two wire thermistors. The resistance vs. temperature table is shown below: Table 1 Resistance vs. Temperature Temperature °F Temp. °F (°C) Resistance +/-2% Resistance +/-2% Temp.
- Page 16 PLUMBING, COMPRESSOR AND REFRIGERANT CIRCUITS DETAIL Suction Line Suction Line Stage 2 Stage 1 Discharge Line Stage 1 Discharge Line Stage 2 Low Pressure Switch High Pressure Evaporator Coil Switch Low Pressure Switch High Pressure Compressor Switch Compressor FIGURE 6 B-Cooling Components Units are equipped with a single slab style evaporator.
- Page 17 1-Compressors B1, B2 2-Compressor Inverter A192 Units are equipped with one variable speed scroll and one WARNING fixed scroll compressor each operating on a separate cool ing circuit. Compressor capacity may vary from stage to Electrical Hazard stage. In all cases, the capacity of each compressor is High Voltage added to reach the total capacity of the unit.
- Page 18 INVERTER CONTROLS BEHIND THE HINGED CONTROL PANEL REACTOR (not used on J volt units) T3 Transformer (used on J volt units INVERTER MODBUS COMMUNICATION HAR INVERTER POWER NESS CONNECTION TRANSFORMER A192 A192 COMPRESSOR INVERTER FILTER BOARD BEHIND HINGED PANEL FIGURE 7 Page 18...
- Page 19 TABLE 5 INVERTER-RELATED ALARMS ALARM CODE DISPLAY MESSAGE EVENT ACTION Possible alarming values for Prodigy Alarm 187 are: 12 - High compressor input current 13 - High heat sink temperature 14 - High PFC input current Alarm might be caused by outdoor fan abnormal operation, high ambient conditions, dirty outdoor coil, INVERTER LOW LEVEL refrigerant overcharge, or a blocked heat sink.
- Page 20 INVERTER WIRE ROUTING TRANSFORMER A192 INVERTER 208/230V INVERTER BOARD SHOWN FILTER BOARD W V U High voltage en ters the filter board here. High voltage enters the compressor COMPRESSOR here. REACTOR FIGURE 8 3-Crankcase Heaters HR1, HR2 INVERTER HEAT SINK All LGM units use insertion type heaters.
- Page 21 5-Filter Drier Unit Controller. The PWM signal determines the condenser fan speed. Both fans will operate in low speed with a Y1 de LGM units have a filter drier located in the liquid line of each mand and both will will operate in high speed with a Y2 de refrigerant circuit.
- Page 22 THERMISTOR LOCATION RT42, 43, 46, 47 (EVAPORATOR COIL VIEW FROM FRONT SIDE OF UNIT) RT42 RT47 RT46 BULB RT42/43 SUCTION LINE RT43 FIGURE 10 Page 22...
- Page 23 THERMISTOR LOCATION RT44 & 45 (VIEW FROM FRONT SIDE OF UNIT) 092, 102 CONDENSER COIL 120, 150 CONDENSER COIL RT44 & 45 RT44 RT45 RT45 RT44 FIGURE 11 Page 23...
- Page 24 THERMISTOR LOCATION RT48 & 49 (VIEW FROM FRONT SIDE OF UNIT) 092, 102 CONDENSER COIL 120, 150 CONDENSER COIL RT48 RT49 FIGURE 12 Page 24...
- Page 25 C-Blower Compartment Initiate blower only (G) demand at thermostat according to instructions provided with thermostat. Unit will cycle on Units are equipped with variable speed, direct drive blow thermostat demand. The following steps apply to applica ers. The installer is able to enter the design-specified sup tions using a typical electro-mechanical thermostat.
- Page 26 LOCATION OF STATIC PRESSURE READINGS INSTALLATIONS WITH DUCTWORK INSTALLATIONS WITH CEILING DIFFUSERS ROOFTOP UNIT ROOFTOP UNIT RETURN AIR READING LOCATION RETURN AIR READING RE RE LOCATION SUPPLY SUPPLY TURN TURN FIRST BRANCH OFF OF MAIN RUN MAIN DUCT RUN SUPPLY AIR SUPPLY AIR READING READING...
- Page 27 C-Direct Drive Start-Up installed or if there is a change in the duct work or air filters after installation. Use the mobile service app to navigate to The supply CFM can be adjusted by changing Unit Con the SETUP>TEST & BALANCE>BLOWER menu. After troller settings.
- Page 28 TABLE 7 DIRECT DRIVE BLOWER MOTOR TROUBLESHOOTING Failure Error Warning Reason Troubleshoot No changes in hall signals Check for obstruction keeping Locked Rotor • within 2000ms impeller from rotating Warning, no error code set, Check for secondary airflow source in Braking Mode •...
- Page 29 TABLE 8 MANUFACTURER'S NUMBERS DRIVE COMPONENTS Drive Motor Pulley Blower Pulley Belt Supplier No. OEM Part No. Supplier No. OEM Part No. Supplier No. OEM Part No. 1VP34x7/8 31K6901 AK54 x 1 100244-19 100245-17 1VP34x7/8 31K6901 AK49 x 1 100244-18 100245-16 1VP34x7/8 31K6901...
- Page 30 HEATING SECTION COMPONENTS S18 BLOWER PROVING SWITCH COMBUSTION AIR INDUCER PRIMARY GV1 GAS LIMIT VALVE SWITCH J15 P15 IGNITION CONTROL S47 ROLLOUT IGNITION SENSOR SWITCH WIRE WIRE FIGURE 15 D-GAS HEAT COMPONENTS out, the ignition control automatically resets and provides three more attempts at ignition.
- Page 31 NORMAL IGNITION SEQUENCE - TIMINGS NOMINAL ON / CLOSED É É OFF / OPEN SECONDS 0 END OF DEMAND É É É É É É É É É É É É É THERMOSTAT DEMAND COMBUSTION AIR BLOWER É É É É É É É É É É É É É É...
- Page 32 2-Heat Exchanger (Figures 19 and 20) BURNER BOX ASSEMBLY The LGM units use aluminized steel inshot burners with matching tubular aluminized (stainless steel is an option) VALV steel heat exchangers and two‐stage redundant gas valves. Units are equipped with one eleven tube/burner for high heat and one six tube/burner for standard heat.
- Page 33 INSERT LOCATION - DIRECT DRIVE ONLY STANDARD HEAT (130,000BTUH) HIGH HEAT (180,000BTUH) Note - No inserts on medium heat. INSERTS (4) INSERTS (2) FIGURE 21 5-Primary High Temperature Limits S10 TYPICAL GAS BURNER ASSEMBLY S10 is the primary high temperature limit and is located on BURNER SUPPORT CAP the blower deck to the right of the blower housing.
- Page 34 6-Flame Roll-out Limit S47 pressure in 40 seconds and off to low fire pressure in 30 seconds). On the Honeywell second stage is quick open Flame roll-out limit S47 is a SPST N.C. high temperature ing. On a call for first stage heat (low fire), the valve is ener limit located as shown in figure 15.
- Page 35 11-Spark Electrodes 12-Flame Sensors A flame sensor is located on the right side of each burner An electrode assembly is used for ignition spark. Two iden support. The sensor is mounted through a hole in the burn tical electrodes are used (one for each gas heat section). er support and the tip protrudes into the flame envelope of The electrode is mounted through holes on the left‐most the right most burner.
-
Page 36: Ii-Placement And Installation
II-PLACEMENT AND INSTALLATION are listed for sea level applications at 80 F dry bulb and Make sure the unit is installed in accordance with the instal F wet bulb return air. lation instructions and all applicable codes. See acces 4- Compare the normal operating pressures to the pres sories section for conditions requiring use of the optional sures obtained from the gauges. - Page 37 TABLE 14 581030-01 TABLE 18 581034-01 LGM/LCM102U Reheat LGM/LCM150U Reheat Circuit 1 Circuit 2 CIRCUIT 1 CIRCUIT 2 Outdoor Outdoor Dis Dis Dis Dis Coil Coil Suction Suction Suction Suction Entering charge charge charge charge Entering +5 psig +5 psig +10 psig +5 psig +10 psig...
-
Page 38: Iv-Start Up - Operation
IV-START-UP - OPERATION 1- Initiate first and second stage cooling demands ac cording to instructions provided with thermostat. Refer to start-up directions and to the unit wiring diagram 2- First-stage thermostat demand will energize compres when servicing. See unit nameplate for minimum circuit sors 1 and 2 on low speed. - Page 39 5- Turn the knob on the gas valve clockwise to “OFF”. D-Safety or Emergency Shutdown Depress 36C knob slightly. Do not force. Turn off power to the unit. Close manual and main gas 6- Wait five (5) minutes to clear out any gas. If you then valves.
-
Page 40: V-System Service Checks
V- SYSTEMS SERVICE CHECKS When checking piping connection for gas leaks, use the preferred means. Common kitchen detergents can cause harmful corrosion on various metals used in gas piping. WARNING The use of specialty Gas Leak Detector is strongly recom mended. - Page 41 Manifold Adjustment Procedure TYPICAL GAS BURNER ASSEMBLY 1- Connect test gauge to the outlet pressure tap on the BURNER SUPPORT CAP gas valve. Start the unit (call for second stage heat) and allow five minutes for the unit to reach steady state. BURN...
-
Page 42: Vi-Maintenance
1- Disconnect power to unit. NOTE-Filters must be U.L.C. certified or equivalent for use in Canada. 2- Remove lead from sensing electrode and install a 0-50DC microamp meter in series between the sensing B-Lubrication electrode and the sensing lead. All motors and blower wheels used in LGM units are prelu bricated;... -
Page 43: Vii-Accessories
VII-ACCESSORIES TYPICAL FLASHING DETAIL The accessories section describes the application of most UNIT BASE BOTTOM of the optional accessories which can be factory or field in stalled to the LGM units. UNIT BASE A-Mounting Frames RAIL When installing units on a combustible surface for down FIBERGLASS INSULATION flow discharge applications, a C1CURB roof mounting... - Page 44 LAOAD(M) MOTORIZED OUTDOOR AIR DAMPER MOTORIZED DAMPER COVER PANEL HORIZONTAL SUPPLY AIR OPENING COMPRESSOR HORIZONTAL SECTION RETURN AIR OPENING LOWER PANEL FIGURE 34 MANUAL OUTDOOR AIR DAMPER COVER PANEL MANUAL DAMPER HORIZONTAL SUPPLY AIR OPENING COMPRESSOR HORIZONTAL SECTION RETURN AIR OPENING LOWER PANEL FIGURE 35...
- Page 45 ECONOMIZER ACCESSORY PANEL MULLION ECONOMIZER DIVIDER PANEL BOTTOM OF COMPRESSOR SECTION FLANGED RETURN AIR OPENING FIGURE 36 H-Economizer (all units) NOTE - All free cooling modes of operation will modu late dampers to 55_F (13_C) supply / discharge air. (Field or Factory Installed) The optional E1ECON15 economizer can be used with Unit Controller Settings downflow and horizontal air discharge applications.
- Page 46 SENSOR LOCATION FIN/TUBE UNIT SHOWN DISCHARGE AIR SENSOR RT16 RETURN AIR SENSOR RT17 OUTDOOR AIR SENSOR (ON RT17 ULTRA HIGH EFFICIENCY UNITS OUTDOOR AIR SENSOR (ON HIGH AND UNITS EQUIPPED WITH AN AND STANDARD EFFICIENCY UNITS ALL-ALUMINUM COIL; SECURED EQUIPPED WITH TUBE/FIN COIL) TO INSIDE OF CORNER MULLION) FIGURE 37 I-Gravity Exhaust Dampers...
- Page 47 K-Optional Cold Weather Kit (Canada only) M-Indoor Air Quality (CO ) Sensor A63 Electric heater is available to automatically control the mini The indoor air quality sensor monitors CO levels and re mum temperature in the gas burner compartment. Heater ports the levels to the A55 Unit Controller.
- Page 48 REHEAT MODE REFRIGERANT ROUTING FIGURE 40 COOLING MODE REFRIGERANT ROUTING FIGURE 41 Page 48...
-
Page 49: Viii-Direct Drive Supply Air Inverter
TABLE 23 L14 Reheat Coil Solenoid Valve Blower CFM Design Specifications When Unit Controller input (Unit Controller J298-5 or Design Blower Speed J299-8) indicates room conditions require dehumidifica Specified CFM tion, L14 reheat valve is energized (Unit Controller P269-3) Heating and refrigerant is routed to the reheat coil. - Page 50 Note - Intake air CFM can also be determined using the out TABLE 24 MINIMUM AND MAXIMUM CFM door air temperature, return air temperature and mixed air temperature. Refer to the economizer or outdoor air Gas Heat Minimum CFM damper installation instructions. Airflow Unit Gas Heat Size...
-
Page 51: Xi-Wiring And Operation Sequence
LOW TEMPERATURE VESTIBULE HEATER, BURNER 1 P228 P228 DENOTES OPTIONAL COMPONENTS AND WIRING Model: LGM Series RTU − Gas Heat HTG CLG ACCS ACCS 130k, 180k, 240k BtuH WI R I N G D I A GRAM F LOW Voltage: 208/240/3/60(Y),460/3/60(G) 538149−01... - Page 52 FROM F10 T1 LOAD, P228 P228 B−SECT LOC FF09 WB−001 DENOTES OPTIONAL COMPONENTS AND WIRING Model: LGM Series RTU − Gas Heat ACCS ACCS 130k, 180k, 240k BtuH WI R I N G DI A GRAM F LOW Voltage: 575/3/60 (J) 538173−01 Supersedes: XXXXXX−XX Form No:...
- Page 53 GAS HEAT SEQUENCE OF OPERATION LGM092/150 First Stage Heat: End of Second Stage Heat: 1- Heating demand initiates at W1 in the thermostat. 8- Heating demand is satisfied. Terminal W2 (high fire) is 2- 24VAC is routed through the A55 unit controller to A3 de-energized.
- Page 54 ELECTRONIC OR ELECTROMECHANICAL THERMOSTAT 24 V POWER TO M3 THERMOSTAT INPUTS J297A P297 TO R TO G K55*1 J255 J298A P255 TO Y1 OTHER THERMOSTAT SIGNALS REMAIN CONNECTED AS SHOWN ON THE RIGHT. TO PROVIDE SUPERMARKET REHEAT SCHEME USE S86 DEHUMIDISTAT AND K55. J298A J298A P298...
- Page 55 BRWN DESCRIPTION A130 COMPONENT TB37 SENSOR, SOLID STATE ENTHALPY CONTROL, ERS A130 CONTROL, MAIN PANEL LENNOX SENSOR, ENTHALPY INDOOR CONTROL, REMOTE MIN POS (OPT) MOTOR, DAMPER ECONOMIZER MOTOR, EXHAUST DAMPER JACK, UNIT ECONOMIZER JACK, SENSOR OUTDOOR ENTHALPY J104 JACK, SENSOR RETURN AIR ENTHALPY...
- Page 56 Sequence of Operation LGM/LCM092U/150U Power: 1. Line voltage through the TB13 terminal block the T1 transformer. T1 provides 24VAC power to A55 Unit Controller which provides 24VAC to the unit cooling, heating and blower controls. 2. Line voltage is also routed to compressor crankcase heaters, compressor contactors, supply air inverter control, condenser fan relays and exhaust fan relays.
- Page 57 DIRECT DRIVE BLOWER SEQUENCE OF OPERATION / TROUBLESHOOTING Blower Operation: Line voltage is routed to B3 blower motor through TB2 terminal strip, TB13 terminal strip, T4 transformer (575v units only), and J/P48 terminals 1, 2 and B3 blower motor runs internal diagnostics to check for proper temperature, voltage, etc. (KL2-2 and -3). This process takes approximately 10 seconds. Refer to the Failure Handling/Troubleshooting section.
- Page 58 LGM/LCM192U/150U Y Voltage DRNWR TO A3 ON GAS UNITS. REF A−SECT LOC CC01−02 RED−BLK RED−BLK 24VAC RT17 SHIELDED HPSW1 CABLE DRNWR RED−BLK RED−BLK RT48 RT46 HTSW1 ODF2 PWM3 P337 24VAC P336 5VDC RED−BLK RED−BLK OPTIONAL IONIZER HTSW2 RT49 RT47 WIRING. SEE IAQ WIRING DIAGRAM ODF1 PWM2...
- Page 59 LGM/LCM092U/150U G Voltage DRNWR TO A3 ON GAS UNITS. REF A−SECT LOC CC01−02 RED−BLK RED−BLK 24VAC RT17 SHIELDED CABLE HPSW1 TWISTED PAIR DRNWR RED−BLK RED−BLK RT48 RT46 HTSW1 ODF2 PWM3 P337 24VAC P336 5VDC RED−BLK RED−BLK HTSW2 RT49 RT47 OPTIONAL IONIZER WIRING.
- Page 60 LGM/LCM092U/150U J Voltage DRNWR TO A3 ON GAS UNITS. REF A−SECT LOC CC01−02 RED−BLK RED−BLK 24VAC RT17 SHIELDED CABLE HPSW1 TWISTED PAIR DRNWR RED−BLK RED−BLK RT48 RT46 HTSW1 ODF2 PWM3 P337 24VAC P336 5VDC OPTIONAL IONIZER WIRING. SEE IAQ RED−BLK RED−BLK HTSW2 RT49...
Need help?
Do you have a question about the LGM Series and is the answer not in the manual?
Questions and answers