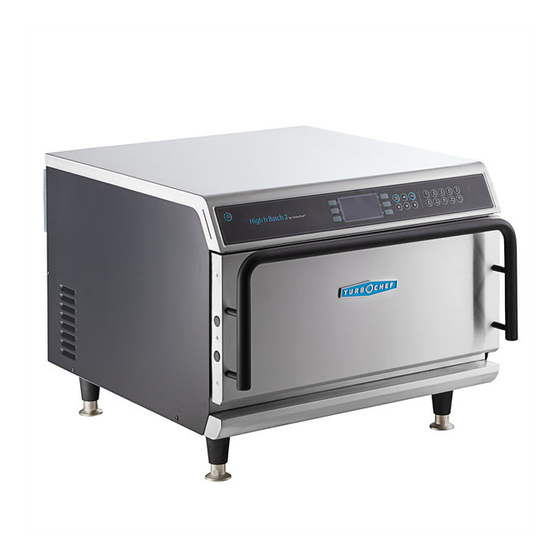
TurboChef High h batch 2 Service Manual
Rapid cook oven
Hide thumbs
Also See for High h batch 2:
- Owner's manual (38 pages) ,
- Features & benefits (1 page) ,
- Owner's manual (36 pages)

Related Manuals for TurboChef High h batch 2


Summary of Contents for TurboChef High h batch 2
- Page 1 Service Manual f o r t h e t urb och ef hig h batch 2 r a pid c oo k o ve n ©2009–2010 TurboChef Technologies, Inc.
- Page 3 For further information call: Customer Service at 800.90tur bo Sales & Marketing at 866.90turb o...
- Page 4 The information contained in this manual is important for the proper installation, use, maintenance, and repair of this oven. Follow these procedures and instructions to ensure satisfactory baking results and years of trouble-free service. Errors – descriptive, typographic, or pictorial – are subject to correction. Specifications are subject to change without notice.
-
Page 5: Table Of Contents
Table of Contents Safety Instructions General Safety Information Reducing Fire Risk Preventing Oven Damage Grounding Instructions Power Cord Replacement Specifications and Installation Theory of Operation Certifications Dimensions Construction Exterior Interior Electrical Specifications United States Canada Latin America Europe/Asia/Pacific United Kingdom/Ireland Standard Features Performance Installation... - Page 6 Operating the Oven Control Display and Key Identification Cooking Instructions Additional Cooking Options Time Screen Done Screen Options Menu Enabling/Disabling the Edit Menu Erasing the Recipe Menu Enabling/Disabling the Write Card Function Enabling/Disabling the Time Screen Enabling/Disabling the Done Screen Demonstration Mode Programming Recipes Adjusting the Cook Cavity Temperature...
- Page 7 Fault Code Troubleshooting F1: BLOWER (Blower Running Status Bad) F2: LOW TEMP (Cook Temperature Low) F6: EC TEMP (Electrical Compartment Temperature High) F7: THERMO (Thermocouple Open) F8: HEAT LOW Non-Fault Code Troubleshooting No Keypad Input “Cook Door Open” Message when Door is Closed No Display –...
- Page 8 Door Handle Door Hinges Door Skin Door Interlock Switch Removing/Reinstalling the Oven Door The Filtering System/Miscellaneous Components Filtering System Components Grease Filter Grease Filter Frame Catalytic Converter Miscellaneous Components Schematics High h Batch 2 Schematic Control Board and Test Point Locations...
-
Page 9: Important Safety Instructions
IMPORTANT SAFETY INSTRUCTIONS WARNING: When operating this oven, strictly adhere to all safety precautions below, on page ii, and throughout this manual to reduce the risk of burns, electric shock, fire, injury, oven damage, or property damage. Improper installation, adjustment, alteration, service, or maintenance of this equipment can cause property damage, injury, or death. -
Page 10: Safety Instructions
Once per month or more frequently depending on use, perform the deep cleaning procedure (pages £ 10-11). Failure to do so will adversely affect cooking performance and shorten the life of the oven. Clean the oven only with TurboChef Oven Cleaner. £ Operate the oven only when food is in the cook chamber. -
Page 11: Specifications And Installation
Specifications and Installation... -
Page 13: Theory Of Operation
(425 mm) Volume 1.45 cu. ft. (41.1 liters) Wall Clearance 2” (51 mm) Sides 2” (51 mm) 25.9 in. (658 mm) 31.7 in. (805 mm) 29.2 in. (742 mm) 10 in. (254 mm) Figure 1: High h Batch 2 Dimensions... -
Page 14: Construction
SPECIFICATIONS AND INSTALLATION Construction Latin America HHB2LA (P/N: HHB-8603-1K-2073) Exterior £ Phase Stainless steel front, top, back, and powder- £ Voltage 230 VAC coated sides Frequency 50/60 Hz 4” (102 mm) matte black legs £ Current 24 amps Ergonomic, cool to touch powder-coated door £... -
Page 15: Standard Features
£ placed on the table or countertop at all times. Warranty - 1 year parts and labor £ TurboChef will not recognize a fallen oven as a warrantable claim and is not liable for any Performance injuries that may result. -
Page 16: Securing Oven To Cart
(kit HHB-8206 includes four brackets). Built-In Installation 5. Secure each leg by aligning the bracket with the TurboChef ovens are designed to be installed on holes on the oven cart and attaching the parts a countertop or table. They are not intended for listed in Figure 3. - Page 17 Bolt Flat Washer Bracket Flat Washer Split-Lock Washer Fig ure 3: HhB 2 Oven Secured to TurboChef Oven Cart Fig ure 4: Stacked HhB 2 Ovens (Two Configurations)
-
Page 18: Installation Near Open Heat Source
F igur e 5 : Installation Near Open Heat Source Installation Near Open Heat Source Setup Once the oven is properly positioned on the When placing a TurboChef oven near an open counter: heat source, strictly adhere to the following (Figure 5): 1. -
Page 19: Optional Installation Items
Optional Installation Items 18" (457 mm) Oven Cart Dimensions Height 18" (457 mm) Oven Restraint Kit (P/N: TC3-0242 KIT) with single oven 39.4" (1001 mm) The oven restraint kit is an optional device that with stacked ovens* prevents the oven from moving forward during use top unit without legs 56.8"... -
Page 20: Replacing/Exchanging Jetplates
SPECIFICATIONS AND INSTALLATION Replacing/Exchanging Jetplates Reference Figure 7. The top and bottom jetplates ensure hot air is distributed evenly to maximize food quality. For product-specific results, jetplates with different hole patterns can be installed. To remove the bottom jetplate: Ensure the oven is off and the cook cavity temperature is below 150°F (66°C). -
Page 21: Oven Maintenance
Oven Maintenance... - Page 23 The daily and deep cleaning procedures below will help maintain the High h Batch 2 oven. Be sure to use only TurboChef Oven Cleaner; any other cleaner can damage and void the warranty on critical parts. To order TurboChef Oven Cleaner, Oven Guard, or a new filter, call 1-800-90TURBO, +1-214-379-6000, or your Authorized Distributor.
-
Page 24: Deep Cleaning
OVEN MAINTENANCE Deep Cleaning TurboChef recommends deep-cleaning once per month, or more frequently depending on oven use. Step 1: Prepare the Oven Ensure the oven is turned off – press the On/Off key. £ DO NOT attempt to clean the oven until the display reads “Ready to £... - Page 25 Step 6: Remove the Upper Jetplate Remove both upper support rails by pulling the peg (Figure 6a). £ Remove the upper jetplate. If additional clearance is required, remove the £ air diverter using a Phillips screwdriver (Figure 6b). Wash, rinse, sanitize, and dry the upper jetplate and support rails. £...
- Page 26 OVEN MAINTENANCE This page intentionally left blank.
-
Page 27: Operating The Oven
Operating the Oven... -
Page 29: Control Display And Key Identification
F igur e 8 : High h Batch 2 Keypad Control Display and Key Identification This section contains information on: Control display and key identification Reference Figure 8. £ Cooking instructions £ 1. Display Additional cooking options £ Programming recipes Displays operational information. -
Page 30: Cooking Instructions
OPERATING THE OVEN 1ST GROUP 4TH GROUP 5TH GROUP 2ND GROUP 3RD GROUP 6TH GROUP Press the soft key that corresponds to the desired food NOTE: Press the Down key to view food groups group. In this example, pressing the top left soft key 7-12. -
Page 31: Additional Cooking Options
ENTER COOK TIME 02:00 START Press the “Start” soft key (bottom right) Use the Up and Down keys to adjust time in to initiate a cook cycle. 5-second increments. F igur e 1 1 : Time Screen DONE SAVE TIME COOK MORE Press the “Save Time”... -
Page 32: Enabling/Disabling The Edit Menu
OPERATING THE OVEN OVEN OPTIONS EDIT MENU ON TIME SCREEN ON ERASE MENU DONE SCREEN ON WRITE CARD OFF DEMONSTRATE OFF Step: 1 Step: 2 The Edit menu is turned on. To access the Options menu, press and hold either key for two seconds. F i g u re 1 3 : Enabling/Disabling the Edit Menu OVEN OPTIONS EDIT MENU ON... -
Page 33: Enabling/Disabling The Write Card Function
OVEN OPTIONS EDIT MENU ON TIME SCREEN ON ERASE MENU DONE SCREEN ON WRITE CARD OFF DEMONSTRATE OFF Step: 1 Step: 2 The Write Card function is turned off. To access the Options menu, press and hold either key for two seconds. Fig ure 1 5 : Enabling/Disabling the Write Card Function OVEN OPTIONS EDIT MENU ON... -
Page 34: Enabling/Disabling The Done Screen
Demonstration Mode Disabling it helps ensure all originally-programmed When enabled, demonstration mode will prevent cook times remain unaltered. By default, the Done the oven from heating. This mode should remain screen is enabled. off unless otherwise instructed by TurboChef. -
Page 35: Programming Recipes
SET TEMP 475°F PRESS “ENTER” Step: 3 & 4 Step: 5 F igur e 1 8 : Adjusting the Cook Cavity Temperature Programming Recipes 6. Select the food group that contains the item to be modified (Figure 19). Programming options include: 7. - Page 36 OPERATING THE OVEN EDIT GROUP 1ST GROUP 4TH GROUP 2ND GROUP 5TH GROUP 3RD GROUP 6TH GROUP Step: 6 In this example, pressing the top left soft key would NOTE: Press the Down key to view Food access all food items in the “1st Group”. Groups 7-12.
-
Page 37: Ordering A Smart Card
3. Insert the smart card into the smart card reader Ordering a Smart Card Orient the card as shown in Figure 22. To order a Smart Card, call 1-800-90TURBO, 4. Press the bottom-left soft key. +1 214-379-6000, or your Authorized Distributor. 5. - Page 38 OPERATING THE OVEN This page intentionally left blank.
-
Page 39: Diagnosing An Issue
Diagnosing an Issue... -
Page 41: Fault Codes: Descriptions, Clearing Instructions, And Troubleshooting
Testing options £ F2: LOW TMP (Cook Temperature Low) The High h Batch 2 oven continually monitors This fault will display if the cook chamber and logs fault conditions. For instructions on temperature is more than 84°F (47ºC) below the viewing the fault log, see page 26. -
Page 42: F6: Ec Temp (Electrical Compartment Temperature High)
DIAGNOSING AN ISSUE High-limit reset button F i g u re 2 6 : Location of High-Limit Thermostat Reset Button F6: EC TEMP (Electrical Compartment To clear this fault: Temperature High) The control system must detect continuity on This fault displays if the electrical compartment the thermocouple circuit. -
Page 43: Status Indicators
TEST HHB2STD 080409 CC 81°F BLOWER HEATER A FAULTS HEATER B OFFSET RACK OS F igur e 2 7 : Test Mode Screen 1 of 2 TEST HHB2STD 080409 CC 81°F DIAG °ELEC COOKS °F/°C ACCUM F igur e 2 8 : Test Mode Screen 2 of 2 Status Indicators Testing Options To assist in troubleshooting, status indicators are... -
Page 44: Diagnosing Door Switch Operation
DIAGNOSING AN ISSUE Diagnosing Door Switch Operation Checking Heaters A and B From Test Mode screen 1, view status indicator D NOTE: The motor must be running to test the as you monitor/adjust the door, hinges, or switch. heaters. If the blower speed is 0%, it will automati- cally increase to 10% at the initiation of this test. -
Page 45: Viewing The Cumulative Operating Time
TEST HHB2STD 080409 CC 81°F DIAG °ELEC < HHB2D59033 > COOKS °F/°C ACCUM F igur e 2 9 : Serial Number Edit Viewing the Cumulative Operating Time Viewing/Editing the Serial Number The oven logs the total amount of time the oven 1. -
Page 46: Fault Code Troubleshooting
DIAGNOSING AN ISSUE Fault Code Troubleshooting Troubleshooting: F1: BLOWER (Blower Running Status Bad) Remove obstruction Is the blower motor or if necessary, replace Do resistance measurements spinning freely? blower motor. between windings and chassis agree with values on motor windings resistance Is Status Indicator “A”... - Page 47 Troubleshooting: F2: LOW TMP (Cook Temperature Low) Does the display read “Cook Door Open” when the door is closed? Is wiring from the Correct wiring. door switch to the control board OK? (See page 49 for schematic.) Adjust or replace door switch if Reset and determine Is the high-limit...
-
Page 48: F6: Ec Temp (Electrical Compartment Temperature High)
DIAGNOSING AN ISSUE Troubleshooting: F6: EC TEMP (Electrical Compartment Temperature High) Is the oven in an area of moderate temperature (120ºF (49ºC) or cooler)? Does the oven have Relocate oven to room to ventilate? Move oven to open area cooler area. (not tightly enclosed or remove items that are by other appliances... -
Page 49: F8: Heat Low
Troubleshooting: F8: HEAT LOW Is the blower motor moving air? See page 28 Is the high-limit Is the heater element to troubleshoot thermostat tripped? defective? F1: BLOWER (Blower Running Status Bad) Replace defective Is the solid state relay Reset and determine heater. -
Page 50: Non-Fault Code Troubleshooting
DIAGNOSING AN ISSUE Non-Fault Code Troubleshooting This section provides troubleshooting tips for issues that may occur independent of an oven fault. Troubleshooting: No Keypad Input Is the keypad cable properly connected to the control board? Replace the keypad. Correct wiring. (page 38) Troubleshooting: “Cook Door Open”... -
Page 51: No Display - Screen Is Blank
Troubleshooting: No Display – Screen is Blank Does the control beep when a key is pressed? Is the power supply receiving power? Replace fuses. (page 40) Is wiring from the Correct wiring. control board to If ribbon cable is display OK? damaged, replace with P/N 103024. -
Page 52: Food Not Cooking Properly
Is the menu part number Ensure the food item and revision correct? Verify is being properly with customer or contact stored/prepared TurboChef Customer Service. before cooking. Is the correct amount Contact Customer of food (portion) being Service to obtain the... -
Page 53: Read Fail" Message When Loading Menu
Does a backup copy of No backup copy the menu work? If the menu card was created by TurboChef, obtain a new menu card by contacting customer service at Is the connection from 800.90turbo or +1 214-379-6000. smart card reader to... - Page 54 DIAGNOSING AN ISSUE This page intentionally left blank.
-
Page 55: The Control System
The Control System... -
Page 57: Components
The control system signals, senses, commands, and EMI Filter actuates all electrical components within then oven. Figure 32. The EMI filter helps suppress the See page 49 for a schematic. See pages 38-40 for amount of RF interference emitted by the oven. illustrations regarding part locations and replace- ment. -
Page 58: Solid State Relay (Ssr)
THE CONTROL SYSTEM Solid State Relay (SSR) Thermostat – High-Limit Figure 32. The solid state relay is a 240 VAC, dual Figure 34. The high limit thermostat is a three- 40-amp relay. K4 (right) switches power to heater pole, manual-reset thermostat with a trip point of 572 º... - Page 59 F igur e 3 2 : Control System Components - Right Side Ref # Part Description Part Number Hardware Description Hardware # Clamp, Thermostat NGC-1152 Screw, #8 x 1/2 PTRH, Type 17, Serr, 410 SS 101688 Control Board, Standard Kit HHB-3213-X Screw, 6-32 x 3/8, PPH M/S, Sems, Lock Wshr 102911 (qty 4)
- Page 60 THE CONTROL SYSTEM NOTE: Fuse configurations vary depending on oven model. See the schematic (page 49) for more details. High-limit reset button F i gure 33: Control System Components - Back Panel F i g u re 3 4 : Control System Components - Lower Corner of Electrical Compartment Ref # Part Description Part Number...
-
Page 61: The Convection System
The Convection System... -
Page 63: Components
49 for a schematic. See pages 42-44 for illus- blower motor into the cook cavity. Different hole trations regarding part locations and replacement. patterns are available for custom cooking results; contact TurboChef for more details. Components Jetplate Support Rails The convection system consists of the following components: Figure 35. - Page 64 THE CONVECTION SYSTEM NOTE: Oven door removed for illustration clarity; not required for removing cavity components. F i g u re 3 5 : Convection System Components - Oven Cavity NOTE: Door does not need to be removed to access components inside the oven cavity - illustration is for clarity purposes only.
- Page 65 14 10 F igur e 3 7: Convection System Components - Right Side Ref # Part Description Part Number Hardware Description Hardware # Jetplate, Bottom, Standard HHB-8013-1 Screw, Thumb, 8-32 x 3/8, SS 101748 Jetplate, Bottom, High Coverage HHB-8155-1 Washer, Split Lock, #10 102350 Jetplate, Bottom, Pizza HHB-8156-1...
- Page 66 THE CONVECTION SYSTEM F i g u re 3 8 : Convection System Components - Swing Arms and Link Bar Ref # Part Description Part Number Hardware Description Hardware # Bushing, Swing Arm, 5/16 100152 Flange Mount (qty 2) Cover, Swing Arm, No Mount HHB-8297 Screw, #8 x 1/2 PTRH, Type 17, Serr, 410 SS 101688 (qty 2)
-
Page 67: The Oven Door
The Oven Door... -
Page 69: Components
Components Removing/Reinstalling the Oven Door The oven door consists of the following To remove or reinstall the oven door, follow the components: steps below. Door Gasket 1. Ensure the oven has cooled to 150°F (66°C). £ Door Handle 2. Open the oven door to its full open position £... - Page 70 THE OVEN DOOR F ig u re 4 0 : Oven Door F ig ure 41 : Left Hinge Detail F i gur e 42 : Right Hinge Detail Ref # Part Description Part Number Hardware Description Hardware # Bracket, Hinge Support, Left HHB-8238 Screw, #8-32 x 3/8, Hex Washer Head 102953 (qty 3)
-
Page 71: The Filtering System/Miscellaneous Components
The Filtering System and Miscellaneous Components... -
Page 73: Filtering System Components
Filtering System Components Catalytic Converter The catalytic converter, a VOC type catalyst, is The filtering system consists of the following located behind the rear cook cavity wall and is components: responsible for cleaning the recirculating airflow. Grease filter £ The catalyst functions by substantially lowering Grease filter frame £... -
Page 74: Miscellaneous Components
MISCELLANEOUS COMPONENTS F i g u r e 4 4 : Miscellaneous Components Ref # Part Description Part Number Hardware Description Hardware # Cover, Left Side HHB-8271 Screw, #8 x 1/2 PTRH, Type 17, Serr, 410 SS 101688 (qty 3) Cover, Right Side HHB-8272 Screw, #8 x 1/2 PTRH, Type 17, Serr, 410 SS... -
Page 75: Schematics
Schematics... -
Page 77: High H Batch 2 Schematic
800.908.8726 (USA) 100592 JUMPER USA = NEMA 6-30 (100187) EU = 5 PIN, 16A EU = 4 PIN, 32A CANADA = NEMA 6-50 (I5-9127) (HHB-8195-3) (HHB-8195-2) EU = 3 PIN, 32A (HHB-8195-1) Figure 4 4 : High h Batch 2 Schematic... - Page 78 SCHEMATICS This page intentionally left blank.
- Page 79 HhB 2 Oven Schematic Low Voltage Components Figure 45, page 49. Cable – Smart Card Connector Display, VFD NOTE: Schematic shows the oven with door open Door Switch and without power applied. I/O Control Board Keypad Color Code (Line Voltage) Ribbon Connector –...
-
Page 80: Control Board And Test Point Locations
SCHEMATICS F i g u re 4 6 : I/O Control Board and Test Point Locations... - Page 82 2 1 4 .3 7 9 .6 0 7 3 fa x Customer Service Part Number: HHB-8722 / Revision B / August 2010 8 0 0 .9 0 tu rbo © 2009–2010 TurboChef Technologies, Inc. t ur b oc h ef .co m...
Need help?
Do you have a question about the High h batch 2 and is the answer not in the manual?
Questions and answers