Creative Sound Blaster X-Fi User Manual
Sb046x series;
sb055x series;
sb073x series
Hide thumbs
Also See for Sound Blaster X-Fi:
- User manual (22 pages) ,
- Installation manual (16 pages) ,
- Quick start manual (1 page)
Table of Contents
Advertisement
How to use this manual
This document is designed to provide you with direct access to vital product
knowledge. You can resize the document window or print this document, access
linked web sites and get information from specially prepared graphics.
To jump to a linked topic or a web site, click the underlined blue text, or the
hand symbol
To show a short description (tooltip) of an object, move your mouse cursor
over it. A tooltip appears after a few seconds.
You can choose to print portions of this document:
1. On the Contents tabbed page to your left, click a topic heading.
On the menu, click the Print button.
In the dialog box that appears, click the option to print one topic only, or all
topics under a heading.
whenever it appears.
Advertisement
Table of Contents

Related Manuals for Creative Sound Blaster X-Fi


Summary of Contents for Creative Sound Blaster X-Fi
- Page 1 How to use this manual This document is designed to provide you with direct access to vital product knowledge. You can resize the document window or print this document, access linked web sites and get information from specially prepared graphics. To jump to a linked topic or a web site, click the underlined blue text, or the hand symbol whenever it appears. To show a short description (tooltip) of an object, move your mouse cursor over it. A tooltip appears after a few seconds. You can choose to print portions of this document: 1. On the Contents tabbed page to your left, click a topic heading. On the menu, click the Print button. In the dialog box that appears, click the option to print one topic only, or all topics under a heading.
- Page 2 Introduction Congratulations on your purchase of Creative's latest audio revolution, Sound Blaster X-Fi™! With cutting edge technology from the leaders in PC audio, Sound Blaster X-Fi will give you years of reliable entertainment. This User's Guide contains software installation and usage information for the Sound Blaster X-Fi series of audio devices. Notes Some products in the Sound Blaster X-Fi series are only available in certain regions. For more information on product availability and possible upgrade options, consult your local distributor or visit www.soundblaster.com/X-Fi.
-
Page 3: System Requirements
System Requirements Basic Requirements ® ® ® Genuine Intel Pentium III 1 GHz, AMD 1 GHz processor or faster Intel, AMD or 100% compatible motherboard chipset ® ® Microsoft Windows Vista 64-bit with Service Pack 1 (SP1), Windows Vista ® 32-bit with SP1, Windows XP Professional x64 Edition, Windows XP Service Pack 2 (SP2), Windows XP Media Center Edition (MCE) 2005 or Windows XP MCE 2004. 256 MB RAM (512 MB for Windows Vista) 600 MB of free hard disk space Available PCI 2.1 slot for the audio card Headphones or amplified speakers (available separately) CD-ROM/CD-RW or CD/DVD-ROM required for software installation Available USB port for the IR Receiver* Available 5 1/4-inch drive bay for the X-Fi I/O Drive* Additional Requirements (where applicable) Gaming ® ® DirectX 9 and OpenGL compliant 3D graphics accelerator with at least 32 MB of texture RAM DVD-Video 6x or faster DVD-ROM drive ® ® ® DVD player software such as InterVideo WinDVD or CyberLink... - Page 4 Notes Other applications, especially games, may have higher system requirements. Refer to the applications' documentation for details. *Available with some models of your audio device, or as an upgrade accessory in some regions. **Available without additional charge for selected models.
- Page 5 More Help Visit www.soundblaster.com for the latest Sound Blaster news and products. The site also includes information on making purchases, technical help, and the latest driver updates.
-
Page 6: About Your Hardware
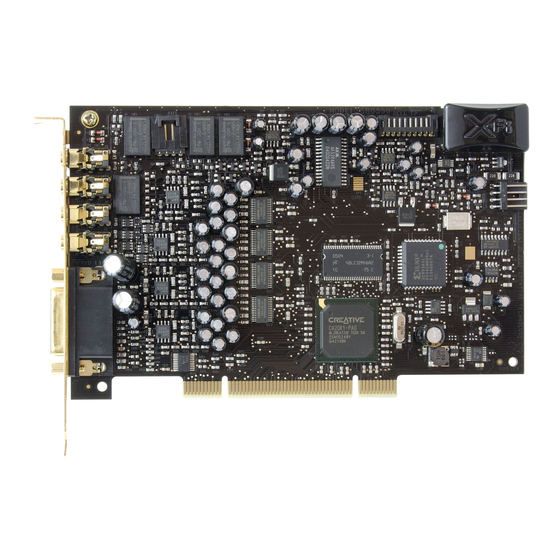
About Your Hardware Refer to the Quick Start leaflet for instructions on installing your Sound Blaster X-Fi. To learn more about your product, refer to the relevant section below: Your Sound Blaster X-Fi audio card Your Remote Control* Your IR Receiver* Your Digital I/O Module* Your Sound Blaster X-Fi I/O Drive* Your Sound Blaster X-Fi I/O Console* Notes *Available with some models of your audio device, or as an upgrade accessory in some regions. - Page 7 Your Sound Blaster X-Fi audio card Your audio card has the jacks and connectors below to enable the attachment of a wide variety of devices. The availability and position of the jacks and connectors may vary, as shown below: SB046X Series SB055X Series...
- Page 8 SB073X Series Jack or Description Connector Connect one end of the AD_Link cable to this connector. Connect the other end to the AD_Link 1. AD_Link connector (26 pin) connector on the X-Fi I/O Console*.
- Page 9 Connect the following inputs on powered analog speakers or a home theater receiver to this jack: On 4.1 and 5.1 systems: Rear Left and Rear Right On 7.1 systems: Rear Left, Rear Right and Side Right Line Out 1 jack Connect the Front Left and Front Right inputs on powered analog speakers or a home theater receiver to this jack. You can also connect your stereo headphones with a 3.50 mm (1/8-inch) plug to this jack. FlexiJack For SB046X and SB055X series Performs a 3-in-1 function, supporting Microphone-in, Line-in and Digital I/O connections. Connect one of the following to this jack: analog devices like cassette players and other line-level sources a microphone the Digital I/O Module* external digital audio devices that accept stereo PCM or compressed Dolby Digital/DTS Bitstream from the S/PDIF output See Configuring your FlexiJack. For SB073X series Performs a 3-in-1 function, supporting Microphone-in, Line-in and Optical out connections. Connect one of the following to this jack: analog devices like cassette players and other line-level sources a microphone external digital audio devices that accept stereo PCM or compressed Dolby Digital/DTS Bitstream from the Optical output On a SB073X series card, this jack does not have the Digital-in function to support the Digital I/O Module. Creative Proprietary connector Provides a proprietary connection for Creative devices. Do not use this connector unless instructed to do so. Aux In connector Connect an analog CD cable (available separately) from the analog output on an audio device like a TV tuner to this connector. Power connector Powers the X-Fi I/O Console* via the AD_Link connector. Connect a power cable from your computer's power supply to this connector. AD_EXT connector Connect one end of the AD_EXT cable to this connector. Connect the other end to the AD_EXT connector on the X-Fi I/O Drive*. Front Panel Header Audio connector Connect one end of the Intel ® Front Panel Audio cable (available separately) to this connector. See Front Panel Header (for SB073X series) for specifications.
- Page 10 SPDIF I/O connector Connect the Optical Digital IO Card* to this connector. Notes *Available with some models of your audio device, or as an upgrade accessory in some regions. Select the Digital I/O option when connecting digital audio devices to the Digital I/O Module (available with selected models or as an upgrade option). Also select the option if you want to connect external digital audio devices that accept stereo PCM or compressed Dolby Digital/DTS Bitstream from the S/PDIF output. See Configuring your FlexiJack for more information. Some models of your audio device come with a built-in 64 MB X-RAM. This special RAM is reserved for game developers to store a game's audio file on the audio card, for faster retrieval, processing and playback. Any game that supports X-RAM receives an even bigger performance boost.
- Page 11 Configuring your FlexiJack Your audio card's FlexiJack* provides both analog and digital support. After connecting the device that you want to the FlexiJack, follow the instructions below to configure your FlexiJack for the following user modes: Entertainment Mode 1. In Entertainment Mode, click the Digital I/O icon. The Digital I/O page appears. Click Digital I/O or Mic-In/Line-In to select the FlexiJack Mode that you want. Audio Creation Mode 1. In Audio Creation Mode, click the Settings button. The Settings dialog box appears. Under Digital I/O, click Digital I/O or Mic-In/Line-In to select the FlexiJack Mode that you want. Game Mode 1. In Game Mode, click the Settings button. The Settings dialog box appears. Under Digital I/O, click Digital I/O or Mic-In/Line-In to select the FlexiJack Mode that you want. Notes *Applicable only to FlexiJacks with Digital I/O functions.
-
Page 12: Your Remote Control
Your Remote Control* Designed for use with the IR Receiver*, X-Fi I/O Drive* or X-Fi I/O Console*, your remote control lets you operate your computer from the comfort of your sofa or bed, at a distance of up to 3 meters (approximately 9.8 feet). Notes *Available with some models of your audio device, or as an upgrade accessory in some regions. To select an option on a menu, press the Up, Down, Left and Right buttons to scroll to the option, and then press the Select/OK button on your remote control. The remote control included with your product may vary from the one shown here, depending on the region where it was originally purchased. - Page 13 Button Description Scroller Use to select tracks for playback. To access a two-digit track such as track 10, press the 1 button followed by the 0 button (in quick succession). 1. Number pad 2. Return Returns to a previous menu. 3. Options Displays the options menu. Displays Entertainment Center when minimized or displays the Now Playing screen when it is 4. Display maximized.
- Page 14 5. EAX Press repeatedly to progressively cycle through available EAX effects. Scroll forward or backward to adjust the amount of EAX effect applied. X-Fi Turns the X-Fi Crystalizer effect on or off when pressed. Scroll forward or backward to adjust the Crystalizer amount of X-Fi Crystalizer effect applied. 7. Power Turns Entertainment Center on or off when pressed. Turns X-Fi CMSS-3D on or off when pressed. Scroll forward or backward to adjust the amount of X-Fi CMSS- stereo envelopment between the front and surround channels on a multispeaker system, or the amount of virtualization on a pair of stereo speakers. Turns 3DMIDI on or off when pressed. Scroll forward or backward to adjust the pan spread of the MIDI source in relation to the Front direction on the horizontal plane. 9. 3DMIDI Volume Up (+) and Volume Control the master volume of your computer. Down (-) 11. Mute Mutes audio. Minimizes Entertainment Center or closes any application that you are controlling with your remote 12. Cancel control. 13. Start Displays Entertainment Center's main menu. 14. Left Scrolls left. 15. Up Scrolls up. 16. Select/OK Executes a selected option in a menu.
- Page 15 Your IR Receiver* Your IR Receiver receives infrared signals from the remote control* and transmits them to your computer. Connect the IR Receiver to a USB port on your computer. Connector 1. USB Port Notes *Available with some models of your audio device, or as an upgrade accessory in some regions.
- Page 16 Your Digital I/O Module* The Digital I/O Module provides additional connectivity for a number of other devices. Jack or Description Connector Optical SPDIF Out Connect recording devices with optical jacks (for example, MiniDisc recorders, Digital Audio jack Tape recorders or external hard disk recorders) to this jack. Optical SPDIF In Connect playback devices with optical jacks (for example, MiniDisc players, Digital Audio Tape jack players or DVD players) to this jack. Coaxial SPDIF In Connect playback devices with coaxial jacks (for example, MiniDisc players, Digital Audio Tape jack or DVD players) to this jack. Connect recording devices with coaxial jacks (for example, MiniDisc recorders, Digital Audio Coaxial SPDIF Tape recorders or external hard disk recorders) to this jack. Out jack Notes *Available with some models of your audio device, or as an upgrade accessory in some regions.
-
Page 17: Front Panel
Your Sound Blaster X-Fi I/O Drive* The X-Fi I/O Drive provides additional connectivity for a number of other devices. Front panel Jack or Description Connector Coaxial SPDIF Connect digital audio recording/playback devices with coaxial jacks (for example, MiniDisc In/Out jacks recorders, Digital Audio Tape recorders or external hard disk recorders) to these jacks. Optical SPDIF Connect recording/playback devices with optical jacks (for example, MiniDisc recorders, Digital In/Out jacks Audio Tape recorders or external hard disk recorders) to these jacks. Auxiliary 2 Line Connect one end of an RCA cable to these jacks. Connect the other end to the RCA outputs on In jacks analog devices like VCRs, TVs and CD players. 4. Infrared receiver Receives infrared signals from the remote control* and transmits them to your computer. Mini MIDI In/Out Connect MIDI devices to these connectors using mini-MIDI-to-standard-MIDI adapter cables*. connectors... -
Page 18: Top Panel
Controls the volume to your headphones. Turn clockwise to increase the volume, and Headphone counterclockwise to decrease the volume. volume dial Connect stereo headphones with a 6.35 mm (1/4-inch) stereo plug to this jack. Speaker output will 7. Headphone jack be muted if the Automatically mute speakers check box is selected in Audio Console or Entertainment Mode. For more information, refer to their online Help. Line In 2/Mic In Connect a line-level source (for example, a cassette player or an electric guitar running through a 2 jack Pre-amp FX Box) or a microphone to this jack. Line In 2/Mic In Selects Line In 2 or Mic In 2. Also controls the input gain. Turn the dial clockwise to increase the 2 dial input gain, and counterclockwise to decrease the input gain. To select Line In 2 for line-level sources, turn the dial counterclockwise over the Line In 2/Mic In 2 separator mark until you hear a "click". To select Mic In 2, turn the dial clockwise over the Line In 2/Mic In separator mark until you hear a "click". 2 separator mark Top panel Jack or Description Connector Connect the shunt supplied with your X-Fi I/O Drive to this jumper if you want to use a dynamic 1. Jumper JP1 microphone. Do not connect the shunt if you want to use a condenser microphone or computer microphone. 2. Power connector Connect the power splitter cable supplied with your X-Fi I/O Drive to this connector. AD_EXT Connect one end of the AD_EXT cable to this connector. Connect the other end to the AD_Link connector connector on the Sound Blaster X-Fi audio card. Notes... - Page 19 *Available with some models of your audio device, or as an upgrade accessory in some regions.
- Page 20 Your Sound Blaster X-Fi I/O Console* The X-Fi I/O Console provides additional connectivity for a number of other devices. Front panel Jack or Description Dial Connect stereo headphones with a 6.35 mm (1/4-inch) stereo plug to this jack. Speaker output will be Headphone muted if the Automatically mute speakers check box is selected in Audio Console or Entertainment jack Mode. For more information, refer to their online Help. Connect a line-level source (such as a cassette, DAT or MiniDisc player) to this jack. You can also Line In 3/Hi- connect a low output impedance device such as an electric guitar when Hi-Z is enabled. Z jack Hi-Z offers high input impedance to match the load delivered by low output impedance devices. This eliminates the need to run such devices through pre-amp equipment. Line In Connect a line-level source (such as a cassette, DAT or MiniDisc player, or an electric guitar running 2/Mic In 2 through a Pre-amp FX Box) or a microphone to this jack. jack Selects Line In 3 or Hi-Z. Also controls the input gain. Turn the dial clockwise to increase the input gain, and counterclockwise to decrease the input gain. Line In 3/Hi- To select Line In 3 for line-level sources, turn the dial counterclockwise over the separator mark Z dial until you hear a "click". To select Hi-Z for low output impedance devices such as an electric guitar, turn the dial clockwise over the separator mark until you hear a "click". Selects Line In 2 or Mic In 2. Also controls the input gain. Turn the dial clockwise to increase the input gain, and counterclockwise to decrease the input gain. Line In 2/Mic In 2 To select Line In 2 for line-level sources, turn the dial counterclockwise over the separator mark dial until you hear a "click". To select Mic In 2, turn the dial clockwise over the separator mark until you hear a "click". Turns 3DMIDI on or off when pressed. Turn the dial clockwise or counterclockwise to adjust the pan spread of the MIDI source in relation to the Front direction on the horizontal plane. 6.
-
Page 21: Rear Panel
Turns the X-Fi Crystalizer effect on or off when pressed. Turn the dial clockwise or counterclockwise Crystalizer to adjust the amount of X-Fi Crystalizer effect applied. dial Master Controls the combined level of all audio handled through the X-Fi I/O Console. Cuts off all audio when Volume/Mute pressed. dial Infrared Light Lights up when infrared signals are received from the remote control*. Emitting Diode (LED) Lights up and remains constant when power is supplied to the X-Fi I/O Console. Blinks when the 12. Power LED Mute function is enabled. Receives infrared signals from the remote control* and transmits them to your computer. Infrared receiver Rear panel Jack or Description Connector Auxiliary 2 Line Switches between line level or phono sources. In/Phono In switch Supports line level or phono sources, depending on which setting is currently selected using the Auxiliary 2 Line In/Phono In switch. Auxiliary 2 Line When Auxiliary 2 Line In is selected: In/Phono In jacks Connect one end of an RCA cable to these jacks. Connect the other end to the RCA outputs on line level devices like VCRs, TVs and CD players. When Phono In is selected: Connect one end of a phono cable to these jacks. Connect the other end to a vinyl record player. DIN jack Connect Creative analog speaker systems that have a Volume Control jack (9-pin DIN jack). For more information, see About the DIN Jack. - Page 22 MIDI In/Out connectors Connect MIDI devices to these connectors using standard MIDI cables. Optical SPDIF In/Out jacks Connect recording/playback devices with optical jacks (for example, MiniDisc recorders, Digital Audio Tape recorders or external hard disk recorders) to these jacks. Coaxial SPDIF In/Out jacks Connect digital audio recording/playback devices with coaxial jacks (for example, MiniDisc recorders, Digital Audio Tape recorders or external hard disk recorders) to these jacks. AD_Link (26 pin) connector Connect one end of the AD_Link cable to this connector. Connect the other end to the AD_Link connector on your Sound Blaster X-Fi audio card. Notes *Available with some models of your audio device, or as an upgrade accessory in some regions.
-
Page 23: Installing And Uninstalling Software
Installing and Uninstalling Software Installing Drivers and Applications You need to install device drivers and applications before using your Sound Blaster X-Fi. The instructions below apply to all supported Windows operating systems. 1. After you have installed your audio card, turn on your computer. Windows automatically detects your audio card and searches for device drivers. When prompted for the audio drivers, click the Cancel button. Insert the Installation and Applications CD into your CD/DVD-ROM drive. Your CD should start automatically. If it does not, follow the steps below: 1. Double-click the My Computer icon. Alternatively, click Start Computer or My Computer. Right-click the CD-ROM/DVD-ROM drive icon, and then click Open Autoplay or AutoPlay. Select the Always do this for software and games checkbox and double-click the Install or Run Program option. (For Windows Vista only) Follow the instructions on the screen to complete the installation. When prompted, restart your computer. -
Page 24: Using Creative Software Autoupdate
Using Creative Software AutoUpdate Locating, downloading and installing updates for your Creative products is now simpler and faster with the new web-based Creative Software AutoUpdate system. When you connect to Creative Software AutoUpdate via the Internet, the web site will analyze your computer system to determine what operating system (OS), language and Creative products are installed in your system. After the online analysis, you will be able to select from a list of only the most relevant software and driver updates. The files will then be retrieved and installed on your system for you. To find out more about Creative Software AutoUpdate, go to www.soundblaster.com/support/. Notes First-time users of Creative Software AutoUpdate may be prompted to authorize the download of a browser component required for system inspection. Ensure that the content is signed by Creative Labs, Inc., and then click the Yes button. Ensure that all your Creative products are connected and installed on the same computer running Creative Software AutoUpdate. -
Page 25: Updating Directx
Updating DirectX To download the latest update for DirectX, go to www.microsoft.com. -
Page 26: Uninstalling And Reinstalling The Applications And Device Drivers
Uninstalling and Reinstalling the Applications and Device Drivers At times you may need to uninstall or reinstall some or all of the audio applications and device drivers to correct problems, change configurations, or upgrade outdated drivers or applications. The following instructions tell you how to do so in all Windows operating systems. Before you begin, close all the audio applications. Applications that are still running during the uninstallation will not be removed. - Page 27 Reinstalling Audio Drivers and Applications 1. Click Start Control Panel Uninstall a program or Add or Remove Programs. Select the Sound Blaster X-Fi entry. Click the Uninstall/Change or the Change/Remove button. In the InstallShield Wizard dialog box, select the Repair option. If prompted, insert the Installation and Applications CD into your CD/DVD- ROM, and click the OK button. To repair an application, select the application check box. Click the Next button. Restart your computer when prompted. You can now check the computer to see if the reinstalled software works properly. If not, see Troubleshooting and FAQs.
-
Page 28: Uninstalling All Audio Drivers And Applications
Uninstalling all Audio Drivers and Applications 1. Click Start Control Panel Uninstall a program or Add or Remove Programs. Select the Sound Blaster X-Fi entry. Click the Uninstall/Change or the Change/Remove button. In the InstallShield Wizard dialog box, select the Remove All option. Click the Yes button. Restart your computer when prompted. You may now install the original or updated Sound Blaster X-Fi device drivers or applications. For more information, see Installing Drivers and Applications. -
Page 29: Installing/Uninstalling Selected Audio Drivers Or Applications
Installing/Uninstalling selected Audio Drivers or Applications 1. Click Start Control Panel Uninstall a program or Add or Remove Programs. Select the Sound Blaster X-Fi entry. Click the Uninstall/Change or the Change/Remove button. In the InstallShield Wizard dialog box, select the Add option to add new software components to your existing installation, or the Remove option to remove previously installed software components from your system. To install or uninstall an application, select the application check box. Click the Next button. When prompted, insert the Installation and Applications CD into your CD/DVD- ROM, and click the OK button. Restart your computer when prompted. To uninstall a selected component in Creative MediaSource: 1. Click Start Control Panel Uninstall a program or Add or Remove Programs. Select the Creative MediaSource entry. Click the Uninstall/Change or the Change/Remove button. In the InstallShield Wizard dialog box, click the Remove button, and then click the Next button. Select the check box of the application you want to uninstall. Click the Next button. Restart your computer when prompted. -
Page 30: Connecting Peripherals
Connecting Peripherals Your Sound Blaster X-Fi works seamlessly with many external devices to give you endless hours of listening and music authoring pleasure. To connect these peripherals, refer to the relevant sections below: Watching DVDs Playing/Recording Music Creating Music Notes For more information on the Creative peripherals mentioned in this chapter, visit www.creative.com. The cables shown in these topics are available separately. -
Page 31: Watching Dvds
Watching DVDs Using an external decoding device or software, your Sound Blaster X-Fi can decode Dolby Digital and DTS multichannel sound from DVDs . For more information, refer to the relevant sections below: Decoding with an external decoder or home theater receiver Decoding from a software DVD player Connecting a multichannel home theater receiver... - Page 32 Decoding with an external decoder or home theater receiver You can use an external decoder to process Dolby Digital, DTS, DTS-ES or Dolby Digital EX signals from your Sound Blaster X-Fi device (such as Sound Blaster X-Fi audio card, Digital I/O Module*, X-Fi I/O Drive* or X-Fi I/O Console*) and output the content to 5.1 and 7.1 speakers. Alternatively, you can use a home theater receiver to decode Dolby Digital or DTS signals to 5.1 speakers. For more information on external decoders or home theater receivers, the associated speaker connection settings, or how to set up your DVD player software to use the digital output, please consult the relevant User's Guide. Connecting your external decoder to the Sound Blaster X-Fi audio card...
- Page 33 Jack, Connector or Cable 1. FlexiJack 2. 3.50 mm (1/8-inch) mono-to-RCA cable (available separately) 3. Coaxial SPDIF In jack Notes Actual products may differ slightly from those pictured. Connecting your external decoder to the Digital I/O Module For optical connections: Jack, Connector or Cable 1. Optical SPDIF Out jack 2. Optical cable (available separately) 3. Optical SPDIF In jack For coaxial connections:...
- Page 34 Jack, Connector or Cable 1. Coaxial SPDIF Out jack 2. Coaxial cable (available separately) 3. Coaxial SPDIF In jack Connecting your external decoder to the Sound Blaster X-Fi I/O Drive For optical connections:...
- Page 35 Jack, Connector or Cable 1. Optical cable (available separately) 2. Optical SPDIF In jack 3. Optical SPDIF Out jack For coaxial connections:...
- Page 36 Jack, Connector or Cable 1. Coaxial cable (available separately) 2. Coaxial SPDIF In jack 3. Coaxial SPDIF Out jack Connecting your external decoder to the Sound Blaster X-Fi I/O Console For optical connections...
- Page 37 Jack, Connector or Cable 1. Optical cable (available separately) 2. Optical SPDIF In jack 3. Optical SPDIF Out jack Notes Actual products may differ slightly from those pictured. For coaxial connections...
- Page 38 Jack, Connector or Cable 1. Coaxial cable (available separately) 2. Coaxial SPDIF In jack 3. Coaxial SPDIF Out jack Notes *Available with some models of your audio device, or as an upgrade accessory in some regions. Actual products may differ slightly from those pictured.
- Page 39 Decoding from a software DVD player To play Dolby Digital or DTS encoded DVDs on your computer, you need to install the latest version of a software DVD player such as WinDVD or PowerDVD. You can download the following software* and codecs*: CyberLink PowerDVD player MPEG-2 decoder DTS decoding codec Dolby Digital decoding codec Some product models enable you to upgrade PowerDVD, and download its codec, in the following ways: Click Start Programs or All Programs Creative Get PowerDVD. Notes *Available without additional charge for some models of your audio card.
- Page 40 Connecting a multichannel home theater receiver If you have a multichannel home theater receiver, you can connect it directly to the Sound Blaster X-Fi audio card's Line Out 1, Line Out 2 and Line Out 3 jacks as shown below. For more information on multichannel home theater receiver speaker connections, consult the User's Guide of your home theater receiver. For more information on the appropriate jacks to use, see Stereo and 4-Pole Jack Diagrams. Jack, Connector or Description Cable Connect this jack to the Line Out 1 jack on your Sound Blaster X-Fi audio card, using 1. Front Left jack a 3.50 mm (1/8-inch) stereo-to-RCA cable (available separately). Connect this jack to the Line Out 1 jack on your Sound Blaster X-Fi audio card, using 2. Front Right jack a 3.50 mm (1/8-inch) stereo-to-RCA cable (available separately). 3.50 mm (1/8-inch) stereo-to- RCA cable (available Connects the Sound Blaster X-Fi audio card and home theater receiver. separately) Connect this jack to the Front Left and Front Right jacks on a multichannel home theater receiver, using a 3.50 mm (1/8-inch) stereo-to-RCA cable (available 4. Line Out 1 jack separately).
- Page 41 Jack, Connector or Description Cable Connect this jack to the Line Out 2 jack on your Sound Blaster X-Fi audio card, using a 3.50 1. Rear Left jack mm (1/8-inch) 4-pole-to-RCA cable (available separately). Connect this jack to the Line Out 2 jack on your Sound Blaster X-Fi audio card, using a 3.50 2. Rear Right jack mm (1/8-inch) 4-pole-to-RCA cable (available separately). Connect this jack to the Line Out 2 jack on your Sound Blaster X-Fi audio card, using a 3.50 3. Side Right jack mm (1/8-inch) 4-pole-to-RCA cable (available separately). Connect the following jacks on a multichannel home theater receiver to this jack using a 3.50 mm (1/8-inch) 4-pole-to-RCA cable (available separately): 4. Line Out 2 jack On 4.1 and 5.1 systems: Rear Left and Rear Right On 7.1 systems: Rear Left, Rear Right and Side Right 3.50 mm (1/8-inch) surround-to-RCA cable (available separately) Connects the Sound Blaster X-Fi audio card and home theater receiver.
- Page 42 Jack, Connector or Description Cable Connect this jack to the Line Out 3 jack on your Sound Blaster X-Fi audio card, using a 3.50 1. Side Left jack mm (1/8-inch) 4-pole-to-RCA cable (available separately). Connect this jack to the Line Out 3 jack on your Sound Blaster X-Fi audio card, using a 3.50 2. Center jack mm (1/8-inch) 4-pole-to-RCA cable (available separately). Connect this jack to the Line Out 3 jack on your Sound Blaster X-Fi audio card, using a 3.50 3. Subwoofer jack mm (1/8-inch) 4-pole-to-RCA cable (available separately). Connect the following jacks on a multichannel home theater receiver to this jack using a 3.50 mm (1/8-inch) 4-pole-to-RCA cable (available separately): 4. Line Out 3 jack On 5.1 systems: Front Center and Subwoofer On 7.1 systems: Front Center, Subwoofer and Side Left. 3.50 mm (1/8-inch) surround-to-RCA cable (available separately) Connects the Sound Blaster X-Fi audio card and home theater receiver. Notes Actual products may differ slightly from those pictured. Use the Sound Blaster 7.1 Multichannel cable (available separately), which is a 3 x 3.50 mm (1/8 inch) jack-to-8 x RCA adapter cable, to connect the Sound Blaster X-Fi audio card to your 7.1 channel home theater receiver. Visit www.creative.com for more information.
-
Page 43: Playing/Recording Music
Playing/Recording Music You can connect stereo headphones to the Line Out 1 jack on your Sound Blaster X-Fi audio card. Jack, Connector Description or Cable Connect stereo headphones with a 3.50 mm (1/8-inch) plug to this jack. Use a convertor if 1. Line Out 1 jack your headphones come with a larger plug. You can also connect headphones to the X-Fi I/O Drive* or X-Fi I/O Console*. Jack, Connector Description or Cable... - Page 44 Connect stereo headphones with a 6.35 mm (1/4-inch) stereo plug to this jack. Speaker output will be 1. Headphone jack muted if the Automatically mute speakers check box is selected in Audio Console or Entertainment Mode. For more information, refer to their online Help. To record music to your DAT or MiniDisc recorder, connect your recording device to the Optical or Coaxial SPDIF Out connector on the Digital I/O Module*, X-Fi I/O Drive or X-Fi I/O Console. You can play back music from your DAT or MiniDisc player by connecting it to the Optical or Coaxial SPDIF In jack. Connecting your DAT or MiniDisc recording device to the Digital I/O Module Jack, Connector or Cable Description 3.50 mm (1/8-inch) optical miniplug-to- Connects to the Optical SPDIF Out jack on your Digital I/O Module and optical SPDIF cable (available separately) to the Optical In jack on your portable MiniDisc player/recorder. 2. Optical SPDIF Out jack Connect the Optical SPDIF In jack on recording devices to this jack. 3. Optical SPDIF In jack Connect the Optical SPDIF Out jack on playback devices to this jack.
- Page 45 Connect to the Optical SPDIF In/Out jacks on your Digital I/O Module 4. Optical cables (available separately) and your playback/recording device. Connecting your DAT or MiniDisc recording device to the Sound Blaster X-Fi I/O Drive Jack, Connector or Cable Description Connect to the Optical SPDIF In/Out jacks on your X-Fi I/O Drive and 1. Optical cables (available separately) your playback/recording device. 3.50 mm (1/8-inch) optical miniplug-to- Connects to the Optical SPDIF Out jack on your X-Fi I/O Drive and to optical SPDIF cable (available separately) the Optical In jack on your portable MiniDisc player/recorder. Connect the Optical SPDIF In/Out jacks on recording/playback devices 3. Optical SPDIF In/Out jacks to these jacks. 4. Headphone jack Connect stereo headphones with a 6.35 mm (1/4-inch) plug to this jack.
- Page 46 5. Coaxial SPDIF In/Out jacks Connect the Coaxial SPDIF In/Out jacks on recording/playback devices to these jacks. Connect to the Coaxial SPDIF In/Out connectors on your X-Fi I/O Drive and your playback/recording device. 6. Coaxial cables (available separately) Connecting your DAT or MiniDisc recording device to the Sound Blaster X-Fi I/O Console Jack, Connector or Cable Description Connect to the Optical SPDIF In/Out jacks on your X-Fi I/O Console and 1. Optical cables (available separately) your playback/recording device. 3.50 mm (1/8-inch) optical miniplug-to- Connects to the Optical SPDIF Out jack on your X-Fi I/O Console and to optical SPDIF cable (available separately) the Optical In jack on your portable MiniDisc player/recorder. Connect the Coaxial SPDIF In/Out jacks on recording/playback devices 3. Coaxial SPDIF In/Out jacks to these jacks. Connect to the Coaxial SPDIF In/Out jacks on your X-Fi I/O Console and...
- Page 47 4. Coaxial cables (available separately) your playback/recording device. Connect the Optical SPDIF In/Out jacks on recording/playback devices to these jacks. 5. Optical SPDIF In/Out jacks Notes *Available with some models of your audio device, or as an upgrade accessory in some regions. Actual products may differ slightly from those pictured.
-
Page 48: Creating Music
Creating Music You can set up a home music studio using your Sound Blaster X-Fi. The comprehensive array of connectivity options offered by the X-Fi I/O Drive* and X-Fi I/O Console* enable you to put together your own productions consisting of multiple music tracks from a MIDI Synthesizer, an electric guitar or a microphone. Connecting instruments to your Sound Blaster X-Fi audio card Connect a microphone or a line-level source (such as an electric guitar running through a Pre-amp FX Box) to the FlexiJack. Jack, Connector or Cable Description 1. FlexiJack Connect a microphone or a line-level source to this jack. Connecting instruments to your Sound Blaster X-Fi I/O Drive If you have installed the X-Fi I/O Drive, you can also connect a MIDI Synthesizer, an electric guitar or a microphone to it. - Page 49 Jack, Connector or Cable Description Connects to the Optical SPDIF Out jack on the X-Fi I/O Drive and the 1. Optical cable (available separately) SPDIF In jack on your MiniDisc recorder. 2. Optical SPDIF Out jack Connect recording devices with optical jacks to this jack. 3.50 mm (1/8-inch) optical miniplug-to- Connects to the Optical SPDIF Out jack on your X-Fi I/O Drive and to optical SPDIF cable (available separately) the Optical In jack on your portable MiniDisc player/recorder. Connect a microphone, an electric guitar running through a Pre-amp FX 4. Line In 2/Mic In 2 jack Box, or other line-level devices to this jack. Connect to the MIDI In/Out connectors on the X-Fi I/O Drive and two 5. Mini-MIDI-to-standard-MIDI adapter cables standard MIDI cables (available separately). Connect to the MIDI In/Out connectors on your MIDI keyboard and the two mini-MIDI-to-standard-MIDI adapter cables provided. 6. Standard MIDI cables (available separately) Connecting instruments to your Sound Blaster X-Fi I/O Console...
- Page 50 The X-Fi I/O Console hosts all the connectors necessary to meet every conceivable music creation need. It features a Hi-Z connector which offers high input impedance to match the load delivered by low output impedance devices such as electric guitars, eliminating the need to run such devices through pre- amp equipment. Front Panel Jack, Connector Description or Cable Connect a line-level source to this jack when Line In 3 is enabled. Connect a low output impedance device, such as an electric guitar with no preamplification, to this jack when Hi-Z is 1. Line In 3/Hi-Z jack enabled. Use the Line In 3/Hi-Z dial on your X-Fi I/O Console to toggle between Line In 3 and Hi-Z. Line In 2/Mic In 2 Connect a microphone, an electric guitar running through a Pre-amp FX Box, or other line-level jack devices to this jack.
- Page 51 Rear Panel Jack, Connector or Cable Description Connects to the Optical SPDIF Out jack on the X-Fi I/O Console and the 1. Optical cable (available separately) SPDIF In jack on your MiniDisc recorder. 3.50 mm (1/8-inch) optical miniplug-to- Connects to the Optical SPDIF Out jack on your X-Fi I/O Console and to optical SPDIF cable (available separately) the Optical In jack on your portable MiniDisc player/recorder. 3. Optical SPDIF Out jack Connect recording devices with optical jacks to this jack. Connect to the MIDI In/Out connectors on the X-Fi I/O Console and to 4. Standard MIDI cables (available separately) the MIDI In/Out connectors on your MIDI keyboard. Notes *Available with some models of your audio device, or as an upgrade accessory in some regions. Actual products may differ slightly from those pictured.
-
Page 52: Connecting Speakers
Connecting Speakers The connectors and associated components shown here may be different from that of your speaker system. Consult the User's Guide of your speaker system to identify similar input connectors. The cables shown here are available separately. For interactive help on speaker connectivity, visit the Knowledge Base at www.creative.com. Positioning your speakers Good speaker placement can enhance your listening experience, while careless placement can make good audio systems sound bad. Below are our recommendations for 5.1 and 7.1 channel speakers. For detailed speaker placement tips, refer to the User's Guide of your speaker system. For 5.1 channel speakers: Speaker component 1. Subwoofer 2. Front Left 3. Front Center 4. Front Right 5. Rear Left Rear Right... - Page 53 For 7.1 channel speakers: Speaker component 1. Subwoofer 2. Front Left 3. Front Center 4. Front Right 5. Side Left 6. Side Right 7. Rear Left Rear Right Notes If you have a 5.1 channel or 7.1 channel speaker system, you can upmix your stereo sources (for example, CD Audio, MP3, WMA, MIDI, and Wave) to the respective channels by using X-Fi CMSS-3D technology. To upmix, you need to enable the X-Fi CMSS-3D feature in Entertainment Mode or Game Mode. For more information, refer to their respective online Help.
-
Page 54: Connecting Digital Speaker Systems
Connecting Digital Speaker Systems Select the Digital I/O option in Entertainment Mode, Game Mode and Audio Creation Mode when connecting external digital speakers that accept stereo PCM or compressed Dolby Digital/DTS Bitstream from the S/PDIF output. Notes Visit www.creative.com for more information. - Page 55 2.1 channel digital speakers Connecting your 2.1 channel digital speakers to the Sound Blaster X-Fi audio card Device/Cable 1. FlexiJack 2. RCA-to-miniplug cable (available separately) 3. RCA-to-RCA cable (available separately) Digital In jack Notes Actual products may differ slightly from those pictured. Connecting your 2.1 channel digital speakers to the Digital I/O Module* For optical connections:...
- Page 56 Device/Cable 1. Optical SPDIF Out jack 2. Optical cable (available separately) 3. Optical SPDIF In jack For coaxial connections:...
- Page 57 Device/Cable 1. Coaxial SPDIF Out jack 2. Coaxial cable (available separately) 3. Coaxial SPDIF In jack Connecting your 2.1 channel digital speakers to the Sound Blaster X-Fi X-Fi I/O Drive* For optical connections:...
- Page 58 Device/Cable 1. Optical cable (available separately) 2. Optical SPDIF In jack 3. Optical SPDIF Out jack For coaxial connections:...
- Page 59 Device/Cable 1. Coaxial cable (available separately) 2. Coaxial SPDIF In jack 3. Coaxial SPDIF Out jack Connecting your 2.1 channel digital speakers to the Sound Blaster X-Fi X-Fi I/O Console* For optical connections:...
- Page 60 Device/Cable 1. Optical cable (available separately) 2. Optical SPDIF In jack 3. Optical SPDIF Out jack For coaxial connections:...
- Page 61 Device/Cable 1. Coaxial cable (available separately) 2. Coaxial SPDIF In jack 3. Coaxial SPDIF Out jack Notes *Available with some models of your audio device, or as an upgrade accessory in some regions.
-
Page 62: Connecting Analog Speaker Systems
Connecting Analog Speaker Systems You can connect analog speaker systems of up to 7.1 channels. For more information on the appropriate jacks to use, see Stereo and 4-Pole Jack Diagrams. Notes Visit www.creative.com for more information. - Page 63 2.1 channel analog speakers Jack, Connector or Cable 1. Line Out 1 jack 2. 2 channel audio cable (available separately) 3. Audio Input jack Notes Actual products may differ slightly from those pictured.
- Page 64 4.1 channel analog speakers Jack, Connector or Cable 1. Line Out 2 jack 2. Line Out 1 jack 3. 4 channel audio cable (available separately) 4. Front (Audio Input) jack Rear (Audio Input) jack Notes Actual products may differ slightly from those pictured.
- Page 65 5.1 channel analog speakers Jack, Connector or Cable Rear (Audio Input) jack 2. Front (Audio Input) jack 3. 5.1 channel audio cable (available separately) 4. Line Out 1 jack 5. Line Out 2 jack 6. Line Out 3 jack Center/Subwoofer (Audio Input) jack Notes Actual products may differ slightly from those pictured.
- Page 66 7.1 channel analog speakers Jack, Connector or Cable Line Out 3 jack 2. Line Out 2 jack 3. Line Out 1 jack 4. 7.1 channel audio cable (available separately) 5. Rear (Audio Input) jack 6. Front (Audio Input) jack 7. Center/Subwoofer (Audio Input) jack Side (Audio Input) jack...
- Page 67 Notes Actual products may differ slightly from those pictured. When you are using 7.1 channel analog speakers with your audio card, make sure you select the 7.1 Speakers option in Entertainment Mode, Audio Creation Mode or Game Mode to experience 7.1 channel audio.
- Page 68 About the DIN Jack Your X-Fi I/O Console* features a DIN jack on its rear panel. In order to enjoy integrated speaker control functions, you can connect this jack to selected Creative analog speaker systems that have a wired remote control or Audio Control Pod. You can, for example, adjust the volume of your speakers, or mute them, using the Master Volume/Mute dial on your X-Fi I/O Console. Jack, Connector or Cable 1. DIN jack 2. 9-pin DIN cable 3. DIN jack, often labelled as Volume Control Notes *Available with some models of your audio device, or as an upgrade accessory in some regions.
- Page 69 Visit www.creative.com for more information.
- Page 70 Creative Sound Blaster X-Fi Applications and Modes Sound Blaster X-Fi software suite The following software enables you to access the rich features of your audio device. To learn more about each application, please refer to its online help. Depending on the application, you can do this by clicking on the toolbar of the application, or selecting Help Topics from the Help menu. 3DMIDI Player Audio Control Panel AutoMode Switcher Console Launcher Mode Switcher Entertainment Mode Audio Creation Mode Game Mode Creative ALchemy (for Windows Vista only) Creative Entertainment Center Creative Karaoke Player Creative MediaSource Creative Media Toolbox Creative Smart Recorder Creative WaveStudio Sound Blaster Plugin (for Windows Media Center Edition) SoundFont Bank Manager Speaker Setup Console Volume Panel Diagnostic and troubleshooting utilities Diagnostics Notes The applications included with Creative Sound Blaster X-Fi may differ from those described here. Creative Sound Blaster X-Fi may also come...
- Page 71 with third party applications.
- Page 72 Modes Sound Blaster X-Fi is built around the most powerful audio processor in the world! To ensure that different types of user have access to the full power of the audio processor, Sound Blaster X-Fi provides 3 different modes of operation: Entertainment, Audio Creation and Gaming. Each mode focuses the power of the audio processor for that operation and optimizes the audio processor's features for the best possible experience. Select Game Mode when you require the full power of the audio processor for the best gaming experience. Select Audio Creation Mode when you want to record audio with full fidelity ASIO support. Select Entertainment Mode for optimized movie soundtrack and music playback. Select a mode that suits your usage or stick to your favorite mode. Your computer remembers the last selected mode, even after you restart your computer. The modes are not exclusive to one type of operation. For example, you will still be able to play games in the other modes, but you will not get the full benefits of the card when the best mode is not selected for that usage. Select a mode that best suits your needs in the Mode Switcher or Audio Console application. For information on each mode, refer to its online Help. Entertainment Mode Audio Creation Mode Game Mode...
-
Page 73: Entertainment Mode
Entertainment Mode In Entertainment Mode, your audio device is optimized for movie soundtrack and music playback. With the Entertainment Mode console, you can: Adjust master volume, bass and treble levels. Adjust volume mixer settings. Configure playback settings for your speakers or headphones. Adjust equalizer settings. Enable environment effects. Enable multichannel upmixing. Enable virtual surround sound. Enhance detail and impact of audio with X-Fi Crystalizer. - Page 74 Audio Creation Mode In Audio Creation Mode, your audio device is optimized to handle sophisticated audio operations such as bus routing, multichannel wave recording and stereo balancing. With the Audio Creation Mode console, you can: Mix and record multiple audio sources. Route audio to specific bus destinations. Apply studio-quality effects to all sources. Position MIDI output in three-dimensional space. Enhance detail and impact of audio with X-Fi Crystalizer.
-
Page 75: Game Mode
Game Mode In Game Mode, your audio device is optimized for 3D audio and EAX performance in games. With the Game Mode console, you can: Adjust the master volume or mute all audio. Configure playback settings for your speakers or headphones. Adjust the Bass Boost and Bass Management settings. Enable multichannel upmixing. Enable virtual surround sound. Enhance detail and impact of audio with X-Fi Crystalizer. Adjust equalizer settings. Adjust basic controls for common mixer sources. -
Page 76: Summary Of Software Features
Summary of Software Features Entertainment Audio Creation Game 3DMIDI Playback 3DMIDI Interaction EAX ADVANCED HD 5.0 Limited Limited EAX ADVANCED HD 4.0 Limited Limited EAX ADVANCED HD 3.0 Number of Auxiliary Effects Maximum Number of Reverbs Insert Effects ASIO Out Channels: Dry 1 Pair 5 Pairs 1 Pair ASIO Out Channels: FX 4 Pairs ASIO In Channels: WUH ASIO In Channels: Basic 2 (1 Pair) 2 (1 Pair) 2 (1 Pair) ASIO 2.0 Support Limited Limited ASIO 2.0 Direct Monitoring 12 (6 pairs) Bit-Matched Playback Bit-Matched Recording X-Fi CMSS-3D Surround X-Fi CMSS-3D Headphone X-Fi CMSS-3D Virtual X-Fi Crystalizer Graphic EQ 10 Bands 10 Bands 10 Bands Smart Volume Management... -
Page 77: General Specifications
General Specifications This section displays the specifications of your Sound Blaster X-Fi audio card, Digital I/O Module*, X-Fi I/O Drive* and X-Fi I/O Console*. PCI Bus Mastering PCI Specification up to Version 2.3 compliant Bus mastering reduces latency and speeds up system performance Sound Blaster X-Fi Audio Processor Advanced hardware accelerated digital effects processing All new dedicated DSP capable of both time and frequency domain audio processing 128 3D voices with advanced 3D positional audio rendering algorithms Professional quality digital mixing and equalization maintaining 24-bit accuracy User-selectable Master Sampling Rate for bit-matched professional audio applications Ultra-high quality sample rate conversion for gaming and professional audio applications Professional Digital Audio Processing 24-bit Analog-to-Digital conversion of analog inputs at 96 kHz sample rate 24-bit Digital-to-Analog conversion of digital sources at 96 kHz to analog 7.1 speaker output 24-bit Digital-to-Analog conversion of stereo digital sources at 192 kHz to stereo output 16-bit to 24-bit recording sampling rates: 8, 11.025, 16, 22.05, 24, 32, 44.1, 48 and 96 kHz ASIO 2.0 support at 16-bit/44.1kHz, 16-bit/48kHz, 24-bit/44.1kHz 24- bit/48kHz and 24-bit/96kHz Supports Sony/Philips Digital Interface (SPDIF) format of up to 24-bit/96 kHz quality SPDIF output at selectable sampling rate of 44.1, 48 or 96 kHz SPDIF output not available during playback of protected digital audio content authored with DRM (Digital Rights Management) technology... -
Page 78: Flexible Mixer Control
ASIO 2.0 with direct monitoring Accelerated ASIO for ultra low latency Enhanced SoundFont support of up to 24-bit resolution X-RAM 64 MB of dedicated X-RAM for processing a game's audio that supports this feature (available only with some models of your audio device) Flexible Mixer Control Selectable input source or mixing of various audio sources for recording Adjustable master volume control Separate bass and treble control Front and rear balance control Muting, soloing and panning control for mixer sources Mode Selector Control Three exclusive working modes (Entertainment Mode, Audio Creation Mode and Game Mode), optimized to perform key tasks within each category of usage Creative MultiSpeaker Surround (CMSS) X-Fi CMSS-3D Surround: Upmixes mono or stereo sources to 4, 5.1 or 7.1 channels X-Fi CMSS-3D Headphone: Provides a multichannel playback experience over headphones for all types of content X-Fi CMSS-3D Virtual: Provides a multichannel playback experience over two loudspeakers for all types of content Notes *Available with some models of your audio device, or as an upgrade accessory in some regions. -
Page 79: Audio Outputs
Connectivity Sound Blaster X-Fi audio card Audio Inputs One analog input via stereo jack on rear bracket (selectable from line-level analog line input or mono microphone analog input) AUX_IN line-level analog input via 4-pin Molex connector on card Audio Outputs Three line-level analog outputs via 4-pole 3.50 mm (1/8-inch) jacks on rear bracket: Front Left, Front Right, Rear Left, Rear Right, Side Right, Center, Subwoofer and Side Left channels Stereo headphone (32-ohm load) support on Line Out 1 jack For SB046X and SB055X series: Digital Out via 3.50 mm (1/8-inch) jack on rear bracket (sharing with the Line In/Microphone In jack) For SB073X series: Optical Out via 3.50 mm (1/8-inch) jack on rear bracket (sharing with the Line In/Microphone In jack) Interfaces 4-pin power supply header for connection to the system power supply unit, supplying power to the X-Fi I/O Console* 2 x 20 pin AD_EXT header for connection to the X-Fi I/O Drive* 2 x 5 pin Front Panel Header for connections with Intel HD Front Panel Audio standard header (For SB073X series only) One AD_Link (26 pin) connector for linking to the X-Fi I/O Console* Digital I/O Module* Audio Inputs Optical jack for optical SPDIF input Coaxial jack for coaxial SPDIF input Audio Outputs... -
Page 80: Inputs And Outputs On Rear Panel
Optical jack for optical SPDIF output Coaxial jack for coaxial SPDIF output Sound Blaster X-Fi I/O Drive* Inputs and outputs on front panel Two RCA jacks for coaxial SPDIF input and output Headphone output and volume control with auto detection via 6.35 mm (1/4- inch) stereo jack Shared line-level analog Line/Microphone input via 6.35 mm (1/4-inch) stereo jack. Shared input selectable via dial with gain control for microphone. Two mini MIDI female connectors for MIDI input and output Two RCA jacks for Auxiliary input Two optical connectors for optical SPDIF input and output Infrared receiver for receiving infrared signals from the remote control. Transmission range within four meters (13 feet) with 15-degree deviation from the center axis. Interfaces 4-pin power supply header for connection to system power supply unit 2 x 20 pin AD_EXT header for connection to Sound Blaster X-Fi audio card Sound Blaster X-Fi I/O Console* Inputs and outputs on front panel Headphone output and volume control with auto detection via 6.35 mm (1/4-inch) stereo jack Shared line-level analog Line/Hi-Z input via 6.35 mm (1/4-inch) stereo jack. Shared input selectable via dial with gain control for Hi-Z input. Shared line-level analog Line/Microphone input via 6.35 mm (1/4-inch) stereo jack. Shared input selectable via dial with gain control for microphone. Infrared receiver for receiving infrared signals from the remote control. Transmission range within four meters (13 feet) with 15-degree deviation from the center axis. Inputs and outputs on rear panel... - Page 81 Two RCA jacks for Auxiliary input DIN jack for connection to supported Creative analog speaker systems with the wired remote control or Audio Control Pod that comes with the speakers Two standard MIDI female connectors for MIDI input and output Two optical connectors for optical SPDIF input and output Two RCA jacks for coaxial SPDIF input and output Interfaces One AD_LINK connector for linking to the audio card Notes *Available with some models of your audio device, or as an upgrade accessory in some regions.
-
Page 82: Stereo And 4-Pole Jack Diagrams
Stereo and 4-Pole Jack Diagrams For analog audio 5.1 channel analog audio 5.1 channel analog audio 1. Line Out 1 jack 2. Line Out 2 jack 3. Line Out 3 jack 4. Front Left 5. Front Right 6. Ground 7. Rear Left 8. Rear Right 9. Ground 10. Center 11. Subwoofer Ground 7.1 channel analog audio... - Page 83 7.1 channel analog audio 1. Line Out 1 jack 2. Line Out 2 jack 3. Line Out 3 jack 4. Front Left 5. Front Right 6. Ground 7. Rear Left 8. Rear Right 9. Ground 10. Side Right 11. Center 12. Subwoofer 13. Ground Side Left Notes Actual products may differ slightly from those pictured.
-
Page 84: Pin Configuration
Front Panel Header (for SB073X series) Connection compatiblity Intel HD Front Panel Audio standard only Not compatible with AC97 or Intel-compatible HD Front Panel Audio Microphone limitation Rear microphones are automatically disabled when both front and rear microphones are connected Pin configuration Signal Description Name PORT 1L Analog Port 1 - left channel (Microphone) Ground PORT 1R Analog Port 1 - right channel (Microphone) Active low signal that signals BIOS that an Intel HD Audio dongle is connected to the analog PRESENCE# header. PRESENCE# = 0 when an Intel HD Audio dongle is connected PORT 2R Analog Port 2 - right channel (Headphone) SENSE1_RETURN Jack detection return for front panel (JACK1) SENSE_SEND Jack detection sense line from the Intel HD Audio CODEC jack detection resistor network Connector Key PORT 2L Analog Port 2 - left channel (Headphone) SENSE2_RETURN Jack detection return for front panel (JACK2) -
Page 85: Troubleshooting And Faqs
Troubleshooting and FAQs This section provides solutions to problems you may encounter during installation or normal use. This includes: Problems with Sound Problems with Sound and CD-ROMs Insufficient SoundFont Cache Problems with Multiple Audio Devices Problems with Digital Audio Devices Known Issues... -
Page 86: Problems With Sound
Problems with Sound No sound from the headphones. Check the following: The headphones are connected to the Headphone jack. In the Speakers tab of Audio Console, the Headphones option is selected in the Speaker/Headphone Selection box. In the speakers and headphone selection of Entertainment Mode, Game Mode or Audio Creation Mode, the Headphones option is selected. No audio output when playing digital files such as .WAV, MIDI files or AVI clips. Check the following: The speakers' volume control knob, if any, is set at mid-range. Adjust the volume mixer settings in Entertainment Mode or Game Mode, if necessary. The powered speakers or external amplifier are connected to the card's Line Out jacks. There is no hardware conflict between the card and a peripheral device. See Problems with Digital Audio Devices. The speakers and headphone selection in Audio Console, Entertainment Mode, Game Mode or Audio Creation Mode corresponds to your speaker or headphone configuration. -
Page 87: Problems With Sound And Cd-Roms
Problems with Sound and CD-ROMs No audio output when playing audio CDs. To solve this problem: Enable digital CD playback (for Windows XP only): 1. Click Start Settings Control Panel or Start Control Panel. In the Control Panel dialog box, double-click the System icon. In the System Properties dialog box, click the Hardware tab. Click the Device Manager button. Double-click the DVD/CD-ROM drives icon. Your computer drives appear. Right-click the disk drive icon. A menu appears. Click Properties. In the Digital CD Playback box of the next dialog box, click the Enable digital CD audio for this CD-ROM device check box to select it. Notes This feature is enabled in Windows Vista by default. -
Page 88: Insufficient Soundfont Cache
Insufficient SoundFont Cache There is insufficient memory to load SoundFont banks. This may occur when a SoundFont-compatible MIDI file is loaded or played while insufficient memory has been allocated to SoundFont Bank Manager. To have sufficient SoundFont cache memory: Remove one or more SoundFont banks from your SoundFont cache. Do the following: 1. Click the Bank button. The Configure Bank panel appears. In the Select Bank box, click a bank location. If the selected bank location contains a bank, the bank will appear in the Bank Stack box. Click the bank you want to remove in the Bank Stack box and click the Remove button. Click the OK button to finish configuring your banks. Load smaller SoundFont banks instead; or add more RAM to your system. Do one of the following: In the Configure Bank panel of SoundFont Bank Manager, select a smaller SoundFont bank, if available, from the Select Bank box. Increase the system RAM on your computer. For more details, visit www.soundblaster.com for technical help. Notes The amount of SoundFont cache you can allocate depends on the system RAM available. Your computer may slow down if the amount of cache used is too high. -
Page 89: Problems With Multiple Audio Devices
Problems with Multiple Audio Devices The other installed audio card is not working well. You may have an existing audio device installed in your computer. The audio device may be an audio card or an onboard audio chipset. Before you install your Sound Blaster X-Fi audio card, you are advised to disable or completely uninstall and remove your existing audio device. Operating multiple audio devices in your computer may introduce usability issues. Alternatively, during the installation of your audio card, do the following: If your computer detects an installed Sound Blaster Audigy series, Sound Blaster Live! series or Sound Blaster PCI512 audio card, a message box recommending that you completely uninstall and remove the older audio device will appear. Click the Yes button and follow the instructions on the screen to complete the removal of the old audio device. Remove the old audio card from your computer. If your computer detects any other installed audio card, a message box recommending that you completely uninstall and remove the older audio device will appear. Click the Yes button to continue with the installation of the Sound Blaster X-Fi audio card. After the installation of the Sound Blaster X-Fi audio card, completely uninstall the existing card and remove the audio card from your computer. The onboard audio chipset is not working well. Disable your computer's onboard audio chipset. See your computer's motherboard documentation for details. -
Page 90: Problems With Digital Audio Devices
Problems with Digital Audio Devices Intermittent hissing or no sound is heard from my digital speakers. Make sure you select the sampling rate of the PCM SPDIF output of your Digital I/O connector to match the requirements of the receiving device. You may need to select a lower digital output sampling rate. The choices available are 48 kHz and 96 kHz. To solve this problem: In Creative MediaSource Go! Launcher: 1. Click the Product Settings tab. Double-click the Audio Console icon. Click the SPDIF I/O tab. Click the required sampling rate from the Digital Output (PCM) Sampling Rate list. In Entertainment Mode, click the Digital I/O button, and click the required sampling rate from the Digital Output Sampling Rate list. Popping noises are heard during playback. The DMA feature may not be enabled for your computer's drives. To solve this problem: For Windows Vista 1. Click Start Control Panel Hardware and Sound Device Manager. If a User Account Control dialog box appears, asking you for permission to continue with the action, click the Continue button. Double-click the IDE ATA/ATAPI Controllers icon. For each ATA Channel in the list, right-click and select Properties. Click the Advanced Settings tab and select the Enable DMA checkbox. Click the OK button. For Windows XP 1. Click Start Settings Control Panel or Start Control Panel. In the Control Panel dialog box, double-click the System icon. In the System Properties dialog box, click the Hardware tab. - Page 91 Double-click the IDE ATA/ATAPI Controllers icon. For each ATA Channel in the list, right-click and select Properties. Click the Advanced Settings tab and select the DMA if available checkbox. Click the OK button.
-
Page 92: Known Issues
Known Issues When playing MIDI files in Creative MediaSource with X-Fi Synth A or B settings selected, volume cannot be adjusted through Creative MediaSource. Adjust the volume control knob in Audio Creation Mode, Entertainment Mode or Game Mode, if necessary. There is a "click" sound when I switch modes. This may occur when you switch modes or restore the mode settings to their factory default. The sound comes from the relays of your uniquely designed Sound Blaster X-Fi audio card. Sound is heard from my center analog speaker only. This may occur when you are playing a 2D MIDI file. When playing 2D MIDI content without the "pan" parameter or SoundFont- compatible MIDI content with zero panning, Sound Blaster X-Fi may channel sound through your analog center speaker only. Audio output with older Audio output with Sound Blaster Speaker Creative audio cards X-Fi audio card Stereo Stereo Stereo Front Left / Front Right / Center Stereo Front Left / Front Right / Center Notes 2D MIDI content is equivalent to the standard MIDI format. Use the 3DMIDI Player application to convert your 2D MIDI file to a 3D MIDI file. By configuring the MIDI pan parameter of a SoundFont-compatible MIDI content, you can channel sound through your front left and front right speakers other than the center speaker. -
Page 93: License And Copyright
License and Copyright Information in this document is subject to change without notice and does not represent a commitment on the part of Creative Technology Ltd. No part of this manual may be reproduced or transmitted in any form or by any means, electronic or mechanical, including photocopying and recording, for any purpose without the written permission of Creative Technology Ltd. The Software License Agreement is found in a separate folder on the Installation and Applications CD. Creative MediaSource, X-Fi, CMSS and Crystalizer are registered trademarks or trademarks of Creative Technology Ltd. in the United States and/or other countries. Intel and Pentium are registered trademarks of Intel Corporation. AMD, the AMD Arrow logo, and combinations thereof, are trademarks of Advanced Micro Devices, Inc. Dolby and the double-D symbol are registered trademarks of Dolby Laboratories, Inc. DTS is a trademark of Digital Theater Systems, Inc. WinDVD is a registered trademark of InterVideo, Inc. CyberLink and PowerDVD are registered trademarks or trademarks of CyberLink Corp. Microsoft, MS-DOS, Windows and the Windows logo are registered trademarks of Microsoft Corporation. All other products are trademarks or registered trademarks of their respective owners. This product is covered by one or more of the following U.S. patents: 4,506,579; 4,699,038; 4,987,600; 5,013,105; 5,072,645; 5,111,727; 5,144,676; 5,170,369; 5,248,845; 5,298,671; 5,303,309; 5,317,104; 5,342,990; 5,430,244; 5,524,074; 5,698,803; 5,698,807; 5,748,747; 5,763,800; 5,790,837. Copyright © 2008 by Creative Technology Ltd. All rights reserved. Version 1.4 December 2008...
Need help?
Do you have a question about the Sound Blaster X-Fi and is the answer not in the manual?
Questions and answers