Table of Contents
Advertisement
Quick Links
A D J U S TA B L E A I R H E L P E R S P R I N G S
TOW AND HAUL WITH SAFETY AND COMFORT
Kit Numbers
88216 &
88128
INSTALLATION GUIDE
For maximum effectiveness and
safety, please read these instructions
safety, please read these instructions
completely before proceeding with
completely before proceeding with
installation.
Failure to read these instructions can result in an
Failure to read these instructions can result in an
incorrect installation.
MN-831 • (021306) • ECR 7668
TM
Advertisement
Table of Contents

Related Manuals for Air Lift LoadLifter 5000 88216


Summary of Contents for Air Lift LoadLifter 5000 88216
-
Page 1: Installation Guide
A D J U S TA B L E A I R H E L P E R S P R I N G S TOW AND HAUL WITH SAFETY AND COMFORT Kit Numbers 88216 & 88128 INSTALLATION GUIDE For maximum effectiveness and safety, please read these instructions safety, please read these instructions completely before proceeding with... -
Page 3: Table Of Contents
LoadLifter 5000 Ultimate TABLE OF CONTENTS Introduction ..........2 Important Safety Notice . -
Page 4: Introduction
Air Lift Company reserves the right to make changes and improvements to its products and publications at any time. For the latest version of this manual, contact Air Lift Company at (800) 248-0892 or visit our website at www.airliftcompany.com. -
Page 5: Installation Diagram
LoadLifter 5000 Ultimate Installation Diagram KIT 88216 F O R W A KIT 88128 I N B O A R D NOTE: No roll plates are used. fig. 1 MN-831... -
Page 6: Hardware List
Safety Stands ..............1 Safety Glasses ..............1 Air Compressor, or Compressed Air Source ....1 Spray Bottle with Dish Soap/Water Solution ....1 Missing or damaged parts? Call Air Lift customer STOP! service at (800) 248-0892 for a replacement part. MN-831... -
Page 7: Installing The Loadlifter 5000 Ultimate System
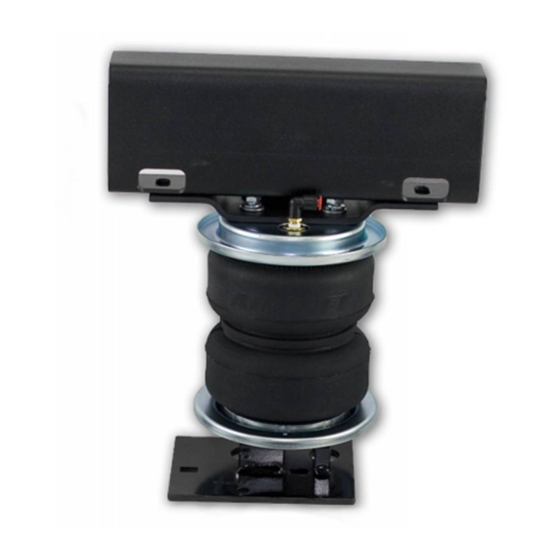
LoadLifter 5000 Ultimate Installing the LoadLifter 5000 Ultimate System NOTE This instruction manual is for kits 88216 and 88128. The only difference between the two kits is the bellows. The drawings depict a double convolute bellow, as found in kit 88216. But all instructions and illustrations apply to kit 88128 as well, which uses a single convolute bellow. -
Page 8: Raising The Vehicle
LoadLifter 5000 Ultimate 3. Measure the distance between the center of the hub and the bottom edge of the wheel well (Figure 3). This is the Normal Ride Height. Enter the measurement below: NORMAL RIDE HEIGHT: __________ inches NOTE: The measurement from one end of the arrow to the other end is the Normal Ride Height. - Page 9 LoadLifter 5000 Ultimate NOTE As a general rule, 1/2 and 3/4 ton trucks and some 1 ton trucks with single rear wheels take the stack in Figure 4. Most 1 ton single rear wheels and some 1 ton dual rear wheel trucks take the stack in Figure 5.
- Page 10 LoadLifter 5000 Ultimate 4. Due to manufacturing tolerances, the shock mounting bracket may stop the lower bracket from sitting completely flat on the axle housing/jounce bumper pad. This may occur on only one side of the vehicle. In such instances, it will be necessary to use a grinder to trim the shock bracket until it is flat with the top of the axle housing (Figure 7).
-
Page 11: Attaching The Lower Bracket
LoadLifter 5000 Ultimate ATTACHING THE LOWER BRACKET 1. Set the assembly on the axle with the tall, wide vertical leg of the upper bracket on the outside of the frame rail. The lower bracket spacer sets just inboard of the jounce bumper pad on the axle housing. -
Page 12: Installing The Air Lines
LoadLifter 5000 Ultimate 4. Install a bolt (M), flat washer (J), oversized flat washer (K), and a lock nut (O). Hold the lock nut with a 9/16” open end wrench through the access hole and tighten the bolt to 44 ft-lbs. Repeat for other mounting hole (Figure 10). fig. - Page 13 LoadLifter 5000 Ultimate washer (EE), flat washer (DD), and 5/16 “ nut (GG) and cap (CC). There should be enough valve exposed after installation - approximately 1/2 “ - to easily apply a pressure gauge or an air chuck (Figure 11). 5.
-
Page 14: Installing The Heat Sheild
LoadLifter 5000 Ultimate INSTALLING THE HEAT SHIELD 1. Bend tabs to provide a 1/2” dead air space between exhaust pipe and heat shield (Figure 13). Bend Tabs Up fig. 13 2. Attach the heat shield (Q) to the exhaust pipe using the clamps (R) (Figure 14). Bend the heat shield for maximum clearance to the air spring. -
Page 15: Before Operating
FITTING USELESS. CUT AIR LINE OFF A FEW INCHES IN FRONT OF THE FITTING AND USE A PAIR OF PLIERS OR VISE-GRIPS TO PULL/TWIST THE AIR LINE OFF THE FITTING. 3. If the preceding steps have not resolved the problem, call Air Lift Technical Service at 1-800-248-0892 for assistance. Before Operating... -
Page 16: Product Use, Maintenance And Servicing
The required air pressure will vary depending on the state of the original suspension. Operating the vehicle below the minimum air spring pressure will void the Air Lift warranty. 5. When increasing load, always adjust the air pressure to maintain the normal ride height. -
Page 17: Frequently Asked Questions
LoadLifter 5000 Ultimate If the preceding steps do not solve the problem, it is possibly caused by a failed air spring — either a factory defect or an operating problem. Please call Air Lift at (800) 248-0892 for assistance. FREQUENTLY ASKED QUESTIONS Q. -
Page 18: Guidelines For Adding Air
LoadLifter 5000 Ultimate GUIDELINES FOR ADDING AIR 1. Start with the vehicle level or slightly above. 2. When in doubt, always add air. 3. If the front of the vehicle dives while braking, increase the pressure in the front air bags, if equipped. -
Page 19: Choosing The Right On-Board Air Compressor System
— from inside or outside of the vehicle. • For convenient, on-the-go control of your air springs, add an Air Lift on-board air compressor system. • Air Lift on-board air compressor systems eliminate the search for gas stations that have a working compressor, saving you time, energy and money. -
Page 20: Warranty And Returns Policy
Air Lift at (800) 248-0892 in the U.S. and Canada (elsewhere, (517) 322-2144) for a Returned Materials Authorization (RMA) number. Returns to Air Lift can be sent to: Air Lift Company • 2727 Snow Road • Lansing, MI • 48917. -
Page 21: Replacement Information
LoadLifter 5000 Ultimate Replacement Information If you need replacement parts, contact the local dealer or call Air Lift customer service at (800) 248-0892. Most parts are immediately available and can be shipped the same day. Contact Air Lift Company customer service at (800) 248-0892, first if: •... - Page 24 Thank you for purchasing Air Lift products — the professional installer’s choice! Air Lift Company • 2727 Snow Road • Lansing, MI 48917 or PO Box 80167 • Lansing, MI 48908-0167 Toll Free (800) 248-0892 • Local (517) 322-2144 • Fax (517) 322-0240 • www.airliftcompany.com...
Need help?
Do you have a question about the LoadLifter 5000 88216 and is the answer not in the manual?
Questions and answers