Air Lift LoadLifter 5000 Series Installation Manual
2001-10 chevrolet/gmc 2500/3500
Hide thumbs
Also See for LoadLifter 5000 Series:
- Installation manual (20 pages) ,
- Installation manuals (16 pages) ,
- Installation manual (16 pages)
Table of Contents
Advertisement
Quick Links
S E R I E S
2001-10 Chevrolet/GMC 2500/3500
Kits 57275 | 88275 | 89275
Watch the video
Info on next page
MN-1047 • (011704) • ERN 8631
For maximum effectiveness and safety, please read these instructions
completely before proceeding with installation.
Failure to read these instructions can result in an incorrect installation.
Installation
TM
Guide
Advertisement
Table of Contents

Related Manuals for Air Lift LoadLifter 5000 Series


Summary of Contents for Air Lift LoadLifter 5000 Series
- Page 1 Installation Guide S E R I E S 2001-10 Chevrolet/GMC 2500/3500 Kits 57275 | 88275 | 89275 For maximum effectiveness and safety, please read these instructions Watch the video completely before proceeding with installation. Info on next page Failure to read these instructions can result in an incorrect installation. MN-1047 •...
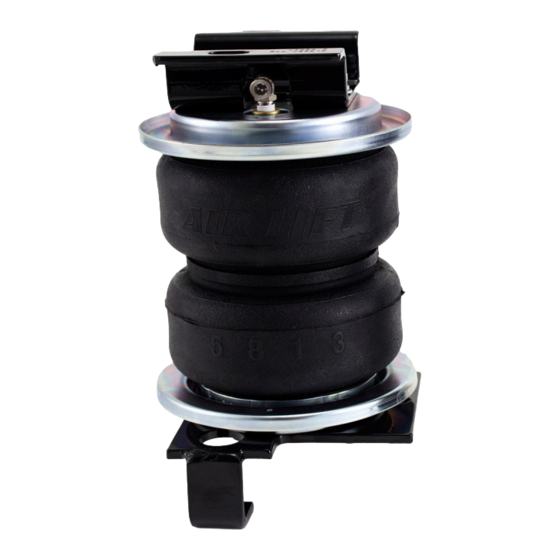
- Page 2 IDENTIFYING THE DIFFERENCES BETWEEN KITS Should you need to contact Air Lift customer service, you will need to know which kit you are inquiring about: standard LoadLifter 5000, LoadLifter 5000 Ultimate or LoadLifter 5000 Ultimate Plus. The kits are easily identifiable by looking at the roll plates and air lines.
-
Page 3: Table Of Contents
Notation Explanation ............4 Installing the LoadLifter 5000 Series System . . . . . . . . . . . . . . 5 Getting Started . -
Page 4: Installation Diagram
LoadLifter 5000 Series Installation Diagram 2500 HD model, driver’s side shown *The 3500 model has a different style strike plate. J OR V L, only on 2500 HD model U, only on 2500 HD model Small weld nut bracket must be removed. Only on 2500 HD model. -
Page 5: Hardware And Tools Lists
18623 Stainless steel star washer ......2 21813 PTC to AN adapter fitting ........2 20084 Air line assembly ..........1 Missing or damaged parts? Call Air Lift customer Missing or damaged parts? Call Air Lift customer STOP! service at (800) 248-0892 for a replacement part. -
Page 6: Introduction
Air Lift Company reserves the right to make changes and improvements to its products and publications at any time. For the latest version of this manual, contact Air Lift Company at (800) 248-0892 or visit airliftcompany .com. -
Page 7: Installing The Loadlifter 5000 Series System
LoadLifter 5000 Series Installing the LoadLifter 5000 Series System GETTING STARTED Your vehicle may be equipped with a rear brake proportioning valve. Any type of load assist product could affect brake performance. We recommend that you check with your dealer before installing this type of product. If your vehicle DOES NOT have a rear brake proportioning valve or is equipped with an anti-lock type brake system, installation of a load assist product will have NO EFFECT on brake performance. - Page 8 LoadLifter 5000 Series 4. Driver’s side only: Insert a 5/16” bolt (O) into the small hole on the lower bracket (B) before attaching the lower bracket to the air spring assembly (Fig. 3). 5. 2500 HD models only: Install a 3/8” bolt (U) and lock nut (L) through the hole in the lower bracket (Fig.
-
Page 9: Removing The Jounce Bumper And Positioning The Assembly On The Axle
LoadLifter 5000 Series REMOVING THE JOUNCE BUMPER AND POSITIONING THE ASSEMBLY ON THE AXLE 1. Remove both jounce bumpers under the frame rail and discard. On the 2500 HD models only, the driver’s side of the axle may have a small bracket with a NOTE nut that has nothing attached to it. -
Page 10: Attaching The Upper Bracket
LoadLifter 5000 Series ATTACHING THE UPPER BRACKET 1. The elbow fitting points toward the rear of the vehicle on the driver’s side and toward the front of the vehicle on the passenger’s side. 2. Insert two 3/8” bolts (H) and flat washers (J) through the existing jounce bumper holes and through the slotted holes in the upper bracket (Fig. -
Page 11: Installing The Emergency Brake Line Bracket And Clip
LoadLifter 5000 Series 4. Attach the axle strap (F) to both lower bracket carriage bolts using two flat washers (J) and two nylon lock nuts (L). Torque evenly to 16 lb.-ft. (22Nm) (Fig. 9). Axle strap (F) Flat washer (J) fig. -
Page 12: Installing The Air Lines
Installing the Air Lines Schrader valve Air line hex nut Air lines are routed from the air springs to Schrader valves. LoadLifter 5000 Series air Star washer lines come in two styles: nylon and braided stainless steel. Begin by choosing locations Rubber washer for the Schrader valves and drill a 5/16”... -
Page 13: Installing Braided Stainless Steel Air Lines
LoadLifter 5000 Series INSTALLING BRAIDED STAINLESS STEEL AIR LINES KEEP THE AIR LINE AWAY FROM THE FUEL LINE, BRAKE LINES AND ELECTRICAL CAUTION WIRES. 1. Use zip ties to secure Air Line Setup Without Compressor System the air line to fixed points... -
Page 14: Before Operating
DO NOT CUT OFF THE AIR LINE COMPLETELY AS THIS WILL USUALLY NICK THE CAUTION BARB AND RENDER THE FITTING USELESS. 3. If the preceding steps have not resolved the problem, call Air Lift customer service at (800) 248-0892. MN-1047... -
Page 15: Installation Checklist
If a heat shield was included in the kit, install it. If there is no heat shield, but one is required, call Air Lift customer service at (800) 248-0892. Fastener test — Recheck all bolts for proper torque. -
Page 16: Product Use, Maintenance And Servicing
(combined on both springs) for each 1 PSI of pressure. The required air pressure will vary depending on the state of the original suspension. Operating the vehicle below the minimum air spring pressure will void the Air Lift warranty. 5. When increasing load, always adjust air pressure to maintain normal ride height. Increase or decrease pressure from the system as necessary to attain normal ride height for optimal ride and handling. -
Page 17: Tuning The Air Pressure
LoadLifter 5000 Series TUNING THE AIR PRESSURE Pressure determination comes down to three things — level vehicle, ride comfort and stability. 1 . Level vehicle If the vehicle’s headlights are shining into the trees or the vehicle is leaning to one side, then it is not level (Fig. -
Page 18: Troubleshooting Guide
Q . Will installing air springs increase the weight ratings of a vehicle? No. Adding air springs will not change the weight ratings (GAWR, GCWR and/ or GVWR) of a vehicle. Exceeding the GVWR is dangerous and voids the Air Lift warranty. -
Page 19: Limited Warranty And Return Policy
For additional warranty information contact Air Lift Company customer service. Replacement Part Information If replacement parts are needed, contact the local dealer or call Air Lift customer service at (800) 248-0892. Most parts are immediately available and can be shipped the same day. - Page 20 (517) 322-2144. For calls outside the U.S. or Canada, dial (517) 322-2144. Air Lift Company • 2727 Snow Road • Lansing, MI 48917 or P.O. Box 80167 • Lansing, MI 48908-0167 Printed in the USA JJC-0417...
Need help?
Do you have a question about the LoadLifter 5000 Series and is the answer not in the manual?
Questions and answers