
Related Manuals for SPX FLOW Johnson pump


Summary of Contents for SPX FLOW Johnson pump
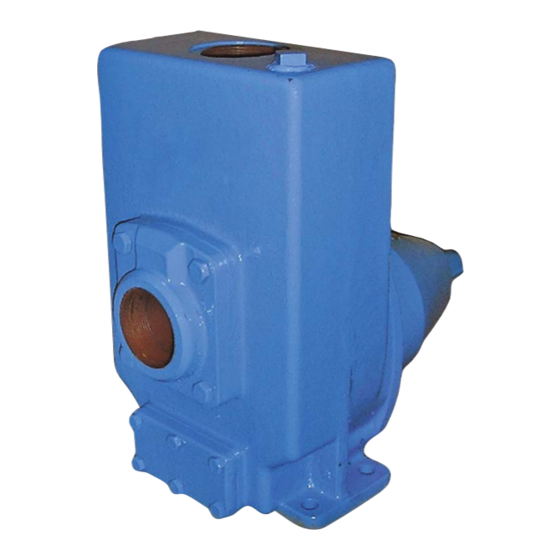
- Page 1 INSTRUCTION MANUAL Self-priming centrifugal pump Orginal instructions KGE/EN (1711) 6.5 Read and understand this manual prior to operating or servicing this product.
- Page 3 EC Declaration of conformity (Directive 2006/42/EC, appendix II-A) Manufacturer SPX Flow Technology Assen B.V. Dr. A.F. Philipsweg 51 9403 AD Assen The Netherlands hereby declares that all pumps member of productfamilies CombiBloc, CombiBlocHorti, CombiChem, CombiDirt, CombiFlex(U)(B), CombiPrime H, CombiLine, CombiLineBloc,...
- Page 4 EC/EN (1609) 5.9...
- Page 5 SPXFLOW is a global multi-industry manufacturing leader. The company's highly- specialized, engineered products and innovative technologies are helping to meet rising global demand for electricity and processed foods and beverages, particularly in emerging markets. SPX Flow Technology Assen B.V. P.O. Box 9 9400 AA Assen The Netherlands Tel.
- Page 6 INT/EN (1512) 1.2...
-
Page 7: Table Of Contents
Table of Contents Introduction Preface Safety (general) 1.2.1 Signs on the pump 1.2.2 This instruction manual is meant for: 1.2.3 Safety instructions relevant for operation 1.2.4 Safety instructions relevant for maintenance, inspection and assembly work Guarantee 1.3.1 Copyright SPXFLOW service Symbols used Check delivery Instructions for transport and handling... - Page 8 System pressure Shut-down Re-use Scrapping of the pump Trouble shooting Maintenance Precautionary measures Daily Periodic inspection Flushing Ball Bearings Electrical installation The oil chamber Mechanical seal Oil seal 6.10 Impeller Disassembly and assembly General Replacing the impeller 7.2.1 Disassembly impeller 7.2.2 Impeller assembly Replacement of mechanical seal...
-
Page 9: Kge/En (1711) 6.5
10.8 Parts list and sectional drawing KGE, Bearing bracket 2, KGE22-6 10.9 Parts list and sectional drawing KGEF, Bearing bracket 00, 0 and 0+ (+) 10.10 Parts list and sectional drawing KGEF, Bearing bracket 1 and 2, KGEF18-4 / KGEF20b-5 Order form for spare parts KGE/EN (1711) 6.5... - Page 10 KGE/EN (1711) 6.5...
-
Page 11: Introduction
1 Introduction Preface • The data published in these operating instructions have been based on the most recent information. They are provided subject to alterations. • We reserve the right to change the design and/or construction of our products at any time without being obliged to adapt earlier supplies accordingly. -
Page 12: Safety Instructions Relevant For Operation
1.2.3 Safety instructions relevant for operation • The limit values specified in the data sheet must under no circumstances be exceeded. • If hot or cold machine components involve hazards, they must be guarded against accidental contact. • Guards for moving parts (e.g. coupling) must not be removed from the machine while in operation. -
Page 13: Spxflow Service
In case the pump is not immediately put into service, take the necessary measures to prevent it from seizing up (e.g. periodically rotate the pump shaft several times). - www.johnson-pump.com SPX Flow Technology Assen B.V. CR Nr.04029567 Dr.A.F. Philipsweg 51, NL-9403 AD Assen Ø... -
Page 14: Instructions For Transport And Handling
Instructions for transport and handling Pumps or pump units are often too heavy for manual repositioning. • Consult chapter 8 "Technical specifications" of your pump and do use the proper transport and lift tools. • Leave movement of pumps to authorised personnel. Do not operate or walk under heavy loads. -
Page 15: General Information
2 General information Field of application KGE pumps are selfpriming centrifugal pumps with volute and radial (semi-open or closed) impeller, mounted overhung on the bearing pedestal. If a spacer type coupling is used, the pump can easily be dismantled without it being necessary to disturb the pipings or to move the motor. -
Page 16: Type Designation
Type designation There are a large number of different KGE configurations, which are defined by the pump type designation. Example: KGE F 11 3 A6 Pump family Pump construction pump with bare shaft end KGEF pump with flanged motor countreclockwise rotation when viewing the shaft end KGEL with bearing pedestal Pump size... - Page 17 Once all air has been evacuated, the pump starts working as a normal centrifugal pump. A precondition for good functioning is that it should be possible for the aspirated air to escape without back pressure in the discharge line (open valves !). The pump has a non- return valve, so the suction and discharge lines can not be siphoned empty, when the pump has been stopped.
- Page 18 General information KGE/EN (1711) 6.5...
-
Page 19: Installation And Preparation Start-Up
3 Installation and preparation start-up The instructions for installation contain important and helpful information for the proper functioning and maintenance of your equipment. It is absolutely vital that you go through this publication attentively, to acquaint yourself with the operation and to follow the recommendations. -
Page 20: Main Piping (Suction / Discharge)
Main piping (suction / discharge) • Select the suction line diameter as a function of its length. It must not be smaller than the pump suction connection. • The suction and discharge lines should have a snug fit and remain stress free, also during operation. -
Page 21: Piping Accessories
Table 1: Permitted forces and torques on the flanges (based on ISO5199) Pump or base plate not set in Pump or base plate set in concrete concrete KGE bracket [N] Fh [N] M [Nm] Fv [N] Fh [N] M [Nm] max. -
Page 22: Preparations Start-Up
Do the same check, but now on either coupling side, near the shaft. For safety sake, repeat the check, using an outside caliper (B) at 2 diametrically opposed points on the half coupling side faces. Table 2: Tolerances for aligning coupling [mm] - Va [mm] Outer Ø... -
Page 23: Drive
Figure 6: A: pump housing filling hole B: pump housing filling cleaning cover and drain C: oil chamber filling hole D: oil chamber drain hole • If oil must not come into contact with the liquid to be pumped, drain out the oil, rinse out the oil chamber and fill with a suitable liquid. -
Page 24: Types
3.7.2 Types The electric motors which can be connected to the mains electricity supply normally have on the motor plate one of the following voltage specifications: • Motor 230 V~ : 230 V. Single phase motors which are connected between the live and the neutral or on 230V between the phases. -
Page 25: Combustion Engines
• 230 VΔ : This specification has the same meaning as 230/400 V. • 400 VΔ : In a circuit with 400 V between the phases, these motors are connected in a delta configuration (figure 8). Remark: Motors with a power of 3 kW and higher are usually not connected directly in delta configuration (the initial current rises to too high a value immediately during start-up. -
Page 26: Direction Of Rotation
Direction of rotation • The direction of rotation of the pump is indicated by an arrow; check whether the direction of rotation of the motor is the same, by switching it on for a short time. Immediately switch the motor off, if the direction of rotation is found to be wrong. To change the direction of rotation switch L1 with L2 or L3. -
Page 27: Start-Up
4 Start-up • Check whether it is safe to put the pump into operation. Make sure any risks to persons and environment (high pressure, hot temperature, leakage) are absolutely excluded. • A protective cover which completely encloses the coupling must always be used. -
Page 28: Shut-Down
Shut-down • Turn off the motor. Always avoid restarting the pump during the emptying phase. During this process, the pump is running in the opposite direction. Restarting it can result in the impeller coming loose and being damaged and can even cause breakage of the shaft. -
Page 29: Trouble Shooting
5 Trouble shooting In case of abnormal operation or when troubles occur the pump must be taken out of service immediately. Inform all responsible personnel. Prior to restarting the pump the cause of the problem must be determined and the problem solved. Table 3: Most frequently occurring failures. - Page 30 Table 4: Possible causes of pump failures. Possible causes Wrong direction of rotatio Pump not filled with liquid Inlet or suction pipe insufficiently submerged NPSH available too low Pump not up to rated speed Foreign matter in pump Air leaks in suction line Viscosity greater than rated Gas or vapour in liquid Speed too high...
-
Page 31: Maintenance
6 Maintenance Flawed maintenance will result in shorter lifespan, possible break down and in any event loss of warranty. Precautionary measures • Insufficient, wrong and/or irregular maintenance can lead to malfunctions in the pump, high repair costs and long-term inoperability. Therefore, you should carefully follow the guidelines given in this chapter during maintenance operations on the pump. -
Page 32: Flushing
• Make sure appropriate grade and amount of lubricant is present in bearings and in the oil chamber of the mechanical seal. • Check bearings for excessive wear. Worn bearings may result in excessive shaft run- out necessitating frequent seal failure. •... -
Page 33: Mechanical Seal
Mechanical seal If the mechanical shaft seal should start to leak, the oil chamber will overflow via the hole in the oil filler cap (C : see figure 10) and the pump must be immediately stopped to replace the mechanical seal. Oil seal If leakage from (E) is noticed, this indicates the lip seal has failed and needs replacement. - Page 34 Maintenance KGE/EN (1711) 6.5...
-
Page 35: Disassembly And Assembly
7 Disassembly and assembly General • When servicing the pumps, see to a clean working environment because certain parts, say, the mechanical seals, are extremely vulnerable, other parts having close tolerances. Check that the parts have not been damaged in transit. In particular, inspect the spigots mating and sealing faces, etc. -
Page 36: Disassembly Impeller
7.2.1 Disassembly impeller Figure 12: Disassembly impeller with bearing bracket group 0, 0+ and 00 (construction and ) 1 Drain out the drain liquid from the oil chamber by removing the oil drain plug (1160); with and : 0830). 2 Bearing bracket 00, 0 and 0+: •... -
Page 37: Replacement Of Mechanical Seal
Replacement of mechanical seal 7.3.1 Disassembly of mechanical seal Figure 13: Mechanical seal disassembly bearing bracket group 0 and 00 1 Follow steps 1 to 4 of the impeller dismantling procedure. 2 Now remove the rotating part of the shaft seal (0310) fitted to the shaft. 3 Pull the intermediate cover (0140 / 0120) from the bearing bracket. -
Page 38: Assembly Of The Ball Bearings
7.4.2 Assembly of the ball bearings 1 Properly clean the ball bearing bores and the shaft length over which the bearings have to be pushed. 2 Put the removed shoulder rings back into the bearing bracket. 3 Cautiously place the ball bearing on the shaft. In case of construction , then fit a Nilos ring (1090). -
Page 39: Technical Specifications
8 Technical specifications Technical data 11-3 11-4 16-3 12b-5 12-5 12-6 15-6 16-6 14-8 18-4 20b-5 22-6 Construction Bearing bracket Impeller - semi open - closed Connections Suction- and discharge mm/Rp 1¼... -
Page 40: Survey Curve (N = 2900 Min-1)
Survey curve (n = 2900 min Figure 14: Technical specifications KGE/EN (1711) 6.5... -
Page 41: Dimensions
9 Dimensions KGE Pump with bare shaft end Figure 15: Dimensions KGE/EN (1711) 6.5... - Page 42 Rp/Mm 11-3 11-4 16-3 12b-5 12-5 12-6 15-6 16-6 14-8 18-4 20b-5 22-6 DN80 1 ¼ ½ ¼ ½ ½ ½ ¼ ½ 282 282 335 335 360 360 360 100 100 132 132 5P9 5P9 8P9 8P9 8P9 8P9 8P9 8P9 10P9 16j6 16j6 24j6 24j6 24j6 24j6 24j6 24j6 24j6 24j6 24j6 32k6 308 325 372...
-
Page 43: Dimensions Kgef Pump With Flanged Motor
Dimensions KGEF Pump with flanged motor Figure 16: [mm] KGEF 11-3 11-4 16-3 12b-5 12-5 12-6 15-6 16-6 14-8 18-4 20b-5 22-6 Motor 100L 100L 112M 100L 112M 132S -F130 -F130 -F165 -F165 -F165 -F165 -F215 -F215 -F215 -F165 -F265 0,75 aa (Rp) ¼... -
Page 44: Dimensions Kge Pump With Motor (Assembly A6)
Dimensions KGE pump with motor (assembly A6) Figure 17: Rp/mm 11-3 11-4 16-3 12b-5 12-5 12-6 15-6 16-6 14-8 18-4 20b-5 22-6 90L 100L 112M 132S 112M 112M 132S 160M Motor aa (Rp) DN80 ¼ ½ ¼ ½ ½ ½ ¼... -
Page 45: Parts
10 Parts 10.1 Ordering parts 10.1.1 Order form You can use the order form included in this manual for ordering parts. When ordering parts always quote the following data: 1 Your address. 2 The quantity, the item number and the description of the part. 3 The pump number. -
Page 46: Parts List And Sectional Drawing Kge, Bearing Bracket 00, Kge11-3 / Kge11-4
10.2 Parts list and sectional drawing KGE, Bearing bracket 00, KGE11-3 / KGE11-4 0220 0220 0500 0500 0310 0310 0620 0620 0140 0140 0100 0100 0210 0210 1150 1150 0510 0510 1200 1200 0130 0130 0300 0300 0540 0540 1080 1080 1110 1110... - Page 47 10.3 Parts list and sectional drawing KGE, Bearing bracket 0, KGE12(b)-5 / KGE12-6 0220 0220 0500 0500 0310 0310 0140 0140 0620 0620 0100 0100 1150 1150 0210 0210 1200 1200 0510 0510 0130 0130 1070 1070 1090 1090 0540 0540 0300 0300...
-
Page 48: Parts List And Sectional Drawing Kge+, Bearing Bracket 0+, Kge14-8
10.4 Parts list and sectional drawing KGE+, Bearing bracket 0+, KGE14-8 0100 0100 0620 0620 0220 0220 0211 0211 0500 0500 0310 0310 0130 0130 1150 1150 1200 1200 0610 0610 1090 1090 0213 0213 0300 0300 0540 0540 0210 0210 1080 1080... -
Page 49: Parts List And Sectional Drawing Kge, Bearing Bracket 0, Kge16-3
10.5 Parts list and sectional drawing KGE, Bearing bracket 0, KGE16-3 0500 0500 0310 0310 0140 0140 0620 0620 0100 0100 1150 1150 1200 1200 0210 0210 1100 1100 1090 1090 0510 0510 1080 1080 0540 0540 1110 1110 0300 0300 1060 1060... -
Page 50: Parts List And Sectional Drawing Kge+, Bearing Bracket 0+, Kge15-6 / Kge16-648 10.7 Parts List And Sectional Drawing Kge, Bearing Bracket 1, Kge18-4 / Kge20B-5
10.6 Parts list and sectional drawing KGE+, Bearing bracket 0+, KGE15-6 / KGE16-6 0100 0100 0620 0620 0220 0220 0211 0211 0500 0500 0310 0310 0130 0130 1150 1150 1200 1200 0610 0610 1090 1090 0213 0213 0300 0300 0540 0540 0210 0210... - Page 51 10.7 Parts list and sectional drawing KGE, Bearing bracket 1, KGE18-4 / KGE20b-5 0710 2330 2310 0700 2370 0770 0720 0440 2010 0710 0730 2110 0110 2300 0420 0140 0170 0780 2350 2120 0760 0750 0160 0840 0150 2360 0430 0410 0130 2100...
-
Page 52: Parts List And Sectional Drawing Kge, Bearing Bracket 2, Kge22-6
10.8 Parts list and sectional drawing KGE, Bearing bracket 2, KGE22-6 Figure 24: Item Qty Description Material Item Qty Description Material 0110 1 pump casing cast iron 0780 4 Allen screw steel 0120 1 shaft seal cover cast iron 0820 8 Allen screw steel 0130* 1 impeller... -
Page 53: Parts List And Sectional Drawing Kgef, Bearing Bracket 00, 0 And 0+ (+)
10.9 Parts list and sectional drawing KGEF, Bearing bracket 00, 0 and 0+ (+) 0330 0330 2010 2010 2000 2000 0500 0500 0140 0140 0110 0110 0490 0490 0570 0570 0530 0530 0535 0535 0340 0340 0400 0400 Figure 25: For general parts, see part list of basic construction Item Spare part Remark Qty Description Material... -
Page 54: Kgef20B-5
10.10 Parts list and sectional drawing KGEF, Bearing bracket 1 and 2, KGEF18-4 / KGEF20b-5 0701 0701 2120 2120 2300 2300 0440 0440 0770 0770 0120 0120 0700 0700 0730 0730 0100 0100 0780 0780 0390 0390 0720 0720 0110 0110 2340 2340... -
Page 55: Order Form For Spare Parts
Order form for spare parts FAX Nr. ADDRESS Your order will only be dealt with if this order form has been correctly completed and signed. Order date: Your order number: Pump type: Execution: Quantity Item. No. Part Article number pump Delivery address: Invoicing address: Ordered by:... - Page 56 ORDFORM (1512) 3.3 EN...
- Page 57 CombiPrime H Horizontal self-priming centrifugal pump Self-priming centrifugal pump SPX Flow Technology Assen B.V. Dr. A. F. Philipsweg 51, 9403 AD Assen, THE NETHERLANDS Phone: + 31 (0) 592 37 67 67 Fax: + 31 (0) 592 37 67 60 E-Mail: johnson-pump.nl@spxflow.com...
Need help?
Do you have a question about the Johnson pump and is the answer not in the manual?
Questions and answers
4M3@15M-KGE 11-4
The SPX FLOW pump with part number 4M3@15M-KGE 11-4 corresponds to the KGE 11-4 model. Based on the context:
- It uses fitting sizes of 1½ inch (Aa).
- The dimension Da (outer diameter) is 282 mm.
- The dimension Db (bolt circle diameter) is 80 mm.
- The dimension Ea (shaft height) is 40 mm.
- Shaft end dimensions include:
- Eb: 5P9
- Ec: 18 mm
- Ed: 16j6
Note: Some parts and bolts are not used in KGEF11-4, and 4 tap bolts (0530) are used specifically for this model.
This answer is automatically generated
I NEED JOHN PUMP CRUVE PERFOMANCE