
Related Manuals for Paradox PARAKEY


Summary of Contents for Paradox PARAKEY
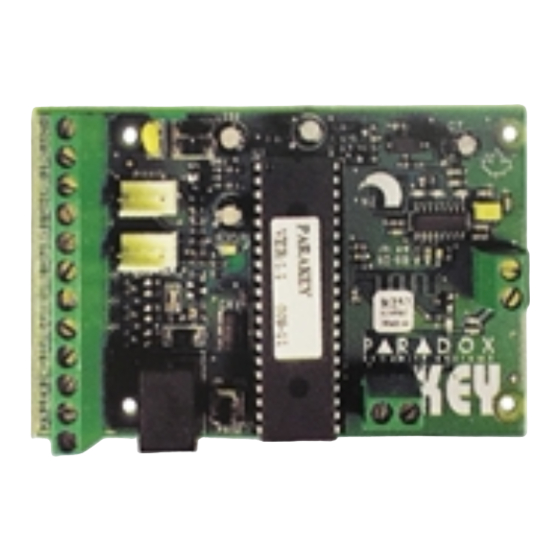
- Page 1 Remote Arming Module V1.10 318MHz/433MHz With KEELOQ high-security code encryption Installer’s Guide PARKEI-02...
-
Page 2: Table Of Contents
TABLE OF CONTENTS INTRODUCTION ......2 1.1 Features ....... 2 1.2 Technical Specifications . -
Page 3: Introduction
INTRODUCTION 1.2 Technical Specifications 1.2.1 Receiver: The PARAKEY is a wireless remote control system that Compatible Programming Keypads: (616 V4.2A & up) consists of a receiving module and up to eight 2 or 4-button (626 V4.1A & up) remote controls (transmitters). When used in conjunction... -
Page 4: Installation
If installing the Parakey away from the control panel, mount 2.3 Keypad the Parakey Receiver Module on a wall, leaving at least 2" around the panel box to permit adequate ventilation/heat The Parakey Receiving Module is programmed using a dissipation. -
Page 5: Antenna
2.4 Antenna 2.6 Hand-Held Remote Control Firmly screw the vertical and horizontal antennas to the There are two types of hand-held PARAKEY remote corresponding " " connections on the Receiving controls. There is a 2-button RF transmitter and a 4- Module as shown in figure 3 or 4. -
Page 6: System Reset
2.7 System Reset Performing a system reset will set the Parakey to default settings. Please note that if connected to a control panel, the reset sequence of the Parakey will not cause the control panel to reset and vice versa. To execute a system reset perform the following: 1) Remove the power connections ("+12"... -
Page 7: How To Program
3.1.1 Step 1 - Enter the Programming Mode When in "Normal Mode", the red LED on the Parakey Receiver flashes on and off at 2-second intervals. To enter the Programming Mode, press the "... -
Page 8: Programming The System
] when entering data will CLEAR Section [35] - Feature Select Programming: [1] erase the current entry. Return to step 3 or press The Parakey can be set to accept 6-digit or 4-digit User ] to exit Programming Mode. CLEAR and Installer Access Codes. -
Page 9: User Access Codes
Sections [09] to [16] - RF Programming Every time a button is pressed on the remote control, it transmits its RF code to the Parakey, identifying it as a user in the system. Therefore, each remote control in the system must be assigned to a user. After entering the... -
Page 10: Remote Control Options
4.4 Panic Output Programming Section [25] - Decimal Select: [0] to [4] When a remote control-activated panic alarm is generated (see section 4.3.3), the Parakey can activate one of the four on-board PGM outputs. In section [25], select only one:... -
Page 11: Panic Lockout Timer
When any of the PGM outputs are activated (see section Disabled Activate Output 1 4.3.3 & 4.4), the Parakey can latch the output in its Disabled Activate Output 2 opposite state until the output is toggled again or for a... -
Page 12: Panic Option
When a remote control-activated panic alarm is period of one year. Except as specifically stated herein, generated (see section 4.3.3), the Parakey can perform all express or implied warranties whatsoever, statutory or one of two actions:...
Need help?
Do you have a question about the PARAKEY and is the answer not in the manual?
Questions and answers