Table of Contents
Advertisement
Quick Links
Advertisement
Table of Contents

Summary of Contents for KitchenAid 5KCG0702
- Page 1 5KCG0702...
-
Page 2: Parts And Features
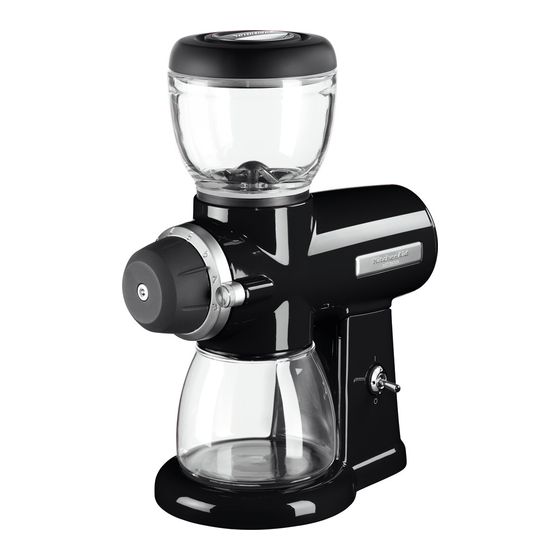
PARTS AND FEATURES PARTS AND ACCESSORIES Hopper lid 200 g glass hopper Easy access stainless steel burrs Die cast 15 grind metal body settings Grind control dial Power switch Faceplate assembly and screws (2) 200 g glass grind jar platform Coffee Cleaning scoop... -
Page 3: Important Safeguards
BURR GRINDER SAFETY IMPORTANT SAFEGUARDS When using electrical appliances, basic safety precautions should always be followed, including the following: 1. Read all instructions. 2. To protect against risk of electric shock, do not put the Burr Grinder in water or other liquid. 3. - Page 4 10. The use of attachments not recommended or sold by KitchenAid may cause fire, electric shock, or injury. 11. Do not use outdoors. 12. Do not let cord hang over edge of table or counter, or touch hot surfaces.
-
Page 5: Electrical Requirements
BURR GRINDER SAFETY ELECTRICAL REQUIREMENTS Voltage: 220-240 Volts A.C. only Frequency: 50-60 Hz Wattage: 220-240 Watts NOTE: This Burr Grinder has a grounded plug. To reduce the risk of electrical shock, the plug will fit in an outlet only one way. If the plug does not fit in the outlet, contact a qualified electrician. - Page 6 USING THE BURR GRINDER NOTE: The bean hopper holds a maximum of 200 g (7 oz) of beans. HELPFUL TIP: Because partially ground coffee beans may remain between the burrs after the Burr Grinder is turned off, it may be easier to select a finer grind setting while the Burr Grinder is running.
- Page 7 USING THE BURR GRINDER ASSEMBLING AND RUNNING THE BURR GRINDER NOTE: Before using the Burr Grinder, wipe the motor housing and cord with a clean damp cloth. Wash the bean hopper and lid, and ground jar in hot soapy water, then rinse and dry;...
- Page 8 USING THE BURR GRINDER Plug the Burr Grinder into a grounded outlet. Flip the POWER switch up to turn After grinding, remove the ground on, and begin grinding your coffee. jar from the Burr Grinder, and scoop out the ground coffee. Flip the POWER switch down when you have ground the desired amount of coffee.
- Page 9 USING THE BURR GRINDER ADJUSTING THE BURRS FOR A FINER OR COARSER GRIND If you’re an espresso or French Press aficionado, you may wish to adjust the factory setting of the cutting burrs to provide optimum performance for your style of brewing. For maximum grind fineness: Turn Make sure the bean hopper is the grind control dial to level 8.
- Page 10 USING THE BURR GRINDER For maximum grind fineness: Turn For maximum grind coarseness: the grind control gear clockwise, one “click” at a time until you hear Turn the grind control gear a distinct grating or rubbing sound counterclockwise, one “click” at that signifies the burrs are touching.
-
Page 11: Care And Cleaning
CARE AND CLEANING CLEANING THE BURR GRINDER AND BURRS IMPORTANT: To avoid damage, never wash or immerse the Burr Grinder main body, cutting burrs, burr-shaft assembly, or face plate in water, or place in the dishwasher. The bean hopper and lid and grind jar are dishwasher safe. Top rack only. After using the Burr Grinder, remove Clean the Burr Grinder main body the bean hopper and lid, and grind... -
Page 12: Troubleshooting
TROUBLESHOOTING If your Burr Grinder should malfunction or fail to operate during use, please check the following: - If the Burr Grinder runs when switched on, but coffee does not grind: The burrs require cleaning or are worn. Refer to “Care and cleaning” section for detailed information on cleaning the cutting burrs. - Page 16 © 2015. All rights reserved. Specifications subject to change without notice. 07/15 W10790652A...


Need help?
Do you have a question about the 5KCG0702 and is the answer not in the manual?
Questions and answers