Table of Contents
Advertisement
Available languages
Available languages
Quick Links
Advertisement
Chapters
Table of Contents

Related Manuals for KitchenAid 5AKCG111


Summary of Contents for KitchenAid 5AKCG111
- Page 1 5AKCG111, KJB22ARANA INSTRUCTIONS INSTRUÇÕES...
-
Page 2: Table Of Contents
BLADE COFFEE GRINDER INSTRUCTIONS TABLE OF CONTENTS BLADE COFFEE GRINDER SAFETY Important safeguards ...................3 Electrical requirements ..................5 BLADE COFFEE GRINDER PARTS AND FEATURES ........6 SPICE GRINDER PARTS AND FEATURES ......7 (KJB22ARANA ONLY) OPERATING BLADE COFFEE GRINDER ............8 OPERATING SPICE GRINDER ............9 (OPTIONAL) TIPS FOR GREAT RESULTS... -
Page 3: Blade Coffee Grinder Safety
BLADE COFFEE GRINDER SAFETY IMPORTANT SAFEGUARDS When using electrical appliances, basic safety precautions should always be followed, including the following: 1. Read all instructions. Misuse of the appliance may result in personal injury. 2. To protect against risk of electrical shock do not put Blade Coffee Grinder in water or other liquid. - Page 4 CMD + SHIFT CLICK TO CHANGE COPY BLADE COFFEE GRINDER SAFETY 9. Do not let cord hang over edge of table or counter. Keep the appliance and its cord out of reach of children. 10. Keep hands and utensils away from the cutting blade while grinding food to reduce the risk of severe injury to person or damage to the Blade Coffee Grinder.
-
Page 5: Electrical Requirements
BLADE COFFEE GRINDER SAFETY 18. This appliance is intended to be used in household and similar applications such as: -staff kitchen areas in shops, offices, and other working environments. -farmhouses. -by clients in hotels, motels, and other residential type environments. -bed and breakfast type environments. -
Page 6: Blade Coffee Grinder Parts And Features
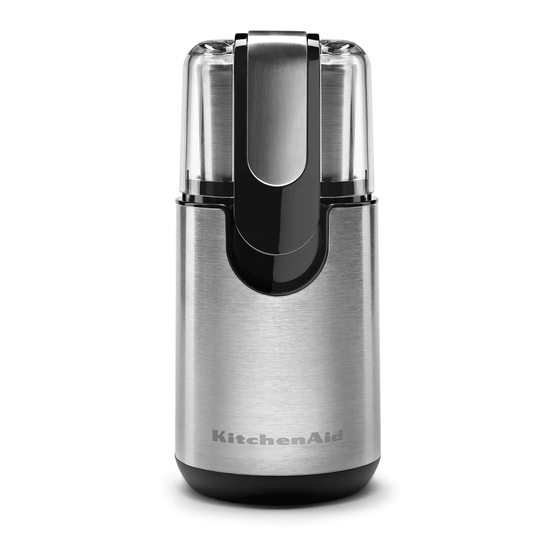
BLADE COFFEE GRINDER PARTS AND FEATURES A. Clear Top Cover with fingertip control Push down on the clear top cover to begin grinding and release to stop grinding. Top cover must be in place to operate grinder. Cover can be washed in the top rack of a dishwasher. -
Page 7: Spice Grinder Parts And Features (Kjb22Arana Only)
SPICE GRINDER PARTS AND FEATURES (KJB22ARANA ONLY) G. Solid Spice Grinder Bowl Lid Place this lid on the spice grinder bowl before placing the clear top cover when grinding spices. H. Stainless Steel Blade Blade is mounted inside the stainless steel bowl. -
Page 8: Operating Blade Coffee Grinder
Remove bowl from the motor housing. 3. A scale is provided inside the bowl for the KitchenAid recommended amount of beans to grind for 4, 8, 10, and 12 cups of coffee. Fill the bowl to your desired cup size with 4 cups minimum or 12 cups maximum level. -
Page 9: Operating Spice Grinder (Optional)
OPERATING SPICE GRINDER (OPTIONAL) 1. Remove the coffee bowl from 4. Place the top cover of the Coffee the grinder base. Grinder over the solid spice grinder lid, making sure the top cover aligns with the motor housing base in the same way it does when grinding coffee. -
Page 10: Tips For Great Results
4 cups minimum or 12 cups results, do not pulse top cover.) maximum level. Various bean blends and bean sizes can cause differences in fill 3. KitchenAid does not recommend using level and grind times. this grinder to grind beans for pump espresso-type machines. -
Page 11: Care And Cleaning
CARE AND CLEANING 1. Always unplug Coffee Grinder before 4. Wipe cord with warm, sudsy cloth; then cleaning. wipe clean with a damp cloth. Dry with a soft cloth. 2. Remove the bowl and top cover. Wash in hot, soapy water, rinse, and dry. Bowl 5. -
Page 12: Moedor De Café E Temperos Segurança
CMD + SHIFT CLICK TO CHANGE COPY MOEDOR DE CAFÉ E TEMPEROS INSTRUÇÕES ÍNDICE MOEDOR DE CAFÉ E TEMPEROS SEGURANÇA Instruções importantes de segurança ..............13 Condições elétricas ...................15 POR ONDE COMEÇO? Rede elétrica da residência ................16 Conexão à tomada ....................16 PARTES E CARACTERÍSTICAS DO MOEDOR DE CAFÉ... -
Page 13: Instruções Importantes De Segurança
CMD + SHIFT CLICK TO CHANGE COPY MOEDOR DE CAFÉ E TEMPEROS SEGURANÇA INSTRUÇÕES IMPORTANTES DE SEGURANÇA Quando utilizar um aparelho elétrico, precauções básicas de segurança sempre devem ser seguidas, incluindo as que seguem: 1. Leia todas as instruções. O uso incorreto do produto pode resultar em acidentes. - Page 14 CMD + SHIFT CLICK TO CHANGE COPY MOEDOR DE CAFÉ E TEMPEROS AVISOS DE SEGURANÇA 7. O uso de acessórios não recomendados ou não vendidos pelo fabricante pode causar incêndio, choque elétrico ou ferimentos. 8. Não use o produto em ambientes externos. 9.
-
Page 15: Condições Elétricas
CMD + SHIFT CLICK TO CHANGE COPY MOEDOR DE CAFÉ E TEMPEROS AVISOS DE SEGURANÇA 17. Nunca utilize produtos tóxicos (amoníaco, álcool, removedores, etc.) e nem esponja de aço ou escovas, na limpeza do seu moedor. Estes produtos podem danificar e deixar odores desagradáveis no interior do seu produto. -
Page 16: Rede Elétrica Da Residência
CMD + SHIFT CLICK TO CHANGE COPY POR ONDE COMEÇO? Antes de ligar seu moedor, verifique ADVERTÊNCIA se a tensão da rede elétrica no local de instalação é a mesma indicada na etiqueta de dados técnicos do produto. Esta mesma informação está indicada na etiqueta fixada próxima ao plugue do cabo de alimentação de seu moedor. -
Page 17: Partes E Características Do Moedor De Café
CMD + SHIFT CLICK TO CHANGE COPY PARTES E CARACTERÍSTICAS DO MOEDOR DE CAFÉ A. Tampa superior com controle de pressão para moagem Pressione a tampa para iniciar a moagem do café e solte para parar a moagem. A tampa deve estar posicionada corretamente para a operação do moedor. -
Page 18: Partes E Características Do Moedor De Temperos
CMD + SHIFT CLICK TO CHANGE COPY PARTES E CARACTERÍSTICAS DO MOEDOR DE TEMPEROS (APENAS KJB22ARANA) G. Tampa do copo do moedor de especiarias Posicione esta tampa sobre o copo do moedor de especiarias antes de colocar a tampa superior, durante a moagem. H. -
Page 19: Usando O Moedor
CMD + SHIFT CLICK TO CHANGE COPY USANDO O MOEDOR Antes do Primeiro Uso 6. Pressione a tampa para iniciar o Lave o copo e a tampa com água morna processo. Para obter resultados ideais e sabão neutro. Seque com um pano limpo de moagem, não pulse a tampa superior. -
Page 20: Utilizando O Moedor De Temperos
CMD + SHIFT CLICK TO CHANGE COPY UTILIZANDO O MOEDOR DE TEMPEROS (OPCIONAL) 1. Remova o copo de café da base 4. Coloque a tampa do moedor de café do moedor. sobre a tampa do moedor de especiarias, de maneira que fique alinhada sobre as guias laterais no compartimento do motor. -
Page 21: Dicas Para Moer Café
A mistura dos grãos e a variedade no tamanho dos grãos de café podem 3. A KitchenAid não recomenda o uso deste causar diferença no volume e no moedor, para moer grãos de café para tempo de moagem. -
Page 22: Cuidados E Limpeza
CMD + SHIFT CLICK TO CHANGE COPY CUIDADOS E LIMPEZA 1. Desligue o moedor (pare de pressionar a ADVERTÊNCIA tampa) e retire o plugue da tomada antes de fazer a limpeza. 2. Remova o copo e a tampa. Lave com água morna e sabão neutro, enxágue e seque com um pano limpo e macio. -
Page 23: Dados Técnicos
Peso líquido (kg) Peso bruto (kg) QUESTÕES AMBIENTAIS 1. Embalagem 2. Produto A KitchenAid procura usar embalagens Este produto foi construído com cujas partes sejam de fácil separação, bem materiais que podem ser reciclados como de materiais recicláveis. Portanto, e/ou reutilizados. Então, ao se desfazer as peças das embalagens (calços de isopor,... - Page 24 Whirlpool S.A. Unidade de Eletrodomésticos Atendimento ao Consumidor Rua Olympia Semeraro nº 675 Jardim Santa Emília CEP 04183-901 São Paulo - SP - Caixa postal 5171 Capitais e regiões metropolitanas: 4004 1759 Demais localidades: 0800 722 1759 ©2017. All rights reserved.
Need help?
Do you have a question about the 5AKCG111 and is the answer not in the manual?
Questions and answers