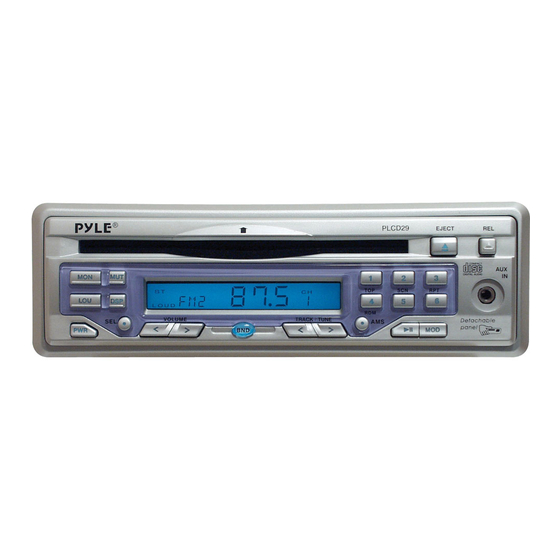
Summary of Contents for Pyle PLCD29
- Page 1 PLCD29 OWNER’S MANUAL Mobile Audio System • PLL Synthesizer Stereo Radio • Digital Compact Disc Player • Automatically Memory Storing • Full Detachable Panel • Auxiliary Input Function...
-
Page 2: Table Of Contents
CONTENTS Installation ... 3 DIN Front-Mount (Method A) ... Installing the unit ... Removing the unit ... DIN Rear-Mount (Method B) ... Using the Detachable Front Panel ... Wiring Connection ... 6 Operation ... 7 General Operation ... Radio Operation ... CD Operation ... -
Page 3: Installation
INSTALLATION Notes: • Choose the mounting location where the unit will not interfere with the normal driving function of the driver. • Before finally installing the unit, connect the wiring temporarily and make sure it is all connected up properly and the unit and the system work properly. -
Page 4: Removing The Unit
INSTALLATION Removing the unit 1. Frame 2. Insert fingers into the groove in the front of frame and pull out to remove the frame. (When reattaching the frame, point the side with a groove downwards and attach it.) 3. Lever Insert the levers supplied with the unit into the grooves at both sides of the unit as shown in figure until they click. -
Page 5: Using The Detachable Front Panel
USING THE DETACHABLE FRONT PANEL To Detach the Front Panel 1. Press the release button (REL), then the right-hand side of the panel will be ejected. 2. Remove the front panel by pulling its right-hand side outward. Front Panel 3. For safekeeping, store the front panel in the supplied protective case immediately after being removed. -
Page 6: Wiring Connection
WIRING CONNECTION ANTENNA CONNECTOR IGNITION SWITCH (B+) MEMORY YELLOW BACK-UP BLACK GROUND (B–) POWER ANTENNA 2-SPEAKERS SYSTEM WHITE FRONT Lch SPK. SPK. Lch SPK. GREEN/BLACK Note: 1. For 2-speakers system, green, violet, white/black and grey/black wire leads are unconnected and isolated. 2. -
Page 7: Operation
OPERATION GENERAL OPERATION • ON/OFF Press the PWR button (1) to turn on. Press PWR again to turn it off. • MUTE Press the MUT button (3) to silence the receiver. Press again to resume listening. • FACEPLATE RELEASE Press REL button (5) to detach the removable faceplate. -
Page 8: Radio Operation
OPERATION Use VOLUME (10) and VOLUME (11) buttons to adjust the selected mode. When mode has not been adjusted for several seconds, display returns to normal radio or CD display. (Bass) (Treble) (Balance) • SELECT LISTENING MODE Press MOD button (13) to choose desired listening mode. -
Page 9: Cd Operation
OPERATION Preset Scanning Press AMS button (18) shortly to toggle preset scanning function. During the scanning, it will stop at every stored station for several seconds and the frequency of station being scanned flashes on the display. Press it again to stop scanning. •... -
Page 10: Specification
Power Supply Requirements Chassis Dimensions Tone Controls - Bass (at 100 Hz) - Treble (at 10 KHz) Maximum Output Power Current Drain CD PLAYER Signal to Noise Ratio Channel Separation Frequency Response RADIO Frequency Coverage Sensitivity (S/N = 30 dB) -
Page 11: Trouble Shooting
TROUBLE SHOOTING Before going through the check list, check wiring connection. If any of the problems persist after check list has been made, consult your nearest service dealer. Symptom No power. The car ignition switch is not on. The fuse is blown. Disc cannot Presence of CD disc inside Remove the disc in the player, then be loaded or... - Page 12 www.pyleaudio.com 88-C1280-11...


Need help?
Do you have a question about the PLCD29 and is the answer not in the manual?
Questions and answers