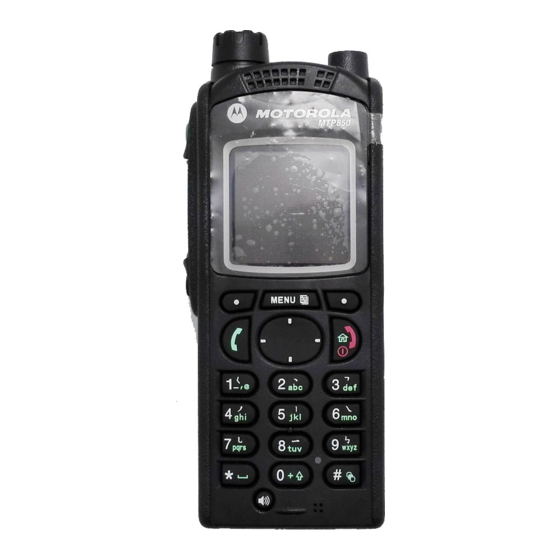
Motorola MTP850 Feature User Manual
Hide thumbs
Also See for MTP850:
- Feature user manual (402 pages) ,
- Basic user's manual (334 pages) ,
- User manual (214 pages)

Related Manuals for Motorola MTP850


Summary of Contents for Motorola MTP850
- Page 1 Mobile Release 5.14.10 MTP850 FEATURE USER GUIDE March 2014 *6866537D80* 6866537D80-AC © 2014 Motorola Solutions, Inc. All rights reserved.
-
Page 3: Table Of Contents
Contents | 3 Contents List of Figures..........................11 List of Tables..........................13 Chapter 1: General Information................15 Safety Information...............................15 Copyrights................................15 Icon Conventions..............................16 Using this Guide..............................16 Feature and Service Availability......................... 17 Chapter 2: Getting Started..................19 Product Technical Information..........................19 Before Power On..............................19 Attaching the Antenna..........................19 Installing the Battery.......................... - Page 4 4 | Contents Writing in iTAP Alphanumeric.......................41 Writing in TAP Alphanumeric........................ 42 Word Locking............................42 Adding Words to the Dictionary......................43 Home Display Text Message..........................43 Chapter 3: Modes....................45 Using Networks..............................45 Trunked Mode Operation............................ 45 Entering TMO Mode..........................46 Selecting Talkgroups..........................46 Making Group Calls in TMO........................
- Page 5 Contents | 5 Disaster Alert............................58 Initializing Disaster Alert Calls.......................58 Exiting Emergency Operations....................... 58 Repeater Mode..............................59 Entering the Repeater Mode........................59 Setting Monitor Option........................... 59 Encryption in the Repeater Mode......................60 Chapter 4: GPS Location Service................. 61 Enhancing GPS Performance..........................62 Enabling GPS..............................62 GPS Icon................................62 GPS Different Location Displays........................62 Viewing Your Position............................63...
- Page 6 6 | Contents Editing Contacts............................75 Deleting Numbers............................75 Deleting Contacts............................ 75 Checking Capacity..........................75 Dialing through the Contact List......................76 Browser................................76 Security................................76 PIN Protect.............................. 76 Protecting the Radio with a PIN Code..................76 Unblocking Your Radio......................76 Changing PIN Codes........................77 Keylock Setup............................
- Page 7 Contents | 7 Setting All Tones.........................85 Talk Permit..........................85 Setting Talk Permit........................85 Clear to Send..........................86 Setting Clear to Send........................86 Periodic Alert..........................86 Setting Periodic Alert........................86 D-PTT Tones..........................86 Setting D-PTT Tones........................86 Display..............................87 Setting Flip Display........................87 Setting Font Level........................87 Setting Large Idle Font........................87 Setting Extra Zoom........................
- Page 8 8 | Contents Adding Talkgroups to Favorites......................97 Managing Folders in Favorites........................97 Deleting Items from Favorites Folder..................... 98 Deleting All Items from Favorite Folders....................98 My Info................................98 Viewing and Modifying Personal Information..................98 Recent Calls.................................98 Viewing Recent Calls..........................99 Calling from Recent Calls........................99 Storing Recent Calls to Contacts......................99 Deleting Recent Calls..........................100 Shortcuts................................100...
- Page 9 Contents | 9 Using Bookmarks........................110 Creating Hotkeys........................110 Using Hotkeys........................... 110 Saving Pages..........................110 Selecting Saved Pages....................... 111 Disabled Packet Data Service........................111 Disabled Browser Entry........................111 Keys Usage............................111 Browser Menu Panes Overview......................112 Navigate Pane............................113 Advanced...............................113 Bookmarks Pane............................114 Working with the Options Pane for Selected Bookmarks............114 Working with the Saved Pages Folder..................
-
Page 10: Contents
10 | Contents... -
Page 11: List Of Figures
List of Figures | 11 List of Figures Figure 1: Trunked Mode Operation ....................45 Figure 2: Direct Mode Operation ....................50 Figure 3: Repeater Mode Operation ....................59 Figure 4: Call-Out Message ......................117... - Page 12 12 | List of Figures...
-
Page 13: List Of Tables
List of Tables | 13 List of Tables Table 1: Special Notations ......................17 Table 2: Product Technical Information ..................19 Table 3: Battery Icons ........................22 Table 4: Controls and Indicators .....................23 Table 5: Display ..........................26 Table 6: Colors of the Soft Key Area ..................... 26 Table 7: Status Icons ........................27 Table 8: Talkgroup Icon ......................... - Page 14 14 | List of Tables...
-
Page 15: Chapter 1: General Information
United States and other countries preserve for Motorola certain exclusive rights for copyrighted computer programs. Accordingly, any copyrighted Motorola computer programs contained in the Motorola products described in this document may not be copied or reproduced in any manner without the express written permission of Motorola. ©... -
Page 16: Icon Conventions
Customers or end-users in EU countries should contact their local equipment supplier representative or service centre for information about the waste collection system in their country. Open Source Software (OSS) Legal Notices For details on OSS Legal Notices visit Motorola Online (emeaonline.motorolasolutions.com) or browse the CPS Plus disc. Icon Conventions... -
Page 17: Feature And Service Availability
General Information | 17 Table 1: Special Notations Example Description key or E button Capital letters indicate a name of a key or button. MERGENCY Entering TMO tone Italic words indicate a name of the tone. Powering Off Bold words indicate the soft menu items, MMI strings, or messages displayed on the radio. -
Page 19: Chapter 2: Getting Started
Chapter Getting Started This chapter contains basic information on how to use the radio. Product Technical Information Table 2: Product Technical Information Description Value Maximum Voltage 4.2 V Maximum Current 0.5 A Maximum RF Power 1 or 1.8 W (switchable) Maximum Speaker Load 0.5 W at 8 Ω... -
Page 20: Installing The Battery
20 | Getting Started 2 Turn clockwise until snug. Installing the Battery Procedure: 1 Remove the battery from its protective case. 2 Insert the battery top into the compartment as illustrated. 3 Carefully press the battery bottom downward until it clicks into place. Note: •... -
Page 21: Removing The Battery
(the battery charges faster). Important: Motorola approved chargers provide optimum performance. Other chargers may not fully charge your Motorola Lithium-Ion battery or may reduce the life of the battery. Prerequisites: Do not charge the battery in a hazardous area. -
Page 22: Charging Indicators
22 | Getting Started Note: If the radio cannot detect the charger and displays the Detecting Charger or Reconnect Radio to the Charger messages, ensure that the charger is connected correctly and that the pins on the radio and the charger are clean. Post requisites: The battery may heat up during charging. -
Page 23: Controls And Indicators
Getting Started | 23 Controls and Indicators Table 4: Controls and Indicators Annotation Description button MERGENCY Table continued… Send Feedback... - Page 24 24 | Getting Started Annotation Description Press and hold E button to enter Emergency operation. When your radio is off, MERGENCY press and hold to power on in Emergency Mode. OTARY • Rotate to set the volume. • Press and rotate to select a different talkgroup. •...
- Page 25 Getting Started | 25 Annotation Description Provides connection for accessories and cable for data transfer. Note: It is recommended to turn off the radio before connecting accessories. NTENNA ICROPHONE Activated during Simplex, high audio calls such as Group Calls. XTERNAL NTENNA ONNECTOR Used with the digital car kit to connect the RF signal to the external antenna.
-
Page 26: Display
26 | Getting Started Annotation Description OTTOM ICROPHONE Note: A detailed list of compatible accessories is included in Accessory Leaflet, part number: 6866537D83. To obtain the document, contact your service provider. Display This section presents the radio's default home screen elements. Table 5: Display Annotation Description... -
Page 27: Configurable Idle Screen
Getting Started | 27 Related Links Display on page 87 Display on page 87 Setting Time and Date on the Display on page 89 Configurable Idle Screen Your service provider can configure the information that is displayed on the home screen below the status icon area. Depending on the radio configuration and services supported, the following information can be displayed: •... - Page 28 28 | Getting Started Icon Description Data Connected — Displayed when the data connection is idle (standby). Data Transmit/Receive — Displayed when the data connection is active. Number 1, 2, 3, or 4 indicates how much bandwidth is used during transmission (25%, 50%, 75%, or 100%). Direct Mode Operation Direct Mode Call —...
- Page 29 Getting Started | 29 Icon Description High Audio — Indicates that the audio mode is changed to high. Audio Profile Selected — Indicates that an audio profile associated with a particular icon is active. The icons can be either solid or blinking. For details on audio profiles available on the radio, contact your service provider.
- Page 30 30 | Getting Started Icon Description End-to-End Encryption (E2EE) Solid, when the E2EE is enabled • for the selected talkgroup, • for the highlighted private number, • for the manually entered private number, • when transmitting voice in Group Calls, •...
-
Page 31: Powering On The Radio
Getting Started | 31 Icon Description Remote Control Indicates that the radio is being remotely controlled and some commands are being executed in the background. For example, when the radio is controlled via special SDS messages or triggered to send a GPS location report. The icon is not visible in the Extra Zoom Mode. -
Page 32: Locking/Unlocking The Keys/Buttons
32 | Getting Started Locking/Unlocking the Keys/Buttons Press M key and * key. Note: The E button is not locked. Entering Emergency Mode unlocks all keys. MERGENCY Related Links Keylock Setup on page 77 Holding Your Radio The radio has two microphones: a top microphone for simplex dispatcher/private calls and a bottom microphone for duplex telephone-like calls. -
Page 33: Setting Flip Display
Getting Started | 33 Setting Flip Display When and where to use: The feature is useful for a user who has to wear the radio on a shoulder, belt, or lapel and at the same time wishes to read the display upside down. Procedure: 1 From the home screen, press the key. -
Page 34: Selecting Talkgroups
34 | Getting Started Note: RF Transmissions from the radio are prevented under the following conditions: • TXI Mode is activated. • Battery is removed. • The radio is turned off. On entering or exiting the transmit inhibit mode, when the radio is camped on a cell, it sends a specially designated SDS status message. -
Page 35: Using Timed Talkgroup Change
Getting Started | 35 Using Timed Talkgroup Change This feature allows you to switch a selected talkgroup between the currently selected talkgroup and a predefined talkgroup (TMO or DMO), making the predefined talkgroup the selected talk group for a predefined time by using a One-Touch button. -
Page 36: Ambience Listening (Al) Call
36 | Getting Started Ambience Listening (AL) Call This feature allows a dispatcher to make a special call that allows listening to the conversations and background noises within the range of a particular radio’s microphone. The call is set up without any indication to the affected radio, and any lower priority ongoing voice call may be preempted. -
Page 37: Terminal Temporary Disable/Enable
Getting Started | 37 Feature Description Screen Saver Activation Turns on/off the Screen Saver feature. Scroll Audio Profiles Scrolls through all available audio profiles. Sending Predefined Message Sends a predefined message to a dedicated address. Sending Status Sends a dedicated status message to a dedicated address. Sending User Defined Message Sends a user defined message to a dedicated address. -
Page 38: High/Low Audio Toggle
It is recommended to Permanent Disable your radio only when you do not expect to recover it. If it is recovered then a Permanent Disable radio can be reactivated by returning it to Motorola. Note: This is a selling feature. -
Page 39: Selecting Text Entry Modes
Getting Started | 39 Related Links Unlocking Your Radio on page 31 Selecting Text Entry Modes Prerequisites: Your radio displays the text entry screen. Procedure: 1 Press M → Entry Mode. 2 Select one of the following: • Primary — for entering alphanumeric characters. •... -
Page 40: Keys Usage
40 | Getting Started Primary Icon Secondary Icons Description iTap — all capitals Numeric Icon Description Enter numbers. Symbolic Icon Description Enter punctuation and symbols. Keys Usage List of keys and characters in Alphanumeric Mode (TAP/iTAP). Table 12: Keys Usage Alphanumeric Mode (TAP/iTAP) Symbol Mode 0 to 9 keys... -
Page 41: Writing In Itap Alphanumeric
Getting Started | 41 Alphanumeric Mode (TAP/iTAP) Symbol Mode 8 key € £ $ ¥ ¤ T U V 8 t u v 8 9 key # % * W X Y Z 9 w x y z 9 Table 13: Other Keys Description Any numeric key •... -
Page 42: Writing In Tap Alphanumeric
42 | Getting Started 3 Press M → Entry Mode. 4 Select Primary. 5 Press 3 key. The alternative row opens and shows D E F 3. 6 Continue entering the letters by pressing one key for each letter. Press 2, 8, 4, and 3 keys. Note: Automatic shift to upper case is used at the beginning of a message, after punctuation followed by space, or for the first letter of a word created as a new contact entry. -
Page 43: Adding Words To The Dictionary
Getting Started | 43 Adding Words to the Dictionary Each language comes with its own dictionary. You can create words (including alphanumeric abbreviations). Once you enter a word followed by space, it is automatically stored in the dictionary and appears as a choice whenever you press the same key combination in the future. -
Page 45: Chapter 3: Modes
Chapter Modes This chapter contains information on available modes that the radio can operate in. Using Networks Procedure: 1 From the home screen, press the key. MENU 2 Select More . . . → Networks. 3 Select one of the following: •... -
Page 46: Entering Tmo Mode
46 | Modes Entering TMO Mode Procedure: 1 From the home screen, press Optns. 2 Select Trunked Mode. Selecting Talkgroups From the home screen, use one of the following methods: • Press left or right N key. Press Select to confirm. AVIGATION •... -
Page 47: Dynamic Group Number Assignment (Dgna)
Modes | 47 • End — cancels the incoming Group Call. Dynamic Group Number Assignment (DGNA) DGNA allows the network operator to dynamically manage talkgroups on your radio over the air interface. Using DGNA, the network operator can: • Add talkgroups. •... -
Page 48: Initializing Broadcast Calls
48 | Modes Note: This feature is not supported on the Dimetra infrastructure. Initializing Broadcast Calls Procedure: 1 From the home screen, press the key. MENU 2 Select More . . . → Services → Broadcast. Your radio displays the predefined alias and the Broadcast Call icon. 3 To start the call press the PTT button. -
Page 49: Call Modification
Modes | 49 Call Modification Call Modification is a feature that allows your service provider to modify the call in order to optimize it and adjust to a current situation. Modification can cover: • Call priority — modified during call setup. •... -
Page 50: Exiting Local Site Trunking
50 | Modes Note: Your service provider can turn on/off all the visual and audio indications, when you enter Local Site Trunking Mode. Exiting Local Site Trunking When the link with the central network controller is reestablished, your radio exits Local Site Trunking, and the following occurs: •... -
Page 51: Making Group Calls In Dmo
Modes | 51 Note: If the R mode is set to Scroll, then you do not need to press it to enter the scrolling OTARY mode. Note: Your radio can have an access up to three levels of the folder structure. Making Group Calls in DMO The Group Call is received by all members of the selected group who have their units turned on and are in range. -
Page 52: Private Call With Presence Check
52 | Modes Private Call With Presence Check This feature allows you to see if the calling party is available in DMO. When this feature is enabled, you can only initiate a Private Call if the called radio is present on the same channel and responds with a presence check acknowledgement. -
Page 53: Selecting Dmo Group Call Options
Modes | 53 When the radio connects to a gateway, it plays a tone, displays the Gateway available message and shows an appropriate icon. When the radio looses connection with the gateway, it plays a tone, displays the Gateway not available message, and the gateway icon is blinking. -
Page 54: Emergency Operations
54 | Modes To activate, select M → More . . . → Networks → TXI Mode → Activate. In this mode, the radio does not transmit under any circumstances except for the Emergency Calls. All the functions and keys which cause transmission, for example registration to the network, changing talkgroup or folder, sending SDS messages, or pressing the PTT button are disabled. -
Page 55: Emergency Group Call
Modes | 55 Note: It is possible to turn on the radio by pressing the EMERGENCY button. Depending on the service provider settings, the radio can start Emergency Operations automatically. If the radio is PIN-protected (except for SIM PIN), Emergency Operations will bypass the PIN lock for the duration of the Emergency Operations. -
Page 56: Non-Tactical Emergency
56 | Modes Non-Tactical Emergency In Non-Tactical Emergency, the radio switches to a designated Emergency talkgroup when starting Emergency Operations. This talkgroup is used for the complete duration of the Emergency Operations (you cannot change the talkgroup). In TMO, it is possible to configure the radio to make Emergency Non-Tactical Group Calls without sending attachment. -
Page 57: Alternating Hot Microphone
Modes | 57 Alternating Hot Microphone The Alternating Hot Microphone is an enhancement of the Hot Microphone. After activation, the radio alternately enters transmission phases (your microphone is active) and reception phases (you can only listen) for an amount of time precisely determined by your service provider. -
Page 58: Invisible Emergency
58 | Modes Invisible Emergency It is possible for the service provider to disable visual and audible indications of performing Emergency Operations on the radio. The purpose of this feature is to hide the fact of using Emergency Operations in a critical situation (e.g. direct attack on the user) and thus to provide additional layer of safety. -
Page 59: Repeater Mode
Modes | 59 3 If your radio displays Do you want to exit?, press Yes to exit. Your radio exits Emergency Operations. Repeater Mode The Repeater Mode provides repeater connectivity between radios operating in the DMO Mode. Figure 3: Repeater Mode Operation A DMO repeater is used to extend the DMO range by retransmitting received information from one radio to another. -
Page 60: Encryption In The Repeater Mode
60 | Modes Encryption in the Repeater Mode While in the Repeater Mode, the radio supports Air Encryption and is able to repeat encrypted calls and messages. If SCK keys installed on the radio are invalid: • The radio transfers calls and messages without deciphering them (provided that the encryption level is not the highest). -
Page 61: Chapter 4: Gps Location Service
Chapter GPS Location Service The GPS Location Service feature uses information from Global Positioning System (GPS) satellites orbiting the Earth to determine the approximate geographical location of your radio. The GPS Location Service availability, accuracy, and the position calculation time vary depending on the environment in which you use the radio. -
Page 62: Enhancing Gps Performance
62 | GPS Location Service Enhancing GPS Performance Sometimes the GPS feature is unable to complete a location calculation successfully. You hear an audible tone indicating that your radio cannot see the satellites. To maximize the ability of your radio to determine a location fix please note the following guidelines: •... -
Page 63: Viewing Your Position
GPS Location Service | 63 Latitude / Longi- MGRS Coordi- UK Coordinates Irish Coordinates UTM Coordinates tude nates Satellites Satellites Satellites Satellites Satellites • Time — indicates when the last time the location was calculated. The time is provided in Universal Time Coordinated. - Page 64 64 | GPS Location Service • Under any other metal or concrete roof or structure • Near a powerful radio or television tower • When your GPS antenna is covered (for example, by your hand or other object) or facing the ground •...
-
Page 65: Chapter 5: Main Menu
Chapter Main Menu This chapter contains information on items in the main menu. You can enter the menu items during a call. If you are viewing a menu when a new call starts, the radio exits the menu. Important: Some menu items are model specific and may not be activated or available on your radio. Scrolling through the Menu Procedure: 1 From the home screen, press the... - Page 66 66 | Main Menu Menu Icon Description Browser Starts the WAP browser. Security Lets you turn on/off and verify security features, and change passwords. Setup Allows you to customize your radio. More... Contains additional setup menu items. Group Setup Contains additional menu items for Scanning Talkgroups features. Favorites Contains shortcuts to frequently used talkgroups and contact numbers.
-
Page 67: Messages
Main Menu | 67 Messages This feature allows you to send and receive text messages. A message can contain up to 1000 characters, depending on your service provider settings. Pressing the PTT button when a message is highlighted can cause one of the following actions, depending on your service provider settings: •... -
Page 68: Delivery Report
68 | Main Menu • Private – enter the private number or press abc to choose the destination number from the contact list. • Phone – enter the phone number or press abc to choose the destination number from the contact list. Note: Your service provider can enable to send a Store and Forward message to a talkgroup. -
Page 69: Inbox
Main Menu | 69 Inbox It contains up to 100 new or old incoming messages. Table 16: Inbox Icons Icon Description Unread (New) Message Read (Old) Message Sender Information in Message View — name or number Time and Date Stamp in Message View — arrival time and date Delivery Status Received —... -
Page 70: Embedded Number
70 | Main Menu • Reply (only for Inbox) — Invokes the edit screen with the old message as default text and the message originator as a recipient. After editing, press Send, the PTT button, or the S key to send. •... -
Page 71: Immediate Message
Main Menu | 71 Procedure: 1 From the home screen, press the key. MENU 2 Select Messages → Inbox. 3 Highlight the required message and press the PTT button. Immediate Message When the new immediate message is received, radio plays the New Mail Received tone and displays the content overlapping your previous screen. -
Page 72: Templates
72 | Main Menu Related Links on page 109 WAP Push on page 116 Templates This feature is used to store up to 100 predefined and your message templates. Each of the Inbox and Outbox message can be stored as a template. Each template name and text can be edited afterwards. Sending User-Defined Templates Procedure: 1 From the home screen, press the... -
Page 73: Status Messages
Main Menu | 73 3 Highlight the required template and press Send, the PTT button, or the S key. Note: You can edit the predefined template before you send it. Press the M key and select Edit. Edit screen opens with the template text. You are only allowed to replace the existing text. Status Messages The radio allows you to send two types of status messages: statuses and targeted statuses. -
Page 74: Contacts
74 | Main Menu • Select required talkgroup from the TalkGroup List. The display shows one of the following delivery reports: • Status Sent. • Status Failed. Contacts This sub-menu stores all your contact numbers. Each entry requires the following information: •... -
Page 75: Editing Contacts
Main Menu | 75 Note: If the entered number exist, the radio displays Overwrite? message. Press Yes to confirm, or No to enter the speed dial number again. 7 Press Done. You have create a contact with one number. To add additional number repeat steps 4–6. Editing Contacts Procedure: 1 From the home screen, press Contcs. -
Page 76: Dialing Through The Contact List
76 | Main Menu • Private • Phone / PABX • Contact Dialing through the Contact List Procedure: 1 From the home screen, press Contcs. 2 To highlight the required contact, use up and down N keys, or enter up to 12 characters of the contact AVIGATION name. -
Page 77: Changing Pin Codes
Main Menu | 77 Procedure: 1 Radio displays Unit BlockedEnter PUK. 2 Enter 8–digit PUK (Personal Unblocking Key) number. Note: The PUK is an eight-digit master code provided by your service provider. 3 Enter the new PIN code twice. Changing PIN Codes Procedure: 1 From the home screen, press the key. -
Page 78: Setting Keylock On Startup
78 | Main Menu Setting Keylock on Startup Procedure: 1 From the home screen, press the key. MENU 2 Select Security → Keylock Setup → Start Locked. 3 Select On/Off. Air Encryption Air Encryption is a feature that enables encryption of entire communication between the radio and infrastructure, which results in increased security of calls, messages, and data. -
Page 79: Verifying K Validity
Main Menu | 79 Verifying K Validity Procedure: 1 From the home screen, press the key. MENU 2 Select Security → K Validity. 3 Your radio displays: • K is Valid — the infrastructure can authenticate your radio. • K is Invalid — the infrastructure is unable to authenticate your radio. Please call your service provider to restore the key to your radio. -
Page 80: Verifying Dmsck Validity
80 | Main Menu Verifying DMSCK Validity When and where to use: To ensure that the DMSCKs in the radio are valid and can be used for the air interface encryption. Procedure: 1 From the home screen, press the key. MENU 2 Select Security →... -
Page 81: Sds Remote Control
Main Menu | 81 • On — To restore all vibrations. • Off — To disable all vibrations. SDS Remote Control SDS Remote Control is a feature that enables to remotely control behavior and configuration of the radio via special SDS messages. -
Page 82: Ring Style
82 | Main Menu 4 Select the required setting, and press Select. Note: If you choose Duplex Calls, Simplex Calls or Messages, the settings available are Vibe then Ring (for messages it is Vibe & Ring), Vibe Only or Ring Only. If you choose Group Call, the settings available are Vibe On or Vibe Off only. -
Page 83: Language
Main Menu | 83 Language This sub-menu allows you to change the language of the radio. Setting Language Procedure: 1 From the home screen, press the key. MENU 2 Select Setup → Language. 3 Select desired language. Data Setup This menu item allows you to set up your radio to transmit and receive data from the external device. To connect your radio accessory connector to the external device, use the PMKN4025 cable. -
Page 84: Setting Audio Profiles
84 | Main Menu Setting Audio Profiles When and where to use: To adjust the audio parameters of the radio its current operating environment. Procedure: 1 From the home screen, press the key. MENU 2 Select Setup → Audio → Audio Profile. 3 Select a required profile. -
Page 85: Setting Volume Adjustment Mode
Main Menu | 85 Setting Volume Adjustment Mode Procedure: 1 From the home screen, press the key. MENU 2 Select Setup → Audio → Volume Adj. Mode. 3 Select one of the following: • Individual — You can set Duplex, Simplex, Earpiece, Speaker and Keypad per your preferences in M →... -
Page 86: Clear To Send
86 | Main Menu 3 Select one of the following: • No Tone — No tone heard upon pressing the PTT button. • Short Tone — Short tone heard upon pressing the PTT button. • Normal Tone — Factory-default tone heard upon pressing the PTT button. Clear to Send You can activate/deactivate tone for the transmitting radio that the receiving radio is ready to accept the transmission. -
Page 87: Display
Main Menu | 87 • D-PTT Mode — Activates/deactivates D-PTT tone. • Tone Style— Indicates how many times the D-PTT tone is played. Display This menu item allows you to adjust your radio display settings. Related Links Display on page 26 Display on page 26 Setting Time and Date on the Display... -
Page 88: Setting Extra Zoom
88 | Main Menu Setting Extra Zoom Enabling Extra Zoom simultaneously changes three settings: switches Font Level to the largest possible one, activates Large Idle Font, and sets Extended Status Icons to Idle Only If you modify any of these settings, for example decrease the font level, the radio leaves the Extra Zoom Mode. However, to restore all the three previous settings, you need to manually change the values of Font Level, Large Idle Font, and Extended Status Icons. -
Page 89: Setting Wallpaper
Main Menu | 89 Note: Setting the backlight intensity level by pressing the B key changes the LED, keypad ACKLIGHT backlight, and E button backlight intensity. MERGENCY Setting Wallpaper When and where to use: To change the look of the home screen. Procedure: 1 From the home screen, press the key. -
Page 90: Setting The Time Manually
90 | Main Menu Procedure: 1 From the home screen, press the key. MENU 2 Select Setup → Time & Date → Format → Format Time. 3 Select one of the following: • 12-Hour — Displays the time with am (before noon) or pm (after noon) indication. •... -
Page 91: Setting Automatic Updates For The Time And Date
Main Menu | 91 Setting Automatic Updates for the Time and Date Procedure: 1 From the home screen, press the key. MENU 2 Select Setup → Time & Date → System Update. 3 Select one of the following: • Off — All the infrastructure informations are ignored. The radio uses internal time and offset. •... -
Page 92: Book On
92 | Main Menu Note: • Changing RF Power Class to Normal RF Pwr during calls may result in dropping the call. The power level may be not sufficient to sustain the transmission. • Battery consumption is higher when Hi RF Power is selected. Note: This is a selling feature. -
Page 93: Setting Rotary Lock
Main Menu | 93 Setting Rotary Lock Procedure: 1 From the home screen, press the key. MENU 2 Select Setup → Rotary Knob → Rotary Lock. 3 Select one of the following: • Locked — Locks R , you can unlock it by selecting Unlocked or by pressing and holding R OTARY OTARY •... -
Page 94: Setting Rotary Knob Talkgroup Selection
94 | Main Menu Setting Rotary Knob Talkgroup Selection Procedure: 1 From the home screen, press the key. MENU 2 Select Setup → Rotary Knob → Confirm TG Sel.. 3 Select one of the following: • On — You need to confirm the talkgroup selection by pressing Select or pressing the PTT button to immediately start a call on a new talkgroup. -
Page 95: Setting Talkgroups In The Active Scan List
Main Menu | 95 Scan on page 94 Setting Talkgroups in the Active Scan List When and where to use: If you want to edit talkgroups in the active scan list. Procedure: 1 From the home screen, press the key. MENU 2 Select More . -
Page 96: Favorite Folders
96 | Main Menu To quickly access favorite folders, from the home screen press the up N key. To scroll through items inside AVIGATION favorite folders, you can either use the keys or the R NAVIGATION OTARY Favorite Folders Favorite talkgroups and contact numbers are stored in favorite folders. The folders are common for all types of talkgroups and contact numbers, which means that in one folder you can have items available in different modes. -
Page 97: Adding Contact Numbers To Favorites
Main Menu | 97 Procedure: 1 From the home screen, press the key. MENU 2 Select More . . . → Favorites. 3 Select [New Folder]. 4 Enter a name and select Ok. Adding Contact Numbers to Favorites Procedure: 1 From the home screen, press the key. -
Page 98: Deleting Items From Favorites Folder
98 | Main Menu Deleting Items from Favorites Folder When and where to use: To delete a single contact number or a talkgroup from a favorite folder. Procedure: 1 From the home screen, press the key. MENU 2 Select More . . . → Favorites. 3 Select a folder containing the item you want to remove. -
Page 99: Viewing Recent Calls
Main Menu | 99 Viewing Recent Calls Procedure: 1 From the home screen, press the key. MENU 2 Select More . . . → Recent Calls. 3 Select one of the following: • Dialed • Received • Missed 4 Select a required call from the list. 5 Press the key. -
Page 100: Deleting Recent Calls
100 | Main Menu Deleting Recent Calls Procedure: 1 From the home screen, press the key. MENU 2 Select More . . . → Recent Calls. 3 Select Dialed, Received or Missed. 4 Press M on the required call. 5 Select Delete. Note: To erase all the calls, select Delete All. -
Page 101: Rui
Main Menu | 101 • Delete All — Erases all the shortcuts. Select Yes to confirm. This menu item allows you to log in/out to the radio. Related Links RUA/RUI on page 108 Book On on page 92 Logging On Procedure: 1 From the home screen, press the key. -
Page 102: Selecting Your Network
102 | Main Menu Note: If the radio is in TXI Mode, it is not possible to switch from Direct Mode to Trunked Mode or Repeater Mode. Related Links Entering TMO / DMO Mode on page 33 Networks on page 101 Selecting Your Network Procedure: 1 From the home screen, press the... -
Page 103: Location
Main Menu | 103 Location See the GPS Location Service for more information. Related Links GPS Location Service on page 61 Viewing Your Position Procedure: 1 From the home screen, press the key. MENU 2 Select More . . . → Location → Position. 3 Scroll to view the results about the last time your location was calculated. -
Page 104: Viewing Encryption Status
104 | Main Menu Note: Data services are only available in TMO Mode. The data option must be set to Voice & Data or Data Only. 3 Select one of the following: • Sent Data — the number of KBs sent and throughput since current Packet Data activation is displayed. •... -
Page 105: Chapter 6: Features
Chapter Features Private Call The Private Call, also called point-to-point, or individual call, enables calling between two individuals. No other radio can hear the conversation. This call type can be carried out in two ways: • Duplex call (if the system allows), in TMO Mode. Both parties can speak at the same time. •... -
Page 106: Rms Icons
106 | Features remaining part, you need to go to Menu → Messages → RMS Box. The latest RMS free text is kept on the home screen until the next power cycle. RMS free text messages and incoming and outgoing RMS statuses (with the exception of RMS statuses sent) are stored in the RMS Box. -
Page 107: Viewing The Talkgroup Speed Number
Features | 107 Viewing the Talkgroup Speed Number Procedure: 1 From the home screen, press Optns. 2 Select one of the following: • TG by Folder then select the folder and highlight the required talkgroup. • TG by abc enter up to 15 characters to narrow the talkgroup names and highlight the required talkgroup. 3 Press M →... -
Page 108: Dtmf Overdial
108 | Features DTMF Overdial This feature allows you to communicate with an automated answering device (for example, the voice mail or answering machine) during an on-going private, phone or PABX call. While in an on-going private, phone or PABX call, press the DTMF keys (0-9, *, #). When pressed, the DTMF key sounds a tone and the entered digit is displayed on the screen. -
Page 109: Wap
Features | 109 Wireless Application Protocol (WAP) is a standard for application layer network communications in a wireless communication environment such as TETRA network. The protocol is used to access the mobile web from a radio through a WAP browser. Note: This is a selling feature. -
Page 110: Creating Bookmarks Through The Bookmarks Pane
110 | Features 4 The screen displays the title and URL of the marked page. 5 To save it: a Press Save (or Select) to save the page in bookmarks. b Select Menu and select an option: • Save — Confirms the bookmark creation. •... -
Page 111: Selecting Saved Pages
Features | 111 Selecting Saved Pages Procedure: 1 Enter the browser. 2 Scroll to Bookmarks pane. 3 Select Organise (if there are no saved bookmarks), or More..4 Select Go to enter the Saved Pages folder. 5 Select a saved page and press Ok. The display shows the saved page. Depending on the saved page, you may browse the web from here. -
Page 112: Browser Menu Panes Overview
112 | Features Key Press Action # key (press or hold) Brings up the Text Input pane, while in editor. Otherwise, sounds a wrong key press. Left or right S Selects the option that appears in the display directly above the left and right soft key (part of the page). Up N While in list of options, moves up one line. -
Page 113: Navigate Pane
Features | 113 Table 22: Additional Menu Panes Menu Pane Description Options Displayed only when there are additional options for the pane or page. Image Displayed only when an image is selected. Provides access to image details, storage, and display use. Input Text Displayed only in text entry mode. -
Page 114: Bookmarks Pane
114 | Features • Clear... — for clearing of browser data: history, cache cookies, or auto-fill. • Restart Browser — for restarting the browser. • About... — for showing the information about the current version of Openwave Mobile Browser. Bookmarks Pane If there are bookmarks in the root folder, select More... -
Page 115: Tools Pane
Features | 115 Tools Pane Procedure: 1 From the Tools pane select More... 2 Scroll to a document. 3 Select M key to open the Options pane for that document. 4 Select one of the following: • Show URL — For displaying the current page URL. •... -
Page 116: Wap Push
116 | Features WAP Push WAP push allows WAP content to be pushed to a radio. This push is carried out by sending a specially formatted (Push Access Protocol) XML document to the Push Proxy Gateway, that in turn forwards the document to the radio. A WAP push message is an encoded message including a link to a WAP address. -
Page 117: Types Of Call-Out Alerts
Features | 117 Note: To read an entire Call-Out message, scroll down the screen by pressing the down key. NAVIGATION The length of the message is indicated by the vertical red bar on the left of the screen. Figure 4: Call-Out Message Note: This is a selling feature. -
Page 118: Shadow Groups (Address Bundle)
118 | Features voice group call or Call-Out text function which enables you to send a text message. You can always respond and send back the text or the voice message using voice group call. Shadow Groups (Address Bundle) The Shadow Groups feature (also known as Address Bundle) offers a way of sending messages to multiple destinations or recipients simultaneously. -
Page 119: Appendix A: Tones
Appendix Tones Table 24: Radio Tones Tone Name Default Tone Diagram [Hz] 2400 2100 Back to Coverage 1800 1000 Back to Full Service [ms] [Hz] 2400 2100 1800 1000 Clear-to-send [ms] [Hz] 2400 2100 1800 1000 Bad Key Pressed [ms] [Hz] 2400 2100... -
Page 120: Low Battery Alert
120 | Tones Tone Name Default Tone Diagram [Hz] 2400 2100 Toggling Betwen DMO and 1800 1000 400[ms] [Hz] 2400 2100 Entering/Exiting Local Site 1800 1000 Trunking 400[ms] [Hz] 2400 2100 Receiving/Sending 1800 1000 Emergency Alarm 400[ms] [Hz] 2400 2100 1800 1000 Emergency Alarm Failed... -
Page 121: Appendix B: Led Indications
Appendix LED Indications Table 25: LED Indications Indication Status Solid green In use Blinking green In service Solid red Out of service Blinking red Connecting to the network Entering DMO Solid orange Transmit inhibit in service Channel busy in DMO Blinking orange Incoming call No indication... -
Page 123: Appendix C: Troubleshooting
Appendix Troubleshooting Your radio displays the following messages: Table 26: Displayed Messages Message Message Description ...-Received Call received but not answered, or rejected. Attachment Failed Your radio could not perform talkgroup attachment. It keeps on trying. If it does not succeed, try another talkgroup. Authenticate Failure Your radio could not register on an authenticated system (for example, the Authentication Key is incorrect, or authentication is... - Page 124 124 | Troubleshooting Message Message Description Gateway not available Your radio cannot connect to a gateway, or connection has been lost. This group already exists The group you are attempting to add exists in the My Groups folder. Individual Calls Only You can make only individual (private) calls.
- Page 125 Troubleshooting | 125 Message Message Description No Selected Scan List You selected an empty network list. No Service Your radio is out of coverage. Not Allowed To Initiate Call You are not allowed to dial a number which is not in the address book.
-
Page 127: Appendix D: Maintenance
A battery is an expendable part and may need replacing during the life of the radio. To ensure maximum service life of your radio, always replace the battery with a genuine Motorola replacement. In order to ensure maximum life for your battery: •... -
Page 128: Battery Charging Rules
128 | Maintenance Battery Charging Rules Generally, to reduce the number of charge cycles as much as you can, wait for the Low Battery message to charge, as it ensures maximum battery life. Do not use your charger as a radio holder or leave your radio and fully charged battery connected to the charger while not charging.
Need help?
Do you have a question about the MTP850 and is the answer not in the manual?
Questions and answers