
Related Manuals for Zoom F1


Summary of Contents for Zoom F1
- Page 1 Operation Manual You must read the Usage and Safety Precautions before use. © 2018 ZOOM CORPORATION Copying or reprinting this manual in part or in whole without permission is prohibited.
-
Page 2: Usage And Safety Precautions
Do not do anything that could exceed the ratings of outlets and other electrical wiring equipment. Before using the equipment in a foreign country or other region where the electrical voltage differs, always con- sult with a shop that carries ZOOM products and use the appropriate AC adapter. ■ Operation with batteries Use 2 commercially-available AAA batteries (alkaline dry cell batteries, NiMH batteries or lithium dry cell batter- ies). -
Page 3: Declaration Of Conformity
Never use abrasive cleansers, wax or solvents such as alcohol, benzene or paint thinner. ■ Breakdown and malfunction If the unit breaks or malfunctions, immediately turn the power off, disconnect the AC adapter, remove the batter- ies and disconnect other cables. Contact the store where you bought the unit or ZOOM service with the following information: product model, serial number and specific symptoms of breakdown or malfunction, along with your name, address and telephone number. - Page 4 In addition, the dedicated removable shock mount can be used to reduce noise when mounted on a digital SLR camera. Compatible with ZOOM mic capsules is compatible with all Zoom mic capsules, allowing you to switch microphones according to your audio needs. Supports various recording formats Use 96 kHz/24-bit Mono/Stereo PCM (WAV/BWF), MP3 and other formats when recording.
- Page 5 Contents Usage and Safety Precautions Setting the recording file name format Introduction Set the recording file type Names of parts Automatically disable buttons during recording Display overview Outputting tone signals when starting and stopping recording (sound marker function) Preparations Setting how the counter appears Providing power Setting when marks are added when recording/ Inserting microSD cards...
-
Page 6: Names Of Parts
⑤ REC button ⑥ REC LED ⑦ REC FORMAT, LO CUT, LIMITER and REC LEVEL buttons ① MIC IN connector Connect a ZOOM mic capsule here. ② Display This shows various types of information. ③ PLAY/PAUSE button Use this to start and pause playback of recorded files. - Page 7 ■ Left and right sides ① VOLUME ③ microSD card buttons ② USB port slot ④ POWER [HOLD] switch ① VOLUME buttons Use these to adjust the headphone output volume. ② USB port Connect this to a computer or iOS device to use the as an audio interface or card reader.
- Page 8 Display overview Home Screen (in recording standby) ① File name ⑤ Remaining battery charge ⑥ Counter ② Status icon ⑦ Clipping ③ Level meter indicator ④ Function buttons ① File name This shows the name of the recording file. ② Status icon This shows the recording status.
-
Page 9: Playback Screen
Playback Screen ① File name ⑦ Remaining battery charge ② Status icon ⑧ Counter ③ Progress bar ④ Number of selected file/ ⑨ Remaining playback time total number of files ⑩ Clipping indicator ⑤ Level meter ⑥ Function buttons ① File name This shows the name of the file being played. -
Page 10: Using Batteries
Preparations Providing power Using batteries Turn the power off and then remove the battery cover. Unlock and pull the cover open Install the batteries. Replace the battery cover. NOTE • Use only one type of batteries (alkaline, NiMH or lithium) at a time. •... - Page 11 Using an AC adapter Connect the cable of an AD-17 AC adapter to the USB port. Plug the AC adapter into an outlet.
- Page 12 Inserting microSD cards Turn the power off and then open the microSD card slot cover. Insert the microSD card into the card slot. To remove a microSD card, gently push it further into the slot and then pull it out. Close the microSD card slot cover.
-
Page 13: Turning The Power On
Turning the power on/off Turning the power on Slide toward until the Home Screen appears on the display. NOTE • The first time you turn the power on after purchase, you must set the language ( → "Setting the language shown") and the date/time ( →... - Page 14 Setting the language shown Setting the language Set the language shown on the display. While pressing , press to open the MENU screen. to select "Language", and press Press to select the language, and press HINT The first time you turn the power on after purchase, this screen opens automatically.
- Page 15 In addition to Japanese and English, various display languages can be added. Copy the file for the language you want to add to the root directory on a microSD card. HINT Download language files from the ZOOM website (www.zoom.co.jp). ( → Insert the microSD card into the "Inserting microSD...
- Page 16 NOTE • Only one other language can be added at a time. If a different language is added when another language has already been added, the previous language will be deleted. • Added languages will be deleted if the is reset ( → "Restoring default setting values").
- Page 17 Setting the date and time Setting the date and time Set the date and time used when recording files. While pressing , press to open the MENU screen. to select "Date/Time", and press to select "Set Date/Time", and press to select the item to change. HINT The first time you turn the power on after purchase, this screen opens automatically after you set the language used.
-
Page 18: Setting The Date Format
to change the value of the selected item. Press HINT Press to cancel the setting change. Setting the date format The date format can be changed. This is used when adding dates to file names and when showing the date on the Playback Screen. - Page 19 to select "Date Format", and press to select the date format, and press The following date formats can be used. Setting value Explanation YYMMDD Year, month, day order MMDDYY Month, day, year order DDMMYY Day, month, year order...
- Page 20 Preventing misoperation In order to prevent misoperation while recording, the hold function can be used to disable the buttons on the NOTE This can be set to automatically disable button operation only during recording. ( → "Automatically disable buttons during recording") Activating the HOLD function Slide...
- Page 21 Connections Attaching to a camera Connecting the shock mount This reduces noise when the is mounted on a digital SLR camera. Attach the ends of two arms from the shock mount to one belt loop on the Attach the other arms to the other belt loop, one at a time. Using the elasticity of the arms, attach their ends to the belt loops while bending them slightly.
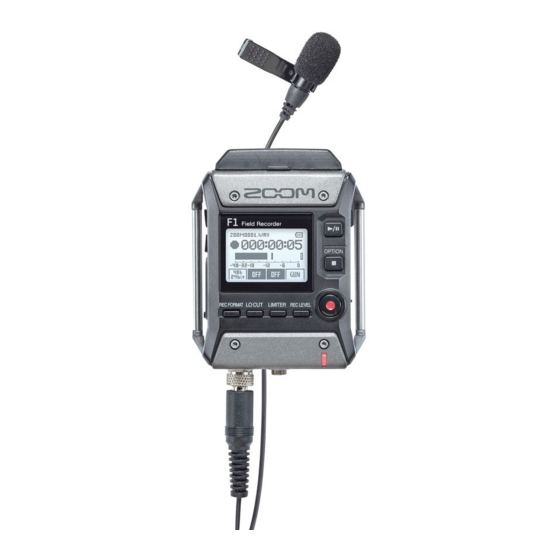
- Page 22 Connecting mics Connecting mic capsules Remove the protective caps from the and the mic capsule. While pressing the buttons on the sides of the mic capsule, connect it to the , inserting it completely. To disconnect the mic capsule, pull it away from the unit while pressing the buttons on its sides. Connecting lavalier mics Attach the windscreen and the clip to the lavalier mic.
- Page 23 Connect the lavalier mic to the MIC/LINE IN jack, and tighten the screw lock. HINT • This jack can provide plug-in power to mics that use it. ( → "Setting plugin power") • Mics without screw locks can also be connected to the MIC/LINE IN jack.
-
Page 24: Recording Video
Connection examples Recording is possible in a variety of situations like these. ■ Recording video while using a lavalier mic Record sound of performer with lavalier mic connected to the MIC/LINE IN jack. Lavalier mic MIC/LINE IN jack ■ Recording video Record sound of main subject with shotgun mic capsule connected to the Connect the PHONE OUT jack to the camera mic input. - Page 25 Setting plugin power Use this setting when a mic that is compatible with plug-in power is connected to the MIC/LINE IN jack or to the MIC/LINE input jack of a mic capsule connected to the While pressing , press to turn it ON.
- Page 26 Adjusting the side mic level of a mid-side capsule You can adjust the side mic level (stereo width) before recording when using a mid-side mic capsule When the mic capsule is connected, press , and select the side mic level. HINT This can be set to OFF, 30°, 60°, 90°, 120°...
- Page 27 Adjusting connected equipment levels (playing test tones) Use the test tone in order to adjust the level of a digital SLR camera or other device connected to the Turn down the input gain of the other device. NOTE If the automatic gain control function on the other device is on, turn it off. Use an audio cable to connect the external mic jack of the other device with the PHONE OUT jack of the While pressing , press...
- Page 28 to adjust the output level. While checking the audio level meter of the other device, adjust the audio signal level so that it never exceeds −6 dB. Adjust the input gain of the other device. While checking the audio level meter of the connected device, make small adjustments to the input gain of that device until the audio signal level is about −6 dB.
- Page 29 Recording Adjusting input levels Adjust the recorded level of signals coming in to the HINT • Adjust so that the peak level stays around −12 dB. • Plug-in power can be supplied by the MIC/LINE IN jack as well as by the MIC/LINE IN jack of a connected mic capsule ( →...
- Page 30 When using the MIC/LINE IN jack Press , and select the input level. HINT • This can be set to Lo-, Lo, Mid-, Mid, Mid+, Hi-, Hi, Hi+, Hi++ or AUTO. • Select AUTO if you want the input level to be adjusted automatically.
- Page 31 Monitoring recording The sound being recorded can be monitored using headphones. Connect headphones to the PHONE OUT jack on the to adjust the headphone volume. HINT The volume can be set from 0 to 100.
- Page 32 Reducing noise This function can reduce low-frequency noise, including wind and vocal pops. Press to set the cutoff frequency. HINT Select OFF or 80 Hz, 120 Hz or 160 Hz as the frequency.
- Page 33 Setting the limiter The limiter can prevent distortion by reducing input signals that have excessively high levels. Press to select ON. NOTE When the limiter is ON, noise will be more audible when the input signal level is low.
- Page 34 Selecting the recording format The recording format can be selected in consideration of audio quality and file size. Press to select the recording format. The following recording formats can be set. They are listed in order from highest quality (largest file size) to lowest quality (smallest file size).
- Page 35 Recording Press to record. Press to pause/resume. Pausing during recording will add a mark at that instant. HINT How pausing occurs and marks are added when is pressed can be changed. ( → "Setting how marks are added when recording/playing") NOTE •...
- Page 36 Capturing audio before recording starts (PRE REC) The input signal can be captured for about 2 seconds before is pressed. This is useful when a performance starts suddenly, for example. While pressing , press to turn on Pre Rec.
-
Page 37: Playing Recordings
Playback Playing recordings Press The following operations can be performed during playback. Adjust the headphone volume Pause/resume playback and add a mark (This operation can be changed with a setting.) ( → "Setting Press how marks are added when recording/playing") Search forward Press and hold Search backward... - Page 38 Setting the playback mode You can set the file playback mode to Play All, Repeat One, or Repeat All. While pressing , press to open the MENU screen. to select "Record/Play", and press to select "Playback Mode", and press to select the playback mode, and press The following playback modes can be set.
- Page 39 Setting value Explanation Play All Every file from the selected one to the last one will be played back. Repeat One The one selected file will be played repeatedly. Repeat All All files will be played back repeatedly.
- Page 40 Deleting marks Marks added to files can be deleted when not needed. Pause playback. to jump to the mark that you want to delete. Press to select "Delete", and press...
- Page 41 Working with files Checking file information You can view a variety of information about the selected file. Press while the file is playing to check its information. Check the file information. to change the page. HINT The information items that can be viewed are the date and time, the format, the size, and the recording length.
-
Page 42: Deleting Files
Deleting files You can delete unwanted files. Press during playback of the file to delete. to select "Delete", and press... - Page 43 Using USB functions Connecting to computers and iOS devices can be used as a card reader or audio interface when the is connected to a computer, iOS device or other equipment. When the Home Screen is open, use a USB cable to connect the to a computer or iOS device.
- Page 44 Using as a card reader You can use a computer to check the files saved on the microSD card and copy those files to the computer. Press on the USB screen to select "Card Reader", and press Use the computer to transfer the files saved on the microSD card. When you want to disconnect, use the computer to end the USB connection with the Windows: Select from "Safely Remove Hardware".
- Page 45 Using as an audio interface input signals can be input directly to a computer, iOS device or other equipment, and playback signals on a computer, iOS device or other equipment can be output from the Press on the USB screen to select "Audio I/F", and press to select the type of device, and press NOTE After selecting "iOS", turn the...
- Page 46 Monitor playback signals from the computer or iOS device. HINT When connected to a Windows computer, you can use a dedicated driver for low-latency monitoring. Download the driver from the ZOOM website (www.zoom.co.jp). To disconnect, while pressing , press to select "Exit", and press Disconnect the USB cable from the and the computer or iOS device.
- Page 47 Enabling direct monitoring This directly outputs the input signal from the before sending it to the computer or iOS device. This enables monitoring without latency. While pressing , press to turn on direct monitoring.
- Page 48 Making various settings Setting the recording file name format The format can be set for the names given to files automatically during recording. While pressing , press to open the MENU screen. to select "Record/Play", and press to select "Rec File Name", and press...
- Page 49 The following file name formats can be used. Setting value Explanation Files are named with consecutive numbers from "ZOOM0001.WAV/MP3" to ZOOM**** "ZOOM9999.WAV/.MP3". Files are named with the date and time that the recording started, using a "YYM- MDD-HHMMSS.WAV/MP3" format. YYMMDD-HHMMSS The "Date Format"...
- Page 50 Set the recording file type When using the MIC/LINE IN jack, the recording file type (mono/stereo) can be selected. This cannot be set when using a ZOOM mic capsule. While pressing , press to open the MENU screen. to select "Record/Play", and press to select "Rec File", and press...
- Page 51 The following file types can be set. Setting value Explanation L ch → Mono The left channel of the input signal is saved as a mono file. The left channel of the input signal is saved as a stereo file. The same audio is saved L ch →...
- Page 52 Automatically disable buttons during recording Button operations can be disabled during recording to prevent misoperation. To stop recording when this function is on, while pressing , press While pressing , press to open the MENU screen. to select "Record/Play", and press to select "Rec Hold", and press to select "On", and press...
- Page 53 Setting value Explanation Button operations will not be automatically disabled during recording. Button operations will be disabled during recording. To stop recording, while pressing , press HINT Even while button operations have been automatically disabled during recording, can be used.
- Page 54 Outputting tone signals when starting and stopping record- ing (sound marker function) Half-second tone signals (sound markers) can be played from the PHONE OUT jack when recording starts and stops. Since sound markers are also written to files, when recording audio for video with the , sending the output signal to the camera input can make synchronizing audio and video easier.
- Page 55 Setting how the counter is displayed The counter shown during recording can be set to either the elapsed recording time or the remaining possible recording time. While pressing , press to open the MENU screen. to select "Record/Play", and press to select "Rec Counter", and press Press to select how it is shown, and press...
- Page 56 Setting how marks are added when recording/playing You can set how marks are added when is pressed while recording and playing back. While pressing , press to open the MENU screen. to select "Record/Play", and press to select "PLAY Key Option", and press to select "Recording"...
- Page 57 to select when marks are added, and press Setting value Explanation Pause Pressing will pause without adding a mark. Pause & Mark Pressing will pause and add a mark. Mark Pressing will add a mark without pausing.
- Page 58 Setting the display backlight You can set the display backlight to turn off after a specific amount of time without use. While pressing , press to open the MENU screen. to select "LCD", and press to select "Backlight", and press to set the amount of time until the backlight turns off, and press HINT This can be set to Off, On, 30 seconds, or 1 to 5 minutes.
-
Page 59: Adjusting The Display Contrast
Adjusting the display contrast While pressing , press to open the MENU screen. to select "LCD", and press to select "Contrast", and press to adjust the contrast, and press HINT This can be set from 1 to 10. - Page 60 Setting the type of battery used Set the type of battery used so that the amount of remaining battery charge can be accurately displayed. While pressing , press to open the MENU screen. to select "Battery", and press to select the battery type, and press...
- Page 61 Setting the time until the power turns off automatically You can set the to automatically turn off after being unused for a specific amount of time. While pressing , press to open the MENU screen. to select "Auto Power Off", and press to set the time until the power turns off, and press HINT This can be set to Off, 5, 10, 30, or 60 minutes.
-
Page 62: Other Functions
Other functions Formatting microSD cards A microSD card that has been purchased or formatted by a computer should be reformatted for use with the While pressing , press to open the MENU screen. to select "SD Card", and press to select "Format", and press to select "Execute", and press... - Page 63 NOTE • Before using a microSD card, it must be formatted by the • Be aware that all data previously saved on a microSD card will be deleted when it is formatted.
- Page 64 Testing microSD card performance Use "Quick Test" or "Full Test" to check the current microSD card's compatibility with the A Quick Test can be done in a short amount of time, while a Full Test takes longer to examine the entire microSD card.
- Page 65 to select "Quick Test", and press to select "Execute", and press Check the result when the test completes.
- Page 66 Conducting a full test NOTE Use the AC adapter to supply power when conducting a full test ( → "Using an AC adapter"). While pressing , press to open the MENU screen. to select "SD Card", and press to select "Test", and press to select "Full Test", and press...
- Page 67 The estimated amount of time required for the full test will be shown. to select "Execute", and press HINT You can press to pause and resume a test. Check the result when the test completes.
- Page 68 Checking the firmware versions You can check the current firmware versions. While pressing , press to open the MENU screen. to select "Version", and press Check the firmware versions. HINT If a language file has been added, its version will also be shown.
- Page 69 Restoring default setting values You can restore all settings to their factory defaults. While pressing , press to open the MENU screen. to select "Factory Reset", and press to select "Execute", and press After the settings are restored, the power will automatically turn off. NOTE Restoring factory defaults will delete any added language file.
- Page 70 Executing a firmware update is not possible if the remaining battery power is low. Copy the firmware update file to the root directory on a microSD card. HINT Files for the latest firmware updates can be downloaded from the ZOOM website (www.zoom.co.jp). ( → Insert the microSD card into the "Inserting microSD...
-
Page 71: Troubleshooting
Other trouble ■ Computer does not recognize the when they are connected by a USB cable • Confirm that the operating system of the connected computer is supported on the ZOOM website (www.zoom. co.jp). ( → • The USB function must be set on the to allow the computer to recognize the ·"Using as an audio... -
Page 72: Specifications
44.1kHz/16-bit, 48kHz/16-bit, 2-in/2-out Transfer method: asynchronous Power 2 AAA batteries (alkaline, NiMH or lithium) AC adapter (ZOOM AD-17): DC 5V/1A Estimated continuous recording time With SGH-6 mono shotgun mic capsule connected (48 kHz/24-bit, mono) using batteries Alkaline batteries: about 6.5 hours... - Page 73 ZOOM CORPORATION 4-4-3 Kanda-surugadai, Chiyoda-ku, Tokyo 101-0062 Japan www.zoom.co.jp Z2I-3132-01...
Need help?
Do you have a question about the F1 and is the answer not in the manual?
Questions and answers