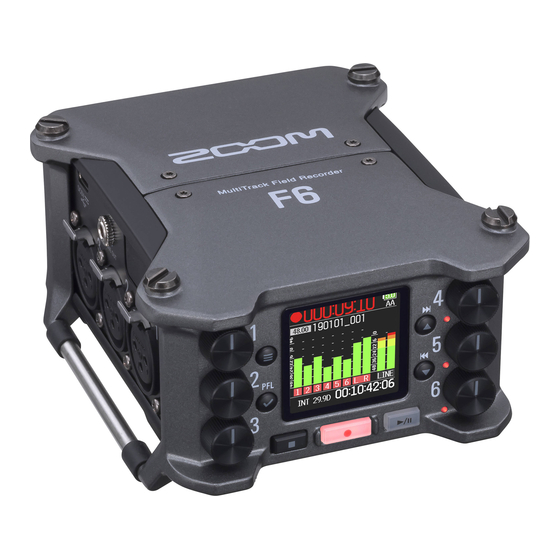
Zoom F6 Quick Manual
Multitrack field recorder
Hide thumbs
Also See for F6:
- Operation manual (199 pages) ,
- Supplementary manual (16 pages) ,
- Firmware update manual (6 pages)
Advertisement
Table of Contents
- 1 Supplying Power
- 2 Loading SD Cards
- 3 Turning the Power on and off
- 4 Setting the Date and Time (First Time Starting Up)
- 5 Display Overview
- 6 Input and Output Settings
- 7 Setting the Input Source
- 8 Adjusting Headphone Volume
- 9 Playing Recordings
- 10 Specifications
- Download this manual
See also:
Operating Manual
You must read the Usage and Safety Precautions before use.
The Operation Manual can be downloaded from the ZOOM website (https://www.zoom.jp/docs/f6).
This page has files in PDF and ePub formats.
The PDF file format is suitable for printing on paper and reading on a computer. The ePub format can be
read with electronic document readers and is designed for reading on smartphones and tablets.
© 2019 ZOOM CORPORATION
Copying or reprinting this manual in part or in whole without permission is prohibited.
Product names, registered trademarks and company names in this document are the property of their respective companies.
You might need this manual in the future. Always keep it in a place where you can access it easily.
The contents of this manual and the specifications of the product could be changed without notice.
Windows
is a trademark or registered trademark of Microsoft
®
Mac is a trademark or registered trademark of Apple Inc.
Quick Guide
Corporation.
®
Advertisement
Table of Contents

Related Manuals for Zoom F6


Summary of Contents for Zoom F6
- Page 1 Quick Guide You must read the Usage and Safety Precautions before use. The Operation Manual can be downloaded from the ZOOM website (https://www.zoom.jp/docs/f6). This page has files in PDF and ePub formats. The PDF file format is suitable for printing on paper and reading on a computer. The ePub format can be read with electronic document readers and is designed for reading on smartphones and tablets.
- Page 2 Condenser Inputs for mics, instruments and mixers • Computer Audio interface Card reader • FRC-8 F Series remote controller • Dedicated AC adapter (ZOOM AD-17) • 5V mobile battery (commercially-available) Dynamic mic ■ Right side Headphones Timecode Inputs for mics, instruments and mixers NOTE The timecode cable input and output should have the following specifications.
-
Page 3: Supplying Power
Preparations Supplying power Power can be supplied using AA batteries, an L battery or USB. ■ AA batteries Loosen the screw in the battery cover on the bottom. Open the battery cover on the bottom, and remove the battery case. Install 4 AA batteries in the battery case. - Page 4 Installing the camera mount adapter Remove the 4 screws from the top of the Align the screw positions of the camera mount adapter with those of the , and tighten the screws. Attach the to a tripod, for example, and then attach the camera with the camera mount adapter screw.
-
Page 5: Loading Sd Cards
Loading SD cards Open the SD card slot cover, and insert an SD card. HINT To remove the SD card, push it further into the slot and then pull it out. NOTE Before using SD cards that have just been purchased or that have been formatted on a computer, they must be formatted by the . -
Page 6: Setting The Date And Time (First Time Starting Up)
Setting the language (first time starting up) The first time you turn the power on after purchase, set the display language when the Lan- guage setting screen opens. to select the display language, and press HINT The language setting can be changed later using Menu > SYSTEM > Language. Setting the date and time (first time starting up) When the Date and Time setting screen opens after the Language settings screen, set the date and time. -
Page 7: Display Overview
Display overview ■ Home Screen Status icons Counter During recording: Elapsed/remaining recording time) Stopped Paused During playback: Elapsed/remaining playback time) Playing back Recording Power type and remaining amount Recording/playback USB: Power supply connected to port sample rate EXT: L battery Clipping indicator AA: AA batteries Recording/playback take name... -
Page 8: Input And Output Settings
Input and output settings Setting the input source Set the input source using Menu > INPUT > PFL > Input 1–6 > Source. Open the Menu Screen. Select up/down. Confirm. Setting Explanation Select this when connecting a mic or other equipment with a low input level. Mic (PH) Use this setting for mic level with phantom power. - Page 9 Adjusting input levels (trim) When the recording setting mode is not “Float (32 bit)”, use Menu > INPUT > PFL > Input 1–6 > Trim to adjust the input level. Open the Menu Screen. Select up/down, adjust value. Confirm. HINT See “Adjusting headphone volume”...
-
Page 10: Adjusting Headphone Volume
Adjusting track volume Turn for a track to adjust its volume. Adjusting headphone volume Turn... - Page 11 Recording Press This starts recording. Press This stops recording. ■ Operations during recording Function Operation Pause & Mark/Resume Press Press Start recording the next take. This will stop recording in the current take and start recording in a new take without interruption. NOTE If the file size exceeds 2GB during recording, a new take will be created automatically and recording will continue without interruption.
-
Page 12: Playing Recordings
Playing recordings Press This starts playback. Press This stops playback. ■ Playback operations Function Operation Pause/resume Press Select take/Jump to mark Press Search forward Press and hold Search backward Press and hold... - Page 13 List of functions and settings When the Home Screen is open, press to open the Menu Screen where you can use the following functions and settings. Item Explanation The Finder allows you to view and edit takes and folders on SD cards, create project/scene FINDER folders, and make recording/playback folder settings, for example.
-
Page 14: Specifications
Specifications Recording SD cards, SDHC cards, SDXC cards (that conform to standards) media Inputs Inputs 1–6 Connectors XLR jack (pin 2 hot) Input (mic) Input gain +12 dB - +75 dB Input impedance 3 kΩ or more Maximum input level +4 dBu Input (line) Input gain... - Page 15 Continuous 48 kHz/16-bit 2ch recording to SD card recording time (LINE OUT off, TIMECODE off, LED/LCD Brightness 5, headphones into 32Ω load, PHANTOM off) Alkaline batteries 7.5 hours or more NiMH batteries 10.5 hours or more (2450 mAh) Lithium batteries 16.5 hours or more 48 kHz/24-bit 6ch recording to SD card (LINE OUT off, TIMECODE off, LED/LCD Brightness 5, headphones into 32Ω...
- Page 16 ZOOM CORPORATION 4-4-3 Kanda-surugadai, Chiyoda-ku, Tokyo 101-0062 Japan www.zoom.co.jp Z2I-3735-01...
Need help?
Do you have a question about the F6 and is the answer not in the manual?
Questions and answers