Table of Contents
Advertisement
Quick Links
Advertisement
Table of Contents

Subscribe to Our Youtube Channel
Related Manuals for Baumatic BCG900SS


Summary of Contents for Baumatic BCG900SS
- Page 1 BCG900SS 90 cm Single cavity gas cooker...
- Page 2 User Manual for your Baumatic BCG900SS 90 cm Single cavity gas cooker NOTE : This User Instruction Manual contains important information, including safety & installation points, which will enable you to get the most out of your appliance. Please keep it in a safe place so that it is easily available for future reference;...
- Page 3 34 – 35 Gas conversion to LPG for the oven and grill 35 – 36 Minimum flow adjustment for the oven burner Gas tap replacement 36 - 38 My appliance isn’t working correctly 38 – 39 Baumatic consumables Contact details...
-
Page 4: Environmental Note
Environmental note o The packaging materials that Baumatic uses are environmentally friendly and can be recycled. o Please discard all packaging material with due regard for the environment. -
Page 5: Important Safety Information
Baumatic Ltd. will invalidate any warranty or liability claim. o Your new appliance is guaranteed against electrical or mechanical defects, subject to certain exclusions that are noted in Baumatic’s Conditions Of G uarantee. The foregoing does not affect your statutory rights. - Page 6 Safety o Baumatic strongly recommend that babies and young children are prevented from being near to the appliance and not allowed to touch the appliance at any time. During and after use, all surfaces will become hot. o If it is necessary for younger family members to be in the...
- Page 7 o Do not store chemicals, food stuffs, pressurised containers in or on the cooker or in cabinets immediately above or next to the cooker. o Do not heat up unopened food containers, as pressure can build up which may cause the container to burst. o Do not place flammable or plastic items on or near the hob burners, these types of materials should also not be placed in the oven or the compartment below the oven.
- Page 8 Please see the specific section of this booklet that refers to installation. Baumatic Ltd. declines any responsibility for injury or damage, to person or property, as a result of improper use or installation of this appliance.
-
Page 9: Specifications
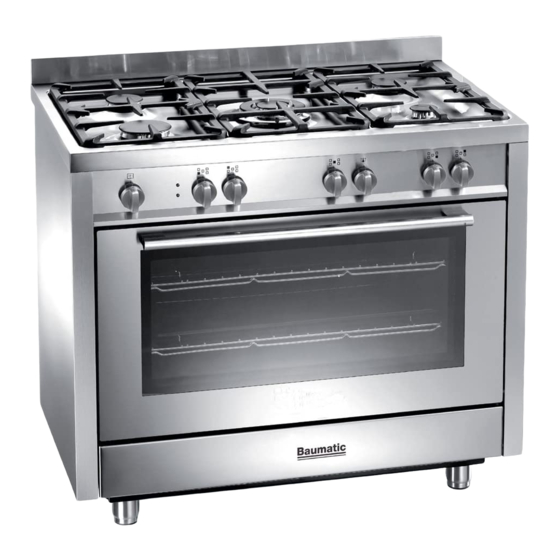
pecific ations Height = 885 - 940 mm Width = 900 mm epth = 600 mm Product specifications: o 5 zone gas hob: o 1 x 3.80 kW triple crown wok bur o 1 x 3.00 kW rapid burner o 2 x 1.80 kW semi-rapid burners 1 x 1.00 kW auxiliary burner o Flame failure safety device on eac burner Automatic ignition... -
Page 10: Electrical Details
Standard ac cessories: o Trivet o WipeClean enamelled b aking tray with handle o 2 x Safety shelves o Removable side racks o LPG conversion jets o Wok stand Optional extra: o BPS2 Pizza Stone o BT2GRID Griddle Plate With Handles Electrical details Rated Voltage: 220 - 240 Vac 50 Hz... -
Page 11: Control Panel
Control Panel Control Panel Cooking zone dial Turn the relevant dial anticlockwise to select a power level for a chosen burner. 0 = Burner OFF position – Low temperature – High temperature Gas oven and grill knob o Turn dial nti-clockwise select fixed... -
Page 12: Using The Hob Top
Using the hob top Hob surface layo 2) 3.00 kW rapid burner 3) 1.80 kW semi-rapid burners 4) 1.00 kW auxilia ry burner 6) 3.80 kW triple c rown (wok) burner Before first use IMPORTANT: You should clean the hob surface (see “Cleaning and maintenance”... -
Page 13: Lighting A Burner
o Matches can also be used to light the burner during a power cut. Simply follow the p revious step but place a lit match to the burner as you press the dial. Once lit, keep the dial pressed for about ten seconds. -
Page 14: Hob Guidelines
Hob guidelines o The f irst few times the hob top is used, it may give off an acrid, burning smell. This smell will disappear completely with repeated use. o The worktop is fitted with cooking areas of different diameter and power. -
Page 15: Using The Oven
Especially if pointed or hard objects are allowed to fall on it with some force. o DO NOT USE THE HOB IF THE SURFACE BECOMES BROKEN OR CRACKED. YOU SHOULD CONTACT THE BAUMATIC SERVICE DEPARTMENT IMMEDIATELY. Using the oven Before first use... -
Page 16: Using The Main Oven
Using the main oven o You rotate this dial anti- clockwise to se lect the fixed electric grill function. o You can also turn the dial clockwise to switch on the gas oven and then proceed oven temperature. REMEMBER: When using the grill function, it is important to place a drip pan at the base of the oven cavity to collect any ices which may drip down (see image below). -
Page 17: Cooking Guidelines
Cooking guidelines o Please refer to the information given on food packaging for guidance on cooking temperatures and times. Once familiar with the performance of your appliance, te mperatures and times can be varied to suit personal preference. o Make sure that frozen foods are thoroughly thawed before cooking, unless the instructions on the food packaging advise that you can “cook from frozen”. -
Page 18: Cooking Guide
ooking guide ultifunction oven: Shelf position from bottom Cooking without fan Cooking with fan Weigh With 5 With 4 With Temperature Cooking Temp erature Cooking Foods (kg) runners runners three (°C) time (°C) time runners mins mins Meat Roast veal 200-225 100-120 100-120... -
Page 19: Cooking Tips For Cakes And Bread
rilling: lf po sition rom bottom Coo ing with out fan Co king wit h fan Cooking Cooking Foods Weight With 5 With 4 With 3 time in time in (kg) runners runners runners perat perat (°C) (°C) side side side side Meat... -
Page 20: Cooking Tips For Meat
o If the cake is too dark on top next time put the cake on a lower shelf and cook it at a lower temperature for longer. o If the top of the cake is burnt, cut off the burnt layer and cover with sugar or decorate with cream, jam and confectioner’s cream. -
Page 21: Cleaning And Maintenance
Any damage that is caused to the appliance by a cleaning product will not be fixed by Baumatic free of charge, even if the appliance is within the guarantee period. -
Page 22: Cleaning The Gas Hob Top
Cleaning the gas hob top o Remove the dirty pan supports from the hob and place in warm soapy water for some time. Then wash and dry before replacing. After each use o Wipe the appliance over with a damp cloth and a little washing up liquid. -
Page 23: Replacing The Oven Bulb
Replacing the oven bulb IMPORTANT: The oven must be disconnected from your mains supply before you attempt to either remove or replace the oven bulb. o Draw out the side guide rails in order to provide access to the bulb. o Remove the glass protection cap (C) from the bulb socket by lifting it with a screwdriver placed between the cap and the oven wall. -
Page 24: Removing The Inner Door Glass For Cleaning
o Partially close the door, forcing it upwards at the same time to free the stop tooth and hinge sector. o Once the hinge is free, pull the door forwards tilting it slightly upwards to free the sector. o To reassemble, proceed in the reverse order, paying attention to the correct position of the sectors. -
Page 25: Removing The Side Guide Rails For Cleaning
Removing the side guide rails for cleaning o For an effective cleaning of the oven side guide rails, these can be extracted by unscrewing the knurled nuts. o To fit the rails back in their place, first insert rear pins in the holes and then secure them with the knurled nuts. - Page 26 (including the burners). o Baumatic do not recommend that the cooker is positioned below wall cupboards, as the heat and steam from the appliance and what is being cooked, may damage the cupboard and its contents.
- Page 27 o The cooker is fitted with four legs that can be adjusted to match the height of your kitchen cabinets. o If the cooker is not level or is unstable due to an uneven floor surface, use the adjustable feet to alter each corner until the cooker is level.
-
Page 28: Securing The Back-Guard
o If there are any other fuel burning appliances in the same room the current edition of BS 5440: Part 2: should be consulted to determine air vent requirements. o Ensure that the room containing the cooker is well ventilated, keep natural ventilation holes or install a mechanical ventilation device (mechanical cooker hood). -
Page 29: Fitting The Safety Chain And Hook
Fitting the safety chain and hook o To prevent the cooker from tipping forward, two lengths of chain MUST BE fixed to the back of the oven which should be secured to the hook provided at all times. o The hook should be secured to the wall at the back of the cooker. -
Page 30: Electrical Connection
Electrical connection YOUR COOKER IS INTENDED FOR FITTED AND PERMANENT INSTALLATION. o Before connecting the appliance, make sure that the supply voltage marked on the rating plate corresponds with your mains supply voltage. o We recommend that the appliance is connected by a qualified electrician, who is a member of the N.I.C.E.I.C. -
Page 31: Gas Connection
Conversion for use on LPG and other gases must only be undertaken by a qualified person. For information on the use of other gases, please contact the Baumatic Technical Department. o The cooker must be installed by a qualified person, in... -
Page 32: Gas Connection
o It is in your interest and that of safety to ensure compliance with the law. o In the UK, GASSAFE registered installers work to safe standards of practice. The cooker must also be installed in accordance with the current edition of BS 6172. Failure to install the cooker correctly could invalidate the warranty, liability claims and lead to prosecution. - Page 33 o Care should be taken to ensure that the temperature rise of areas at the rear of the cooker that are likely to come in contact with the flexible hose do not exceed 70°C. o Gas pressure may be checked on a semi-rapid hob burner. Remove the appropriate injector and attach a test nipple.
-
Page 34: Minimum Flow Adjustment For Hob Gas Taps
o Reassemble all the burners carefully; in particular you should make sure that the flame spreader is correctly placed on the burner. IMPORTANT: After changing the injectors YOU MUST follow the minimum flow adjustment section below. OPERATING RATE DIAMETER HEAT BY-PASS BURNERS PRESSURE GAS... - Page 35 o Unscrew the adjust ing screw, in order to increase the gas flow or tighten the adjus ti g screw to decrease the gas flow. o The correc t adjustment is ob tained when the flame has a length of about 3 – 4 mm. o For butane/propane gas, the adjusting screw must be tightly screwed in.
-
Page 36: Gas Tap Replacement
MPORTANT: You must change the oven and grill injectors. MPORTANT: After changing the injectors YOU MUST follow the minimum flow adjustment section below. Minimum flow adjustment for the oven bur All work must be carried out by a GASSAFE egistered engineer. Remove the thermostat knob. - Page 37 o Unscrew the burner fixing screws (A) (four for the triple crown burner and two for all others) as shown in the diagram on the next page. o Pull out the knobs. o Unscrew the six fixi ng screws (B) which lock the side profiles and remove it.
-
Page 38: My Appliance Isn't Working Correctly
o Reassemble all the parts following the same procedure but in the reverse order. My appliance isn’t working correctly o The oven isn’t coming on. * Check that the oven is in manual operation mode. Check that you have selected a cooking function and a cooking temperature. - Page 39 Or any installation other than the one specified by Baumatic Ltd. has been completed. Please refer to the conditions of guarantee that appear on the warranty card that you receive with the appliance.
-
Page 40: Baumatic Consumables
BC005 Stainless Steel Cleaner and Prot ector (250 ml) o BC007 E-Cloth – General Purpo se Cloth o BC008 Microwave Cover rder a Baumatic consumable product please call 0123 5437 244 and quote the product code . You can also order online from p.baumatic.co.uk... - Page 41 Czech Republic United Kingdom Baumatic CR s.r.o. Baumatic Ltd., Lípová 665 Baumatic Buildings, 60 01, Liberec 4 Bennet Road, zech Republic Reading, Berkshire RG2 0QX 420 483 577 200 United Kingdom www.baumatic.cz Sales Telephone (0118) 93 3 6900 Slovakia Sales Fax Baumatic Slovak s.r.o.
Need help?
Do you have a question about the BCG900SS and is the answer not in the manual?
Questions and answers