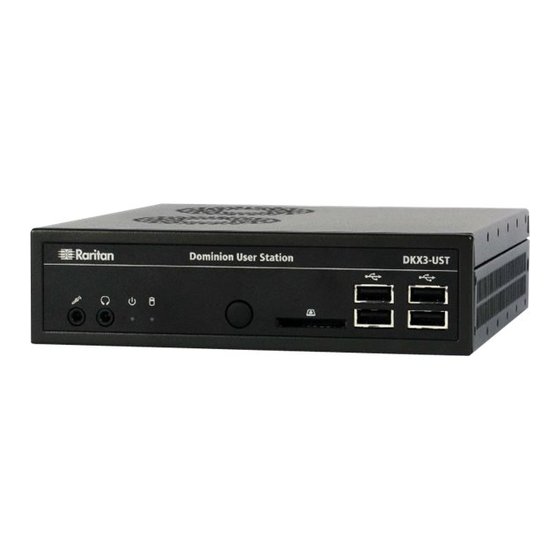
Raritan Dominion KX III User Manual

Raritan Dominion KX III User Manual

User station
Hide thumbs Also See for Dominion KX III:
Table of Contents

Advertisement

Dominion KX III User Station
User Guide
Release 1.0.1
Copyright © 2016 Raritan, Inc.
KX3UST-0B-v1.0.1-E
March 2016
255-62-0011-00

Advertisement

Table of Contents
loading
Need help?

Need help?

Do you have a question about the Dominion KX III and is the answer not in the manual?

Questions and answers

Summary of Contents for Raritan Dominion KX III

  • Page 1 Dominion KX III User Station User Guide Release 1.0.1 Copyright © 2016 Raritan, Inc. KX3UST-0B-v1.0.1-E March 2016 255-62-0011-00...
  • Page 2 Raritan, Inc. © Copyright 2016 Raritan, Inc. All third-party software and hardware mentioned in this document are registered trademarks or trademarks of and are the property of their respective holders.
  • Page 3 Contents What's New in the Dominion User Station User Guide for Release 1.0.1 Chapter 1 Introduction Overview ............................1 Package Contents.......................... 2 Product Photos and Features ......................2 Product Features ......................... 2 Product Photos ........................3 Introduction to the User Station ..................... 4 Front View..........................
  • Page 4 Contents Adding KVM Switches ......................... 30 Editing KVM Switches........................32 Deleting KVM Switches ....................... 33 Configuring KVM Ports ........................ 33 Unavailable Hot Keys for Port Access................35 Port Data Retrieval Status ....................36 Chapter 4 Navigation and Access to KVM Ports Overview ............................39 Port Navigator ..........................
  • Page 5 Contents Keyboard Macro Example ....................81 Audio Settings..........................82 KVM Client Settings ........................83 Password Change........................84 Chapter 7 Administration Features Users............................86 Editing or Deleting Users....................88 User Groups..........................89 Privileges ........................... 91 Editing or Deleting User Groups..................91 Backup and Restore ........................93 Exporting and Importing Backup Files................94 Deleting Backup Files......................95 Factory Reset..........................
  • Page 6 Contents Screen and Keyboard Settings in the Login Screen..............136 Appendix A Specification Appendix B Authentication of User Stations and KVM Switches Appendix C Available Key Sets Appendix D Hot Keys for Controlling User Station Windows Index...
  • Page 7 What's New in the Dominion User Station User Guide for Release 1.0.1 The following sections have changed or information has been added to the Dominion User Station User Guide based on enhancements and changes to the equipment and/or user documentation. Step 2: Log in to the Dominion User Station (on page 12) Connection Error Message...
  • Page 8: Chapter 1 Introduction

    Dominion KX III KVM switches from customer LAN/WAN networks. ALL KX III KVM switches are supported. Note: For information on KX III KVM switches, access its user documentation from its application or the Dominion KX III section of the Raritan website's Support page (http://www.raritan.com/support/).
  • Page 9: Package Contents

    Note: Virtual media is supported only when the accessed KX III KVM switch supports it and you have permissions to use virtual media. Virtual Media (on page 65).  Support USB audio  Support power control for target servers (with Raritan PX PDUs)
  • Page 10: Product Photos

    Chapter 1: Introduction Product Photos Dominion User Station Power adapter and cord...
  • Page 11: Introduction To The User Station

    Chapter 1: Introduction VESA mount kit Introduction to the User Station Front View 1. Microphone input 5. Power button 2. Audio output 6. SD card reader 3. Power LED 7. USB 2.0 ports 4. Hard disk LED...
  • Page 12: Rear View

    Chapter 1: Introduction Rear View 1. RS232/RS422/RS485 7. USB 2.0 ports 2. RS232 8. DisplayPort (DP) video 1 3. Ventilation 9. DisplayPort (DP) video 2 4. DC power input 10. HDMI video 5. Gigabit LAN ports 11. Connector for external power button 6.
  • Page 13: Introduction To The Software

    Chapter 1: Introduction Introduction to the Software After powering on the User Station, the Login Screen is shown. After successfully logging in to the User Station, the Main Screen displays. Login Screen The following diagram illustrates the Login Screen. 1. Text box for entering user credentials: For initial login, see Step 2: Log in to the Dominion User Station (on page 12).
  • Page 14 Chapter 1: Introduction Click the desired icon to configure its settings. These settings apply to the Login Screen only. They do NOT impact the Main Screen, which is shown after login. Icons Description Turn on or off any of the following functions: ...
  • Page 15: Main Screen And Main Toolbar

    Chapter 1: Introduction Main Screen and Main Toolbar The screen displayed after login is the Main Screen. The Main Toolbar is located at the bottom of this screen. This toolbar shows the Main Menu, shortcut icons and lists any open User Station and KVM Client windows.
  • Page 16 Chapter 1: Introduction Command Description Maximize Maximize the window. After a window is maximized, the Maximize command will be replaced by the Unmaximize command. Select Unmaximize to restore the window. Move After selecting this command, move your mouse to move the window. Resize After selecting this command, move your mouse to resize the window.
  • Page 17: Online Help And Hot Keys Help

    Chapter 1: Introduction Online Help and Hot Keys Help Both online help for using the Dominion User Station and information on pre-programmed hot keys are available in the Main Menu. Online help:  Choose Main Menu > Help > User Manual. As long as the User Station is connected to the Internet, the User Manual link directs you to the Dominion User Station's online help.
  • Page 18: Chapter 2 Getting Started

    Getting Started Chapter 2 This chapter introduces the basic installation and configuration. In This Chapter Installation and Configuration ..............11 Basic Network Settings................21 Logout or Shutdown ................24 VESA Mount (Optional) ................24 Rackmount Using L-type Brackets (Optional) .........26 Installation and Configuration Step 1: Connect the Equipment Only the basic hardware installation is described.
  • Page 19: Step 2: Log In To The Dominion User Station

    Chapter 2: Getting Started Note 1: DisplayPort and HDMI transmit both video and audio signals. Your monitor(s) must support the audio transmission if audio is intended. Note 2: Only one or two monitors can be connected to the User Station. 6.
  • Page 20: Step 3: Add Kx Iii Kvm Switches

    Chapter 2: Getting Started 2. Type the password: raritan. Note: It is strongly recommended to change the factory default password. Password Change (on page 84). A reminder message displays in the User Station Configuration window if you have not changed your default password yet.
  • Page 21 Chapter 2: Getting Started 2. Click 3. Enter the data for the KX III KVM switch. Type the KVM switch's IP address or hostname in this field. User credentials on the KVM switch are required for querying this KVM switch's port information. The user credentials may or may not be the same as your user credentials for the User Station.
  • Page 22: Step 4: Access Kvm Switches And Kvm Ports

    Chapter 2: Getting Started Step 4: Access KVM Switches and KVM Ports You access the computer devices connected to a KVM switch's ports through the Port Navigator window, which contains 3 panels:  Favorite Ports shows the favorite ports you have configured. See Configuring KVM Ports (on page 33).
  • Page 23 Chapter 2: Getting Started Note: To show KVM ports whose status is down, see Using Filters (on page 45). 3. Click the desired KVM port's icon , and select one option below.  Open in new KVM client: A new KVM Client window is opened. ...
  • Page 24 Chapter 2: Getting Started To directly access a KVM port: 1. Click the Ports panel, and all "up" KVM ports are displayed by default. 2. Click the desired port's name, or click its icon...
  • Page 25: Step 5: Use The Kvm Client

    Chapter 2: Getting Started Step 5: Use the KVM Client The User Station's KVM Client window opens after accessing a KVM port. The video of the target server that is connected to the KVM port is displayed in the KVM Client. You can use the attached keyboard and mouse to control the target server.
  • Page 26 USB flash drive onto the target server. In addition, you can configure the audio connection to the target server. Power Control: This button turns on, off or power cycles the target server, if a Raritan PDU is connected to the same KVM switch.
  • Page 27 Chapter 2: Getting Started Button Function View: This button shows several display options, such as Scale Video and Full-Screen Mode. The right group comprises the following shortcut buttons for frequently-used functions. These functions are also available in the left group, but the shortcut buttons allow quick access with a click. Button Function Synchronize Mouse:...
  • Page 28: Basic Network Settings

    Chapter 2: Getting Started Connection Error Message If there are problems accessing a KVM port/target server, such as a network connectivity issue, an error message appears while the KVM Client opens.  To close the error message only, click OK. The KVM Client continues to display, with "Disconnected"...
  • Page 29 Chapter 2: Getting Started Select the desired one and click Edit.
  • Page 30 Chapter 2: Getting Started 3. Click the IPv4 Settings tab. 4. In the Method field, select one of the following options:  Automatic (DHCP): The DHCP server automatically assigns an IPv4 address. This is the default.  Manual: This option configures static addressing. Click Add to specify at least one IPv4 address, netmask and gateway.
  • Page 31: Logout Or Shutdown

    Chapter 2: Getting Started Logout or Shutdown Both logout and shutdown commands are available under Leave in the Main Menu.  Log Out: Logs the user out of the User Station.  Shut Down: Provides the following options. Click the one you prefer, or the User Station will automatically shut down in one minute.
  • Page 32 Chapter 2: Getting Started 2. Attach the VESA mount securely to the back of your monitor using four appropriate screws. 3. Align two screw holes on each side of the User Station with those on the VESA mount. 4. Tighten two sides securely using four appropriate screws.
  • Page 33: Rackmount Using L-Type Brackets (Optional)

    Rackmount Using L-type Brackets (Optional) To mount the User Station in a 19-inch data center rack, you must purchase the L-type rackmount kit from Raritan. One rackmount kit contains two L-type brackets, the cable-support bar and a number of screws.
  • Page 34 Chapter 2: Getting Started 2. Secure the cable-support bar to the back end of the L-type brackets, using two of the included screws. Letter Item Cable-support bar Front arms of the L-type brackets 3. Attach the L-type brackets to the rack through the screw holes on the front arms, using your fasteners.
  • Page 35: Chapter 3 Managing Kvm Switches And Ports

    Managing KVM Switches and Ports Chapter 3 KVM switches and their KVM ports are added, configured and deleted in the User Station Configuration window. In This Chapter User Station Configuration ..............28 Adding KVM Switches ................30 Editing KVM Switches ................32 Deleting KVM Switches ................33 Configuring KVM Ports ................33 User Station Configuration The User Station Configuration window is not displayed by default.
  • Page 36 Chapter 3: Managing KVM Switches and Ports The User Station Configuration window opens. 1. Three configuration tabs:  Port Configuration: Manage KVM switches and KVM ports. See the other sections in this chapter.  Preferences: Set personal preferences, such as audio settings. Setting User Preferences (on page 78).
  • Page 37: Password Change Reminder

    Chapter 3: Managing KVM Switches and Ports Password Change Reminder If a user has never changed his or her initial or default password, a password change reminder message as shown below is displayed across various pages in the User Station Configuration window. Adding KVM Switches All KX III KVM switches added to this User Station can be seen by all users who log in to this User Station although they can only access those...
  • Page 38 Chapter 3: Managing KVM Switches and Ports 2. The following page opens, and the user must enter the required information. See Step 3: Add KX III KVM Switches (on page 13). 3. After clicking to save the data, the new KVM switch's content is shown.
  • Page 39: Editing Kvm Switches

    Chapter 3: Managing KVM Switches and Ports Editing KVM Switches Added KVM switches are listed in the User Station Configuration window. Each KVM switch has one to three icons in the Actions column, depending on your privileges on the User Station. Two of the buttons in the Actions column are used to modify the IP address/host name and user credentials of the KVM switch.
  • Page 40: Deleting Kvm Switches

    Chapter 3: Managing KVM Switches and Ports Deleting KVM Switches The final button in the Actions column is used to delete this KVM switch. To delete a KVM switch: 1. Click the desired KVM switch's button. 2. Click OK on the confirmation message. Configuring KVM Ports A KVM switch's ports are shown only after a KVM switch is selected.
  • Page 41 Chapter 3: Managing KVM Switches and Ports Note: The icon shown in the top-right corner of the "Ports" section indicates the KVM port information retrieval status. See Port Data Retrieval Status (on page 36). 2. Click in the Action column of the KVM port that you want to configure.
  • Page 42: Unavailable Hot Keys For Port Access

    Chapter 3: Managing KVM Switches and Ports Checkbox Function Enabled Assign a hot key combination for quickly accessing this KVM port. Available options include:  Ctrl + Shift + <character>  Ctrl + Alt + <character>  Shift + Alt + <character> ...
  • Page 43: Port Data Retrieval Status

    Chapter 3: Managing KVM Switches and Ports Unavailable hot keys Notes Ctrl + Alt + C Ctrl + Alt + F Conflict with the pre-programmed hot keys of the User Station Ctrl + Alt + M Ctrl + Alt + N Port Data Retrieval Status An icon is displayed in the top-right corner of the "Ports"...
  • Page 44 Chapter 3: Managing KVM Switches and Ports You can click this icon to view additional information. The icon changes depending on the current retrieval status of KVM port information. Icon Port data retrieval state Port information on the selected KVM switch is accessible.
  • Page 45 Navigation and Access to KVM Chapter 4 Ports In This Chapter Overview....................39 Port Navigator..................40 Identifying States of KVM Switches and Ports ........42 Using Search ...................44 Using Filters.....................45...
  • Page 46: Chapter 4 Navigation And Access To Kvm Ports

    Chapter 4: Navigation and Access to KVM Ports Overview Port access is performed in the Port Navigator window, which contains three panels for accessing KVM ports: Favorite Ports, Devices and Ports. By default, the Devices panel has been opened. To access a KVM port: 1.
  • Page 47: Port Navigator

    Chapter 4: Navigation and Access to KVM Ports For details, see Step 4: Access KVM Switches and KVM Ports page 15). Note: The User Station CANNOT access a KVM port that is connected to a tiered KVM switch or a blade chassis server. Therefore, such KVM ports are not shown in the Port Navigator window.
  • Page 48 Chapter 4: Navigation and Access to KVM Ports 1. Search: Searches for KVM ports or switches containing the search word(s). Using Search (on page 44). 2. Additional Filters: Determines which KVM switches and ports are displayed in this window based on KVM switch and port states. See Using Filters page 45).
  • Page 49: Identifying States Of Kvm Switches And Ports

    Chapter 4: Navigation and Access to KVM Ports Identifying States of KVM Switches and Ports In the Port Navigator window, different icons and colors are applied to indicate current states of the added KVM switches and ports. The same information is available by clicking Port icons: Icon Port state...
  • Page 50 Chapter 4: Navigation and Access to KVM Ports Color Port state Accessible Busy Error while getting port status Down Status unknown Status being updated KVM switch's icon and colors: Icon in color KVM switch state Normal (accessible)  Error while communicating with the KVM switch - OR - ...
  • Page 51: Using Search

    Chapter 4: Navigation and Access to KVM Ports Icon in color Port state Down, but there are network connectivity issues Up, accessible, but Single Login Limitation has been enabled on the KVM switch and the User Station's port status retrieval program has consumed the single login Note: The KVM port data retrieval status will impact the device and port status shown in the Port Navigator window.
  • Page 52: Using Filters

    Chapter 4: Navigation and Access to KVM Ports Using Filters Per default, the Port Navigator window only shows KVM switches that can be communicated properly, and the KVM ports that are up. You can change the display criteria by using filters. To change the filter: 1.
  • Page 53 Chapter 4: Navigation and Access to KVM Ports Checkbox KVM port's state Up and Idle The port is up, accessible and no KVM sessions are active. Up and Connected The port is up, and at least one KVM session is active. Up and Busy The port is up, but busy because an exclusive KVM session is active.
  • Page 54: Chapter 5 Using The Kvm Client

    Using the KVM Client Chapter 5 A KVM Client window opens after accessing a KX III KVM port where a server is physically connected. The server connected to a KVM port is called the target server. The Dominion User Station's KVM Client settings are configured through the toolbar only.
  • Page 55: Connection Properties

    Chapter 5: Using the KVM Client Connection Properties Connection properties manage streaming video performance over connections to target servers. The properties are applied only to your connection, not the connection of other users accessing the same target server. To configure connection properties: 1.
  • Page 56 Chapter 5: Using the KVM Client Setting Description Video Mode This slider controls the video quality as well as the bandwidth.  Left: higher quality with higher bandwidth consumed.  Right: lower quality with less bandwidth consumed. This is useful for low-bandwidth connections.
  • Page 57: Default Connection Properties

    Chapter 5: Using the KVM Client Item Description Device Name The KVM switch's name. Host / Port The KVM switch's IP address, and the TCP/IP port used to access the KVM switch. Target Name The accessed KVM port's name. Data In / Out Rate of data received and sent out to the KVM switch in bytes per second.
  • Page 58: Text Readability

    Chapter 5: Using the KVM Client Text Readability Text Readability is designed to provide video modes with lower color depth but text remains readable. Greyscale modes are even available when applying lower bandwidth settings. This setting is ideal when working with computer GUIs, such as server administration.
  • Page 59: Noise Filter

    Chapter 5: Using the KVM Client Noise Filter Unless there is a specific need to do so, do not change the noise filter setting. The default setting is designed to work well in most situations. The Noise Filter controls how much interframe noise is absorbed by the Dominion User Station.
  • Page 60: Mouse Settings

    Important: Make sure you have configured mouse settings on the target servers properly. For information on configuring mouse settings of target servers, refer to the KX III KVM switch's user documentation from its application or the Dominion KX III section of the Raritan website's Support page http://www.raritan.com/support/...
  • Page 61: Synchronize Mouse

    Chapter 5: Using the KVM Client Synchronize Mouse In the dual mouse mode, the Synchronize Mouse command forces realignment of the target server's mouse cursor with the User Station's. Dual Mouse Modes (on page 55). To synchronize the mouse cursors: ...
  • Page 62: Dual Mouse Modes

    For detailed information of each USB profile, see the section titled "Available USB Profiles" in the user documentation of the KX III KVM switch, which is accessible from the KVM switch application or the Raritan website's Support page (http://www.raritan.com/support/).
  • Page 63 Chapter 5: Using the KVM Client Automatic Mouse Mode In this mode, the User Station can detect the target server's mouse settings and synchronize the mouse cursors accordingly, allowing mouse acceleration on the target server. This mode is the default for non-VM target servers. Note: A non-VM target server is the target server using a CIM that does not support virtual media.
  • Page 64: Mouse Synchronization Tips

    Chapter 5: Using the KVM Client If automatic mouse synchronization fails, this mode will revert to standard mouse synchronization behavior. See Standard Mouse Mode (on page 57). Note that mouse configurations will vary on different target servers' operating systems. Consult your OS guidelines for further details. Note: Automatic mouse synchronization does not work with UNIX target servers.
  • Page 65: Video Settings

    Chapter 5: Using the KVM Client Video Settings Click to open the Video Settings dialog. Video Sensing settings: Setting Description Auto Sense Video This command automatically detects Settings the target server's video settings (resolution, refresh rate) and redraws the video screen. Clicking in the toolbar results in the same video re-sensing function.
  • Page 66 Chapter 5: Using the KVM Client Setting Description Best Possible The User Station will perform the full Video Mode Auto Sense process when switching target servers or target resolutions. Selecting this option calibrates the video for the best image quality. Quick Sense The User Station will use a quick video Video Mode...
  • Page 67: Advanced Video Settings

    Chapter 5: Using the KVM Client Reset Settings: The Clear Video Settings Cache button resets the cache where video settings are stored, which is useful when old video settings no longer apply, such as when a target server is replaced. After calibrating the colors for a target server, color values are cached and reused whenever accessing that server.
  • Page 68 Chapter 5: Using the KVM Client Click , drag sliders, or type a new numeric value in the text box to adjust corresponding settings. Setting Description Clock Controls how quickly video pixels are displayed across the video screen. Changes made to clock settings cause the video image to stretch or shrink horizontally.
  • Page 69: Advanced Color Settings

    Chapter 5: Using the KVM Client Advanced Color Settings In the Video Settings dialog, click Advanced Settings in the Color section to show additional color settings. Click , drag sliders, or type a new numeric value in the text box to adjust corresponding settings. Setting Description Brightness Red...
  • Page 70: Peripheral Devices And Usb Settings

    Chapter 5: Using the KVM Client Setting Description Contrast Green Controls the green signal contrast. Contrast Blue Controls the blue signal contrast. Peripheral Devices and USB Settings Click to open the "Connect Audio and Mass Storage Devices" dialog. Section Description Devices To virtually connect an audio device to the target server, click the "Audio...
  • Page 71: Audio Device

    Note: For detailed information of each USB profile, see the section titled "Available USB Profiles" in the user documentation of the KX III KVM switch, which is accessible from the KVM switch application or the Raritan website's Support page (http://www.raritan.com/support/).
  • Page 72: Virtual Media

    Chapter 5: Using the KVM Client 2. Click the "Audio Device ..." button. The Connect Audio Device dialog appears.  Connect Playback Device: This option connects an available audio playback device, such as a speaker or headphones, to the target server. ...
  • Page 73 USB-mounted CD/DVD drives  USB mass storage devices  ISO images (disk images) ISO9660 is the standard supported by Raritan. However, other ISO standards can be used. Note: Connecting digital audio devices onto the target server is also supported. See Audio Device...
  • Page 74 Chapter 5: Using the KVM Client Mounting Local Drives This option mounts an entire disk drive virtually onto the target server. Use this option for external drives only. It does not include network drives, CD-ROM, or DVD-ROM drives. To mount a local drive: 1.
  • Page 75: Mounting Cd-Rom/Dvd-Rom/Iso Images

    KVM Switches (on page 139). Mounting CD-ROM/DVD-ROM/ISO Images ISO9660 format is the standard supported by Raritan. However, other CD-ROM extensions may also work. Note: Audio CDs are not supported by virtual media so they do not work with the virtual media feature.
  • Page 76 Chapter 5: Using the KVM Client 2. Click the "CD-ROM Device / ISO File ..." button. The Connect CD-ROM Drive / ISO Image dialog appears. 3. For USB CD-ROM/DVD-ROM drives: a. Select the Local CD-ROM Drive option. b. Choose the drive from the Local CD-ROM Drive drop-down list, which shows all available CD-ROM/DVD-ROM drive names.
  • Page 77 Chapter 5: Using the KVM Client The hostnames (file servers) and image paths available in the list are those that you configured using the KX III KVM switch's File Server Setup page. See the KVM switch's user documentation for further information. c.
  • Page 78 Chapter 5: Using the KVM Client Existing virtual media devices are listed at the bottom of the dialog. 2. Click the Disconnect button for the one you want to disconnect. 3. Click Yes on the confirmation message. Virtual Media CIMs It requires the use of the following virtual media (VM) CIMs on the target servers you are accessing.
  • Page 79: Usb Profiles

    Chapter 5: Using the KVM Client Number of Supported Virtual Media Drives With the virtual media feature, you can mount up to two drives (of different types) that are supported by the USB profile currently applied to the target server. These drives are accessible for the duration of the KVM session.
  • Page 80 Chapter 5: Using the KVM Client 2. Click USB Profiles to expand it. 3. Select the desired USB profile from the Active USB Profile drop-down list, and click Apply.  If intended, click the Help button to view information similar to USB Profile Overview (on page 74).
  • Page 81 BIOS profile may be more appropriate. If none of the standard USB profiles provided by Raritan work with a provided target server, contact Raritan Technical Support for assistance. For detailed information of each USB profile, see the section titled "Available USB Profiles"...
  • Page 82: Power Control

    Chapter 5: Using the KVM Client Power Control You can power on, power off, and power cycle a target server through the outlet(s) it is connected to. This power control button is enabled only when the power control requirements are met. Power control requirements: ...
  • Page 83: View Settings

    Chapter 5: Using the KVM Client View Settings Click to show available view options. Fit window to Target The "Fit window to Target" command enlarges or shrinks the size of the KVM Client window to the target server's video resolution. The KVM Client's scroll bars may or may not appear, depending on whether the target server's resolution is small enough for the KVM Client window to show the target server's entire desktop video.
  • Page 84: Show Window Decorations

    Chapter 5: Using the KVM Client Show Window Decorations You can use the KVM Client with or without the window decorations, including the window title and scroll bars. Tip: You can have this display option automatically enabled or disabled by setting your preferences on the KVM Client Settings page. See Client Settings (on page 83).
  • Page 85: Chapter 6 Setting User Preferences

    Setting User Preferences Chapter 6 In the User Station Configuration window, click Preferences to customize the following user settings. In This Chapter Keyboard Macros ..................78 Audio Settings ..................82 KVM Client Settings.................83 Password Change ...................84 Keyboard Macros Keyboard macros ensure that keystroke combinations intended for the target server are sent to and interpreted only by the target server.
  • Page 86 Chapter 6: Setting User Preferences 2. Click Preferences > Keyboard Macros > . The New Keyboard Macro page opens. 3. Enter information for the new keyboard macro. The fields marked with the symbol * are mandatory. Field/option Description Enabled Select this checkbox so that the new macro can appear in the KVM Client of this User Station.
  • Page 87: Executing Macros

    Chapter 6: Setting User Preferences Field/option Description Keys Select each desired key from the list and click to add it to the right box.  Select the keys in the order by which they are to be pressed.  A Release key command is automatically added for each key added to the right box.
  • Page 88: Editing Or Deleting Macros

    Chapter 6: Setting User Preferences Editing or Deleting Macros To view all manually-created keyboard macros in the User Station Configuration window, click Preferences > Keyboard Macros.  An enabled macro shows in the Enabled column.  A disabled macro shows in the Enabled column.
  • Page 89: Audio Settings

    Chapter 6: Setting User Preferences Audio Settings The default audio playback/capture devices used by the User Station are the front-panel analog speakers and microphone. You can change this by setting other audio devices you prefer as the audio playback and/or capture devices. Note: To change additional audio configuration, see Sound Preferences (on page 126).
  • Page 90: Kvm Client Settings

    Chapter 6: Setting User Preferences KVM Client Settings You can configure the preferred positioning and display settings that always apply to the KVM Client window when it opens. To determine your KVM Client preferences: 1. If not displayed, launch the User Station Configuration window. See User Station Configuration (on page 28).
  • Page 91: Password Change

    Chapter 6: Setting User Preferences 5. Determine the display settings that automatically apply to the KVM Client. Checkbox Description Scale Video Enable or disable the Scale Video function. For details on Scale Video, see Scale Video (on page 76). Window Show or hide the window decorations.
  • Page 92: Chapter 7 Administration Features

    Administration Features Chapter 7 In the User Station Configuration window, click Administration to perform the following User Station administration tasks. In This Chapter Users .......................86 User Groups ....................89 Backup and Restore ................93 Factory Reset ..................96 Software Update..................98 Support ....................99 About this Device...................102...
  • Page 93: Users

    Chapter 7: Administration Features Users The Dominion User Station provides a built-in administrator account, which is ideal for initial login and system administration. User name Privileges  System Administration. admin  Device Administration.  Device Access. Privileges (on page 91). You can add user profiles with configurable privileges for other users to operate and administer the User Station.
  • Page 94 Chapter 7: Administration Features 2. Click Administration > Users > . The New User page opens. 3. Enter information for the new user. The fields marked with * are mandatory. Field Description Login User name for logging in to the User Station.
  • Page 95: Editing Or Deleting Users

    Chapter 7: Administration Features Field Description Selected User Assigning user groups determines the Groups permissions granted to this user. See User Groups (on page 89).  To select all available user groups, click  To select one user group, select it in the Available User Groups box, and click ...
  • Page 96: User Groups

    Chapter 7: Administration Features The Privileges column indicates the permissions granted to each user. Privileges are determined based on the user groups assigned to each user. See User Groups (on page 89). Each user profile shows a maximum of five user groups. If there are more than five user groups for a user profile, it shows a message below the fifth user group -- "...
  • Page 97 Chapter 7: Administration Features You can create a new user group if the default user groups do not satisfy your needs. To create a new user group: 1. If not displayed, launch the User Station Configuration window. See User Station Configuration (on page 28).
  • Page 98: Privileges

    Chapter 7: Administration Features Privileges Privilege Operations permitted System All operations on the User Station are Administration permitted.  Log in to the User Station. Device Administration  Modify personal settings.  Access a KVM port.  Add, delete and modify the data of KX III KVM switches.
  • Page 99 Chapter 7: Administration Features The Users column lists the names of all users who belong to this user group. The priority is to show the real names of these users. If the real name is not available in the user profile, the user's login name is shown. Users (on page 86).
  • Page 100: Backup And Restore

    Chapter 7: Administration Features Backup and Restore The User Station allows you to easily back up the latest settings and data with only one click. By default, the backup files are stored in the User Station's hard disk drive. In case you have to restore to the previous settings and data, select the backup file you need and perform the restore command.
  • Page 101: Exporting And Importing Backup Files

    Chapter 7: Administration Features To restore to the previous settings and data: 1. If there are any existing backup files, the Backup Archives page lists all of them. 2. Select the desired file, and click its button. Note: The other button is used to delete the backup file. See Deleting Backup Files (on page 95).
  • Page 102: Deleting Backup Files

    Chapter 7: Administration Features 2. Click Administration > Backup & Restore. The Backup Archives page opens. When the User Station detects the connected USB drive, the export button appears in the Actions column. 3. Click the button of the desired backup file. The selected file is exported to the connected USB drive and therefore listed in the "Import Archive from USB Drive"...
  • Page 103: Factory Reset

    Chapter 7: Administration Features Its software version is 1.0.0.5.284, so its date is 20151014, which is October 14, 2015. To remove a backup file: 1. To show existing backup files, click Administration > Backup & Restore. button of the desired file. 2.
  • Page 104 Chapter 7: Administration Features 2. Click Administration > Factory Reset. The factory reset page opens. Read this page before proceeding to the next step. 3. Click 4. Click OK to confirm the operation or Cancel to abort it.
  • Page 105: Software Update

    (on page 93). To perform the software UPGRADE: 1. Use a computer to download the User Station software file from the Dominion KX III User Station section of the Raritan website's Support page (http://www.raritan.com/support/). 2. Copy the file named "KX3UST_<version>_update.bin" to the root directory of your USB flash drive.
  • Page 106: Support

    Note: In case the software upgrade fails, and the User Station is unable to operate, contact Raritan Technical Support. Support The Support page provides two features which help Raritan Technical Support to troubleshoot your User Station issues.  Support Login: This feature allows the Technical Support to remotely access your User Station.
  • Page 107: Support Login

    The Support Login feature allows remote access from Raritan Technical Support. By default, this feature is disabled for security. You MUST NOT enable this feature unless you are instructed by Raritan Technical Support to do so. To permit remote access from Raritan Technical Support: 1.
  • Page 108: Diagnostic Log File

    When the User Station does not work properly, you can export the User Station's diagnostic log file to a connected USB flash drive, and send the file to the Raritan Technical Support for troubleshooting. You must have the System Administration permission to perform this operation.
  • Page 109: About This Device

    6. Wait until the User Station finishes the export, displaying the "Successfully finished" message as well as the filename of the diagnostic log. 7. Remove the USB drive to copy and send the file to Raritan Technical Support. About this Device The "About this Device"...
  • Page 110 Chapter 7: Administration Features 2. Click Administration > About this Device. The version information page opens. To show the version via the Main Menu:  Choose Main Menu > Help > About this Device.
  • Page 111: Chapter 8 System Settings

    System Settings Chapter 8 Most of the system settings are available under System Settings in the Main Menu. In This Chapter Date/Time ....................105 Keyboard ....................108 Monitors ....................115 Network Connections ................117 Sound Preferences................126 Default Shortcut Icons in the Main Toolbar ...........128 Screen and Keyboard Settings in the Login Screen ......136...
  • Page 112: Date/Time

    Chapter 8: System Settings Date/Time 1. Choose Main Menu > System Settings > Date/Time. The date/time dialog appears. 2. Click the desired tab to configure date/time settings for the User Station.  Configure the date and time using the tab labeled Date and Time (on page 106).
  • Page 113: Date And Time

    Chapter 8: System Settings Date and Time Follow one of the following procedures to set the date and time. To manually customize the date and time: 1. Select the Date and Time tab, if not yet. 2. Deselect the time synchronization checkbox. 3.
  • Page 114: Time Zone

    Chapter 8: System Settings Select this only when you use a radio-controlled clock device to synchronize the User Station's clock with an authoritative time source. Time Zone The time zone setting is important for both customized and NTP-synchronized time. If it is correct, do NOT change it unless required.
  • Page 115: Keyboard

    Chapter 8: System Settings 3. Select your city's name in the list below the map. 4. To make the system time automatically switch between normal and day light savings time, select the "System clock uses UTC" checkbox. Keyboard 1. Choose Main Menu > System Settings > Keyboard. The Keyboard Preferences dialog appears.
  • Page 116: General

    Chapter 8: System Settings 4. In the "Type to test settings" field, type anything to verify the current keyboard settings. General Repeat Keys: 1. Select this checkbox if you want the keys to repeat when you press and hold a key. 2.
  • Page 117: Layouts

    Chapter 8: System Settings Layouts In the Layouts tab, available keyboard layouts are all shown. The same keyboard layout list is also available when working with the keyboard icon in the Main Toolbar. Any changes made to the dialog's keyboard layout list also change the keyboard layout list available in the Main Toolbar.
  • Page 118 Chapter 8: System Settings To determine the keyboard model:  Click the button in the Keyboard model field. Then select the vendor and model of your keyboard. Reset to Defaults:  Click this button to reset all keyboard settings to the defaults. To determine keyboard behaviors: ...
  • Page 119: Accessibility

    Chapter 8: System Settings Option Description Maintain key compatibility with old Only Sun Key compatibility is available for this option. Solaris keycodes Miscellaneous compatibility options Miscellaneous keyboard behaviors are under this option. For example, you can make the Shift key function as a key that cancels the Caps Lock feature.
  • Page 120 Chapter 8: System Settings Bounce Keys:  Ignore fast duplicate keypresses: Activate this function to ignore those key presses that are rapidly repeated. When activated, drag the slider bar to determine the delay. Left side is shorter and right side is longer. Audio feedback: ...
  • Page 121: Mouse Keys

    Chapter 8: System Settings  Bounce Keys: Option Function Beep when a key is In the Bounce Keys mode, the User rejected Station sounds when rejecting any key pressed. Mouse Keys When you want to use the numeric keypad to control the mouse pointer/cursor, select the checkbox labeled "Pointer can be controlled using the keyboard."...
  • Page 122: Typing Break

    Chapter 8: System Settings  Acceleration: Use the slider bar to adjust the pointer acceleration rate. Left side is faster and right side is slower.  Speed: Use the slider bar to adjust the pointer speed. Left side is slower and right side is faster. ...
  • Page 123 Chapter 8: System Settings Setting/button Function On/Off Turn on or off this monitor, if there are two monitors connected to the User Station. This setting is disabled when only one monitor is connected. Resolution Determine the video resolution applied to this monitor.
  • Page 124: Network Connections

    Chapter 8: System Settings Network Connections You can connect the two LAN ports of the User Station to the same or diverse subnets. If you have connected both LAN ports to the network(s) when turning on or restarting the User Station, the User Station randomly selects one of the network connections as the default one.
  • Page 125 Chapter 8: System Settings 2. Select the desired connection, and click Edit. A dialog similar to the following appears. 3. If intended, type a new name for identifying this connection in the "Connection name" field. 4. Click the IPv4 Settings and/or IPv6 Settings tab to configure network settings properly.
  • Page 126: Ipv4 Settings

    Chapter 8: System Settings  IPv6 Settings: Setting Description Method Select one of the following as the connection method:  Automatic  Automatic, addresses only  Automatic, DHCP only  Manual  Link-Local Only  Ignore IPv6 Settings (on page 123). 5.
  • Page 127 Chapter 8: System Settings Note: The option "Shared to other computers" is NOT supported. Automatic (DHCP): The DHCP server in the network automatically assigns an IPv4 address to the User Station as well as DNS server(s) and domain(s). The following settings are configurable for this method. Setting Description Additional DNS...
  • Page 128 Chapter 8: System Settings Setting Description Routes Optional. Configure the IPv4 routing for this User Station.  Click Add to add one or multiple routing addresses for the User Station to reach in the network.  To remove any existing routes, select it and click Delete.
  • Page 129 Chapter 8: System Settings Manual: Select this method when intending to manually assign a static IP address to the User Station. In the Addresses section, click Add and then type the User Station's IPv4 address, netmask and gateway in this section. At least one IPv4 address, netmask and gateway must be specified.
  • Page 130: Ipv6 Settings

    Chapter 8: System Settings IPv6 Settings Automatic: IPv6 autoconfiguration automatically assigns an IPv6 address to the User Station, and retrieves the information of DNS server(s) and domain(s) from the DHCP server. The following settings are configurable for this method. Setting Description Additional DNS Optional.
  • Page 131 Chapter 8: System Settings Setting Description IPv6 privacy Determine whether and how privacy extensions extensions apply to the IPv6 addressing.  Disabled: Disables privacy extensions.  Enabled (prefer public address): Enables privacy extensions and a public address is preferred.  Enabled (prefer temporary address): Enables privacy extensions and a temporary address is preferred.
  • Page 132 Chapter 8: System Settings Setting Description DNS servers Specify IP addresses of one or multiple DNS servers. Use commas to separate multiple servers. Search domains Specify IP addresses of one or multiple domains for resolving host names. Use commas to separate multiple servers. IPv6 privacy extensions Require IPv6...
  • Page 133: Sound Preferences

    Chapter 8: System Settings  Require IPv6 addressing for this connection to complete  Routes Link-Local Only: With this method selected, a link-local IPv6 address is automatically assigned to the User Station when there is no DHCPv6 available in the network. Only the following option is available for this method: ...
  • Page 134: Hardware

    Chapter 8: System Settings  Input (on page 128)  Output (on page 128) Note: The Sound Effects and Applications tabs are NOT supported. Hardware The User Station has two types of built-in audio channels:  Audio channels for Microphone and Audio Output ports. See Front View (on page 4).
  • Page 135: Input

    Chapter 8: System Settings 3. If the profile you selected is related to the audio output, a Test Speakers button is shown for your to test each audio channel's output.  Make sure a speaker or headphones have been connected when testing the audio output.
  • Page 136: Keyboard Layout Icon

    Chapter 8: System Settings Keyboard Layout Icon Clicking the icon: The keyboard layout switches among available languages. By default, the following languages are available.  en - English (US)  es - Spanish  fr - French  de - German Right-clicking the icon: A shortcut menu with these commands displays.
  • Page 137 Chapter 8: System Settings Clicking the icon: A list of available Ethernet networks and connections displays.  Only one network connection is shown if only one LAN port is connected to the network.  Two network connections are listed if both LAN ports are connected to the network.
  • Page 138: Clock Icon

    Chapter 8: System Settings Right-clicking the icon: A shortcut menu with these commands displays.  Enable Networking: Enables or disables the networking capability. The default is to enable it.  Connection Information: This command shows the networking information of the User Station, including IPv4 and IPv6 addresses. ...
  • Page 139 Chapter 8: System Settings Clicking the icon: A calendar displays, as well as the Locations section. You can click "Locations" to:  Determine the location of the User Station.  Change the time format of the clock shown in the Main Toolbar. For details, see Location and Clock Time Format (on page 133).
  • Page 140: Location And Clock Time Format

    Chapter 8: System Settings Location and Clock Time Format After expanding the Locations section, click Edit.
  • Page 141 Chapter 8: System Settings The Clock Preferences dialog appears. Click the desired tab or button to configure settings. Help:  You can click the Help button in this dialog for detailed information about the dialog. Time Settings:  Date/Time (on page 105). Locations: ...
  • Page 142 Chapter 8: System Settings  To modify or delete any existing location in the Locations tab, select it and click Edit or Remove. General:  Clock Format: Select the desired clock format to be shown in the Main Toolbar - 12 or 24 hour format. ...
  • Page 143: Screen And Keyboard Settings In The Login Screen

    Chapter 8: System Settings Screen and Keyboard Settings in the Login Screen The following settings are available in the Login Screen, and their changes only impact the Login Screen (on page 6). To turn any item on or off, just click it. Note: Screen Reader is NOT supported.
  • Page 144 Chapter 8: System Settings Setting Description Mouse Keys Mouse Keys (on page 114).
  • Page 145: Appendix A Specification

    Appendix A Specification Slim 1.3 litre metal chassis, black Chassis design 190 x 165 x 43 mm Dimension (LxWxH) 0 to 40 degrees Celsius Operating temperature non-condensing: 10~90% Humidity  75 x 75 mm VESA mount  100 x 100 mm ...
  • Page 146: Appendix B Authentication Of User Stations And Kvm Switches

    (on page 32). For detailed information on what you can do with a KVM port/target server, see the user documentation for KX III KVM switches, which is accessible from the KVM switch's application or KX III section of Raritan website's Support page (http://www.raritan.com/support/).
  • Page 147 Appendix B: Authentication of User Stations and KVM Switches User account for Tasks you can do on the User account for Tasks you can do on a KVM the User Station User Station the KVM switch port/target server admin You can do anything, user-A Limited privileges are including:...
  • Page 148: Appendix C Available Key Sets

    Appendix C Available Key Sets The following table shows available key sets for Keyboard Macros page 78). Note that a few keys may belong to more than one ket set. Key set Keys contained Letters A to Z Numbers 0 to 9 Non-Graphic Keys ...
  • Page 149 Appendix C: Available Key Sets Key set Keys contained  - (Minus) Symbols  = (Equals)  [ (Left Bracket)  ] (Right Bracket)  \ (Back Slash)  ; (Semi-colon)  ' (Apostrophe)  ` (Grave)  , (Comma) ...
  • Page 150 Appendix C: Available Key Sets Key set Keys contained  Japan Kana Japanese Keys  Japan Convert  Japan No Convert  Japan Yen  Japan Circumflex  Japan @  Japan :  Japan Kanji  Japan Ro  Korea Hanja Korean Keys ...
  • Page 151 Appendix D Hot Keys for Controlling User Station Windows You can use pre-programmed hot keys to move or resize any active window on the User Station, such as the Port Navigator window or a KVM Client window. Hot key Function Ctrl + Alt + Shift + When there are two monitors connected, move the window to the other monitor.
  • Page 152 Appendix D: Hot Keys for Controlling User Station Windows Hot key Function Alt + Windows + Note: If no nearest edges are found in the specified direction, the window size is halved instead. Alt + Windows + While pressing Alt, press and "hold down" the left mouse button to drag Alt + Left mouse button the window to the new location onscreen.
  • Page 153 Index Editing or Deleting Macros • 81 Editing or Deleting User Groups • 91 Editing or Deleting Users • 84, 88 About this Device • 98, 102 Executing Macros • 79, 80 Absolute Mouse Mode • 54, 55, 57 Exporting and Importing Backup Files • 93, 94 Accessibility •...
  • Page 154: Index

    Index Login Screen • 6, 136 Logout or Shutdown • 24 Scale Video • 76, 84 Scenarios When Read/Write is Unavailable • Main Screen and Main Toolbar • 8, 13, 110, 67, 68 112, 116, 128 Screen and Keyboard Settings in the Login Managing KVM Switches and Ports •...
  • Page 155 Index Using the KVM Client • 20, 47, 80 VESA Mount (Optional) • 24 Video Mode • 49, 51 Video Settings • 58 View Settings • 76 Virtual Media • 2, 63, 65 Virtual Media CIMs • 55, 66, 71 Volume Icon •...
  • Page 156: United Kingdom

    For CommandCenter Secure Gateway: Press 6, then Press 2 Phone: +31-10-2844040 Fax: 732-764-8887 Email: tech.europe@raritan.com Email for CommandCenter NOC: tech-ccnoc@raritan.com Email for all other products: tech@raritan.com United Kingdom Monday - Friday 8:30 a.m. to 5 p.m. GMT China Phone +44(0)20-7090-1390...

This manual is also suitable for:

Dkx3-ust

Table of Contents