Advertisement
Quick Links
Advertisement

Related Manuals for Studer Vista 1


Summary of Contents for Studer Vista 1
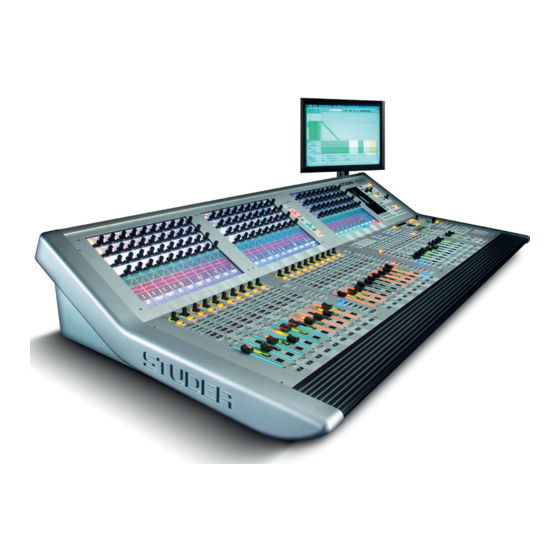
- Page 1 Digital Mixing Console Quick Start Guide...
- Page 2 Prepared and edited by Copyright by Studer Professional Audio GmbH Studer Professional Audio GmbH Technical Documentation Order no. 5028619 (1112) Riedthofstrasse 214 CH-8105 Regensdorf - Switzerland http://www.studer.ch Subject to change Studer is a registered trade mark of Studer Professional Audio GmbH, Regensdorf...
- Page 3 • Only use attachments/accessories specified by the manufacturer • Use only with the cart, stand, tripod, bracket or table specified by the manufacturer, or sold with the apparatus. When a cart is used, use cau- tion when moving the cart/apparatus combination to avoid injury from tip-over • Refer all servicing to qualified service personnel. Servicing is required when the apparatus has been damaged in any way, such as power-supply cord or plug is damaged, liquid has been spilled or objects fallen into the apparatus, the apparatus has been exposed to rain or moisture, does not operate normally, or has been dropped Note: It is recommended that all maintenance and service on the product should be carried out by Studer or its authorised agents. Studer cannot accept any liability whatsoever for any loss or damage caused by service, maintenance or repair by unauthorised personnel • WARNING: To reduce the risk of fire or electric shock, do not expose this apparatus to rain or moisture. Do not expose the apparatus to dripping or splashing and do not place objects filled with liquids, such as vases, on the apparatus • No naked flame sources, such as lighted candles, should be placed on the apparatus • Ventilation should not be impeded by covering the ventilation openings with items such as newspapers, table cloths, curtains etc. Warning: Do not use this apparatus in very dusty atmospheres, or in atmospheres containing flammable gases or chemicals • THIS APPARATUS MUST BE EARTHED. Under no circumstances...
- Page 4 Safety Information • The mains supply disconnect device is the mains plug. It must remain accessible so as to be readily operable when the apparatus is in use • If any part of the mains cord set is damaged, the complete cord set should be replaced. The following information is for reference only. The wires in the mains lead are coloured in accordance with the following code: • Protective Earth (Ground): Green/Yellow (US: Green or Green/ Yellow) • Neutral: Blue (US: White) • Live (Hot): Brown (US: Black) As the colours of the wires in the mains lead may not correspond with the coloured markings identifying the terminals in your plug, proceed as follows: • The wire which is coloured Green and Yellow must be connected to the terminal in the plug which is marked with the letter E or by the earth symbol • The wire which is coloured Blue must be connected to the terminal in the plug which is marked with the letter N • The wire which is coloured Brown must be connected to the terminal in the plug which is marked with the letter L Ensure that these colour codes are followed carefully in the event of the plug being changed • This unit is capable of operating over a range of mains voltages, as marked on the rear panel Note: This equipment has been tested and found to comply with the limits for a Class A digital device, pursuant to Part 15 of the FCC Rules.
-
Page 5: Safety Information
Safety Information Conforming to this directive will minimise the risk of hearing damage caused by long listening periods. A simple rule to follow is: The longer you listen, the lower the average volume should be. Please take care when working with your audio system –... - Page 6 Installation General Installation Instructions Please consider besides these general instructions also any product-specific instructions in the ‘Installation’ chapter of this manual. Unpacking Check the equipment for any transport damage. If the unit is mechanically damaged, if liquids have been spilled or if objects have fallen into the unit, it must not be connected to the AC power outlet, or it must be immediately disconnected by unplugging the power cable.
- Page 7 Installation / EMC Class I Equipment (Mains Operation) Should the equipment be delivered without a matching mains cable, the latter has to be prepared by a trained person using the attached female plug (IEC 320 / C13 or IEC 320 / C19) with respect to the applicable regulations in your country.
- Page 8 EMC / Maintenance / ESD • Use a system grounding concept that satisfies the safety requirements (class I equipment must be connected with a protective ground conduc- tor) and that also takes into consideration the EMC require ments. When deciding between radial, surface, or combined grounding, the advantages and disadvantages should be carefully evaluated in each case.
- Page 9 ESD / Repair • When performing a repair by replacing complete assemblies, the removed assembly must be sent back to the supplier in the same packing material in which the replacement assembly was shipped. If this should not be the case, any claim for a possible refund will be null and void. • Unpacked ESD sensitive components should only be handled in ESD protected areas (EPA, e.g.
- Page 10 Repair / Disposal SMD Components Studer has no commercially available SMD components in stock for service purposes. For repair, the corresponding devices have to be purchased locally. The specifications of special components can be found in the service manual. SMD components should only be replaced by skilled specialists using appro- priate tools.
- Page 11 Conformity Declarations of Conformity Class A Equipment - FCC Notice This equipment has been tested and found to comply with the limits for a Class A digital device, pursuant to Part 15 of the FCC Rules. These limits are designed to provide a reasonable protection against harmful interfer- ence when the equipment is operated in a commercial environment.
- Page 12 Under these conditions the unit or system starts and works without any prob- lem. Beyond these specifications, possible problems are described below. Ambient Temperature Units and systems by Studer are generally designed for an ambient tempera- ture range (i.e. temperature of the incoming air) of +5 °C to +40 °C. When rack mounting the units, the intended air flow and herewith adequate cooling must be provided. The following facts must be considered: • The admissible ambient temperature range for operation of the semicon-...
- Page 13 Appendix evaporation (sublimation) may be expected; otherwise the system must be heated and dried while switched off. A system without visible internal formation of ice or condensation should be heated up with its own heat dissipation, as homogeneously (and subsequently as slow) as possible;...
- Page 14 Appendix Appendix 2: Mains Connector Strain Relief For anchoring connectors without a mechanical lock (e.g. IEC mains connec- tors), we recommend the arrangement below: Procedure: The cable clamp shipped with your unit is auto-adhesive. For mounting please follow the rules below: • The surface to be adhered to must be clean, dry, and free from grease, oil, or other contaminants.
- Page 15 License Programs of Studer The following Terms and Conditions grant the right to use all programs of Studer that are part of the System and/or its options at the time of its delivery to the Customer, as well as the installation software on the original data disk and the accompanying documentation (‘License Material’).
- Page 16 Reverse engineering is only permitted with the express consent of Studer. The consent of Studer can be obtained but is not limited to the case in which the interface software can not be provided by Studer. In any case Studer has to be informed immediately upon complete or partial reverse engineering.
- Page 17 Connector Details ............................21 Rear Panel Connectors ............................21 5.1.1 Connector Area 5..............................22 Front Connectors ..............................26 Monitoring/Talkback Inputs/Outputs ........................27 5.3.1 ‘Vista 1 Mono/Stereo/FOH/Monitor’ Configuration Templates ................. 27 5.3.2 ‘Vista 1 Surround’ Configuration Template ......................28 Quick Start Guide 1 Document generated: 08.11.12...
- Page 18 Vista 1 Digital Mixing System 2 Quick Start Guide Document generated: 08.11.12...
-
Page 19: First Steps
Vista 1 Digital Mixing System utilization for the Purpose intended The Vista 1 mixing console is intended for professional use. It is presumed that the unit is operated only by trained personnel. Servicing is reserved to skilled technicians. The electrical connections may be connected only to the voltages and signals designated in this manual. -
Page 20: Monitor Speakers
Now the real thing setup Please note that the Vista 1 is intended for desk-top mounting and therefore needs a large, flat surface to be mounted on. Ideally this flat surface is a table with a height that is suited for mixing in either standing or seated position. - Page 21 They have a wide-range input so they can be connected to an AC source of 100 to 240 V. Since your Vista 1 is an important node in a Live production, it is recom- mended that the redundant mains inlet is fed from an uninterruptible power supply (UPS).
- Page 22 This file is linked with and loaded statically for each title. It is built and changed off-line with a special configuration tool. Knowledge of the com- plete installation is required to build this. On the Vista 1, standard configura- tions are provided. Additional configurations may be generated away from the console on a PC with the necessary specialist tools.
- Page 23 Vista 1 Digital Mixing System of interest to the user are placed on the surface, often not in chronological order but mixed inputs, groups and outputs. However we recommend that to simplify finding a hidden channel a ‘get out of jail’ section, say section 6, is set-up with all paths placed on the surface in chronological order.
- Page 24 Vista 1 Digital Mixing System Load a template Loading a template happens as follows: With the touchpad, choose File - Open Title on the GC screen. You will see a window with all projects available on the console. When the console is used for the first time, only a project named templates is found.
- Page 25 Before you can start mixing, you need to decide which DSP configuration template to use for your production at hand. Vista 1 is shipped with several factory default configuration templates, each making use of its specific DSP setup. Below you will find a listing of these DSP.
- Page 26 PAR. None Blocks Vista 1 FOH / Monitor Templates There are two session configurations provided for public address (PA) appli- cations, for which the console is either used at the FOH position to provide sound for a large audience, or near the stage to provide monitoring mixes for the performing artists.
- Page 27 Vista 1 Digital Mixing System input Labels One of the next steps you might want to do is to label the input sources, so that they can be found easily by looking at the channel strips. This is also done on the GC screen, in a view that is called general patch that represents the desk’s internal routing matrix.
- Page 28 3.10 desk channel Layout The section of 12 faders the Vista 1 features on the right-hand side is called control bay. The one(s) on the left-hand side, with 10 faders and one Vistonics screen each, is/are called fader bay(s).
- Page 29 Vista 1 Digital Mixing System On the fader bay you will find a pre-arranged layout of the input channels, where with the six SeCtiOn and the </> arrow keys you can navigate between the desk’s six sections and control all available input channels on the desk surface.
- Page 30 To define an output port of a master bus, again the general patch view on the GC screen must be opened. Since in the Vista 1 all output channels can have the same structure as an input channel, a master channel looks the same as an input channel, with the only difference that it is fed from the end of the master summing bus.
- Page 31 Vista 1 Digital Mixing System Sources and targets displayed in white are unrouted, green ones are routed once, and yellow sources to multiple targets. A target with a locked routing point is displayed in red. 3.14 Mic Preamp control The fastest way to access the microphone preamplifiers’ parameters (gain, 48 V phantom power and high-pass filter) is by pressing the miC Ctrl key that is the uppermost of the GlOBal view buttons.
- Page 32 Vista 1 Digital Mixing System Momentary / Latching Most of the physical desk surface keys can work in two different modes. When only tapped shortly, the key is latching, meaning that its function remains on until it is tapped again – latching mode.
- Page 33 Vista 1 Digital Mixing System 3.17 control and Mute Group setup The SetuP - GrOuPS key is used for both setting up control groups – CGM or VCA – and mute groups (the main difference between CGM and VCA ‘slaves’ is that the slave’s faders will move with the group master fader when in CGM mode, but will not in VCA mode).
-
Page 34: Make A Backup
Vista 1 Digital Mixing System 3.19 Make a Backup After a production has been finished, it is a good idea to make a backup of the console’s Title. Even if someone should delete the title from the project folder it will still be available for the future if you have a backup. - Page 35 3.22 connect a stagebox To connect a remote stagebox to the Vista 1, a D21m MADI I/O card (either an optical or an electrical twisted-pair card that matches the MADI HD card in the stagebox) needs to be inserted into the Vista’s D21m option slot. Proceed as described above.
- Page 36 We’re done! Your Vista 1 console is ready to go live now. For in-depth operating information please refer to the Vista 1 Operating Instructions manual. For connector pinout details please refer to the following pages.
-
Page 37: Rear Panel Connectors
Panel connectors Due to the fact that Vista 1 is an all-in-one console, wiring is somewhat easier since no connection(s) to any external DSP core need to be made. There are six connector areas at the console’s rear side. - Page 38 Vista 1 Digital Mixing System 5.1.1 connector area 5 Connector for the external graphical controller screen. Ethernet port for communication with the console’s control system. Dual USB port for connecting an external keyboard (and a mouse, if required) or a memory device for backup purposes to the console’s control system.
- Page 39 Vista 1 Digital Mixing System CuStOm Panel GPiO (37-pin D-type, female, UNC 4-40 thread) for wiring the 12-key CuStOm Panel desk section for external tasks such as signaling. The 12 ‘Switch’ control outputs are open collectors pulling to ground if active. They are controlled by the CuStOm Panel GP 1-12 desk keys.
- Page 40 Vista 1 Digital Mixing System diP Sw On S185-1 Switch 1 momentary action Switch 1 toggling action S185-2 Switch 2 momentary action Switch 2 toggling action S185-3 Switch 3 momentary action Switch 3 toggling action S185-4 Switch 4 momentary action...
- Page 41 Vista 1 Digital Mixing System Inputs The control inputs (GPI Xa/b) are completely independent and electrically isolated. They may be used either with the internal +5 V DC supply voltage, or with external voltages of 5...24 V DC, regardless of the polarity.
- Page 42 Vista 1 Digital Mixing System GPO 1-8 (25-pin D-type, female, UNC 4-40 thread) Signal ‘GPO 1-8’ Signal ‘GPO 1-8’ GPO 1a GPO 1b GPO 2a GPO 2b GPO 3a GPO 3b GPO 4a GPO 4b GPO 5a GPO 5b GPO 6a...
- Page 43 Vista 1 Digital Mixing System Monitoring/talkback inputs/Outputs The monitoring and talkback input and output assignment is not fixed but depends on the currently loaded desk configuration and on any personal changes made to it later. The next two paragraphs show the monitoring/TB I/O factory defaults. Please...
- Page 44 Vista 1 Digital Mixing System 5.3.2 ‘Vista 1 surround’ configuration template CR Monitor (Surround) Format analog i/O digital i/O CR Mon Main LineOut 25-30 CR Mon stereo LineOut 31, 32 PFL/Nearfields CR Meter AES Out 5-10 (inactive) Studio A Mon...
Need help?
Do you have a question about the Vista 1 and is the answer not in the manual?
Questions and answers