Table of Contents
Advertisement
Quick Links
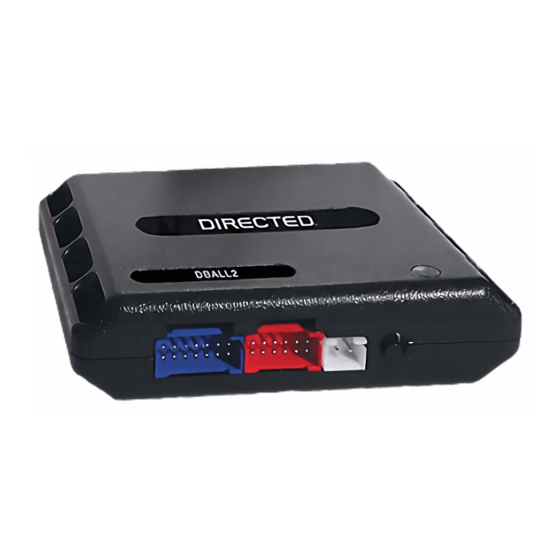
Platform: DBALL
Firmware: GM5
Update Alert: Firmware updates are posted to the web on a regular basis. We recommend
that you check for firmware and/or install guide updates prior to installing this product.
Installation Guide
Doorlock and transponder interface for many late model Buick, Cadillac, Chevrolet, GMC, Isuzu, Oldsmobile, Pontiac and
Saturn vehicles. Features include RAP shutdown, door trigger sensing and tach output.
Index
Vehicle Application Guide................................................................................................................................................
Installation
Type 1..............................................................................................................................................................................
Type 2..............................................................................................................................................................................
Type 3..............................................................................................................................................................................
Type 4..............................................................................................................................................................................
Type 5..............................................................................................................................................................................
Type 6..............................................................................................................................................................................
Programming
Module Programming............................................
Feature & Option List.......................................................................................................................................................
Feature Programming......................................................................................................................................................
LED Diagnostics..............................................................................................................................................................
Warranty...........................................................................................................................................................................
† Buick, Cadillac, Chevrolet, GMC, Isuzu, Oldsmobile, Pontiac and Saturn are registered trademarks and property of their
respective companies.
The Mobile Integration Systems
..........................................................................................................
Vehicle CAN Bus Integration System
TECHNICAL SUPPORT / INFORMATION
TECHNICAL SUPPORT / INFORMATION
web resources:
www.xpresskit.com
www.directechs.com
© 2010 Directed Electronics. All rights reserved.
Rev.: 20101103
02
04
05
06
07
08
09
10
11
11
12
13
Advertisement
Table of Contents

Summary of Contents for Directed Electronics Xpresskit DBALL
-
Page 1: Installation Guide
TECHNICAL SUPPORT / INFORMATION TECHNICAL SUPPORT / INFORMATION web resources: www.xpresskit.com † Buick, Cadillac, Chevrolet, GMC, Isuzu, Oldsmobile, Pontiac and Saturn are registered trademarks and property of their www.directechs.com respective companies. © 2010 Directed Electronics. All rights reserved. The Mobile Integration Systems... - Page 2 • • • Intrigue • • • • • • • • • • • Silhouette • • • • • • • • • • • • • © 2010 Directed Electronics. All rights reserved. The Mobile Integration Systems...
- Page 3 RS: Engine Start & Status ST: Function/Feature Status •: D2D and Wire-to-Wire (W2W) DL: OE Door Lock & Alarm Controls PK: Transponder & Immobilizer Override SS: Entry Point Status-Security © 2010 Directed Electronics. All rights reserved. The Mobile Integration Systems...
-
Page 4: Type
RF Loop Connector You need to connect these wires together. These Programming button (-) Ground connections are required for DBALL the module work properly. P#: XKD2D65 Not required in D2D mode. © 2010 Directed Electronics. All rights reserved. The Mobile Integration Systems... -
Page 5: Type
P#: XKD2D65 BCM is located in the center console. Exception: in Pontiac Solstice and Saturn Sky: located under the carpet, passenger side firewall. Connector C2 Not required in D2D mode. © 2010 Directed Electronics. All rights reserved. The Mobile Integration Systems... -
Page 6: Type
* Rear Hatch or Trunk Release Input: With vehicle with motorized rear hatch, this input will release the hatch. See programming options to change its operation. Not required in D2D mode. © 2010 Directed Electronics. All rights reserved. The Mobile Integration Systems... -
Page 7: Type
These Programming button (-) Ground connections are required for DBALL the module work properly. P#: XKD2D65 * If applicable - see the Function List. Not required in D2D mode. © 2010 Directed Electronics. All rights reserved. The Mobile Integration Systems... -
Page 8: Type
: With vehicle with motorized rear hatch, this input will release the hatch. See programming options to change its operation. ** If applicable - see the Function List. Not required in D2D mode. © 2010 Directed Electronics. All rights reserved. The Mobile Integration Systems... -
Page 9: Type
Orange/Black Bulb test wire coming Yellow White or from black connector Red/White at the ignition switch. * If applicable - see the Function List. Not required in D2D mode. © 2010 Directed Electronics. All rights reserved. The Mobile Integration Systems... -
Page 10: Module Programming
ON solid for 3 seconds. Solid Green x3 secs You can remove the key, the module is now programmed and ready to operate. Module reset will be done automatically upon programming. © 2010 Directed Electronics. All rights reserved. The Mobile Integration Systems... -
Page 11: Programming
No activity for 30 seconds; after 30 seconds, the orange LED will turn ON for 2 seconds to confirm exiting. Press and HOLD the IPB for 3 seconds. After 3 seconds, the orange LED will turn ON for 2 seconds to confirm exiting. © 2010 Directed Electronics. All rights reserved. The Mobile Integration Systems... -
Page 12: Programming
If it does not flash, the bypass module did not receive the Flashes green 3 times Trunk release function has been signal. Verify the connections between the bypass and every second. executed. the remote starter module. © 2010 Directed Electronics. All rights reserved. The Mobile Integration Systems... -
Page 13: Warranty
Limited One-Year Consumer Warranty For a period of ONE YEAR from the date of purchase of a Directed Electronics remote start or security product, Directed Electronics. (“DIRECTED”) promises to the original purchaser, to repair or replace with a comparable reconditioned piece, the security or remote start accessory piece (hereinafter the “Part”), which proves to be defective in workmanship or material...


Need help?
Do you have a question about the Xpresskit DBALL and is the answer not in the manual?
Questions and answers