Advertisement
Advertisement
Table of Contents

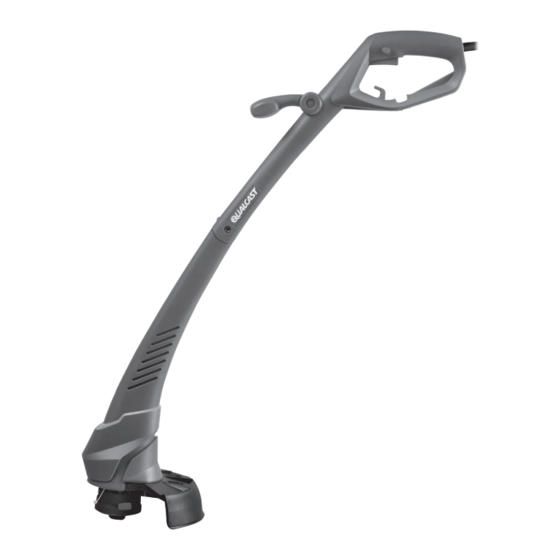
Summary of Contents for Qualcast 1718638
-
Page 1: Operating Instructions
OPERATING INSTRUCTIONS 250W Electric Grass Trimmer HELPLINE NO 03448010979... -
Page 2: General Safety Warnings
ORIGINAL INSTRUCTIONS GENERAL SAFETY when switching on the motor; h) Take care against injury from any WARNINGS device fitted for trimming the filament WARNING! When using the line length. After extending new cutter line always return the machine machine the safety rules must to its normal operating position be followed. - Page 3 ORIGINAL INSTRUCTIONS SYMBOLS cutting elements; It is recommended that appliances should be supplied via a residual current device (RCD) with a tripping Read operator’s manual current of not more than 30 mA. Double insulation Warning Wear ear protection Wear eye protection Keep bystanders away.
- Page 4 ORIGINAL INSTRUCTIONS 250W Electric Grass Trimmer HELPLINE NO 03448010979...
- Page 5 ORIGINAL INSTRUCTIONS LOCK-OFF BUTTON ON/OFF SWITCH AUXILIARY HANDLE UPPER TUBE LOCKING KNOB (SEE FIG. C2) LOWER TUBE MOTOR HOUSING FEED BUMP HEAD CUTTING LINE 10. SAFETY GUARD 11. CABLE STRAIN RELIEF 12. MAIN HANDLE 13. AUXILIARY HANDLE LOCKING KNOB (SEE FIG. I) 250W Electric Grass Trimmer HELPLINE NO 03448010979...
- Page 6 ORIGINAL INSTRUCTIONS ASSEMBLY 1. ASSEMBLY OF GRASS TRIMMER (SEE FIG A, B,C1, C2) NOTE: This may be fully assembled when you get the machine, however this instruction gives you full assembly details. Insert the upper parts into lower part firmly until a “click”...
- Page 7 ORIGINAL INSTRUCTIONS 3. MAINS SUPPLY CABLE STRAIN RELIEF (SEE guard will cause the motor to overheat, and FIG G) void the warranty. Double the main supply cable, about a foot from the end. Lead the loop through the hole on the rear handle and hook the loop over the upper cable holder.
-
Page 8: Operation
ORIGINAL INSTRUCTIONS WARNING: Allow 5 seconds or more for positions (See Fig. I). 2). When the handle is in desired position, the grass trimmer to stop rotating after releasing the ON/OFF switch. DO NOT invert loosen the button. the grass trimmer or place hands under the guard until the grass trimmer has come to a complete stop. - Page 9 ORIGINAL INSTRUCTIONS 6) While edging allow the tip of the line to make contact. Do not force the line. The edge guard helps protect the unit and keeps the unit from contacting the ground. Take extra caution while edging as objects can be thrown from the trimmer line.
- Page 10 ORIGINAL INSTRUCTIONS other material and the line will become 5) Press the spool down GENTLY until you feel jammed as a result. To clear the jam, follow it drop into place. Take care to keep the the steps listed below. lines from becoming trapped under the 1) Unplug the trimmer.
- Page 11 ring ORIGINAL INSTRUCTIONS on the spool until the line builds up to the agent or similarly qualified persons in order to notches in the spool rim. Do not overfill spool. avoid a hazard. The spool holds about 5m of line (see Fig T). MAINTENANCE Remove the plug from the socket before carrying out any adjustment, servicing or...
-
Page 12: Technical Data
ORIGINAL INSTRUCTIONS TECHNICAL DATA Voltage 230–240V~ 50Hz Power input 250W No load speed 12000 /min Max. cutting diameter 23cm Diameter of line 1.4 mm Line length 2*3m Protection class Machine weight 1.64kg NOISE AND VIBRATIOB DATA A weighted sound pressure 84.8 dB(A) K: 1.03dB(A) A weighted sound power 91.7dB(A) - Page 13 ORIGINAL INSTRUCTIONS the tool is switched off and when it is running idle but not actually doing the job. This may significantly reduce the exposure level over the total working period. Helping to minimise your vibration exposure risk. ALWAYS use sharp chisels, drills and blades Maintain this tool in accordance with these instructions and keep well lubricated (where appropriate) If the tool is to be used regularly then invest in anti vibration accessories.
-
Page 14: Troubleshooting
ORIGINAL INSTRUCTIONS TROUBLESHOOTING The following chart lists problem symptoms, possible causes and corrective action, if your electric grass trimmer does not operate properly. If these do not identify and correct the problem, contact your service agent. WARNING! Always switch the product off, disconnect it from power supply and let the product cool down before performing inspection, maintenance and cleaning work! Problem Possible Cause... -
Page 15: Environmental Protection
ORIGINAL INSTRUCTIONS ENVIRONMENTAL 13Amp fuse approved to BS1362 PROTECTION Connect This product has been marked with a Brown L (live) Blue to N symbol relating to removing electric (neutral) and electronic waste. This means that this product shall not be discarded with Outer sleeve Cable grip household waste but that it shall be returned...


Need help?
Do you have a question about the 1718638 and is the answer not in the manual?
Questions and answers