Table of Contents
Advertisement
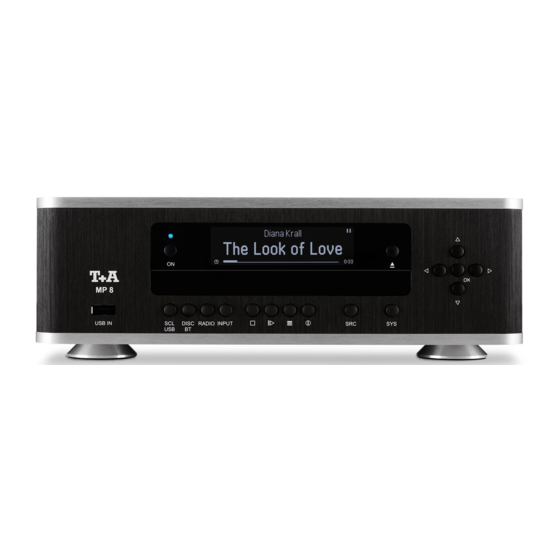
Quick Links
Advertisement
Table of Contents

Related Manuals for T+A MP 8


Summary of Contents for T+A MP 8
- Page 1 Owner`s Manual Bestell-Nr. 9103-0547 (V1.0)
- Page 3 Welcome We are delighted that you have decided to purchase a product. With your new MP 8 you have acquired a top-quality piece of equipment which has been designed and developed with the wishes of discerning listeners as absolute top priority.
- Page 4 About these instructions All the controls and functions of the MP 8 which are frequently used are described in the first section of these operating instructions. The second part 'Basic settings, Installation, Using the system for the first time' covers connections and settings which are very seldom required;...
-
Page 5: Table Of Contents
Front panel controls ....................8 Remote control ....................14 Charging the remote control handset ..............16 Operation with the App or the FM1000 ..............16 Basic settings of the MP 8 .................. 17 Calling up and operating the menu .................17 Source names ......................17 Display brightness ....................18 Display mode ......................18... - Page 6 Favourites lists ....................... 29 Search function ...................... 29 Operating music services ................... 30 General information....................30 Selecting the music service ..................30 Playback ........................ 30 Search function ...................... 31 Playlists and favourites ..................31 Operating the UPnP source ..................32 General information on the streaming client ............
- Page 7 The Configuration for a WLAN connection ..............53 Setting the parameters for a wireless network ............53 Selecting and connecting a WLAN by hand ............53 Searching for and Selecting the Network ..............53 Entering the Password (for encoded networks) ............53 Storing Network Settings and Restarting ..............54 Connecting to WLAN via the WPS-function ............54 WPS-function ......................54 Connecting WLAN automatically via the WPS function ...........54...
-
Page 8: Front Panel Controls
Front panel controls All the important functions of the MP 8 can be operated using the buttons on the front panel. Direct-acting buttons are provided for fundamental functions. Functions not needed so frequently are controlled using menus which are called up using the and -button. The following section explains the functions of the buttons on the machine, and the information provided on the screen. - Page 9 Selects one of the following radio sources: FM / VHF (FM RADIO source), DAB (DAB RADIO source), Internet radio (INTERNET RADIO source) or Podcasts. Press this button repeatedly until the desired source is displayed on the screen. ...
- Page 10 This socket can be used to recharge the battery in the FM8. Also possible if the MP 8 is in stand-by mode. CD drawer The CD drawer is located below the display. Please insert the disc with the label side facing upwards into the appropriate depression of the tray.
- Page 11 The bottom line (d) displays supplementary context-sensitive information (e.g. sampling frequency, elapsed time) The MP 8 features different display views for the playback of the sources. Large-format display: Enlarged display of the most important information, clearly legible even from a distance ...
- Page 12 These processes may take some time to complete depending on the speed of your network and the load upon During such periods the MP 8 may be muted, and may not respond to the controls. Please wait until the symbol disappears, then try again.
-
Page 14: Remote Control
(not available for all sources) * Only possible when the MP 8 is operated stand-alone. When the MP 8 is used in combination with a DAC 8 DSD, these buttons select the desired input on the DAC 8 DSD. In this case the ... - Page 15 Brief press Calls up the Favourites list stored on the MP 8. Long press Switches between stereo and mono reception during radio playback (FM Radio source only). The Stereo setting is constantly displayed in the screen window by a ...
-
Page 16: Charging The Remote Control Handset
USB IN socket of the MP 8 using the USB lead supplied in the set. The LED on the remote control handset flashes red when charging is in progress. -
Page 17: Basic Settings Of The Mp 8
When you call up this menu item using the / -button, a list of all the external sources of the MP 8 appears. Each source is followed by the assigned name, or if you have disabled the source concerned the note “disabled”. -
Page 18: Display Brightness
MP 8. Device name This menu point can be used to assign an individual name to the MP 8. menu item In a home network the device then appears under this name. -
Page 19: Music Services
If access data for the selected music service has already been stored, the new data will overwrite them. To use the new access data you must first perform a “Logout” for the service in question, then switch the MP 8 off and on again. -
Page 20: Device Info
Device Info At this menu point you will find information on the status of the installed menu item software and the factory reset. Sub-point At this point it is possible to initiate a firmware update. The update can be Update accessed from an Internet connection. -
Page 21: Operating The Sources In Detail
Operating the sources in detail Favourites lists General The MP 8 includes the facility to create Favourites lists. The purpose of information these lists is to store radio stations, so that they can be accessed swiftly. Each of the sources FM radio, DAB radio, and Internet radio features its own Favourites list. -
Page 22: Erasing A Favourite From The Favourites List
Open the Favourites list by pressing the button. Use the Erasing a favourite from / buttons to select the station in the list which you wish to the Favourites erase, then hold the red button pressed in; this action removes list the item from the Favourites list. - Page 23 Now move the activated favourite to your preferred position in the Favourites list. A further press on the / -button de-activates the Sort function, and the favourite is stored at the new position. Briefly press the / - button again to close the Favourites list.
-
Page 24: Operating The Radio
Operating the radio The MP 8 features an FM tuner (VHF radio), a DAB / DAB+ receiving section (digital radio) and also includes the facility to stream Internet radio. The following section describes in detail how to operate the individual radio sources. -
Page 25: Automatic Station Search
A brief press on the -button on the machines front panel or a long Automatic station search - press on the button on the FM8 remote control calls up the Station list menu. The following select points are available: If you wish to create a new station list, select the item “Create new list”... -
Page 26: Switching Radio Text On And Off
With or without Radiotext. Mono / Stereo You can toggle the radio of the MP 8 between stereo and mono reception (only FM – by a long press on the -button. The reception mode is shown on... -
Page 27: Automatic Station Search
These lines display information which is broadcast by the station (e.g. Radio text). Display of Stereo ''. The field strength and therefore the reception quality to be expected from the set transmitting station can be assessed from the field strength. Bit-rate of the broadcasting station when listening to DAB radio. -
Page 28: Rds Functions
Internet-Radio and podcasts Selecting Briefly press the -button on the FM8 remote control handset, or the -button on the MP 8 - repeatedly if necessary - until the Internet Radio source “Internet Radio” is displayed on the screen. as source Select the “Podcasts”... -
Page 29: Favourites Lists
Stopping playback A long press on the button of the FM8 or a brief press on the button on the MP 8`s front panel halts playback. Favourites Stations to which you often listen can be stored in a Favourites list; this makes it easier to select them (see the section entitled “Favourites list”). -
Page 30: Operating Music Services
Selecting the Briefly press the -button on the FM8 remote control handset, or music service the -button on the MP 8 - repeatedly if necessary - until the desired music service is displayed on the screen. Playback The music content to be played is selected with the help of Select lists. -
Page 31: Search Function
Once created, the playlists appear in the Select list of the corresponding music service, where they can be called up and played via the MP 8 The location within the select list at which the playlists can be accessed varies from one music service to another. -
Page 32: Operating The Upnp Source
MP 8 cannot be exploited with all servers or media. You may therefore find that in many cases not all the functions described in... -
Page 33: Playback Of Directories
Stopping playback A long press on the button of the FM8 or a brief press on the button on the MP 8`s front panel halts playback. Skipping tracks A brief press on the / buttons during playback causes the device to jump to the next or previous piece of music within the current playlist. -
Page 34: Playing Usb Memory Media
Playing USB memory media (USB Media source) General The MP 8 is capable of playing music files stored on USB memory information media, and features two USB sockets for this purpose: USB IN on the front panel and USB HDD on the back panel. -
Page 35: Playback Of Directories
Stopping playback A long press on the button of the FM8 or a brief press on the button on the MP 8`s front panel halts playback. Skipping tracks A brief press on the / buttons during playback causes the device to jump to the next or previous piece of music within the current playlist. -
Page 36: Operating The Bluetooth Source
Before music from a Bluetooth-capable device can be played through the audio transfer MP 8, the external device must first be registered to the MP 8. As long as the MP 8 is switched on and no device is connected, it is always ready to receive. -
Page 37: Notes
Please note that many AVRCP-capable mobile devices do not support the controlling through the MP 8. In case of doubt, please ask the manufacturer of your mobile device. Notes The MP 8 has been tested with a large number of Bluetooth-capable mobile devices. -
Page 38: Operating The Disc Player
Selecting CD Briefly press the button on the FM8 remote control handset, or as source the button on the MP 8 - repeatedly if necessary - until the source “Disc” is displayed on the screen. Open the CD drawer by pressing the button on the FM8 or by Inserting a CD pressing the ... -
Page 39: Variations
button repeatedly if necessary. Playback mode The CD player in the MP 8 features various playback modes. During playback the current playback mode is shown on the screen. A long press on the button, repeatedly if necessary, causes the Repeat ... -
Page 40: Playback Program
Program cassette recording. A playback program can only be created for the CD currently in the disc drawer of the MP 8. The program remains stored until it is erased again, or until the CD drawer is opened. When you place the CD in the drawer, the screen displays the total number of tracks on the disc, e.g.: '13 Tracks... -
Page 41: Installation, Using The System For The First Time, Safety Notes
Installation, Using the system for the first time, Safety notes This section describes all those matters which are of fundamental importance when setting up and first using the equipment. This information is not relevant in daily use, but you should nevertheless read and note it before using the equipment for the first time. -
Page 42: Back Panel Connections
DIGITAL IN 1 Inputs for digital source devices with coaxial (RCA) outputs. DIGITAL IN 2 At this input the MP 8 accepts digital stereo signals (S/P-DIF signals) with sampling rates from 32kHz up to 192 kHz. DIGITAL IN OPT Inputs for digital source devices with optical (TOSLINK) outputs. - Page 43 ‘Appendix A’. If the MP 8 is operated in conjunction with a DAC 8 DSD, the USB input of the DAC 8 DSD is used to connect the MP 8. In this case the USB INPUT on the MP 8 is used to connect the MAC or Windows computer.
-
Page 44: Installation And Wiring
Installation and wiring Carefully unpack the unit and store the original packing material carefully. The carton and packing are specially designed for this unit and will be needed again if you wish to move the equipment at any time. If you have to transport the device, it must always be carried or sent in its original packaging in order to prevent damage and defects. - Page 45 Loudspeaker Loudspeaker cables and signal cables (inter-connects) have a and signal significant influence on the overall reproduction quality of your sound cables system, and their importance should not be under-estimated. For this reason recommends the use of high-quality cables and connectors.
-
Page 46: Safety Notes
Safety notes For your own safety please consider it essential to read these operating instructions right through, and observe in particular the notes regarding setting up, operation and safety. Installation Please consider the weight of the device. Never place the device on an unstable surface;... - Page 47 Enclosure Liquid or particles must never be allowed to get inside the unit through openings the ventilation slots. Mains voltage is present inside the unit, and any electric shock could cause serious injury or death. Never exert undue force on mains connectors. Protect the unit from drips and splashes of water;...
- Page 48 Approval and In its original condition the unit meets all currently valid European conformity regulations. It is approved for use as stipulated within the EC. By attaching the CE symbol to the unit declares its conformity the with EC directives EC directives (See page 4) and the national laws based on those directives.
-
Page 49: Network Configuration
Information Powerline LAN) or in wireless networks (WLAN). If you wish to use your MP 8 in your home network, you must first enter the necessary network settings on the MP 8. This includes entering the network parameters such as the IP address etc. both for wired and wireless operation. - Page 50 Closing the Once you have correctly set all the parameters, select the menu item 'Store and exit?', then press the button. This action causes the MP 8 to menu accept the settings, and you should see the available network media sources (Internet radio, UPnP-AV server, etc.) displayed in the main menu.
-
Page 51: The Configuration For A Wired Ethernet Lan Or Power-Line Lan Connection
Open the System Configuration menu by pressing the button Network on the remote control handset or the front panel of the MP 8. Use the / buttons to select the “Network” menu point, then confirm by pressing the button. - Page 52 In this mode an IP address is automatically assigned to the MP 8 by the router. The screen shows only the MAC address and the message DHCP state ON. In this case the address input fields shown in the illustration do not appear in the menu.
-
Page 53: The Configuration For A Wlan Connection
The Configuration for a WLAN connection Disconnect a possibly connected LAN-cable. Setting the parameters for Now switch the MP 8 on, and open the System Configuration menu by a wireless pressing the -button on the remote control handset or the network -button on the front panel of the MP 8. -
Page 54: Storing Network Settings And Restarting
The MP 8 supports WPS for WLAN setup. WPS (Wi-Fi Protected Setup) an easy process for establishing a secure WLAN connection. WPS can be used to connect the MP 8 with your router in a quick and convenient way. For that usage most modern routers have implemented the WPS function. - Page 55 The window shown below will appear once the WLAN is selected: Select the “Login” menu point and press the button to activate it. Now select the setting „Auto (WPS)“ and confirm it with the button. Now select the “Store and exit?” menu point and press the button.
-
Page 56: Trouble Shooting
IR remote The integrated battery of the FM8 is empty. control. Remedy: For charging connect the FM8 to the USB IN socket of the MP 8. Cause 2: The remote control transmitter has no direct line-of-sight with the unit. Remedy:... - Page 57 This can be a LAN or WLAN network or a USB storage device. Remedy: If the MP 8 shall be operated without network (LAN / WLAN) please connect at least a USB stick. The device does not work...
-
Page 58: Software Update
Internet connection generally If you are operating the MP 8 in conjunction with a DAC 8 DSD, the machine can also be updated via the SYS connection. The wiring diagram for the machines is shown in 'Appendix A'. -
Page 59: Notes On Energy Saving
In stand-by mode the current drain of the MP 8 is less than 0.5 Watt. If you intend not to use the device for a long period, it should be disconnected from the mains socket, i.e. -
Page 60: Wiring Diagram
Wiring diagram Attention! A properly set up home network with router must be installed and in operation to use the MP 8. For the use of internet radio a DSL access to the internet is needed. For questions regarding setting up your network and internet connection please ask your system administrator or any network specialist. -
Page 61: Wiring Diagram
Wiring diagram... -
Page 62: Specification
Appendix B Specification CD Player Formats CD/DA,CD-R, CD-RW / CD-Tex Frequency response 2 Hz - 20 kHz/100 dB Streaming Client Formats MP3, WMA, AAC, AIFF, OGG-Vorbis, FLAC + WAV PCM 32...192 kHz,16/32 Bit; MP3 up to 320 Data rates kBit; constant and variable data rate Services Tidal, Deezer, qobuz (subscription required) Media server... - Page 63 Connections Inputs SP/DIF (16-24bit): 2x coax (192kHz), 1x TOS-Link (96kHz) Outputs Coaxial digital output (IEC 60958), DAC 8 LINK USB-Output 100 – 240 V, 50 – 60 Hz Power requirement max. 20 W, Power consumption Eco Standby <0,5 W Comfort Standby 3 W Dimensions (WxHxD) 27 x 9 x 27 cm Weight...
- Page 64 elektroakustik GmbH & Co. KG Herford Deutschland Germany Allemagne...
Need help?
Do you have a question about the MP 8 and is the answer not in the manual?
Questions and answers