
Subscribe to Our Youtube Channel
Related Manuals for Tektronix MSO4104B


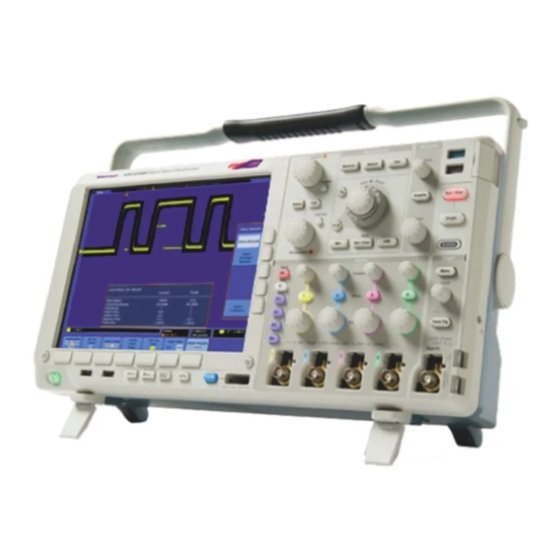
Summary of Contents for Tektronix MSO4104B
- Page 1 MSO4000B and DPO4000B Series Digital Phosphor Oscilloscopes Service Manual *P077051201* 077-0512-01...
- Page 3 This document applies to firmware version 1.00 and above. Warning The servicing instructions are for use by qualified personnel only. To avoid personal injury, do not perform any servicing unless you are qualified to do so. Refer to all safety summaries prior to performing service. www.tektronix.com 077-0512-01...
- Page 4 Copyright © Tektronix. All rights reserved. Licensed software products are owned by Tektronix or its subsidiaries or suppliers, and are protected by national copyright laws and international treaty provisions. Tektronix products are covered by U.S. and foreign patents, issued and pending. Information in this publication supersedes that in all previously published material.
-
Page 5: Table Of Contents
Table of Contents General Safety Summary ..................Preface ......................Manual Conventions..................Where to Find Operating Information................Theory of Operation....................Power Supply....................I/O Board ....................... Main Board and Analog Board................Front-Panel Board ..................... Adjustment Procedure....................Required Equipment................... Before Adjustments.................... Navigating During Adjustments ................Connecting the Equipment.................. - Page 6 Table of Contents List of Figures Figure 1: Four-channel model MSO4000B and DPO4000B series block diagram ......Figure 2: Two-channel model MSO4000B and DPO4000B series block diagram......Figure 3: Removing tabs from the front protective cover............. Figure 4: Module locator ..................Figure 5: Primary troubleshooting procedure ..............
- Page 7 Table of Contents List of Tables Table 1: External inspection checklist................Table 2: Internal inspection checklist ................Table 3: Parts list column descriptions................Table 4: Replaceable parts – Front Panel assembly ............Table 5: Replaceable parts – Display, Analog board, and Main board ........Table 6: Replaceable parts –...
-
Page 8: General Safety Summary
General Safety Summary General Safety Summary Review the following safety precautions to avoid injury and prevent damage to this product or any products connected to it. To avoid potential hazards, use this product only as specified. Only qualified personnel should perform service procedures. To Avoid Fire or Personal Use proper power cord. - Page 9 General Safety Summary Terms in This Manual These terms may appear in this manual: WARNING. Warning statements identify conditions or practices that could result in injury or loss of life. CAUTION. Caution statements identify conditions or practices that could result in damage to this product or other property.
- Page 10 General Safety Summary MSO4000B and DPO4000B Series Digital Phosphor Oscilloscopes Service Manual...
-
Page 11: Preface
Preface This service manual provides information that you need to troubleshoot, disassemble, and replace parts on the following Tektronix oscilloscopes: Model Bandwidth Analog Channels MSO4104B 1 GHz MSO4104B-L 1 GHz MSO4102B 1 GHz MSO4102B-L 1 GHz MSO4054B 500 MHz 350 MHz... - Page 12 Preface viii MSO4000B and DPO4000B Series Digital Phosphor Oscilloscopes Service Manual...
-
Page 13: Where To Find Operating Information
Where to Find Operating Information For information on installing and operating your DPO4000B or your MSO4000B Series Digital Phosphor Oscilloscope, refer to the Tektronix MSO4000B Series and DPO4000B Series Digital Phosphor Oscilloscopes User Manual, which was provided with your oscilloscope. This manual is also available, in 11 languages, at www.tektronix.com/manuals. - Page 14 Where to Find Operating Information MSO4000B and DPO4000B Series Digital Phosphor Oscilloscopes Service Manual...
-
Page 15: Theory Of Operation
Theory of Operation This chapter describes the electrical operation of the oscilloscope to the module level. The block diagrams show four-channel and two-channel oscilloscope module interconnections. (See Figure 1 on page 5.) (See Figure 2 on page 6.) Power Supply The Power Supply board converts AC line voltage to +12 V to power for all internal circuits. -
Page 16: Front-Panel Board
Theory of Operation Power Converter The Power Converter receives +12 V power and +5 V standby power from the main power supply and generates voltages for the analog and digital circuitry on the Main board. The front panel receives the +5 V standby power, and uses input from the power switch to turn the oscilloscope on and off. -
Page 17: Figure 1: Four-Channel Model Mso4000B And Dpo4000B Series Block Diagram
Theory of Operation Figure 1: Four-channel model MSO4000B and DPO4000B series block diagram MSO4000B and DPO4000B Series Digital Phosphor Oscilloscopes Service Manual... -
Page 18: Figure 2: Two-Channel Model Mso4000B And Dpo4000B Series Block Diagram
Theory of Operation Figure 2: Two-channel model MSO4000B and DPO4000B series block diagram MSO4000B and DPO4000B Series Digital Phosphor Oscilloscopes Service Manual... -
Page 19: Adjustment Procedure
500 ns. 1 kHz with <50 ps ch-ch Edge Generator skew Adjustment tool Tektronix part number Nonconducting shaft with diameter = 0.1 in (= 2.5 mm) 003-1433-00 The following table specifies the equipment that is required to adjust the MSO4000B Series oscilloscopes. -
Page 20: Before Adjustments
Specifications and Performance Verification Technical Reference manual, which was provided with your product. This manual is also available at www.tektronix.com/manuals.) Before performing the adjustment procedure, you must warm up the oscilloscope and the oscilloscope calibrator for at least 30 minutes in an ambient temperature between 20 °C and 30 °C. -
Page 21: Connecting The Equipment
Adjustment Procedure Connecting the Equipment Connect the Oscilloscope Connect the oscilloscope and the calibrator to the same AC power circuit. Using a common power strip will accomplish this. and the Calibrator to AC Power NOTE. Connecting the equipment to separate AC power circuits can result in offset voltages between the equipment, which can invalidate this procedure. -
Page 22: Factory Adjustment Procedure
Adjustment Procedure Factory Adjustment Procedure NOTE. Changing oscilloscope settings will abort the adjustment procedure. Do not turn any knobs or push any oscilloscope buttons except those used to navigate the procedure. To perform the factory adjustment procedure, complete these steps: 1. - Page 23 Adjustment Procedure d. In the utility page menu, select Calibration by turning the Multipurpose a knob. e. Push the Factory lower-bezel button. Note the important information that is displayed in the factory dialog box. g. Push the OK Do Factory Calibration side-bezel button to start the adjustment process.
- Page 24 If a step fails twice, return to the first step in the adjustment procedure and try the entire procedure again. If the procedure still fails, it could indicate a problem with the oscilloscope. Contact Tektronix for technical support (see the contact information at the beginning of this manual).
-
Page 25: Setting The Calibrator Output Signal
Adjustment Procedure Setting the Calibrator Output Signal This section tells how to set the calibrator for the DC Voltage, Time Mark, Deskew and Sine signals that are required by the adjustment procedure. DC Voltages Use one of the following three methods to set the DC voltage: to 0 V, to any voltage into 1 MΩ... - Page 26 Adjustment Procedure For voltages >5.5 V into 50 Ω. Complete these steps to set the calibrator output for a DC Voltage signal >5.5 V into 50 Ω (for example, to select 6 V or -6 V in 50 Ω mode): 1.
- Page 27 Adjustment Procedure 3. Verify that the calibrator is in direct mode by pushing the lower-bezel button until 1.0 is selected. 4. Set the calibrator amplitude as follows: a. Select the Amplitude field using the front-panel tab key b. Set the voltage specified by the oscilloscope prompt. 5.
- Page 28 Adjustment Procedure Deskew Complete these steps to set the calibrator output for deskew. NOTE. If you are adjusting an MSO4000B Series, and the oscilloscope prompts you to connect the digital channels, connect the digital probe according to the instructions in Connecting the Equipment. (See page 9, Connecting the Equipment.) 1.
- Page 29 Adjustment Procedure Troubleshooting the Refer to the following table for solutions to problems that you might encounter during the calibration procedure. Adjustment Procedure Problem Possible solutions The instrument fails an adjustment step Are the channels hooked up properly? Is the signal being sent to the correct channels? (Check for the green lights on the probe heads.) Is the signal set to the correct waveform,...
- Page 30 Adjustment Procedure MSO4000B and DPO4000B Series Digital Phosphor Oscilloscopes Service Manual...
-
Page 31: Maintenance
This section contains the information needed to do periodic and corrective maintenance on the oscilloscope, as well as repackaging instructions for returning the oscilloscope to Tektronix for service. Preventing ESD Before servicing this product, read the General Safety Summary and the Service Safety Summary at the front of the manual, and familiarize yourself with the following electrostatic discharge (ESD) information. - Page 32 Maintenance How often you do maintenance depends on the severity of the environment in which the oscilloscope is used. A proper time to perform preventive maintenance is just before oscilloscope adjustment. General Care The cabinet helps keep dust out of the oscilloscope and should normally be in place when operating the oscilloscope.
-
Page 33: Table 1: External Inspection Checklist
Use a 75% isopropyl alcohol solution as a cleaner and rinse with deionized water. Before using any other type of cleaner, consult your Tektronix Service Center or representative. Exterior Inspection Inspect the outside of the oscilloscope for damage, wear, and missing parts, using the following table as a guide. - Page 34 Maintenance Table 2: Internal inspection checklist (cont.) Item Inspect for Repair action Resistors Burned, cracked, broken, blistered condition. Remove and replace damaged circuit board. Resolder joint and clean with isopropyl Solder connections Cold solder or rosin joints. alcohol. Remove and replace damaged circuit board. Capacitors Damaged or leaking cases.
-
Page 35: Module Removal
Maintenance Module Removal WARNING. Only qualified personnel should perform service procedures. Before performing this or any other procedure in this manual, read the General Safety Summary and Service Safety Summary located at the beginning of this manual. Also, to prevent possible injury to service personnel or damage to electrical components, read Preventing ESD. -
Page 36: Figure 4: Module Locator
Maintenance To Remove Modules To remove any of the instrument modules or assemblies, you must first remove the rear cover and separate the front chassis from the rear chassis. To remove the Front Panel board assembly or the front panel case assembly, you must first remove the Main board assembly, the Analog board assembly, and the front chassis. -
Page 37: Troubleshooting
Maintenance Troubleshooting This section contains information and procedures to help you isolate a defective module in the MSO4000B Series and DPO4000B Series oscilloscopes. WARNING. Before performing this or any other procedure in this manual, read the General Safety Summary and Service Safety Summary found at the beginning of this manual, and, to prevent possible injury to service personnel or damage to electrical components, read Preventing ESD. -
Page 38: Figure 5: Primary Troubleshooting Procedure
Maintenance Figure 5: Primary troubleshooting procedure MSO4000B and DPO4000B Series Digital Phosphor Oscilloscopes Service Manual... -
Page 39: Figure 6: Ac Power Supply Troubleshooting Procedure
Maintenance Figure 6: AC power supply troubleshooting procedure NOTE. The test point voltages are printed on the Main board. From left to right in the illustration, they are: +1.225 V, -1.2 V, -2.5 V, +1.5 V, -5 V, +12 V, +1.8 V, +5 VA, +5 VSB, and +2.5 V, +3.3 V, +5 V. -
Page 40: Figure 7: Module Isolation Troubleshooting Procedure
Maintenance Figure 7: Module isolation troubleshooting procedure MSO4000B and DPO4000B Series Digital Phosphor Oscilloscopes Service Manual... -
Page 41: Unpacking And Repacking Instructions
A complete description of the service required Seal the shipping carton with an industrial stapler or strapping tape. Mark the address of the Tektronix Service Center and also your own return address on the shipping carton in two prominent locations. See www.tektronix.com/service to find a service center near you. - Page 42 Maintenance MSO4000B and DPO4000B Series Digital Phosphor Oscilloscopes Service Manual...
-
Page 43: Replaceable Parts List
Level revision level number. When you order parts, Tektronix will provide you with the most current part for your product type, serial number, and modification (if applicable). At the time of your order, Tektronix will determine the part number revision level needed for your product, based on the information you provide. -
Page 44: Using The Replaceable Parts List
Items in this section are referenced by figure and index numbers to the exploded view Number illustrations that precede the list. Tektronix Part Use this part number when ordering replacement parts from Tektronix. Number 3 and 4 Serial Number Column three indicates the serial number at which the part was first effective. Column four indicates the serial number at which the part was discontinued. -
Page 45: Table 4: Replaceable Parts - Front Panel Assembly
Replaceable Parts List Table 4: Replaceable parts – Front Panel assembly Fig. & Tektronix Serial Serial index part number number effective discont’d Name & description FRONT PANEL ASSEMBLY 065-0854-01 FRONT CASE ASSEMBLY, MSO4000B SERIES 065-0855-01 FRONT CASE ASSEMBLY, DPO4000B SERIES 366-0861-01 ASSEMBLY, KNOB: .925 DIAMETER, SOFT TOUCH... -
Page 46: Figure 8: Exploded View, Front Panel Assembly
Replaceable Parts List Figure 8: Exploded view, Front Panel assembly MSO4000B and DPO4000B Series Digital Phosphor Oscilloscopes Service Manual... -
Page 47: Table 5: Replaceable Parts - Display, Analog Board, And Main Board
131-7622-00 CONN, RECEPT; GROUND JACK - - - - - - - MAIN BOARD ASSEMBLY. Return the instrument to Tektronix for service. Must be replaced with the ANALOG BOARD ASSEMBLY. - - - - - - - ANALOG BOARD ASSEMBLY. Return the instrument to Tektronix for service. Must be replaced with the MAIN BOARD ASSEMBLY. -
Page 48: Figure 9: Display, Analog Board, And Main Board Assembly
Replaceable Parts List Figure 9: Display, Analog board, and Main board assembly MSO4000B and DPO4000B Series Digital Phosphor Oscilloscopes Service Manual... -
Page 49: Table 6: Replaceable Parts - Rear Chassis And Connecting Modules
Replaceable Parts List Table 6: Replaceable parts – Rear chassis and connecting modules Figure Serial Serial index Tektronix part no. effective discont’d Qty. Name and description REAR CHASSIS, POWER SUPPLY, I/O BOARD 119-7597-00 POWER SUPPLY; ROHS COMPLIANT; SAFETY CONTROLLED 211-1272-00 SCREW, MACHINE: 6–32 x 0.250, PNH, STL, ZNPL, T-15 TORX DRIVE... -
Page 50: Figure 10: Rear Chassis And Connecting Modules
Replaceable Parts List Figure 10: Rear chassis and connecting modules MSO4000B and DPO4000B Series Digital Phosphor Oscilloscopes Service Manual... -
Page 51: Figure 11: External Parts
Replaceable Parts List Table 7: Replaceable parts – external parts Figure Serial Serial index Tektronix part no. effective discont’d Qty. Name and description EXTERNAL PARTS 200-5130-00 FRONT PROTECTIVE COVER 065-0856-00 REAR CASE ASSEMBLY 211-1272-00 SCREW, MACHINE: 6–32 x 0.250, PNH, STL, ZNPL, T-15 TORX DRIVE... -
Page 52: Figure 12: Rear Chassis, Showing Cables And Connectors
Replaceable Parts List Table 8: Replaceable parts – cable and connectors, rear chassis Figure Serial Serial index Tektronix part no. effective discont’d Qty. Name and description CABLES, REAR CHASSIS 174-5835-00 CABLE ASSEMBLY, LINE INPUT 343-1736-00 CLAMP, CABLE Figure 12: Rear chassis, showing cables and connectors... -
Page 53: Figure 13: Main Board, Showing Cable And Connectors
Replaceable Parts List Table 9: Replaceable parts – cable and connectors, Main board Figure Serial Serial index Tektronix part no. effective discont’d Qty. Name and description Cable, Main Board 174-5809-00 CABLE, MAIN BOARD TO FRONT PANEL BOARD 346-0120-00 STRAP, TIEDOWN; 5.5 L MIN, PLASTIC, WHITE...
Need help?
Do you have a question about the MSO4104B and is the answer not in the manual?
Questions and answers