MJX R/C Bugs 2 User Manual
Bugs series brushless drone with gps
Hide thumbs
Also See for Bugs 2:
- User manual (36 pages) ,
- Instruction manual (17 pages) ,
- Instruction manual (14 pages)
Table of Contents
Advertisement
Bugs Series Brushless Drone with GPS
User Manual
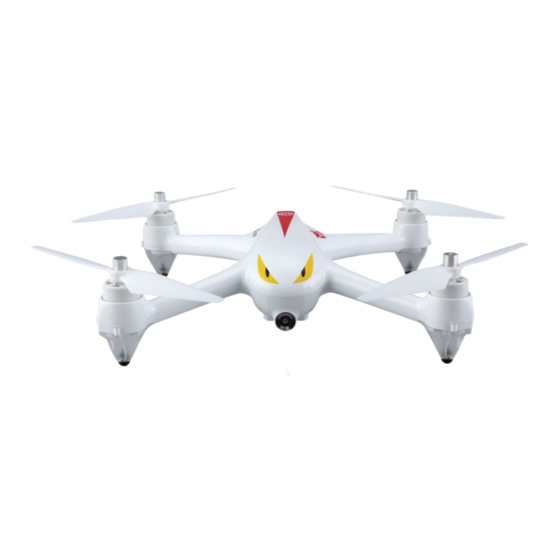
(Recording camera)
Independent ESC
Brushless motor
GPS Positioning
(automatic lock protection,
(1806 1800KV)
high temperature lock protection)
Super-long control
Two direction 2.4GHZ
One key return
1080P Camera
distance
(weak signal alarm, low voltage alarm)
Advertisement
Table of Contents

Related Manuals for MJX R/C Bugs 2


Summary of Contents for MJX R/C Bugs 2
- Page 1 Bugs Series Brushless Drone with GPS User Manual (Recording camera) Independent ESC Brushless motor GPS Positioning (automatic lock protection, (1806 1800KV) high temperature lock protection) Super-long control Two direction 2.4GHZ One key return 1080P Camera distance (weak signal alarm, low voltage alarm)
-
Page 2: Table Of Contents
Contents: Important Statement And Safety Guildlines Product Configuration Major Parts Of The Remote Controller LCD Screen How To Install The Battery Of Remote Controller Remote Cotroller Signal Connection Throttle Mode Switch How To Change Throttle Mode Control Sticks Calibration Remote Controller Status Indicator Major Parts Of The Aircraft How To Charge The Battery Of Aircraft Product Assemble... -
Page 3: Important Statement And Safety Guildlines
Important Statement And Safety Guidelines Thank you for purchasing MJX product. Please read this manual carefully before use and retain it for future reference. Important Statement ● This aircraft is not a toy, but hobby grade model. It should be assembled and operated properly. Pilot must operate this hobby model in safe way. -
Page 4: Product Configuration
● Bear proper operation and safe flight guidelines in mind Please take a careful look at the manuals before flights for important information of product functions and operation tips, and learn how to use the accessory, safe flight always comes first. Stay informed of and abide strictly by relevant local laws and regulations. -
Page 5: Major Parts Of The Remote Controller
Major Parts Of The Remote Controller [1] Left stick [2] Gesture/ GPS mode Switch [3] Power indicator [4] Power switch [5] Right stick [6] Headless mode Switch Model [7] LCD Display [8] Return-to-Home(RTH)/One key landing [9] Unlock [10] [10] Photo/Video [11] [11] Enter/Exit Return-to-Home LCD Screen... -
Page 6: How To Install The Battery Of Remote Controller
How To Install The Battery Of Remote Controller Unscrew counter clockwise to open the battery compartment cover, install 4x AA batteries into the battery compartment according to the given polarity, screw clockwise to close the battery compartment. ●Insert batteries with correct polarity. ●Non rechargeable batteries are not to be charged;... -
Page 7: How To Change Throttle Mode
Attention: To change the stick mode of the remote controller , please make sure that your aircraft is under signal connection status( the indicator light keep flashing). If not, the stick mode could not be changed. Stick Mode Forward Control Throttle control Throttle control Forward Control... -
Page 8: Control Sticks Calibration
Control Stick Calibration Warm tips: Control sticks calibration has been completed by default. It is not necessary to calibrate the control stick unless pilot has felt unnormal stick travel. How to calibrate the control sticks Turn on the remote controller. Push down the calibration button and hold on for 3 seconds. -
Page 9: Remote Controller Status Indicator
Remote Controller Status Indicator Remote Controller Status Operation The remote controller is under signal connection Indicator lights flash quickly. status. Indicator lights flash slowly with steady beep.. beep sound and the battery legend “ ”on The remote controller is in low voltage status. LCD display flashing. -
Page 10: How To Charge The Battery Of Aircraft
How To Charge The Battery Of Aircraft To cater different demands from end users, 3 charging devices are designed and optional for charging. Charging device A:1 X adaptor only; Charging device B:1 X USB cable and 1X balance charging controller; Charging device C:1 X adaptor and 1 X balance charging controller. -
Page 11: Product Assemble
Battery Balance charger Charger Power outlet Attention: It is recommended to use the 5V 1-2A adapter for charging if charging by device B. ●Need adult supervision when this model is being played by children. ●Only batteries of the same or equivalent type as recommended are to be used. ●Insert batteries with correct polarity. -
Page 12: Battery Installation
Attention: Please install all fittings step by step as below plctures. Keep in mind that the propellers are distinguished by A & B mark and propellers screws are distinguished by dot mark.please pay attention to your rotation direction. Screw with dot Screw without dot Step 3 Step 3... -
Page 13: Aircraft Status Indicator
How to remove the battery Put your thumb and index finger on the designated position and press with appropriate force and pull backward. The battery will be removed. To avoid slipping, please keep your finger and your aircraft dry and clean. Aircraft Status Indicator Indicator Status Meanings... -
Page 14: Gyroscope Calibration
Gyroscope Calibration Set the aircraft on horizontal surface; push down both of the control sticks to the lower left corner (indicated as below photo). Once the front and rear lights are both green and flashing rapidly, it means that gyroscope is under calibration status. When the lights turn solid, calibration is succeeded. Model ●... -
Page 15: How To Lock And Unlock The Aircraft
Step 2 Vertical calibration Hold the aircraft with its camera facing down, and rotate it 360 degrees along its central axis for about 3 circles until the front light and rear light of the aircraft change from flashing to solid on. -
Page 16: One-Key Takeoff/Landing
One-Key Takeoff/Landing ● After aircraft unlocked, short-press the button(indicated as below), the aircraft will automatically takeoff and hover at 1.5m altitude. ● When the aircraft is flying, short-press the button(indicated as below), the aircraft will automatically land on the ground. Flight Mode Model Gesture Mode... -
Page 17: Return-To-Home(Rth)
Return-To-Home(RTH) The Return-to-Home(RTH) procedure brings the aircraft back to the last recorded Home Point. There are 3 types of RTH procedures: smart RTH, failsafe RTH and low battery RTH. The following sections describe them in detail. Description The Home Point is the location at which the aircraft Home Point takes off. -
Page 18: Low Voltage Rth
Low Voltage RTH When the aircraft's rear lights flash red slowly, battery icon “ ” is shown on the LCD screen, and steady beep, beep, beep..., beep,beep,beep sound is heard. At this moment, as long as the aircraft flying altitude is over 100 meters or the flying distance is over 300 meters, the aircraft will automatically fly back to the Home Point. -
Page 19: Signal Strength Indicator
Signal Strength Indicator Signal strength icon shows the strength of the received signal. The more, the better. Model Prepare The Flight Before You Take Off, Check And Make Sure That 1.The aircraft and the remote controller are full charged. 2.The propellers are installed correctly. 3.The motors work normally after unlocking. - Page 20 Clockwise propeller screw/ Front/rear LED Indicator Camera GPS Module Counterclockwise propeller screw B2C005 B2C006 B2C007 B2C008 Interleaving paper Compass Receiver PCB B2C009 B2C010 B2C011 B2C012 Clockwise motor Counter clockwise motor Battery Screws pack B2C013 B2C014 B2C015 B2C016 Remote controller Propeller changing tool Silicone rubber ring 708009 GR304...
-
Page 21: Trouble Shooting
Trouble Shooting Problem Solution The front and rear light green lights The remote controller is not linked to the aircraft, and of the aircraft flash rapidly it requires completing the signal connection steps. The front and rear lights of the aircraft 1.Check to see if the aircraft is in the stationary state. - Page 22 MADE IN CHINA...
Need help?
Do you have a question about the Bugs 2 and is the answer not in the manual?
Questions and answers