
Related Manuals for Philips NetCam DVR


Summary of Contents for Philips NetCam DVR
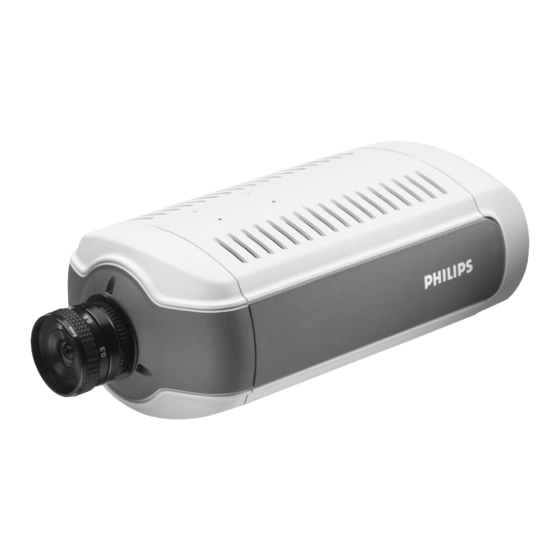
- Page 1 DVR_NC_ii_98911_0047.qxd 12/13/00 1:53 PM Page 1 NetCam DVR Philips Communication, Security & Imaging...
-
Page 2: Important Safeguards
DVR_NC_ii_98911_0047.qxd 12/13/00 1:53 PM Page 2 NetCam DVR Safety IMPORTANT SAFEGUARDS 1. Read Instructions: All the safety and operating instructions should be read before the unit is operated. 2. Retain Instructions: The safety and operating instructions should be retained for future reference. -
Page 3: Fcc Information
DVR_NC_ii_98911_0047.qxd 12/13/00 1:53 PM Page 3 NetCam DVR Safety 12. Damage Requiring Service: Unplug the unit from the outlet and refer servicing to qualified service personnel under the following conditions. If liquid has been spilled, or objects have fallen into the unit. -
Page 4: Safety Precautions
DVR_NC_ii_98911_0047.qxd 12/13/00 1:53 PM Page 4 NetCam DVR Safety SAFETY PRECAUTIONS This label may appear on the bottom of the unit due to space limitations. CAUTION:TO REDUCE THE RISK OF ELECTRICAL SHOCK, DO NOT OPEN COVERS. NO USER SERVICEABLE PARTS INSIDE. -
Page 5: Table Of Contents
Opening the ‘NetCam DVR Viewer’ ......21 Configuring NetCam DVR ........21 Configuring recording and system conditions . - Page 6 DVR_NC_ii_98911_0047.qxd 12/13/00 1:53 PM Page 6 NetCam DVR Contents...
-
Page 7: Introduction
Description DVR with a built-in HDD The NetCam DVR records images onto it’s own HDD at the maximum speed of 10 frames per second. Since the unit is equipped with a dedicated file system, it prevents recorded data from being damaged or lost in course of sudden power failure. -
Page 8: Unpacking
Unpack carefully. This is electronic equipment and should be handled with care to prevent damage to the unit. Check for the following items: NetCam DVR - 4-Channel Camera Style Network DVR AC Adapter & Power cable DC 12V, 1A Lens 8mm, f 1.3, C mount, already assembled... - Page 9 1:53 PM Page 9 NetCam DVR Section 1 Connection Function RS-232 transmit. RS-232 receive. NetCam DVR RS-485. (half-duflex). NetCam DVR RS-485. (half-duflex). Ground Input 1 + Isolated input port Input 1 - Isolated input port Input 2 + Isolated input port...
- Page 10 Page 10 NetCam DVR Section 1 Switch Function OUT/IN Configures NetCam DVR to accept input (IN) or output (OUT) signal to the BNC connector. 75 Ω (ON) or High impedance (OFF) (Loop through). 1, 2, 3, 4 OUT 1 75Ω...
-
Page 11: Installation
Confirm that the green LED of the Ethernet port blinks 2.1.2 Location Place NetCam DVR appropriately for your purpose Wa rning: Do not expose the camera lens to direct sunlight. When you operate NetCam DVR in the glaring light, we recommend using an auto iris lens. -
Page 12: Installing Netcam Dvr Setup Program
‘Modify’, ‘Repair’, and ‘Remove’. The three options are to fix the already installed NetCam DVR Viewer as well as to upgrade to a newer version. If you have a problem with the NetCam DVR Viewer, you may modify manually, repair automatically, or remove and reinstall again. - Page 13 The ‘Confirm File Deletion’ window is displayed. Press ‘Yes’ button. During the deleting process, you are prompted to delete share files MSFLXGRD.OCX, MSCOMCT2.OCX, COMCTL32.OCX. It is recommended not to delete the files. After completion, you should install the NetCam DVR Viewer again.
-
Page 14: Assigning Ip Address And Starting Configuration
NetCam DVR Section 2 Assigning IP address and Starting Configuration To enable access to the NetCam DVR, first you have to assign an appropriate IP. Terminology IP Address: Acquire IP address from network administrator. MAC Address: The 12digit number on the label at the bottom of NetCam DVR. -
Page 15: Starting The Setup Program Of Netcam Dvr
211. 53.133.92). You should key in a password in the ‘Admin’s Password’ box to set up the NetCam DVR or to change the IP address. Default password is ‘admin’. You can change the IP address by clicking the ‘Change IP Addr’ button or change the set up by clicking the ‘Start’ button. - Page 16 You can set the IP address, Network Mask, Broadcast address, Gateway address, and DNS addresses. When the addresses are not assigned correctly, you cannot access the NetCam DVR remotely. If you do not assign an IP address to the NetCam DVR, you cannot access the product regardless of the NetCam DVR’s...
- Page 17 Camera Config: Define the CCD format of the NetCam DVR and CCD cameras [‘NTSC’ or ‘PAL’]. You can rotate the image by 180°. If you rotate the image that is sent from each camera, you can mount the NetCam DVR directly on the ceiling [i.e. upside down].
-
Page 18: Assigning Ip Address With Arp Command
NetCam DVR Section 2 HDD Use: Click the ‘HDD Enable’ field to enable the NetCam DVR to record images on it’s HDD. If not enabled, the NetCam DVR will not record nor replay. (Default figure is set to HDD disable. In this case, every button on a main frame that relates to recording and replaying is disabled.) You can format... - Page 19 NetCam DVR Section 2 Using ARP in Windows 95 Start a DOS window and type the following commands. arp -s <NetCam DVR IP add.> <NetCam DVR Ethernet add.> <my PC IP add.> ping <NetCam DVR IP address> Example arp -s 200.243.232.178 00-40-8c-10-00-86 200.243.232.130 ping 200.243.232.178...
- Page 20 IP address is available, or if a PC (or notebook computer) has the same local network’s IP address as the NetCam DVR. The same local IP address of C grade network means that first 3 numbers are the same but the fourth numbers are different.
-
Page 21: Configuring Netcam Dvr
Configuring NetCam DVR Connect: To connect the NetCam DVR, highlight the respective name and click the ‘Connect’ button. Edit: To add, remove, and edit the IP addresses of NetCam DVR, click the ‘Edit’ button. The “Resource Edit’ window is displayed. - Page 22 Page 22 NetCam DVR Section 3 ADD: You can add a new NetCam DVR. You can also add a backup file as a resource. All the backup files of the NetCam DVR can be only be accessed through NetCam DVR Viewer.
-
Page 23: Configuring Recording And System Conditions
When this option is enabled the NetCam DVR can detect motion, but the source channel is restricted to one. Therefore, you should select which channel is assigned to detect motion and send signals to it’s CPU. You can set sensitivity of motion detection via the ‘THR’... - Page 24 ‘Motion Detect Channel’ option for the respective channel that has the assigned motion detection function). If you check channel 1 as a source channel in relation to ‘Motion Detect’, the NetCam DVR records the video from channel 1 when the NetCam DVR detects motion through assigned motion detect channel.
- Page 25 DVR_NC_ii_98911_0047.qxd 12/13/00 1:53 PM Page 25 NetCam DVR Section 3 HDD: Configures the self-contained HDD: HDD Management: This shows the status of the HDD. The left side shows the same results in graphic format. You can format the HDD by clicking the ‘HDD Format’...
- Page 26 The only way to repair, is to initialize with special software developed by Philips. However, this is not provided to end users. Screen Adj.: You can adjust the screen...
- Page 27 1:53 PM Page 27 NetCam DVR Section 3 If you click the ‘CD (650M)’ option, the NetCam DVR will back-up a file of 650MB. If the selected data size is bigger than 650MB, the NetCam DVR will split the total data into partitions of 650MB.
-
Page 28: Real-Time Image Monitoring
When you access the NetCam DVR for the first time, all 4 channels are viewed in gray. Therefore, you should setup the NetCam DVR before connection. When you enable any channel, it appears in black. You can then view live images. -
Page 29: Recorded Image Replay
Click the ‘Disable’ to return to full view option. Click the ‘Attenuation’ button to change the unfocused area’s image quality. Controlling pan/tilt/zoom (Only available when the pan/tilt/zoom option is enabled for the NetCam DVR.) Zoom: To zoom in and out. Accel: To set controlling speed of pan/tilt/zoom. - Page 30 1,000 frames for each click. The frame number panel (Upper 2) also changes by a unit of 1,000 frames. Upper 1: Displays the NetCam DVR recording start date/time of the current 1,000 frames. Upper 2: Displays the exact frame number of the current image.
- Page 31 DVR_NC_ii_98911_0047.qxd 12/13/00 1:53 PM Page 31 NetCam DVR Section 3 Quad or full view options: Quad: You can view a quad screen, each screen corresponding to each channel. Full: Yon can view a selected channel full screen by clicking ‘1’, ‘2’, ‘3’, or ‘4’. When you want to see images of 720 by 486 resolution, you double click on the replay screen.
- Page 32 DVR_NC_ii_98911_0047.qxd 12/13/00 1:53 PM Page 32 NetCam DVR Section 3 Recorded Image Information Panel: Event indicating: When you replay recorded images with selecting event- detecting sources (‘MD’, ‘S1’, and ‘S2’), this panel shows the events that occurred in a graphic form. You can search the exact time to search by dragging the scroll bar.
-
Page 33: Adjusting Focus
NetCam DVR Section 4 ADJUSTING FOCUS Screws First, adjust focus of the NetCam DVR by turning the front focus ring of the lens. If you cannot focus with the lens, loosen the three screws in the rear focus ring. Setting the lens at the middle range, focus by turning the rear focus ring. - Page 34 DVR_NC_ii_98911_0047.qxd 12/13/00 1:53 PM Page 34 NetCam DVR Section 4...
- Page 35 DVR_NC_ii_98911_0047.qxd 12/13/00 1:53 PM Page 35 2000 Philips Electronics N.V. 3922 988 98911 00-47 Data subject to change without notice...
Need help?
Do you have a question about the NetCam DVR and is the answer not in the manual?
Questions and answers