
Subscribe to Our Youtube Channel
Related Manuals for Milltronics HydroRanger Plus


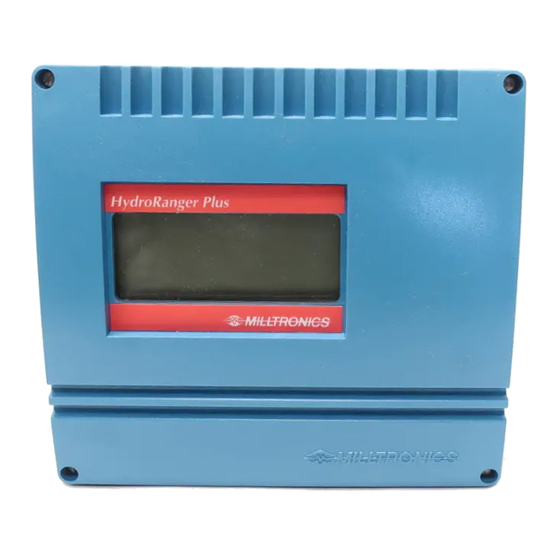
Summary of Contents for Milltronics HydroRanger Plus
- Page 1 HydroRanger Plus Instruction Manual PL-507 October 1997 33455070 Technology based. Customer driven.
-
Page 3: Table Of Contents
TABLE OF CONTENTS TITLE PAGE # INTRODUCTION About this Manual About the HydroRanger Plus Important HydroRanger Plus Features INSTALLATION Environmental Outline Mounting Programmer ComVerter Interconnection PROGRAMMING Program Mode Entry Display Keypad Parameter Value Alteration Special Parameters Parameter Reset Features Programming Security... -
Page 4: Title Page
Advanced Echo Processing Test Measurement Master Reset TECHNICAL REFERENCE Transmit Pulse Echo Processing Scope Displays Distance Calculation Sound Velocity Scanning Volume Calculation Flow Calculation Measurement Response Relay Set Up Maintenance TROUBLESHOOTING Troubleshooting Chart Measurement Difficulties SPECIFICATIONS HydroRanger Plus Programmer Options PROGRAMMING CHART... -
Page 5: Introduction
After reading this INTRODUCTION and completing the physical INSTALLATION, first INSTALLATION INTRODUCTION time system installers may wish to use the HYDRORANGER PLUS Quick Start Guide, PL-439 for step by step start up instructions. INTRODUCTION briefly describes key features. -
Page 6: About The Hydroranger Plus
ABOUT THE HYDRORANGER PLUS The HydroRanger Plus is to be used only in the manner outlined in the instruction manual. The HYDRO+ includes the features of the successful Milltronics "HydroRanger 1" PLUS a variety of new features, incorporating advances in electronic component, manufacturing, and software technology. - Page 7 The HYDRO+ monitors levels 0.3 to 15 m (1 to 50 ft) from the transducer face, with outstanding accuracy, usually within 0.25% of range. (Ensure the transducer selected suits the material and measurement range monitored). This versatility is accomplished by Milltronics patented Sonic Intelligence , providing high measurement reliability, regardless of operating conditions.
-
Page 8: Important Hydroranger Plus Features
IMPORTANT HYDRORANGER PLUS FEATURES FIXED FEATURES ENCLOSURE: Chemical resistant, light weight, dust/liquid tight. LCD: Large digits and symbols for Readings and continuous operating condition indication. HAND PROGRAMMER: 20 tactile feedback keys, (ordered separately). DOLPHIN COMPATIBLE: HYDRO+ / RS 232C interface, (ordered separately). -
Page 9: Installation
INSTALLATION Installation shall only be performed by qualified personnel, and in accordance with local governing regulations. ENVIRONMENTAL Choose a mounting location suited to the HYDRO+ enclosure. The ideal HYDRO+ mounting location is where the: 1. Ambient temperature is always within -20 to 50°C (-5 to 122°F). 2. - Page 10 RACK MOUNT The HYDRO+ rack mount version is a standard DIN 3U/14 HP, 4 rail plug-in unit, for a standard 84 HP deep sub-rack. PANEL MOUNT 72 mm 201 mm (2.9") (7.9") 16 mm (0.6") 144 mm (5.7") 150 mm (5.9") slip on mounting bracket top &...
-
Page 11: Mounting
MOUNTING WALL MOUNT Voltage Selection scope display clock module board A EPROM connection Voltage Supply Selection Voltage Switches (ac) terminal block All field wiring must have insulation suitable for at least 250 V . Hazardous voltage present on transducer terminals during operation. dc terminals shall be supplied from an SELV source in accordance with IEC 1010-1 Annex H. - Page 12 Installation The HYDRO+ wall mount version enclosure design permits quick electronic package removal for enclosure drilling and mounting. Remove the HYDRO+ enclosure lid (4 captivated screws). With the enclosure upright, press down enclosure TABS A and B. Push in on TABS C and D to release the electronics package. Drill sufficient holes for cable / conduit entry in the enclosure bottom.
- Page 13 RACK MOUNT Voltage Selection Set the voltage switches. Supply Voltage Voltage Selection (ac) Switches EPROM scope clock module connections voltage selection switches PL-507...
- Page 14 Installation Slide the Hydro+ into the sub-rack, aligning the connector with the rail mounted terminal block. connector, 2 row form D male 32 way, per DIN41612 terminal block, 2 row form D female 32 way, per DIN41612 All field wiring must have insulation suitable for at least 250 V .
- Page 15 PANEL MOUNT Voltage Selection Set the voltage switches. Voltage Supply Selection Voltage Switches (ac) EPROM scope clock module connections voltage selection switches Installation Slide the HYDRO+ through the panel cut-out. Assemble mounting brackets to the HYDRO+ chassis by hooking them into the top and bottom mounting bracket (top &...
- Page 16 Tighten mounting bracket clamping screw (top & bottom) Plug terminal blocks ‘A’ and ‘C’ into corresponding connector sockets, prewired by customer (refer to \ Rack and Panel Mount). INTERCONNECTION clamping screw connector terminal block ‘A’ terminal block ‘C’ All field wiring must have insulation suitable for at least 250 V .
-
Page 17: Programmer
PROGRAMMER Wall Mount Rack or Panel Mount Programmer The hand held programmer is aimed at the receiver as depicted, while the keys are pressed. COMVERTER (optional) Wall Mount Rack or Panel Mount ComVerter The ComVerter is pressed into the docking area as depicted and held in place by its pressure tabs. -
Page 18: Interconnection
Connect all cable shields to the HYDRO+ shield connections. To avoid differential ground potentials, do not connect cable shields to ground (earth) elsewhere. Insulate (tape) cable shields at all shield junctions to prevent ground loops SYSTEM DIAGRAM Milltronics transducer, HydroRanger see Specifications Plus... - Page 19 TRANSDUCER Run the transducer cable in grounded metal conduit, separate from other wiring, (except TS-3 temperature sensor wiring, if applicable). Typically, one transducer is used. However, if differential or average level monitoring is required, 2 transducers are used. Wall Mount Single Transducer Dual Transducer See transducer...
- Page 20 TEMPERATURE SENSOR All Milltronics Echomax and ST-H transducers have an internal temperature sensor. For optimum accuracy, use a separate TS-3 temperature sensor if: » the transducer is exposed to direct sunlight (or other radiant heat source), » the transducer connected is not an Echomax or ST-H, or »...
- Page 21 RELAYS Connect, alarm, pump, and/or control devices, to the HYDRO+ relays, after RUN mode operation is verified. (See for connection details). APPLICATIONS Wall Mount Rack or Panel Mount n. c. relay 5 n. c. n. o. relay 2 n. o. n.
- Page 22 mA OUTPUT The HYDRO+ mA output may be used to operate a variety of control/monitoring devices (1000 Ω max. load), providing 300 Vac continuous isolation. Rack or Panel Mount Wall Mount mA out mA out mA output to customer instrumentation, ground shield at one end only. mA INPUT If HYDRO+ features are required based upon measurements obtained from another level monitor, connect the level monitor mA output, to the HYDRO+ mA input...
- Page 23 Interconnect the SYNC terminals of all level monitors. Wall Mount HYDRO + HYDRO + to next device Rack or Panel Mount to next device HYDRO + HYDRO + To synchronize the HYDRO+ with other Milltronics ultrasonic level monitors contact Milltronics or your local distributor. PL-507...
- Page 24 POWER The HYDRO+ uses 100, 115, 200, or 230 Vac or 9 to 30 Vdc power. If ac and dc power are supplied, the HYDRO+ draws power from the ac supply. In the event of an ac power interruption, the dc supply is used until ac power is restored. IMPORTANT! Before applying ac power (mains), ensure the correct voltage is selected! Never operate the HYDRO+ with the enclosure lid open,...
- Page 25 DC SUPPLY WIRING Wall Mount Rack or Panel Mount to dc supply to dc supply Customer voltage supply 9 to 30 V dc. Negative dc input (A12) is tied to earth (A14). The equipment must be protected by a 15 A fuse or circuit breaker in the building installation.
- Page 26 PL-507...
-
Page 27: Programming
PROGRAMMING Those not previously familiar with the HYDRO+, may wish to use the step by step initial start up procedure illustrated in the HYDRORANGER PLUS QUICK START GUIDE provided. Then, reference to the remainder of this instruction manual is only necessary if operation modification is required. -
Page 28: Display
DISPLAY In the program mode, the Parameter Number, Parameter Value (and Point Number if applicable) may be viewed (as well as numerous other programming indicators). Note that some indicators are specific to certain programming conditions and therefore, all indicators are not displayed at any given time. e.g. -
Page 29: Keypad
KEYPAD These instructions are for hand programmer (keypad) use. Use the instructions provided with the DOLPHIN interface package, if applicable. Aim the HYDRO+ programmer infra-red transmitter at the HYDRO+ display within 0.3 m (12") of the display window. In the program mode, use the HYDRO+ programmer keys to perform the following identified functions. - Page 30 PARAMETER VALUE ALTERATION In the program mode... to underline the Parameter Number display field and... key in the desired Parameter Number, ( direct access ) or... as required ( scroll access ). (As preset, only Quick Start and altered parameters may be scroll accessed). 2.
-
Page 31: Parameter Value Alteration
SPECIAL PARAMETERS Some Parameter Values are for display purposes only and cannot be operator altered. These are referred to as view only parameters. In the PARAMETERS section of this instruction manual, View Only parameters are PARAMETERS identified by a "(V)" beside the Parameter Number. Many Parameter Values must be common for all Point Numbers. -
Page 32: Programming Security
PROGRAMMING SECURITY All operator programming is retained in non-volatile memory, immune to power interruptions. When programming is complete, the programmer may be locked away to prevent inadvertent programming alteration. As well, the Lock (P000) parameter may be used. PL-507... -
Page 33: Operation
OPERATION With parameter alteration complete, the HYDRO+ may be put into operation. Once put into operation (the RUN mode is entered), the HYDRO+ continues to operate unattended, indefinitely. However, numerous RUN mode features are available for aquiring specific operating information without removing the HYDRO+ from service. -
Page 34: Display
DISPLAY In the RUN mode, the following values and indicators may be observed. Note that many indicators are specific to certain operating conditions and therefore, all indicators are not displayed at any given time. wall mount rack or panel mount the current display pertains to a Transducer measurement. -
Page 35: Keypad
KEYPAD In the RUN mode, the following programmer keys perform the identified functions. Auxiliary Reading Keys Function Keys READING "8 Digit Totalizer" ("OCM" or "PT" Operation, P001 = 6 or 7) AUXILIARY READINGS "Pump Running Time" (key in Pump Number, hold for Starts) "Head"... -
Page 36: System Performance Evaluation
SYSTEM PERFORMANCE EVALUATION to enter the RUN mode. If a pump or control is ON, the corresponding relay is energized. If an alarm is ON, the relay is de-energized. to display the Reading in % (percent of Span, P007). OPERATION LEVEL SPACE or DISTANCE Empty to Full =... -
Page 37: Performance Test Results
PERFORMANCE TEST RESULTS Monitor system performance carefully, under all anticipated operating conditions. When the HYDRO+ performs exactly as required, programming is complete. If alternate Reading units, failsafe action, relay, or mA output operation is desired, proceed to APPLICATIONS and/or PARAMETERS as required. APPLICATIONS PARAMETERS Should system performance not meet installation requirements, (or the "LOE"... -
Page 38: Maintaining Operation
MAINTAINING OPERATION With programming complete, record all parameter alterations. If the keypad programmer is used, enter the program mode and scroll access altered parameters (skipping parameters left at preset values). Record parameter alterations on the PROGRAMMING CHARTS. PROGRAMMING CHARTS If the DOLPHIN interface package is used, refer to the associated instructions to record all operator programming. -
Page 39: Applications
APPLICATIONS The following examples illustrate how easily the HYDRO+ may be programmed to meet specific application requirements. While your installation may not match these examples exactly, by reviewing the closest example (or combination of examples), the relationship between HYDRO+ features and your process measurement requirements may be more easily identified. In every case, refer to General Application. - Page 40 GENERAL APPLICATION PARAMETER PRESET OPERATION P001 Operation 3 = distance display Reading referenced to transducer face P002 Material 1 = liquid anticipates echoes from a flat reflective surface P003 Response 2 = 1 m/min typical liquid surface rate of change P004 Transducer 100 = ST-H compensates for temperature variation...
- Page 41 PARAMETER VALUE OPTIONS Operation 1 = "level", Full = 100% Reading = 20 mA (most common) (P001) = 2 = "space", Empty = 100% Reading = 20 mA (less common) 3 = "distance", (references measurements to transducer face) 4 = "DPD", (displays differential level, 2 transducers required) 5 = "DPA", (displays average level, 2 transducers required) 6 = "OCM", (calculates flowrate for head and total flow volume) 7 = "PT", (calculates total pumped volume)
-
Page 42: Wet Well Control (Pump Down)
WET WELL CONTROL (Pump Down) Typically, wet wells are used to temporarily hold storm and/or waste water. When the surface reaches a high level setpoint, the wet well is pumped down. The discharge goes on to another wet well or directly to the treatment facility. The HYDRO+ provides wet well control with only minimal application programming. - Page 43 PROGRAMMING Set Relay Set Up to "Wet Well 1" (P100=1) to preset relays as follows. PARMETER RL#1 RL#2 RL#3 RL#4 RL#5 P111 Relay Function P112 Relay A Setpoint ---- P113 Relay B Setpoint ---- For one pump, set the RL#1 or RL#2 Relay Function to "off" (P111 = 0). For 3 or more pumps (5 max.), choose the relay(s) to be used and program P111, P112 and P113 similar to RL# 1 and RL# 2 (but stagger the P112 setpoints).
-
Page 44: Reservoir Control (Pump Up)
RESERVOIR CONTROL (Pump Up) Typically, reservoirs are used to temporarily hold processed water. When the water surface reaches a low level setpoint, the reservoir is pumped up. The HYDRO+ provides reservoir control with only minimal application programming. For the following example, we’ll assume Empty (P006) was set from the transducer face to the reservoir bottom. - Page 45 PROGRAMMING Set Relay Set Up to "Reservoir 1" (P100=3) to preset relays as follows. PARAMETER RL#1 RL#2 RL#3 RL#4 RL#5 P111 Relay Function P112 Relay A Setpoint ---- P113 Relay B Setpoint ---- For one pump, set the RL#1 or RL#2 Relay Function to "off" (P111 = 0). For 3 or more pumps (5 max.), choose the relay(s) to be used and program P111, P112 and P113 similar to RL# 1 and RL# 2 (but stagger the P112 setpoints).
-
Page 46: Rake Control (Differential Level)
RAKE CONTROL (Differential Level) Typically a water purification process has a screen on the inlet side to filter solids from entering the process. Should the screen become blocked, and inflow sufficiently reduced, process efficiency can often be compromised. The HYDRO+ provides screen rake control with only minimal application programming. - Page 47 PROGRAMMING Set Relay Set Up to "Rake Control" (P100=5) to preset relays as follows. PARAMETER RL#1 RL#2 RL#3 RL#4 RL#5 P110 Relay Allocation P111 Relay Function P112 Relay A Setpoint ---- P113 Relay B Setpoint ---- OPERATION By level (as indicated by the Point Number bar graphs)... 1.
-
Page 48: Penstock Control
PENSTOCK CONTROL A penstock (motorized liquid flow control gate) is often used to control and maintain open channel flowrate. In some cases, penstock control is used to limit storm flow conditions through the channel by diverting excess (storm condition) flow to a temporary holding vessel. - Page 49 PROGRAMMING GENERAL P001 Operation = 1 (level) P006 Empty = 1.7 m (e.g. Transducer to channel bottom) P007 Span = 1.3 m (e.g. Channel bottom to highest head) RELAYS Set Relay Set Up to "off" (P100=0, preset) prior to relay programming. PARAMETER RL#1 RL#2...
-
Page 50: General Alarms
GENERAL ALARMS If relay operated controls are not required, the following general alarms may be added to the general application programming. Alarms (similar to controls) are always based on level regardless of the Operation (P001) selected. FULL HI HI Alarm On HI HI Alarm Off HI Alarm On HI Alarm Off... - Page 51 PROGRAMMING RELAYS Set Relay Set Up to "General Alarms" (P100 = 6) to preset relays as follows. PARAMETER RL#1 RL#2 RL#3 RL#4 RL#5 P111 Relay Function P112 Relay A Setpoint ---- P113 Relay B Setpoint ---- OPERATION 1. Alarms indicate critical operating conditions. Hi Alarm = high level (on 80%, off 75%).
-
Page 52: Ocm (Open Channel Monitor)
OCM (Open Channel Monitor) Flow and Total Calculation Typically, a water treatment process has a free flowing open channel on the inlet side. The channel is often restricted by a PMD (Primary Measuring Device) having a known head/flow relationship. (See note at end of example for monitoring overflow from a wet well or flow downstream from a Penstock). - Page 53 PROGRAMMING P600 PMD = 1 (preset, change to applicable PMD) P601 Flow Exponent = 2.50 (preset, change per PMD used, P600 = 1 only) P602 Flume Dimension D = 1 (preset, change per PMD used, P600 = 2 or 3) P603 Max Head = Span (preset, change to actual head at Max Flow) P604...
-
Page 54: Volume Calculation
VOLUME CALCULATION Sometimes, an indication of the liquid volume contained within a vessel, or remaining vessel capacity is required. The HYDRO+ provides volume calculation with only minimal application programming. Ensure Empty (P006) is set from the transducer face to the vessel bottom and Span (P007) is set from the vessel bottom to the vessel top. - Page 55 PROGRAMMING VOLUME P050 Tank Shape = 0 (preset, change to applicable shape) P051 Max Volume = 100 (preset, display in %, other = volume of Span, P007). P052 Tank Dimension A (required for Tank Shapes: P050 = 2,3,4,5, or 7). P053 Tank Dimension L (required for Tank Shape P050 = 7) P054...
-
Page 56: Pumped Volume Total
PUMPED VOLUME TOTAL Sometimes, an indication of the total liquid volume pumped from a wet well or into a reservoir is required. The HYDRO+ provides total volume pumped calculation with only minimal application programming. Ensure Operation is set for "Pumped Total" (P001 = 7) and the Wet Well or Reservoir Control and Volume Calculation application programming is complete before proceeding. - Page 57 PROGRAMMING LCD TOTALIZER P622 In/Out Correction = 1 (preset, auto total inflow/discharge adjust) P630 LCD Total Factor = 0 (preset, display total in Max Volume units) P633 LCD Total Decimal = 3 (e.g. display 3 decimal places) REMOTE TOTALIZER (optional) P111 Relay Function = 40 (totalizer) for RL5...
-
Page 58: Failsafe Operation
FAILSAFE OPERATION GENERAL As preset, upon a loss of echo, the HYDRO+ Reading, alarm relays, and mA output are held at last "known" values and pump/control relays are de-energized, until a valid measurement is regained. If desired, program the HYDRO+ to provide alternative display, relay and/or mA output operation under loss of echo conditions to provide failsafe operation. - Page 59 WET WELL FAILSAFE HI Level Fault HI Alarm Detector LO Level Fault Detector OPERATION For this example we’ll assume: P001 Operation is set to "level" (P001 = 1). P003 Measurement Response is set to "medium" (P003 = 2, preset). P006 Empty is set for 6.000 metres.
-
Page 60: Application Assistance
PARAMETERS interesting ways of using the HYDRO+ to monitor specific processes. Milltronics has many years experience applying ultrasonic level measurement to a variety of processes in the mining, aggregate, lumber, grain, chemical, pulp and paper, water, and waste water industries. -
Page 61: Security
PARAMETERS SECURITY PARAMETER (P000) P000 (G) LOCK Use this feature to secure all programming from inadvertent alteration. Direct access (cannot be scroll accessed) this parameter after all programming is complete and enter any value (other than 1954) to activate the programming Lock. When Lock is activated, the HYDRO+ may be switched from the RUN mode to the program mode and the value of any parameter may be viewed but not altered. -
Page 62: Quick Start
QUICK START PARAMETERS (P001 TO P009) P001 (G) OPERATION Enter the type of RUN mode operation desired. If "out-of-service" is entered, the transducer is not fired, alarm relay(s) energize, pump relay(s) de-energize, and mA output(s) assume the surface is at the Empty (P-006) value. If "DPD"... - Page 63 P004 (G) TRANSDUCER Enter the type of transducer(s) connected to the HYDRO+. values: 0 = not entered 100 = STH 103 = XCT-12 1 = ST-25 101 = XCT-8 104 = XPS-15 2 = ST-50 102 = XPS-10 (preset) 250 = auxiliary (see mA Input) P005 (G) UNITS Enter the units of measure desired for programming and/or display.
- Page 64 P007 SPAN Enter the maximum surface distance from Empty (P006). Span is automatically preset to 1.1 x the blanking value (P800) less than the Empty value, unless it is altered manually. For "distance" Operation (P001=3), Span is preset to Empty (P006). Enter a lower value if desired.
-
Page 65: Volume
VOLUME PARAMETERS (P050 to P055) If Readings proportional to volume are desired, adjust the following parameters. P050 TANK SHAPE Enter the Tank Shape option that matches the vessel monitored. If additional vessel dimension entry is required, the associated parameters (as indicated below) may be scroll accessed. When Operation is "level"... - Page 66 P051 MAX VOLUME For Readings in volumetric units (rather than percent), enter the vessel volume between Empty (P006) and Span (P007). e.g. 1) If volume = 3650 m , enter 3650. 2) If volume = 267500 gallons, enter 267.5 (1000’s of gallons). values: 0.000 to 9999 P052...
-
Page 67: Reading
READING PARAMETERS (P060 to P062) Alter the following parameters to: a) change the number of decimal places displayed. b) convert the Reading to alternate units. c) reference measurements to other than Empty (P006) or Span (P007). P060 DECIMAL POSITION Enter the maximum number of Reading decimal places to be displayed. In the RUN mode, the number of decimal places displayed is automatically adjusted (if necessary) to prevent the number of Reading digits from exceeding display capabilities. - Page 68 P062 OFFSET READING Enter the value to be added to the Reading, (before display). This feature is preset to 0.000, (no offset). e.g. To reference the current level to sea level, enter the distance in Units (P005), between Empty (P006) and sea level. (Enter a negative value if Empty is below sea level.) This feature affects the Reading only.
-
Page 69: Failsafe
FAILSAFE PARAMETERS (P070 to P072) As preset, if Failsafe Operation is activated, the display, alarm relays, and the mA output are held at their last "known" values, and control relays de-energize, until a valid measurement is regained. To automatically operate alarms / controls under these conditions, alter the following parameters as required. - Page 70 P071 FAILSAFE MATERIAL LEVEL Select the material level to be reported when the Failsafe Timer expires. If "HOLd" (preset) is selected, the "last known" material level is held. If "HI" is selected, the HYDRO+ advances to the Span (P007) level, per Failsafe Level Advance (P072).
-
Page 71: Relays
RELAY PARAMETERS Alter the following parameters as required. STANDARD RELAY CONFIGURATIONS (P100) These parameters set up Independent Relay Parameters to satisfy the most common relay operation requirements, requiring only one programming entry. P100 (G) RELAY SET UP Enter the Relay Set Up (if desired) to preset numerous relay parameters as required for common HYDRO+ applications. - Page 72 INDEPENDENT RELAY PROGRAMMING (P110 and P111) These parameters need only be accessed if the Relay Set Up (P100) selected does not exactly match the relay operation desired. When any of the following Relay Parameters are accessed, the Point Type display changes to the Relay Symbol and the Relay Number (corresponding to the HYDRO+ terminals) is displayed in the Point Number field.
- Page 73 P111 RELAY FUNCTION Use this feature to define the operation of each relay required. Relay Functions are divided into 4 categories » ALARM: the relay de-energizes to set the alarm "ON". » OPERATION: used for specific modes of Operation (P001). »...
- Page 74 P111 RELAY FUNCTION (continued) to display the Auxiliary Function symbol, , to scroll access the alarm designations and... when the desired designation is displayed. ALARM OPERATION Relay A / B Setpoints (P112 / P113) set the critical points (based on the Relay Function) where, in the RUN mode...
- Page 75 P111 RELAY FUNCTION (continued) Important! Relay A / B Setpoint values cannot be exactly equal. values: 0 = off (relay is always de-energized) 6 = LOE alarm 1 = Level Alarm 7 = Transducer Cable Fault Alarm 2 = In Bounds Alarm 8 = Pump Efficiency 3 = Out of Bounds Alarm 9 =Time of Day...
- Page 76 P111 RELAY FUNCTION (continued) PUMP FUNCTIONS HYDRO+ relays set for a Pump Function are energized to turn pump controls "ON" (start pump), and de-energized to turn pump controls "OFF" (stop pump). Therefore, if HYDRO+ power is interrupted, the pump(s) are turned "OFF". Pumps are started and stopped at the critical Relay A / B Setpoint (P112 / P113) levels entered.
- Page 77 P111 RELAY FUNCTION (continued) CONTROL FUNCTIONS HYDRO+ relays are energized to turn controls "ON", and de-energized to turn controls "OFF". Therefore, if HYDRO+ power is interrupted, the control is "OFF". FUNCTION DESCRIPTION SETPOINTS Time relay operation on elapsed time P114, P115 Storm relay operation on storm conditions P150-P152...
- Page 78 INDEPENDENT RELAY SETPOINTS (P112 to P115) Independent Relay Setpoints define the critical condition(s) which will cause a relay to operate based upon the Relay Function (P111) selected. RELAY A and B SETPOINTS Relay Functions requiring continuous relay operation until a critical condition subsides use Relay A and B Setpoints (P112 and P113).
- Page 79 P 116 BOUND ALARM HYSTERISIS For ‘in bounds’ and ‘out of bounds’ actual ‘ on ’ Relay Functions (P111 = 2 and 3 respectively), a hysterisis or dead P116, hysterisis band prevents relay chatter due to material level fluctuations setpoint at the upper or lower setpoint.
- Page 80 INDEPENDENT FAILSAFE RELAYS (P129) P129 RELAY FAILSAFE Use this feature for relay failsafe operation independent from the Failsafe Material Level (P070). Select: "OFF" for relay response to the Failsafe Material Level (P701). "HOLd" for "last known" relay state retention. "dE" to have the relay de-energize immediately. "En"...
- Page 81 PUMP CONTROL MODIFIERS (P130 to P134 and P136) P130 (G) RUN ON INTERVAL Use this feature to periodically have pumps continue running for a specified time (Run On Duration, P131) to discharge sediment. Sets the period, in hours, during which a pump run-on may occur. values: 0.000 to 9999 (preset = 0.000) P131 (G) RUN ON DURATION Enter the duration of pump run-on, in seconds.
- Page 82 P134 PUMP EXERCISING Use this feature to reduce idle pump corrosion/sediment build up. If a pump remains idle for the time (in minutes) specified by the Relay D Setpoint (P115) value entered, the pump runs for the time specified by the Relay C Setpoint (P114) value. values: 0 = off (preset) 1 = on (exercise pumps per P114 / P115)
- Page 83 PUMP ENERGY COST REDUCTION (P140 to P145) These features enable a single pumping station (or multiple pumping stations in series) to be emptied/filled as required, immediately prior to the high energy cost period. The pump start/pump stop setpoints may also be modified to reduce pump running time during this period.
- Page 84 P143 (G) PEAK LEAD TIME Enter the estimated pump running time (in minutes) required to pump the level from the highest Relay A Setpoint (P112) to the lowest Relay B Setpoint (P113) levels. This value defines the time before the high energy cost period, when the HYDRO+ should start pumping to ensure the level is as far as possible from the Relay A Setpoint (P112) level.
- Page 85 P145 PEAK B SETPOINT Enter the value (similar to Relay B Setpoint, P113) to be used for the high energy cost period. This feature allows the pump(s) to be stopped before the normal Relay B Setpoint, to reduce pump running time during the high energy cost period. values: 0.000 to 9999 (preset = 0.000) The following example illustrates high energy cost usage reduction and/or elimination...
- Page 86 STORM CONDITIONS (P150 to P152) These features permit a Storm Condition to be defined, to operate a relay set for the "Storm Control" Relay Function (P111), or modify the operation of a relay set for any "Pump Control", per Storm Action. Enter Storm A / B Setpoints similar to Relay A / B Setpoints (P112/P113).
- Page 87 FLUSH SYSTEMS (P170 to P173) Use this feature to define the flush operation . When a flush pump (or flush valve in conjunction with a regular pump) is first started, some pump output is diverted back into the vessel to stir up sediment. P170 FLUSH PUMP Enter the HYDRO+ Relay Number connected to the pump to be used...
- Page 88 P180 PUMP RATE REFERENCE This parameter contains a pump rate reference for the assigned pump. The reference value is the change in percent or level (P050 = 0), or volume per minute (P050 ≠ 0) that the pump is rated for. The value is used in the calculation of pump rate efficiency.
-
Page 89: Ma Output
mA OUTPUT PARAMETERS (P200 to P203, P210 to P215, P219) If mA output alteration is required, alter the following parameters. When a mA Output Parameter is accessed, the Point Type symbol changes to "mA". P200 mA RANGE Use this feature to alter the mA output range. If option 1 or 2 is selected, the mA output is directly proportional to the mA Function. - Page 90 P202 mA ALLOCATION Use this feature to alter the mA output/Point Number allocation. As preset, the mA output pertains to Point Number 1. This value may only be altered if Operation is set for DPD (Differential Level, P001 = 4) or DPA (Average Level, P001 = 5). To have the mA output proportional to the differential or average level, allocate the mA output to Point Number 3.
- Page 91 INDEPENDENT mA SETPOINTS (P210 and P211) Use these features to reference the minimum and/or maximum mA output to any point in the measurement range. If mA Function (P201) is set for "level", "space", or "distance", enter the material level in Units (P004) or percent of Span (P007) as referenced to Empty (P006).
- Page 92 INDEPENDENT mA LIMITS (P212 and P213) Use these features to adjust the minimum and/or maximum mA output value limits. Typically, the value entered is to suit the minimum and/or maximum input limit requirements of the device connected to the HYDRO+ mA output terminals. P212 mA MIN LIMIT Enter the minimum mA output value (in mA) to be produced.
- Page 93 INDEPENDENT mA FAILSAFE P219 mA FAILSAFE Use this feature for mA output failsafe operation, independent from the Failsafe Material Level (P071). OPTION DESCRIPTION "OFF" (preset) mA output responds to Failsafe Material Level (P071). "HOLd" the "last known" value is held until normal operation resumes. "LO"...
-
Page 94: Ma Input
mA INPUT PARAMETERS (P250,P251,P252) If HYDRO+ features are required based upon measurements obtained from another level monitor, alter the following parameters as required. This feature enables virtually all HYDRO+ (excluding Transducer specific) features to be used, based upon the measurements of another level monitor (or any device providing a 0 to 20 mA or 4 to 20 mA output proportional to level). -
Page 95: Data Logging
DATA LOGGING PARAMETERS Use these features to view time and date stamped data, pertaining to operation. To view Data Logging Parameter time stamps, To view date stamps, RECORD TEMPERATURES (P300 to P303) Use these features to identify the occurrence of record high and / or low temperatures as recorded in °C. - Page 96 RECORD READINGS (P304 and P305) Use these features to identify the occurrence of the record high and low Readings. P304 (V) READING MAX View the highest Reading calculated (in normal Reading units or %). values: -999 to 9999 P305 (V) READING MIN View the lowest Reading calculated (in normal Reading units or %).
- Page 97 PUMP RECORDS (P310 to P312) Use these features to identify pump usage. When any of these features are accessed, the Point Type display changes to the Relay Symbol and the Relay Number (corresponding to HYDRO+ terminals) is displayed in the Point Number field. These features are enabled if the associated Relay Function (P111) is set for any "pump control"...
- Page 98 FLOW RECORDS (P320 and P321) These features are enabled if Operation is set for "OCM" (P001 = 6). Use these features to identify the occurrence of the record high and low flowrates as displayed in OCM MAX FLOW (P604) units, or as a percent of OCM MAX FLOW. P320 (V) FLOW MAX View the highest flowrate calculated (in units or %).
- Page 99 LCD TOTALIZER (P322 and P323) Use these features to view, reset, or preset the 8 digit display totalizer. These features may be enabled if Operation is set for "OCM" or "Pumped Volume" (P001 = 6 or 7). The 8 digit totalizer display is divided into 2 groups of 4 digits in the program mode. For this reason, the 4 least significant totalizer digits are stored in one parameter and the 4 most significant digits are stored in another.
- Page 100 PROFILE RECORDS (P330 to P337) The following parameters are for authorized Milltronics service personnel or Instrumentation Technicians familiar with Milltronics echo processing techniques. Use these features to record and save a total of up to 10 Echo profiles, initiated manually (P330), or automatically (P331 et al). Each record is time and date stamped as to when the profile was saved.
- Page 101 To manually record a profile: the transducer* fires and an echo profile is recorded into the internal scope buffer for display. To save a manual record: copies the echo profile record in the scope buffer and saves it in the selected address in the record library.
- Page 102 P331 (G) AUTO RECORD ENABLE Use this feature (if desired) to enable / disable the Auto Profile Record function. values: 0 = off 1 = on P332 (G) AUTO RECORD TRANSDUCER Use this feature (if desired) to specify the Transducer Point Number for which Auto Profile Records are saved.
- Page 103 AUTO RECORD A / B Setpoints Use Auto Record A Setpoint (P334) and Auto Record B Setpoint (P335) to define the boundaries within which the level must be, for the resultant Echo Profile to be considered for an Auto Profile Record. If "----"...
- Page 104 INSTALLATION RECORDS (P340 to P342) Use these features to view data relating to this specific HYDRO+ installation. P340 (V) DATE OF MANUFACTURE View the date of manufacture of this HYDRO+. values: YY:MM:DD format P341 (V) RUN TIME View the accumulated number of days this HYDRO+ has been operating, since the Date of Manufacture (P340).
-
Page 105: Ocm
OCM PARAMETERS (P600 - P607, P610, P611, P620, P621) If The HYDRO+ is used to monitor open channel flow, alter the following parameters as required. The HYDRO+ calculates "head" as referenced to Empty (P006) or OCM Zero Offset (P605), when Operation is set for "OCM" (P001 = 6). Flowrate, based on head (at the "point of measure"... - Page 106 P601 (G) FLOW EXPONENT Exponent PMD (P600 = 1) where Q = KH Enter the exponent specified by the PMD manufacturer ( preset 1.55 ) WEIRS transducer * The transducer must be above the maximum head by at least the blanking value, P800.
- Page 107 P601 for P600 = 1 ( cont’d ) FLUMES Parshall Flume plan transducer head front side » sized by throat width » set on solid foundation » general free flow equation is Q = KH where: Q = flow rate K = constant H = head x = exponent...
- Page 108 P601 for P600 = 1 ( cont’d ) FLUMES (cont’d) Leopold Lagco (as manufactured by Leopold Co., Inc.) throat transducer plan diverging converging point of measurement head side front » designed to be installed directly into pipelines and manholes » Leopold Lagco may be classed as a rectangle Palmer-Bowlus flume »...
- Page 109 P601 for P600 = 1 ( cont’d ) FLUMES (cont’d) Cut Throat Flume plan » similar to Parshall flume except that the floor is flat bottomed and throat has no virtual length. » refer to manufacturer’s specifications for flow equation and point of head measurement.
- Page 110 ( P602 cont’d ) values ( P600 = 2 ): index value flume width D Palmer Bowlus Flume (typically those manufactured by Warminster Fiberglass or Plasti-Fab) plan D / 2, point of transducer measurement head side front » sized by pipe diameter, D. Enter value ( in units of P005 ) into P602. »...
- Page 111 ( P602 cont’d ) values ( P600 = 3 ): index value height D H Flume (as developed by the U.S. Department of Agriculture, Soil Conservation service) transducer point of measurement plan side front » sized by max depth of flume, D. Enter value ( in units of P005 ) into P602. »...
- Page 112 ( P602 cont’d ) values ( P600 = 6 ): index value approach width B throat width b hump height p throat length L velocity coefficient Cv discharge coefficient Cd BS-3680 / ISO 4359 Rectagular Flume 3 to 4 x h transducer head PL-507...
- Page 113 ( P602 cont’d ) values ( P600 = 7 ): index value α notch angle discharge coefficient Ce BS-3680 Thin Plate V Notch Weir transducer * 4 to 5 x h * The transducer must be above the maximum head by at least the blanking value, P-800. PL-507...
- Page 114 P603 (G) MAX HEAD Enter the head value associated with Max Flow, in Units (P004). values: -999 to 9999 (preset = Span, P007 value) P604 (G) MAX FLOW Enter the flowrate associated with Max Head, in any flowrate units (flowrate units = volume units / time units) using the Time Units (P606).
- Page 115 P607 (G) FLOWRATE DECIMAL Enter the maximum number of decimal places to be displayed. In the RUN mode, the number of decimal places displayed is automatically adjusted (if necessary) to prevent the number of Flowrate digits from exceeding display capabilities. ( The max.
- Page 116 Head and Flowrate Breakpoint When the primary measuring device (P600) does not fit one of the standard characterizations, it may be programmed for one of two breakpoint characterizations: » P600 = 4 : linear » P600 = 5 : curved Select the characterization which most closely fits the flow characteristics of the primary measuring element.
- Page 117 Typical Flow Characterization linear curved Head Characterization is achieved by entering the head ( P610 ) and corresponding flow ( P611 ), either from empirical measurement or from the manufacturer’s specification. The more breakpoints that are defined, the more accurate will be the flow measurement.
- Page 118 P620 (G) LOW FLOW CUTOFF Use this feature to enter the minimum head in units (P005) or as a percent of span. Ensure the % symbol is displayed before attempting to enter a value in percent, (see PROGRAMMING Keypad). PROGRAMMING This feature eliminates totalizer activity for flows at or below the cutoff value.
-
Page 119: Totalizer
1 = inflow / pump cycle When the pump is off, the HydroRanger plus estimates the volume of inflow by recording the rate at which the liquid level changes. When the pump is operating, the estimated inflow volume is added to the pumped volume total, as in batch processing. - Page 120 P630 (G) LCD TOTAL FACTOR Use this feature if the LCD Total increments/decrements by too large (or small) an amount. Enter the factor (powers of 10 only) by which actual volume is divided, prior to LCD Total display. e.g. for an LCD Total display in 1000’s of volume units, enter 3. values: -3 = .001 3 = 1000...
- Page 121 P641 (G) FLOW SAMPLER MANTISSA Use this feature in conjunction with Flow Sampler Exponent (P642) to establish the number of flow units required to increment the Flow Sampler (device connected to the HYDRO+ relay set for the "flow sampler operation" Relay Function, P111 = 41). Enter the mantissa ( X ) for the exponent ( ) in the formula...
-
Page 122: Range Calibration
RANGE CALIBRATION PARAMETERS (P650 to P654) P650 OFFSET CALIBRATION Use this feature to calibrate Empty (P006), especially if the reported level is consistently high or low by a fixed amount, (e.g. 2 cm). Before using this feature, verify the following parameters are correct: Empty (P006), Temperature (P664), Offset Reading (P062), Zero Head Offset (P605), if used. - Page 123 P652 OFFSET CORRECTION This value is altered when an Offset Calibration is performed. Alternatively, if the amount of Offset Correction required is known, enter the amount to be added to the Reading before display. values: -999 to 9999 P653 VELOCITY This value is adjusted, based on the "Sound Velocity at 20 °C (P654) vs.
-
Page 124: Temperature Compensation
TEMPERATURE COMPENSATION PARAMETERS (P660 to P664) P660 TEMP SOURCE This feature is preset to "AUTO". The HYDRO+ measures the TS-3 temperature sensor assigned to the transducer. If a TS-3 sensor is not connected, the temperature measurement from the ultrasonic/temperature transducer is used. If the transducer used does not have an internal temperature sensor, the Temp Fixed (P661) value is used. - Page 125 P663 TEMPERATURE TRANSDUCER ALLOCATION This feature may only be used for "differential" or "average" Operation (P001 = 4 or 5). As preset, the temperature measurements of Ultrasonic / Temperature Transducer # 1 and 2 are allocated to Point Number 1 and 2 respectively. Use this feature (if desired) if the temperature measurement from both transducers should be identical, however one transducer is mounted in direct sunlight (or near some other radiant heat source).
-
Page 126: Rate
RATE PARAMETERS (P700 to P707) P700 MAX FILL RATE Adjust the HYDRO+ response to increases in the actual material level (or advance to a higher Failsafe Material Level, P071). Enter a value slightly greater than the maximum vessel filling rate. This value, in Units (P005) or % of Span (P007) per minute, is automatically altered when Measurement Response (P003) is altered. - Page 127 P704 RATE FILTER Use this feature to avoid Rate Value (P707) fluctuations due to a "splashing" material surface. This value is automatically altered when Measurement Response (P003) is altered. See TECHNICAL REFERENCE Measurement Response. TECHNICAL REFERENCE This value automatically alters the Rate Update Time (P705) and / or Rate Update Distance (P706).
-
Page 128: Measurement Verification
MEASUREMENT VERIFICATION PARAMETERS (P710 to P713) P710 FUZZ FILTER Use this feature to stabilize the reported level, due to level fluctuations (such as a rippling or splashing liquid surface), within the Echo Lock Window (P713). This value (in % of Span, P007) is automatically altered when Measurement Response (P003) is altered. - Page 129 P712 ECHO LOCK SAMPLING The sampling criterion sets the number of consecutive echoes appearing above or below the echo currently locked onto, that must occur before the measurements are validated as the new reading (for Echo Lock P711 values: 1 or 2). P711 value P712 preset value 1, max verification...
-
Page 130: Scanning
SCANNING PARAMETERS (P726 to P728) P726 (G) LEVEL SYSTEM SYNC Use this feature if another level measurement system is mounted near the HYDRO+. Interconnection/Level System Synchronization. INSTALLATION values: 0 = not required 1 = synchronize level monitors (preset) P727 (G) SCAN DELAY This feature may only be used for "differential"... -
Page 131: Display
DISPLAY PARAMETERS (P730 to P733, P740) P730 (G) AUXILIARY READING Use this feature to display operator selected Auxiliary Readings temporarily or indefinitely (as desired). Select "OFF" to display Auxiliary Readings temporarily. Select "HOLd" to display Auxiliary Readings until another Auxiliary Reading is selected. (See OPERATION Keypad for RUN mode Auxiliary Reading selection.) OPERATION To select the Auxiliary Reading operation desired... - Page 132 P732 (G) DISPLAY DELAY Adjusts the Point Number display scroll speed. Use this feature (if desired) when "differential" or "average" Operation (P001 = 4 or 5) is selected, to adjust the delay (in seconds) before the display advances to the next Point Number. (Display scrolling is independent from transducer scanning.) values: 0.5 to 10 (preset to 1.5 seconds)
-
Page 133: Echo Processing
ECHO PROCESSING PARAMETERS (P800 to P807) P800 NEAR BLANKING Use this feature if the surface monitored is incorrectly reported to be near the transducer face. Near Blanking (the distance from the transducer face which is not ultrasonically measurable) is preset to a value depending on the transducer selected (P004). - Page 134 P802 SUBMERGENCE TRANSDUCER Use this feature (if desired) when the transducer connected is equipped with a submergence shield. When the transducer is submerged, the HYDRO+ detects that the monitored surface is within the Near Blanking (P800) distance, and immediately advances to " zero " distance, operating displays and outputs accordingly. values: 0 = off (preset) 1 = submergence transducer...
- Page 135 P804 CONFIDENCE THRESHOLD Use this feature when an incorrect material level is reported. The short and long shot Confidence Thresholds are preset to 10 and 5 respectively. When Echo Confidence (P805) exceeds the Confidence Threshold, the echo is evaluated by Sonic Intelligence values: x.y x = short (0 to 99), y = long (0 to 99)
-
Page 136: Advanced Echo Processing
ADVANCED ECHO PROCESSING PARAMETERS (P810,P816-P825) The following parameters are for authorized Milltronics Service personnel or Instrumentation Technicians familiar with Milltronics echo processing techniques. P810 SCOPE DISPLAYS Use this feature to monitor Echo Processing alteration effects. Connect an oscilloscope to Display Board TP1, TP2, and TP3. - Page 137 PROFILE POINTER PARAMETERS When a Profile Pointer Parameter is accessed, the Echo Lock Window scope display changes to a Profile Pointer display. The Profile Pointer may be moved to a number of points on the Echo Profile, to gain specific information dependent upon the Profile Pointer Parameter used.
- Page 138 P820 ALGORITHM Use this feature to select the Algorithm(s) (mathematical operations) which the Sonic Intelligence echo selection is to be based on. If the wrong echo is processed, select an alternate algorithm, while observing the resultant echo processing displays. To select an Algorithm... to display the Auxiliary Function symbol, to display the desired Reading display symbol(s), (when the desired Algorithm is displayed)
- Page 139 P823 REFORM ECHO Use this feature, when monitoring solids (P002 = 2), if the reported level fluctuates slightly, though the monitored surface is still). Enter the amount (in ms) of long shot Echo Profile smoothing required to eliminate jagged peaks in the Echo Profile. When a value is keyed in, the nearest acceptable value is entered.
- Page 140 ADVANCED TVT ADJUSTMENT (P830 to P835) P830 TVT TYPE Use this feature to select the TVT Curve desired. This feature is automatically altered when Material (P002) is altered. Do not use "TVT Slopes" with the "bF" or "bLF" Algorithm (P820). values: 1 = TVT Short Curved 2 = TVT Short Flat...
- Page 141 scrolls the breakpoint index through points 1 to 40, and moves the curve pointer left or right respectively. e.g. oscilloscope displays breakpoint 5, And, changes the bias value of the breakpoint, -50 to 50 e.g. breakpoint 5, value enters the change in value. P831, TVT shaper, must be ‘on’.
- Page 142 ADVANCED SHOT ADJUSTMENT (P840-P845, P850 to P852) P840 SHORT SHOT NUMBER Enter the number of short shots to be fired (and results averaged) per transmit pulse. values: 0 to 100 P841 LONG SHOT NUMBER Enter the number of long shots to be fired (and results averaged) per transmit pulse.
- Page 143 P850 SHORT SHOT BIAS Use this feature to slant the echo evaluation in favour of the short shot echo when both short and long shots are evaluated (see Shot Mode, P803). This feature is preset to 20. values: 0 to 100 P851 SHORT SHOT FLOOR Enter the minimum echo strength (in dB above 1 uV), derived from a short...
-
Page 144: Test
TEST PARAMETERS (P900 to P913) Test Parameters are intended for use by Milltronics Service personnel. P900 (V) SOFTWARE REV. # View the EPROM Rev. # without removing the enclosure lid. values: 00.00 to 99.99 P901 (V) MEMORY to activate the HYDRO+ memory test. - Page 145 P907 PROGRAMMER INTERFACE to activate the programmer interface (two way infrared communications) test. On successful test completion, "PASS" is displayed. Otherwise, "FAIL" is displayed. P910 RELAY Access this parameter to display the current state of the specified relay. to alter the relay state (energized / de-energized) or enter the value corresponding to the specific relay state desired.
-
Page 146: Measurement
MEASUREMENT PARAMETERS (P920 to P926) Use these features to verify HYDRO+ programming. If HYDRO+ operation has not been verified, disable all associated process control equipment before accessing the following parameters. Access the parameter desired and press ; repeat 5 times to overcome Echo Lock (P711), if applicable. - Page 147 P920 READING MEASUREMENT The Reading corresponds to all associated programming after is pressed or during simulation. P921 MATERIAL MEASUREMENT The Reading corresponds to the distance between Empty (P006) and the monitored surface after is pressed, or during simulation. P922 SPACE MEASUREMENT The Reading corresponds to the distance between the monitored surface and Span (P007) after is pressed, or during simulation.
-
Page 148: Master Reset
MASTER RESET (P999) P999 MASTER RESET This feature resets all parameters to original values. Use this feature prior to initial programming if arbitrary Parameter Values were used during a "bench test", or after replacing the HYDRO+ EPROM with a different software revision number. Following a Master Reset, complete reprogramming is required. -
Page 149: Technical Reference
TECHNICAL REFERENCE TRANSMIT PULSE The HYDRO+ transmit pulse consists of one or more electrical "shot" pulses, which are supplied to the Transducer connected to the HYDRO+ terminals. The transducer fires an acoustic "shot" for each electrical pulse supplied. After each shot is fired, sufficient time is provided for echo (shot reflection) reception, before the next (if applicable) shot is fired. -
Page 150: Distance Calculation
20 °C (68 °F). Unless altered, the sound velocity used for the distance calculation is 344.1 m / s (1129 ft / s). Variable air temperature is automatically compensated when a Milltronics ultrasonic / temperature transducer is used. If the transducer is exposed to direct sunlight, use a sunshield or better yet, a seperate TS-3 temperature sensor. -
Page 151: Scanning
SCANNING When the HYDRO+ is programmed for "differential" or "average" level Operation (P001 = 4 or 5), two transducers must be used. In this case, the transmit pulse is time shared between the transducers via the "Scanner" relay. See INSTALLATION INSTALLATION Interconnection \ Transducer, and PARAMETERS Relay Function (P111). -
Page 152: Volume Calculation
VOLUME CALCULATION The HYDRO+ provides a variety of volume calculation features (P050 to P055). If the vessel does not match any of the 8 preset Tank Shape calculations, a Universal Volume calculation may be used. Use the level/volume graph or chart provided by the vessel fabricator (or create one based on the vessel dimensions). -
Page 153: Flow Calculation
FLOW CALCULATION The HYDRO+ provides numerous OCM flow calculation features (P600 to P611). If the PMD (primary measuring device) does not match any of the 8 preset PMD calculations, or if a PMD is not used, select a Universal Volume calculation. Use the head/flow graph or chart provided by the PMD fabricator (or create one based on the PMD or channel dimensions). -
Page 154: Measurement Response
MEASUREMENT RESPONSE The HYDRO+ Measurement Response (P003) to material level changes is designed to exceed even the most demanding installation requirements. The Measurement Response setting automatically presets various parameters affecting the HYDRO+ response to material level changes as follows: Parameter Values Dependent on Measurement Response (P003) (units) 1(slow) -
Page 155: Relay Set Up
RELAY SET UP The HYDRO+ Relay alarm/control/pump control features are designed to exceed even the most demanding installation requirements often eliminating the necessity of a Programmable Logic Controller (PLC). The Relay Set Up (P100) setting automatically presets various parameters affecting the HYDRO+ relay operation as follows: DESCRIPTION RELAY P110... -
Page 156: Maintenance
MAINTENANCE The HYDRO+ uses a clock module for time and date calculations required in features such as pump control and logging. It has a ten year life expectancy, and thus should be replaced at that time. Otherwise the HYDRO + requires no maintenance, however a program of periodic checks is advised. -
Page 157: Troubleshooting
TROUBLESHOOTING TROUBLESHOOTING CHART SYMPTOM CAUSE ACTION Display blank, Transmit Neon No power. Check power supply, wiring, ac not flashing, transducer not selection switch positions, power pulsing. fuse F4 or F5. No response to programmer. Obstructed infrared interface, Clean enclosure "docking bay" and or defective programmer. -
Page 158: Measurement Difficulties
MEASUREMENT DIFFICULTIES If the Failsafe Timer (P070) expires due to a measurement difficulty, "LOE" flashes alternately with the Reading. In rare cases, the HYDRO+ may "lock on" to a false echo and report a fixed or wrong Reading. FLASHING "LOE" DISPLAY If "LOE"... - Page 159 FIXED READING If the Reading is a fixed value, regardless of the transducer to material (object) surface distance, ensure the: Transducer acoustic beam is free from obstruction. Surface monitored is not within the transducers’ nearest distance. Transducer is not in contact with any metal object. Material mixer (if used) is operating while the HYDRO+ is operating.
- Page 160 (P852) to stabilize the "shot" mode used for the echo evaluation. Also, adjust the Short Shot Bias to increase (or decrease the amount of preference given to short shot echoes over long shot echoes. Should a stable measurement still not be attainable, contact Milltronics or your local distributor. PL-507...
-
Page 161: Specifications
SPECIFICATIONS HYDRORANGER PLUS Power: » dc supply: » 9 - 30 V dc, 8 W, and / or » 100 / 115 / 200 / 230 V ac ± 15%, » ac supply 50 / 60 Hz, 15 VA Environmental: »... - Page 162 » 0-20 or 4-20 mA, scalable » 0.1% resolution » 1K Ω max load » communication » Dolphin Compatible via optional Milltronics ComVerter Input: » 0-20 or 4-20 mA, from alternate level monitoring device, scalable Enclosure: » wall mount: » Type 4X / NEMA 4X / IP 65 »...
-
Page 163: Programmer
PROGRAMMER Power: » 9 V (ANSI / NEDA 1604, PP3 or equivalent) Ambient Temp.: » -20 to 50°C (-5 to 122°F) Keypad: » 20 keys with tactile feedback Interface: » non-invasive, digital, infra-red Enclosure: » general purpose (waterproof) ABS plastic »... - Page 164 PL-507...
-
Page 165: Programming Chart
PROGRAMMING CHART PARAMETER ALTERED VALUES FOR POINT NUMBERS NAME P000 Lock (G) P001 Operation (G) P002 Material (G) P003 Measurement Response (G) P004 Transducer (G) P005 Units (G) P006 Empty P007 Span P008 Date (G) P009 Time (G) P050 Tank Shape P051 Max Volume P052... - Page 166 PROGRAMMING CHART PARAMETER ALTERED VALUES FOR POINT NUMBERS NAME P130 Run On Interval (G) P131 Run On Duration (G) P132 Start Delay (G) P133 Power Resumption Delay (G) P134 Pump Exercising P136 Wall Cling Reduction (G) P137 Pump Group P140 Energy Saving (G) P141 Peak Start Time (G)
- Page 167 PROGRAMMING CHART PARAMETER ALTERED VALUES FOR POINT NUMBERS NAME P214 4 mA Trim P215 20 mA Trim P219 mA Failsafe P250 mA Input Range P251 0 /4 mA Input Setpoint P252 20 mA Input Setpoint P310 Pump Hours P311 Pump Starts P312 Pump Run Ons P322...
- Page 168 PROGRAMMING CHART PARAMETER ALTERED VALUES FOR POINT NUMBERS NAME P621 Auto Zero Head (G) P622 Inflow Discharge Adjust (G) P623 Pump Total Method P630 LCD Total Factor (G) P633 LCD Total Decimal (G) P640 Remote Total Factor (G) P641 Flow Sampler Mantissa (G) P642 Flow Sampler Exponent (G) P645...
- Page 169 PROGRAMMING CHART PARAMETER ALTERED VALUES FOR POINT NUMBERS NAME P729 Scan Time P730 Auxiliary Reading (G) P731 Auxiliary Reading Key (G) P732 Display Delay (G) P733 Scroll Access (G) P800 Near Blanking P801 Range Extension P802 Submergence Transducer P803 Shot / Pulse Mode P804 Confidence Threshold P820...
Need help?
Do you have a question about the HydroRanger Plus and is the answer not in the manual?
Questions and answers